Home
Bookmarks
Home
Philips
Philips PPX3610/F7 User Manual
Page 9
User Manual - Page 9
For PPX3610/F7.
Page 9/44
Page 1
Page 2
Page 3
Page 4
Page 5
Page 6
Page 7
Page 8
Page 9
Page 10
Page 11
Page 12
Page 13
Page 14
Page 15
Page 16
Page 17
Page 18
Page 19
Page 20
Page 21
Page 22
Page 23
Page 24
Page 25
Page 26
Page 27
Page 28
Page 29
Page 30
Page 31
Page 32
Page 33
Page 34
Page 35
Page 36
Page 37
Page 38
Page 39
Page 40
Page 41
Page 42
Page 43
Page 44
Contents
Table of Contents
Search
Previous
Next
Troubleshooting
Bookmarks
Loading ...
Loading ...
Loading ...
Overview
9
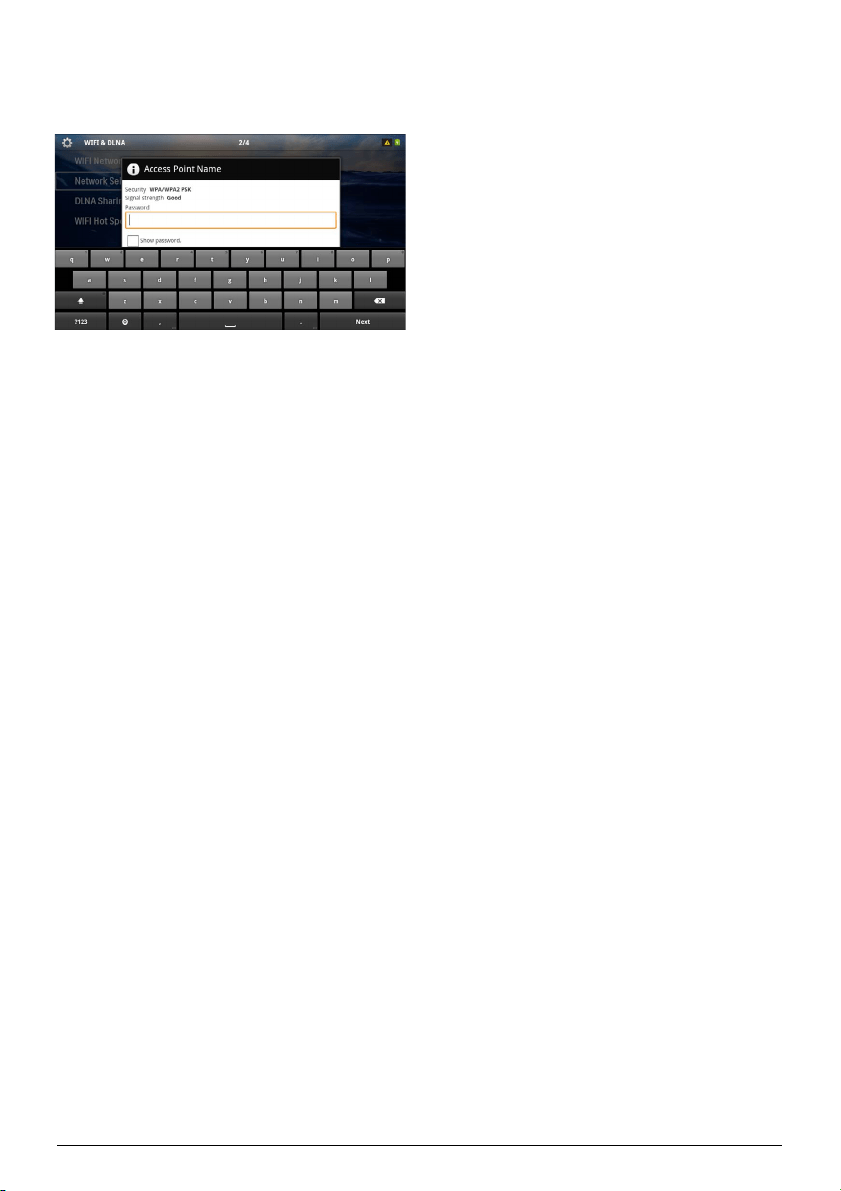
So
ftwa
re Keybo
ar
d
1
Click
in
the
input
eld
(see
also
Touchpad
/
Ges-
tures, page 8) using the touchpad or a mouse.
2
The
so
f
tw
are
ke
yboard appears..
3
Using
the
touchpad or
a mouse
enter the
text on
the
software
ke
y
boa
rd.
Loading ...
Loading ...
Loading ...
<
6
7
8
9
10
11
>
File type: PDF
File name: 21511921_ppx3610-f7.pdf
File size: 5.58 MB
File Language: English
Pages: 44
Author: Philips
Published: 2020-08-25
Updated: 2023-07-25
Download File
Table of Contents
×
Table of Contents
2
Overview
3
Dear Customer
3
About this User Manual
3
Symbols Used
3
What's in the Box
3
Product Highlights
3
1 General Safety Information
4
Setting up the Device
4
Repairs
4
Power Supply
5
Wireless Network (WLAN)
5
2 Overview
6
Top of the Device
6
Bottom of the Device
6
Side View
6
Pico Station
7
Top of the Device
7
Bottom of the Device
7
Front View
7
Rear View
7
Touchpad / Gestures
8
Navigation Area / Scrolling Area
8
Input Area
8
Gestures
8
Software Keyboard
9
Remote Control
10
Overview of the Menu Functions
11
Symbols in the Statusbar
11
3 Initial Operation
12
Setting up the Device
12
Connect Power Supply / Charge Battery
12
Installing or Changing the Batteries of the Remote Control
12
Using the Remote Control
13
Initial Installation
14
4 Connect to the Playback Device
15
Connecting to Devices with HDMI Output
15
Connecting to an iPhone/ iPad/iPod
15
Connecting to Smartphone
15
Connecting to a Computer (VGA)
16
Connecting Using an Audio/ Video (CVBS) Adapter Cable
16
Connecting using Component-Video (YPbPr/ YUV) Cable
17
Directly Connecting Projector to Computer using WLAN (WiFi Streaming)
18
Connecting the headphones
18
5 Memory
19
Inserting a Memory Card
19
Connecting USB Storage Device
19
Connect to a Computer (USB)
20
6 Wireless Network (WLAN)
21
Infrastructure Wireless Network
21
Switching Wireless Networking (WLAN) on/off
21
Setting up a Wireless Network (WLAN)
21
Setting up a Wireless Network (WLAN) Using the Wizard
22
Using Wi-Fi Protected Set-up (WPS)
22
Digital Living Network Alliance (DLNA)
22
Switching DLNA on and off
22
Play Media Using DLNA
22
DLNA Control
22
7 Media Playback
23
Video playback
23
Video Playback (USB/SD Card/ Internal Memory/DLNA)
23
File Format
23
Video Playback (Mini-HDMI Socket)
24
Photo Playback
24
Slide Show with Background Sound
25
Music Playback
25
Office Playback (YOZO Office)
26
Managing Files
26
Copy Files
26
Delete Files
27
8 Digital TV Playback
28
Connecting the Aerial
28
Connecting the Aerial to the Pico Station PPA7301
28
Connecting the Aerial to the USB DVB-T Stick PPA8301
28
First Playback
29
Television
30
9 Android
31
Calling Android
31
Exiting Android
31
Resetting Android
31
Installing Android-Apps
31
Install Adobe Flash Player
32
Adjust Browser Mode
33
Reset Browser Mode
34
10 Settings
35
Overview of the Menu Functions
35
11 Service
37
Care Instructions for the Battery
37
Battery deep discharge
37
Cleaning
38
Cleaning the Lens
38
Device Overheated
38
Update Firmware with Memory Card
38
Troubleshooting
39
Power Cycling
39
12 Appendix
41
Technical Data
41
Accessories
41
Search:
×
Search