Loading ...
Loading ...
Loading ...
6
2 INSTALLATION
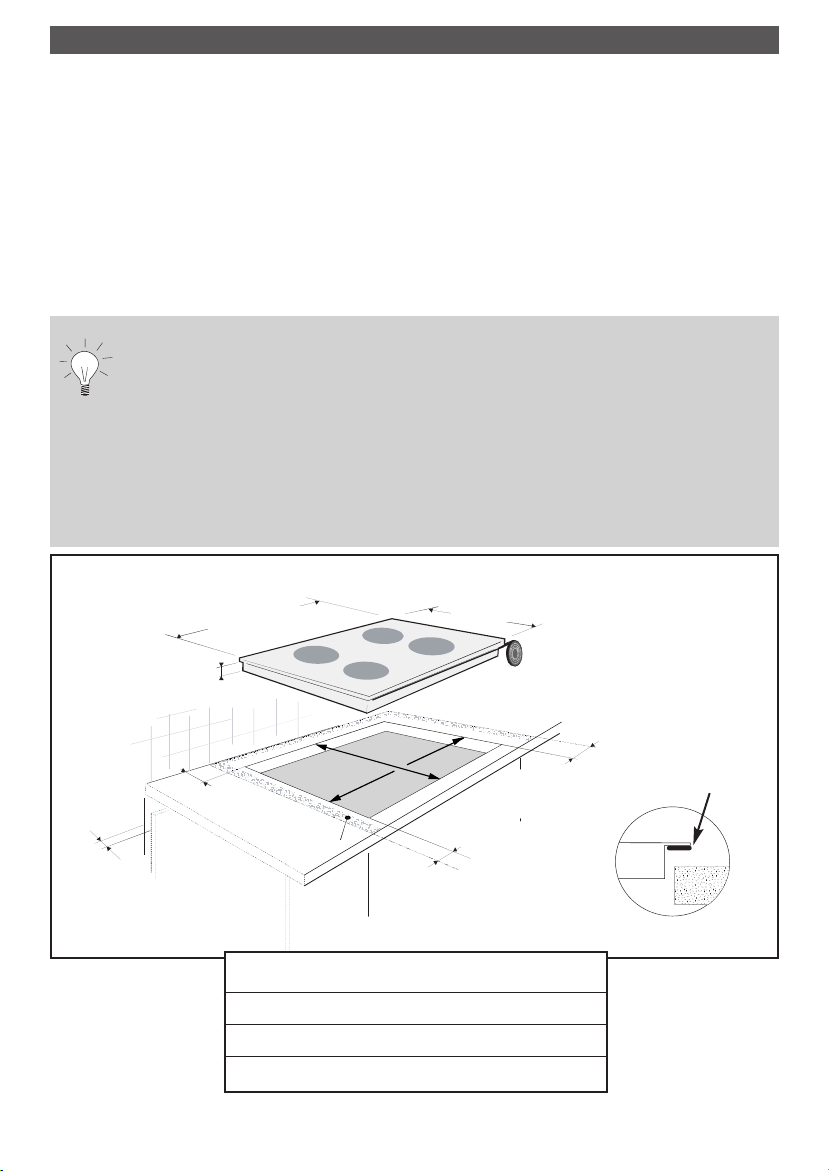
To install the cooktop, cut out a rectangular
opening in the counter as shown on the drawing
and table below. Also, ensure that you have a
minimum of 13/8” of space in the back of the unit,
between the rim and backsplash on your counter
(or wall if no backsplash) for ventilation.
A self-adhesive gasket is supplied with your unit.
Before setting the cooktop in place install this
gasket by sticking it underneath the rim.
If your counter is produced from porous materials which tends to swell if in
contact with humidity and water, use proper sealants on the edge which would
prevent any penetration of humidity and water.
Cut away all exposed edges of decorative laminates to prevent further chipping.
Round corners of the cut-out and file them to ensure smooth edges and prevent
corner cracking.
Rough edges and inside corners which are not rounded as well as forced fits
can contribute to cracking of counter top laminate.
Apply the gasket only along the front rim and on
both sides. Do not put this gasket on the rim in
the back. This gasket will prevent most of the
spills from entering the cabinet below and will
keep the unit in place. Once the gasket is
installed, place the cooktop in the opening and
lay it on the rim. Do this carefully - do not drop the
unit into the cut-out. Make sure that the unit is
sitting properly on its rim all around the perimeter.
Cut-out dimensions
3
5/8
” lf
20
3/8
” lf
29
1/2
” lf
19
1/2
” lf
31
1/8
” lf
Gasket
*This dimension includes clearance underneath the unit of 2"
Cooktop and
Cut-out Sizes
Cut-out Size
Cooktop Box Size
Cooktop Rim Size
Width
29
1/2”
29
1/4”
31
1/8”
Depth
19
1/2”
19
7/32”
20
3/8”
Thickness
5
5/8”
*
3
5/8”
25/64”
Loading ...
Loading ...
Loading ...