used to. If you are using an electric shaver
for the rst time, or if you’ve been using
a dierent brand, take time to acquaint
yourself with your new electric shaver.
Your SatinShave shaver features a oating
foil that follows the contours of your skin for
a close shave. We guarantee smooth results
or Philips will refund you the full purchase
price as long as the request is received
within 45 days of purchase.
Introduction
Congratulations on your purchase and
welcome to Philips! To fully benet from
the support that Philips oers, register your
product at www.philips.com/welcome.
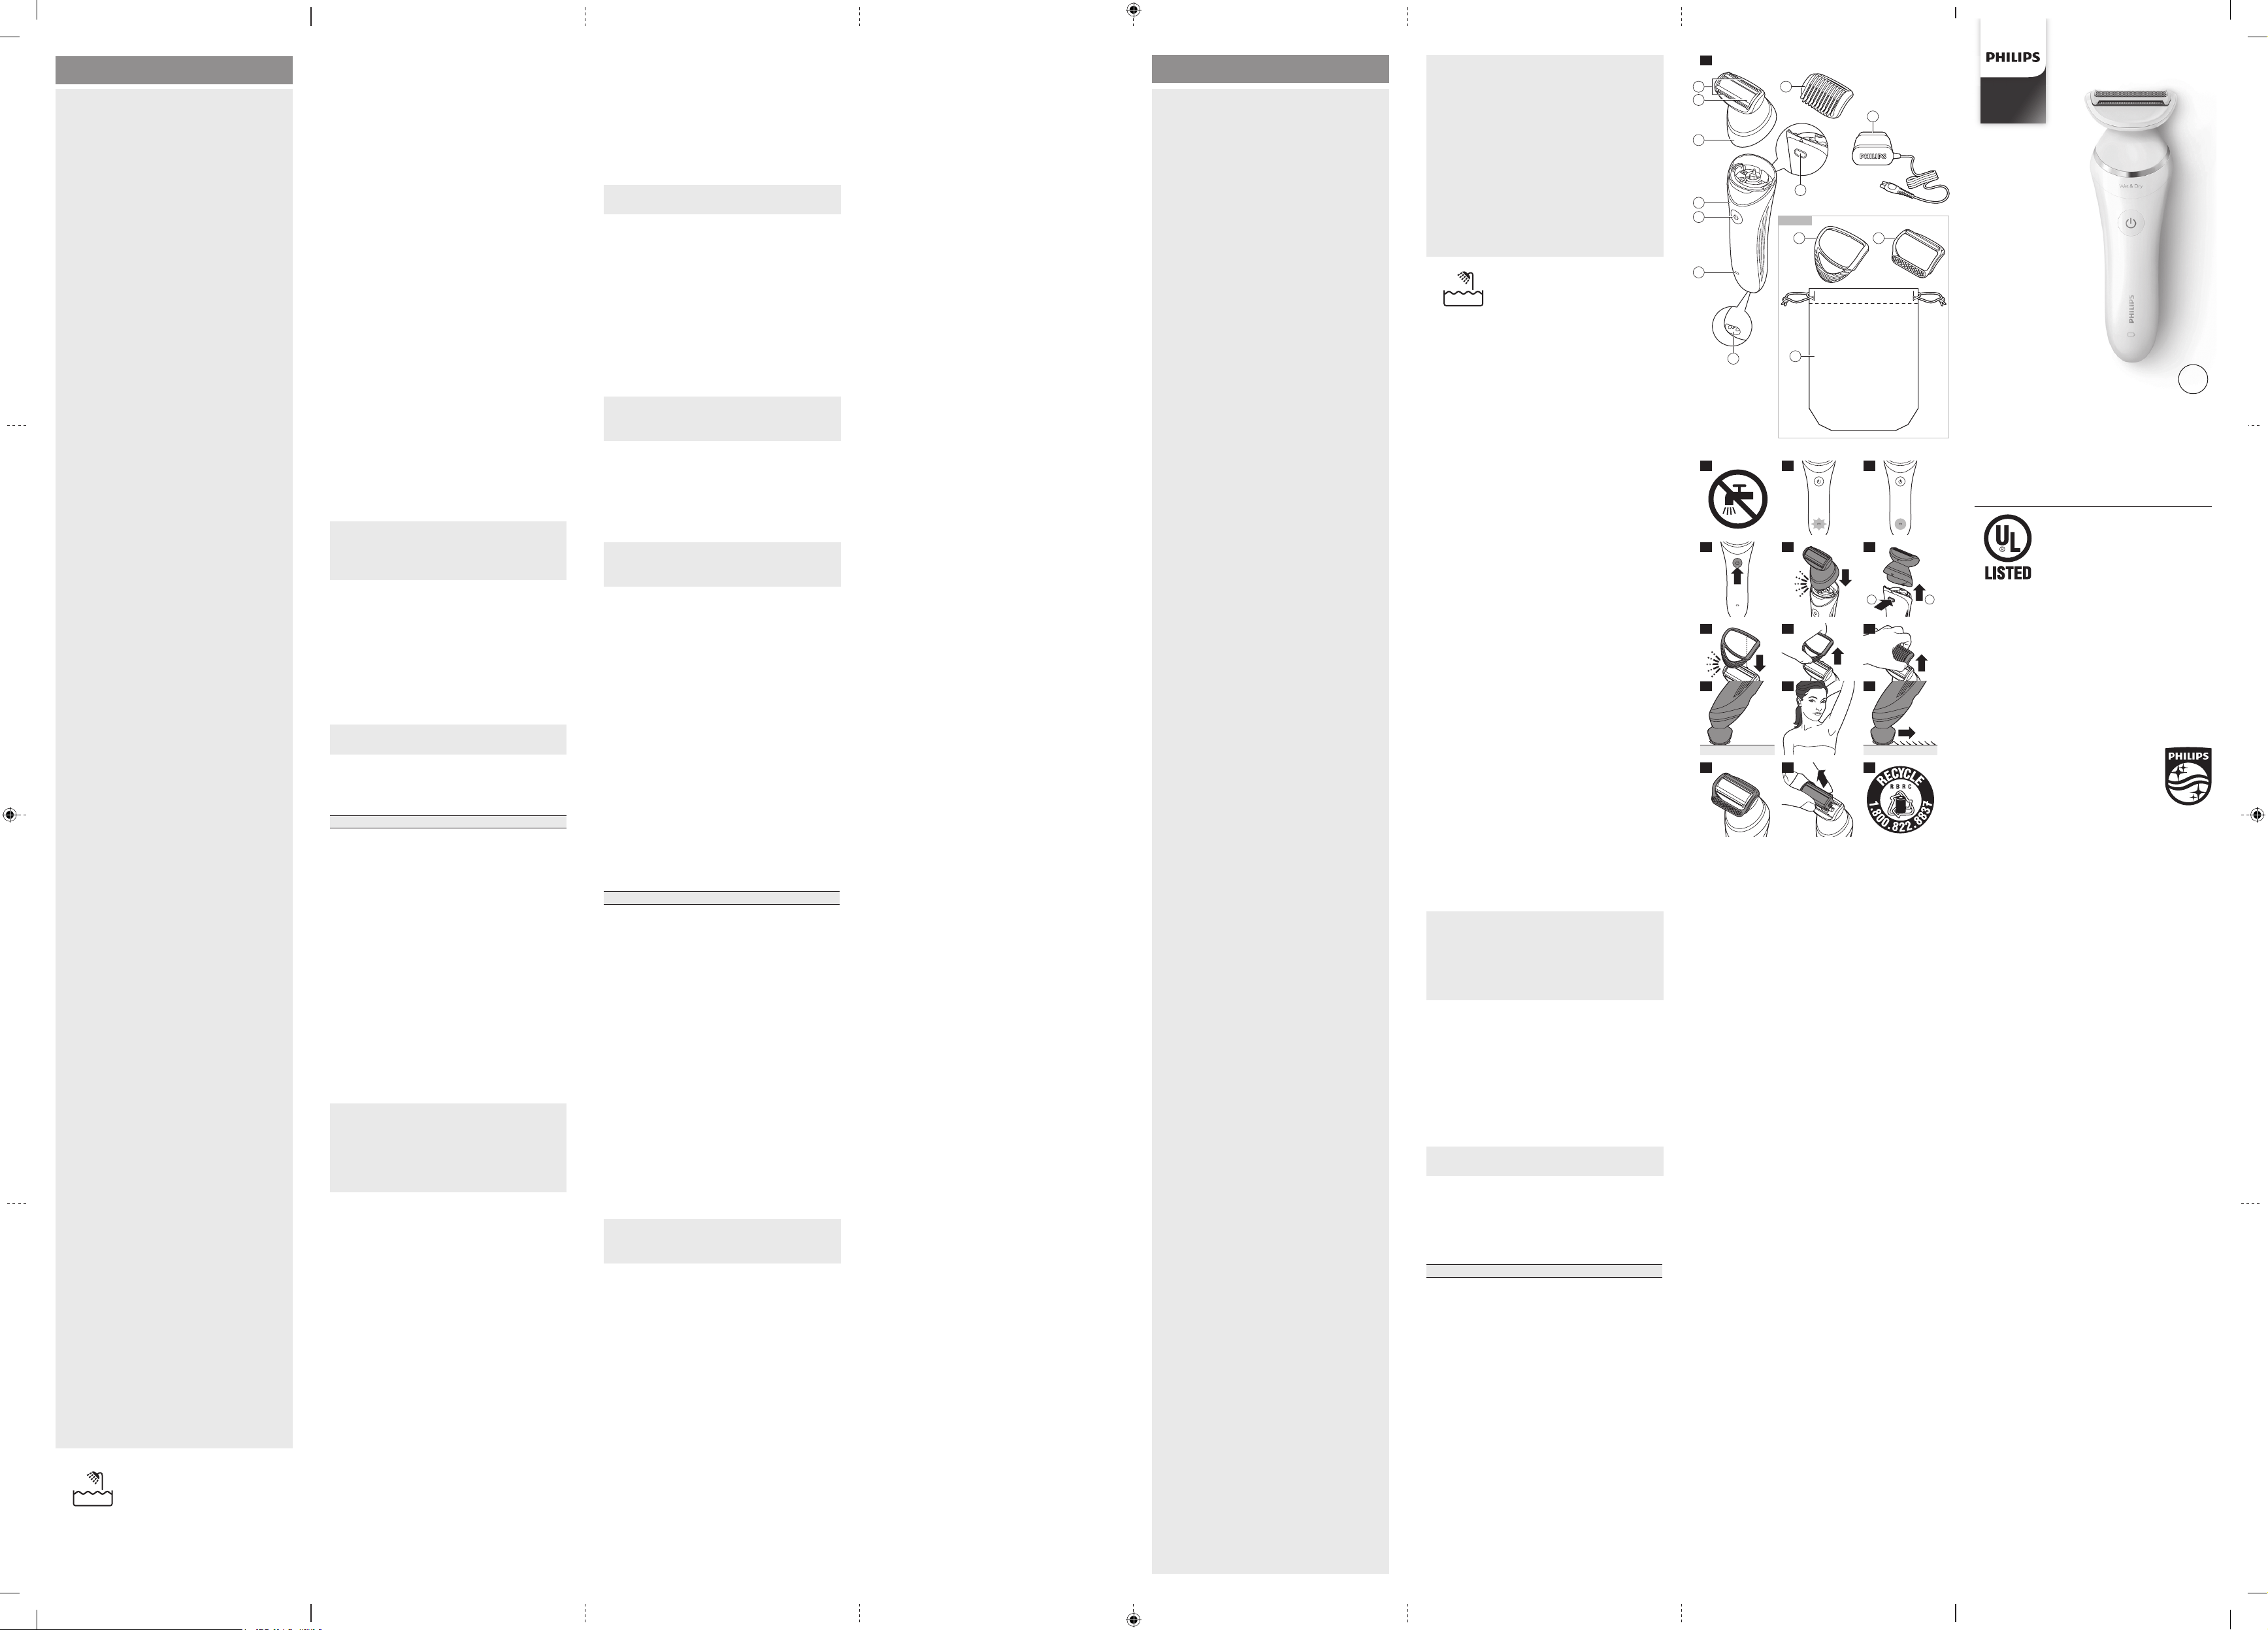
Features (Fig. 1)
1 Handle
2 On/o button
3 Charge indicator
4 Release button
5 Socket for small plug
6 Shaving head
7 Foil
8 Trimmers
9 Trimming comb
10 Power cord
11 Eciency cap (BRL140)
12 Soft glide cap (BRL140)
13 Pouch (BRL140)
Not shown: Cleaning brush
Note: Heads, accessories and features vary
for dierent models. Consult the overview
illustration for the heads, accessories and
features of your particular product.
Charging
Charge the product fully before you use it
for the rst time and after a long period of
non-use.
Charging or using the product at
temperatures below 50 °F (10 °C) or higher
than 95 °F (35 °C) adversely aects the
lifespan of the battery.
Note: This product can only be used without
cord.
1 Make sure that the product is switched o.
2 Insert the small plug into the product and
put the power plug in the wall outlet.
Use only the power cord provided.
3 When the battery indicator ashes white
(Fig. 3), the product is charging.
It takes approximately 8 hours to fully
charge the product for a cordless
operating time of 60 minutes.
4 When the battery indicator lights up
white continuously (Fig. 4), the product is
fully charged.
The battery indicator does not light up
when the product is switched on: the
product contains enough energy to be
used.
5 When the battery indicator ashes
orange (Fig. 3), the battery is almost
empty and needs to be charged. Charge
the product when you have nished
using it.
Note: If the product is fully charged and
connected to the electrical outlet, the
battery indicator ashes a few times when
you press the on/o button. This reminds
you to disconnect the product from the
electrical outlet before using.
Using the product
Switching on and o
1 To switch on the product, press the
on/o button once (Fig. 5).
2 To switch o the product, press the
on/o button once more.
Attaching and detaching heads
1 To attach a head, press it onto the
handle (‚click‘) (Fig. 6).
2 To detach a head, press the release
button on the back of the handle (Fig. 7).
Attaching and detaching accessories
1 To attach an accessory, align the indent
in the accessory with the notch on the
attachment. Then snap the accessory
onto the attachment (‚click‘) (Fig. 8).
2 To detach an accessory, grab its front
and back and pull it upwards o the
attachment. (Fig. 9) To detach a comb,
do not pull at the front and back but at
the sides (Fig. 10).
Shaving and trimming
The product is suitable for use in the bath
or shower, but you can also use it dry. If you
want to use creams or body lotion, apply
them after you have used the product.
Note: The product can only be used without
cord.
Note: When you use the product to trim
hairs, use it dry for the best result.
1 Place the product on your skin in such a
way that the attachment or accessory is
in full contact with the skin (Fig. 11).
2 When you use the product on sensitive
areas, stretch the skin with your
free hand. When you use it on your
underarms, raise your arm and put your
hand on the back of your head to stretch
the skin (Fig. 12).
3 Move the product slowly against the
direction of hair growth (Fig. 13).
Note: If you move the product over your
skin too fast, you may not obtain a smooth
result.
Shaving head
You can use the shaving head to shave your
legs and body.
Note: The product can be moved in two
directions, for easier shaving of underarms.
Note: Always check the foil before use. If it
is damaged in any way, replace the cutting
unit right away (see ‚Replacement‘).
Trimming comb
You can attach the trimming comb onto the
shaving head to trim hairs to a length of 3mm.
Eciency cap
You can attach the eciency cap onto
the shaving head to make the hairs stand
upright during shaving. This makes it easier
to remove them.
Soft glide cap
You can attach the soft glide cap onto the
shaving head to cover the back trimmer of
the shaving head for extra safety in curvy
areas. The smooth material makes it glide
eortlessly over your skin.
Make sure that you attach the soft glide cap
in such a way that the back trimmer of the
shaving head is covered (Fig. 14).
Cleaning and storage
Keep the power cord dry (Fig. 2).
1 Switch o the product.
2 Use the cleaning brush to brush away
any hairs that have collected under the
trimmers of the shaving head.
3 Pull the cutting unit out of the shaving
head (Fig. 15).
4 Clean all parts of the shaving head with
the cleaning brush, except the foil.
5 Rinse the cutting unit, shaving head and
accessories under the tap. Shake them
rmly to remove water drops.
6 Let all parts dry completely.
7 Place the cutting unit back into the
shaving head (‚click‘).
8 Put the trimming comb on the shaving
head to prevent damage to the shaving
head when you store it.
9 Store the handle, heads and accessories
in the pouch.
Note: Lubricate trimmer teeth and foils
with a drop of sewing machine oil every six
weeks for optimal performance.
Replacement
A worn or damaged cutting unit should
only be replaced with an original
Philips cutting unit which is available at
www.philips.com/parts-and-accessories.
You can also call 1-800-243-7884 (in US
only) or 1-866-800-9311 (in Canada only)
for assistance.
This product has no other user-serviceable
parts.
Replacing the shaving head cutting unit
For maximum shaving performance, replace
the cutting unit of the shaving head once a
year.
1 Switch o the product and disconnect it
from the power outlet.
2 Press the release button on the back of
the handle and pull the shaving head o
the handle.
English
IMPORTANT
SAFETY
INSTRUCTIONS
When using an electric product, basic
precautions should always be followed,
including the following:
Read all instructions before using this
product.
DANGER
To reduce the risk of electric shock:
- Do not reach for a corded product that
has fallen into water. Unplug immediately
from the power outlet.
- Keep the power cord dry (Fig. 2).
- Do not place or store the product where
it can fall or be pulled into a tub or sink.
Do not place or drop the product into
water or other liquid.
- Remove power cord from power outlet
and product before cleaning.
WARNING
To reduce the risk of burns, re, electric
shock, or injury to persons:
- Close supervision is required when this
product is used by, on, or near children,
or persons with limited physical, sensory,
or mental capabilities or invalids.
- Use this product only for its intended
household use as described in this
manual. Do not use attachments not
recommended by Philips North America
LLC.
- Never operate this product if it has a
damaged power cord, if it is not working
properly, after it has been dropped or
damaged, or after the product or power
cord has been dropped into water.
For assistance call 1-800-243-7884.
- Keep the power cord away from heated
surfaces.
- Never drop or insert any object into any
opening.
- Do not use the power cord in or near a
power outlet that contains an electric
air freshener to prevent damage to the
power cord.
- Do not use this product outdoors or
operate where aerosol (spray) products
are being used or where oxygen is being
administered.
- Always check the shaving foil and trimmers
before using the product. Do not use the
product if the shaving foil or cutters are
damaged, as injury may occur.
- Always attach power cord to product
rst, then to power outlet. To disconnect,
set all controls to ‚o‘ position. Then
remove power cord from power outlet.
- Plug power cord directly into power
outlet. Do not use an extension cord.
- Unplug power cord before plugging in or
unplugging the product.
- Only use the power cord and other
accessories supplied with the product.
- Do not attempt to open the product
to remove or replace the built-in
rechargeable battery.
- The batteries used in this product may
present a re or chemical burn hazard
if mistreated. Do not disassemble, heat
above 100 °C (212 °F) or incinerate.
- Never put the product in direct sunlight
or store at a temperature above 140 °F
(60 °C).
IMPORTANT: The power plug contains a
transformer. Do not cut o the power plug
to replace it with another plug as this will
cause a hazardous condition.
SAVE THESE
INSTRUCTIONS
This symbol indicates that
the shaver can be used in
the bath or shower.
Put it to the test
Like many new products, your Philips
SatinShave shaver may take a little getting
3 Pull the cutting unit out of the shaving
head (Fig. 15).
4 Place a new cutting unit in the shaving
head (‚click‘).
5 Attach the shaving head back onto the
handle.
Assistance
For assistance, visit our website:
www.philips.com/support or call toll
free 1-800-243-7884 (in US only) or
1-866-800-9311 (in Canada only).
Disposal
- This product contains a rechargeable
lithium-ion battery which must be
disposed of properly (Fig. 16).
- Contact your local town or city ocials
for battery disposal information. In the
US, you can also call 1-800-822-8837
or visit www.call2recycle.org for battery
drop-o locations (Fig. 16). In Canada,
you can also call 888-224-9764 or visit
www.call2recycle.ca for battery drop-o
locations.
- For assistance, visit our website
www.philips.com/support or call
1-800-243-7884 toll free.
- Your product is designed and
manufactured with high quality
materials and components, which can
be recycled and reused. For recycling
information, please contact your local
waste management facilities or visit
www.recycle.philips.com.
Full Two-Year Warranty
Philips North America LLC (USA) and Philips
Electronics Ltd (Canada) warrant this new
product against defects in materials or
workmanship for a period of two years from
the date of purchase, and agrees to repair
or replace any defective product without
charge.
IMPORTANT: This warranty does not cover
damage resulting from accident, misuse or
abuse, lack of reasonable care, the axing
of any attachment not provided with the
product or loss of parts or subjecting the
product to any but the specied voltage.*
NO RESPONSIBILITY IS ASSUMED
FOR ANY SPECIAL, INCIDENTAL OR
CONSEQUENTIAL DAMAGES.
In order to obtain warranty service, simply
go to www.philips.com/support for
assistance. It is suggested that for your
protection you return shipments of product
by insured mail, insurance prepaid. Damage
occurring during shipment is not covered
by this warranty. NOTE: No other warranty,
written or oral, is authorized by Philips
North America LLC and Philips Electronics
Ltd (Canada). This warranty gives you
specic legal rights, and you may also have
other rights which vary from state to state,
province to province or country to country.
Some states do not allow the exclusion or
limitation of incidental or consequential
damages, so the above exclusion and
limitations may not apply to you.
*Read enclosed instructions carefully.
45-Day Money-Back Guarantee
If you are not fully satised with your
product send the product back and we’ll
refund you the full purchase price.
The product must be shipped prepaid
by insured mail, insurance prepaid, have
the original sales receipt, indicating
purchase price and date of purchase,
and the money-back guarantee return
authorization form enclosed.
We cannot be responsible for lost mail.
The product must be postmarked no later
than 45 days after the date of purchase.
Philips reserves the right to verify the
purchase price of the product and limit
refunds not to exceed suggested retail
price.
To obtain the money-back
guarantee service, please go to www.
PhilipsMoneyBack.com and follow the
simple 3-step process.
Delivery of refund check will occur 6–8
weeks after receipt of returned product.
In US manufactured for: Philips Personal Health,
A division of Philips North America LLC, P.O. Box
10313, Stamford, CT 06904
In Canada manufactured for: Philips Electronics
Ltd, 281 Hillmount Road, Markham, ON L6C 2S3
This symbol on the product’s
nameplate means it is listed by
Underwriters’ Laboratories, Inc.
Ce symbole apparaissant sur la
plaque nominale du produit
signie qu’il est enregistré par
Underwriter’s Laboratories, Inc.
Este símbolo en la placa de características del
producto signica que está registrado por
Underwriters Laboratories, Inc.
PHILIPS and Philips shield are registered
trademarks of Koninklijke Philips N.V / PHILIPS et
le blason Philips sont des marques déposées de
Koninklijke Philips N.V. / PHILIPS y Philips Shield
son marcas registradas de Koninklijke Philips N.V.
©2019 Philips North America LLC.
All rights reserved / Tout droits réservés /
Todos los derechos reservados.
3000.038.8277.1 (26/6/2019)
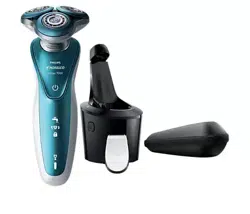
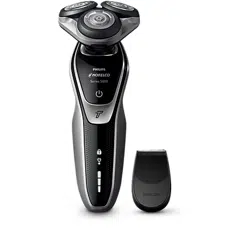
BRL140
BRL131
BRL130
BC
Español
INSTRUCCIONES
IMPORTANTES DE
SEGURIDAD
Cuando utilice un producto eléctrico,
siempre debe seguir las precauciones
básicas, incluidas las siguientes:
Lea todas las instrucciones antes de usar
este producto.
PELIGRO
Para reducir el riesgo de descarga
eléctrica:
- No intente agarrar un producto con cable
que haya caído al agua. Desconéctelo
inmediatamente del enchufe de la pared.
- Mantenga el cable de alimentación seco
(Fig. 2).
- No coloque ni guarde el producto en
un lugar desde donde pueda caerse a
una bañera o fregadero. No coloque
el producto en un lugar desde donde
pueda caerse al agua o a cualquier otro
líquido ni sumerja el producto en ningún
tipo de líquido.
- Desconecte el cable de alimentación del
enchufe de pared y del producto antes
de limpiarlo.
ADVERTENCIA
Para reducir el riesgo de quemaduras,
incendio, descarga eléctrica o lesiones:
- El uso de este dispositivo debe estar
bajo estricta supervisión cuando esté
operado por niños, por personas con
capacidades mentales, sensoriales
o físicas limitas o por personas con
discapacidades, o cuando se emplee en
o cerca de estos.
- Use este producto solo para el uso
doméstico previsto como se describe en
este manual. No use accesorios que no
estén recomendados por la corporación
Philips North America LLC.
- Nunca utilice este producto si el cable
o el enchufe de carga están dañados,
si no funciona correctamente, si se
cayó, si está dañado o si se sumergió
en agua mientras estaba conectado a
la alimentación eléctrica. Para solicitar
asistencia, comuníquese al 1-800-243-
7884.
- Mantenga el cable de alimentación lejos
de supercies calientes.
- No deje caer ni introduzca ningún objeto
en ninguna abertura.
- No utilice el adaptador dentro o cerca de
una salida de corriente que contenga un
ventilador de aire eléctrico para prevenir
daño al adaptador.
- No use este producto a la intemperie ni
lo use donde se estén usando productos
de aerosol (atomizador) o donde se esté
administrando oxígeno.
- Revise siempre la lámina de afeitado y
las cuchillas antes de usar el producto.
No use el producto si la lámina de afeitar
y las cuchillas están dañadas, ya que
puede producirse una lesión.
- Siempre conecte la clavija al producto
primero y, luego, al tomacorriente.
Para desconectar, gire el interruptor
de encendido/apagado a la posición
de ¨APAGADO¨ y, luego, desenchufe la
clavija del tomacorriente.
- Enchufe el cable de alimentación
directamente en el toma corriente.
No use un cable de extensión.
- Desconecte el cable de alimentación
antes de conectar o desconectar el
producto.
- Utilice únicamente el cable de
alimentación y los accesorios
suministrados con el producto
- No intente abrir el producto para retirar
o reemplazar la batería recargable
integrada.
- Las baterías que se emplean en este
producto pueden representar un riesgo
de incendio o de quemadura química
si no se manipulan correctamente. No
desarme, incinere ni permita que la
temperatura de las baterías supere los
100 °C (212 °F).
- Nunca exponga el producto a la luz
directa del sol ni lo guarde en lugares
con temperaturas superiores a los 140 °F
(60 °C).
¡IMPORTANTE!: El enchufe eléctrico
contiene un transformador. No corte el
enchufe eléctrico para reemplazarlo con
otro ya que esto puede producir una
condición de peligro.
CONSERVE ESTAS
INSTRUCCIONES
Este símbolo indica que la
afeitadora puede utilizarse
en el baño o en la ducha.
Póngala a prueba
Como con muchos productos nuevos,
puede tomar un poco de tiempo
acostumbrarse a su afeitadora Philips
SatinShave. Si es la primera vez que usa una
afeitadora eléctrica o ha usado otra marca,
tómese un momento para acostumbrarse a
su nueva afeitadora eléctrica.
Su afeitadora SatinShave cuenta con una
lámina otante que sigue los contornos
de la piel para un afeitado más preciso. Le
garantizamos resultados suaves o Philips
le reembolsará el precio total de la compra,
siempre que la solicitud de reembolso se
reciba dentro de los 45 días posteriores a la
compra.
Introducción
Enhorabuena por la adquisición de este
producto, y bienvenido a Philips. Para
sacar el mayor partido a la asistencia que
Philips le ofrece, registre el producto en
www.philips.com/welcome.
Características (Fig. 1)
1 Mango
2 Botón de encendido/apagado
3 Indicador de carga
4 Botón de liberación
5 Toma para clavija pequeña
6 Cabezal de afeitado
7 Lámina
8 Recortadoras
9 Peine de recorte
10 Cable de alimentación
11 Cabezal para sistema de estiramiento
de la piel (BRL140)
12 Tapa de deslizamiento suave (BRL140)
13 Funda (BRL140)
No se muestra: Cepillo de limpieza
Nota: Los cabezales, los accesorios y
las funciones pueden variar según los
diferentes modelos. Consulte la ilustración
de descripción general para ver los
cabezales, los accesorios y las funciones de
este producto en particular.
Carga
Cargue el producto completamente antes
de usarlo por primera vez y después de un
largo periodo de no usarlo.
La carga o el uso del producto a
temperaturas por debajo de los 50 °F
(10 °C) o superiores a los de 95 °F (35 °C)
afecta la vida útil de la batería.
Nota:Este producto solo se puede utilizar
sin cable.
1 Asegúrese de que el producto esté
apagado.
2 Inserte la clavija pequeña en el producto
y conecte la clavija de alimentación en
cualquier tomacorriente de pared.
Use solo el cable eléctrico provisto.
3 Cuando la luz del indicador de carga
destelle en color blanco (Fig. 3), signica
que el producto se está cargando.
Toma aproximadamente 8 horas para
cargarse totalmente y posee una
autonomía de funcionamiento de
60 minutos sin cable.
4 Cuando el indicador de carga de la batería
muestra una luz blanca continua (Fig. 4),
el producto está totalmente cargado.
El indicador de batería no se ilumina
cuando el producto está encendido: el
producto contiene suciente energía
para ser usado.
5 Cuando la luz del indicador de carga de
la batería destelle en color naranja (Fig.
3), signica que la batería casi no tiene
energía y necesita recargarse. Cargue el
producto cuando termine de usarlo.
8
7
9
11
13
12
6
1
2
3
4
10
5
BRL140
1 2
2
1
5
8
11
14
3
6
9
12
15
4
7
10
13
16
BRL140-US_3000.038.8277.1_LEAFLET_gevouwen_A7_bl.indd 1 02-07-19 14:20

Nota:Si el producto está completamente
cargado y conectado a una toma de
corriente eléctrica, el indicador de la batería
destella unas cuantas veces cuando se
presiona el botón de encendido/apagado.
Esto le recuerda desconectar el producto de
la toma de corriente eléctrica antes de usarlo.
Uso del producto
Siempre revise el producto y todos los
accesorios antes de usarlo. No use el
producto ni ningún accesorio si está
dañado, ya que esto puede causar alguna
lesión. Siempre reemplace una pieza
dañada con una del tipo original.
Cómo encender y apagar
1 Para encender el producto, presione el
botón de encendido/apagado una vez
(Fig. 5).
2 Para apagar el producto, presione el botón
de encendido/apagado una vez más.
Montaje y desmontaje de cabezales
1 Para colocar un cabezal, presiónelo
contra el mango („clic“) (Fig. 6).
2 Para quitar un cabezal, presione el botón
de liberación en la parte posterior del
mango (Fig. 7).
Montaje y desmontaje de accesorios
1 Para jar un accesorio, alinee la
ranura del accesorio con la marca del
aditamento. Luego, coloque el accesorio
sobre el aditamento („clic“) (Fig. 8).
2 Para desmontar un accesorio, sujételo
de los extremos delantero y trasero y
levántelo para sacarlo del aditamento
(Fig. 9). Para desmontar un peine, no jale
por delante o por detrás, sino por los
lados (Fig. 10).
Afeitado y recorte
Aunque este producto es apropiado para
su uso en el baño o la ducha, también
puede usarlo en seco. Si desea usar cremas
o lociones corporales, aplíquelas después
de haber usado el producto.
Nota: El producto solo se puede utilizar sin
cable.
Nota: Cuando use el producto para recortar
vello, úselo en seco para obtener el mejor
resultado.
1 Coloque el producto sobre la piel de tal
manera que el aditamento o accesorio
esté en contacto con la piel (Fig. 11).
2 Cuando use el producto en zonas
sensibles, estire la piel con su mano libre.
Cuando lo use para depilar las axilas,
levante el brazo y apoye la mano en la
parte posterior de la cabeza para estirar
la piel (Fig. 12).
3 Mueva el producto lentamente a
contrapelo (Fig. 13).
Nota: Si mueve el producto sobre la piel
demasiado rápido, es posible que no
obtenga un resultado uniforme.
Cabezal de afeitado
Puede usar el cabezal de afeitado para
afeitar las piernas y el cuerpo.
Nota: Se puede mover el producto en dos
direcciones para una depilación más fácil
de las axilas.
Nota: Revise siempre la lámina antes de
usarla. Si está dañada, reemplace la unidad
de corte de inmediato (ver ‚Sustitución‘).
Peine de recorte
Puede colocar el peine de recorte en el
cabezal de afeitado para cortar vellos que
tengan 3mm de largo.
Cabezal para sistema de estiramiento de la piel
Puede colocar el tapón de eciencia en el
cabezal de afeitado para que el vello se
mantenga erguido durante el afeitado. Esto
facilita removerlos.
Tapa de deslizamiento suave
Puede colocar la tapa de deslizamiento
suave en el cabezal de afeitado para cubrir
el cortador trasero del cabezal de afeitado
para mayor seguridad en las zonas con
curvas. El material suave hace que se
deslice fácilmente sobre la piel.
Asegúrese de colocar la tapa de
deslizamiento suave de tal manera que el
cortador trasero del cabezal de afeitado
esté cubierto (Fig. 14).
Limpieza y almacenamiento
Mantenga el cable de alimentación seco
(Fig. 2).
1 Apague el producto.
2 Use el cepillo de limpieza para quitar el
vello que haya quedado atrapado en los
cortadores del cabezal de afeitado.
3 Extraiga la unidad de corte del cabezal
de afeitado (Fig. 15).
4 Limpie todas las parte del cabezal de
afeitado con un cepillo de limpieza,
excepto la lámina.
5 Enjuague los unidad de corte, el cabezal
y los accesorios bajo la llave de agua.
Sacúdalos rmemente para quitar las
gotas de agua.
6 Deje que las piezas se sequen por
completo.
7 Coloque la unidad de corte nuevamente
en el cabezal de afeitado (hasta que
haga clic).
8 Coloque el peine de recorte en el
cabezal para prevenir dañar el cabezal al
guardarlo.
9 Guarde el mango, el cabezal y los
accesorios en la funda.
Nota: Lubrique los dientes de el cortador y
las láminas con una gota de aceite mineral
cada seis semanas para obtener el mejor
rendimiento.
Sustitución
La unidad de corte gastada o dañada solo
debe reemplazarse con una unidad de
corte Philips original que está disponible en
www.philips.com/parts-and-accessories.
También puede llamar al 1-800-243-7884
(en EE. UU. solamente) o al 1-866-800-
9311 (en Canadá solamente) para obtener
asistencia.
Este producto no contiene otras piezas que
requieran mantenimiento.
Reemplazo de la unidad de corte del
cabezal de afeitado
Para un rendimiento de afeitado óptimo, le
aconsejamos que reemplace la unidad del
cabezal de corte una vez al año.
1 Apague el producto y desconéctelo del
tomacorriente.
2 Presione el botón de liberación en
la parte posterior del mango y jale el
cabeza para retirarlo del mango.
3 Extraiga la unidad de corte del cabezal
de afeitado (Fig. 15).
4 Coloque una nueva unidad de corte en el
cabezal de afeitado (‚clic‘).
5 Vuelva a colocar el cabezal de afeitado
en el mango.
Asistencia
Para asistencia, visite nuestro sitio web:
www.philips.com/support o llame gratis al
1-800-243-7884 (en EE. UU. solamente) o al
1-866-800-9311 (en Canadá solamente).
Desecho
- Este producto posee una batería
recargable de litio-ión que debe
desecharse apropiadamente (Fig. 16).
- Contacte a sus funcionarios locales o
de la ciudad para mayor información
acerca del manejo nal de la batería.
En los Estados Unidos también
puede llamar al 1-800-822-8837 o
visitar www.call2recycle.org para las
ubicaciones (Fig. 16) donde se pueden
desechar las baterías. En Canadá,
también puede llamar al 888-224-9764
o visite www.call2recycle.ca para las
ubicaciones donde se pueden desechar
las baterías.
- Para recibir asistencia, visite nuestro
sitio Web www.philips.com/support
o comuníquese gratuitamente al
1-800-243-7884.
- Su producto está diseñado y fabricado
con materiales y componentes de alta
calidad, que pueden ser reciclados y
reusados. Para obtener información
sobre reciclado, comuníquese con las
ocinas locales de manejo de desechos
o visite www.recycle. philips.com.
Garantía Total de Dos Años
Philips North America LLC (EE. UU.) y
Philips Electronics Ltd (Canadá) garantizan
este nuevo producto contra defectos en
los materiales o en la mano de obra por
un período de dos años desde la fecha
de compra y acepta reparar o remplazar
cualquier producto defectuoso sin cargos.
¡IMPORTANTE!: Esta garantía no cubre
ningún daño que surja como resultado de
un accidente, del uso indebido o abuso,
de la falta de cuidado razonable, del uso
de cualquier accesorio no provisto con
el producto, de la pérdida de piezas o
del uso del producto bajo un voltaje no
especicado.*
NINGUNA RESPONSABILIDAD ES
ASUMIDA POR CUALQUIER DAÑO,
INCIDENTAL O RESULTANTE.
Para obtener el servicio de
garantía, simplemente vaya a
www.philips.com/support para asistencia.
Para su protección, se sugiere que el envío
de las devoluciones del producto se realice
por correo certicado con seguro pagado.
Cualquier daño que ocurra durante el
envío no será cubierto por esta garantía.
NOTA: Philips North America LLC y Philips
Electronics Ltd (Canadá) no extienden
ninguna otra garantía, escrita ni oral.
Esta garantía le brinda derechos legales
especícos y usted también puede tener
otros derechos los cuales varían de estado
a estado, de región en región o de país en
país. En algunos estados no se permite
la exclusión o la limitación de los daños
fortuitos o resultantes, de modo que es
posible que las limitaciones o exclusiones
arriba mencionadas no apliquen a su caso.
*Lea las instrucciones adjuntas
atentamente.
Garantía de devolución del importe
de 45 días
Si no está completamente satisfecho
con su producto, envíelo de regreso y le
reembolsaremos el total de la compra.
El producto debe enviarse por correo
certicado pago, con seguro prepago,
junto con el recibo original de compra,
donde se indique el precio y la fecha
de compra, así como el formulario
de autorización para la garantía de
devolución de dinero.
No asumimos ninguna responsabilidad por
los paquetes perdidos.
El paquete del producto debe contar con
matasellos que no supere los 45 días a
partir de la fecha de compra. Philips se
reserva el derecho a vericar el precio de
compra del producto y limita los
reembolsos al precio de venta minorista
sugerido.
Para obtener el servicio de la garantía
de devolución del dinero, diríjase a www.
PhilipsMoneyBack.com y siga el proceso
sencillo de 3 pasos.
La entrega del cheque de reembolso
ocurrirá de 6 a 8 semanas después de la
recepción del producto devuelto.
Français (Canada)
IMPORTANTES
CONSIGNES DE
SÉCURITÉ
Lorsque vous utilisez un appareil électrique,
suivez toujours les mesures de sécurité
élémentaires, notamment ce qui suit :
Lisez toutes les instructions avant
d’utiliser cet appareil.
DANGER
An de réduire le risque d’électrocution :
- Ne touchez pas l’appareil branché
s’il est tombé dans l’eau. Débranchez
immédiatement de la prise de courant.
- Gardez le cordon d’alimentation sec (g. 2).
- Ne placez pas et ne rangez pas l’appareil
à un endroit où il peut tomber dans une
baignoire ou un évier. N’immergez pas
et ne laissez pas tomber l’appareil dans
l’eau ni dans aucun autre liquide.
- Avant de procéder au nettoyage de
l’appareil, retirez le cordon d’alimentation
de la prise de courant et de l’appareil.
AVERTISSEMENT
Pour réduire tout risque de brûlure,
d’électrocution, d’incendie ou de blessure :
- Une surveillance étroite est nécessaire
lorsque cet appareil est utilisé sur des
enfants, sur des personnes ayant des
capacités physiques, sensorielles ou
mentales limitées ou sur des personnes
handicapées.
- L’appareil ne doit être utilisé qu’aux ns
domestiques décrites dans ce mode
d’emploi. N’utilisez pas d’accessoires non
recommandés par Philips North America
LLC.
- N’utilisez jamais cet appareil si le
cordon d’alimentation est endommagé,
si l’appareil ne fonctionne pas
correctement, s’il est tombé par terre,
s’il est endommagé, ou si l’appareil ou le
cordon d’alimentation sont tombés dans
l’eau. Pour obtenir de l‘aide, composez le
1-800-243-7884.
- Tenez le cordon d’alimentation à l’écart
des surfaces chauantes.
- Ne laissez jamais tomber d’objets et
n’insérez pas d’objet dans une de ses
ouvertures.
- N’utilisez pas le cordon d’alimentation
dans une prise de courant ou près
d’une prise de courant qui contient un
désodorisant électrique an d’éviter
d’endommager le cordon d’alimentation.
- N’utilisez pas cet appareil à l’extérieur et
ne le faites jamais fonctionner près de
produits en aérosol (vaporisateurs) ou
dans un endroit où l’on administre de
l’oxygène.
- Vériez toujours la grille de rasage et les
peignes-guides avant d’utiliser l’appareil.
N’utilisez pas l’appareil si la grille de
rasage ou les lames sont endommagées,
car cela peut causer des blessures.
- Commencez toujours par brancher le
cordon d’alimentation à l’appareil puis
à la prise de courant. Pour débrancher
l’appareil, réglez toutes les commandes
sur la position « arrêt ». Ensuite, retirez
le cordon d’alimentation de la prise de
courant.
- Branchez le cordon d’alimentation
directement sur la prise de courant.
N’utilisez pas de rallonge avec cet
appareil.
- Débranchez le cordon d’alimentation
avant de brancher ou de débrancher
l’appareil.
- Utilisez uniquement le cordon
d’alimentation et les autres accessoires
fournis avec l’appareil.
- N’essayez pas d’ouvrir l’appareil pour
retirer ou remplacer la pile rechargeable
intégrée.
- La batterie de cet appareil peut
présenter un risque d’incendie ou de
brûlure chimique en cas de manipulation
inappropriée. Ne la démontez pas,
ne l’exposez pas à une température
supérieure à 100 °C (212 °F) et ne
l’incinérez pas.
- N’exposez pas l’appareil aux rayons
directs du soleil. Ne le rangez pas
dans un endroit où la température est
supérieure à 60 °C (140 °F).
IMPORTANT : La che d’alimentation
contient un transformateur. Pour éviter tout
risque d’accident, ne coupez pas la che
d’alimentation pour la remplacer par une
autre.
CONSERVEZ CES
INSTRUCTIONS
Ce symbole indique que le
rasoir peut être utilisé dans
le bain ou sous la douche.
Mettez-le à l’épreuve
Comme pour beaucoup de nouveaux
produits, il vous faudra peut-être un peu
de temps pour vous habituer à votre rasoir
Philips SatinShave. Si vous utilisez un rasoir
électrique pour la première fois, ou si vous
avez utilisé une marque diérente, prenez
le temps de vous familiariser avec votre
nouveau rasoir électrique.
Votre rasoir SatinShave dispose d’une grille
ottante qui suit les contours de votre
peau pour un rasage de près. Nous vous
garantissons un résultat parfaitement lisse
ou Philips vous remboursera le prix d’achat
complet à condition que la demande soit
reçue dans les 45 jours suivant l’achat.
Introduction
Félicitations pour votre achat et bienvenue
dans l‘univers Philips! Pour proter
pleinement des avantages de l‘assistance
Philips, enregistrez votre produit à l‘adresse
www.philips.com/welcome.
Caractéristiques (gure 1)
1 Manche
2 Bouton marche/arrêt
3 Indicateur de charge
4 Bouton de déverrouillage
5 Prise pour miniche d’adaptateur
6 Tête de rasoir
7 Grille
8 Tondeuses
9 Sabot
10 Câble d’alimentation
11 Tête d‘ecacité (BRL140)
12 Capuchon de glisse douce (BRL140)
13 Étui (BRL140)
Non illustré: Brosse de nettoyage
Remarque : Les têtes, accessoires et
fonctionnalités varient selon les diérents
modèles. Consultez l’illustration de
présentation pour connaître les têtes,
accessoires et fonctionnalités de votre
appareil.
Charge
Chargez l’appareil complètement avant la
première utilisation ou après une période
d’inutilisation prolongée.
La charge ou l’utilisation de l’appareil à
des températures inférieures à 10 °C ou
supérieures à 35 °C réduit la durée de vie de
la batterie.
Remarque :Cet appareil est uniquement
conçu pour une utilisation sans l.
1 Assurez-vous que l’appareil est bien
éteint.
2 Insérez la petite che dans l’appareil et
branchez le cordon d’alimentation sur la
prise murale.
Utilisez uniquement le cordon
d’alimentation fourni.
3 Lorsque le témoin de la pile clignote en
blanc (g. 3), l’appareil est en cours de
charge.
Le temps de charge complet de
l’appareil est d’environ 8 heures; la durée
d’utilisation sans l est de 60 minutes.
4 Lorsque le témoin de la pile s’allume
en blanc de manière continue (g. 4),
l’appareil est complètement chargé.
Le témoin de la pile ne s’allume pas
lorsque l’appareil est allumé : l’appareil
contient susamment d’énergie pour
être utilisé.
5 Lorsque le témoin de la pile clignote en
orange (g. 3), la batterie est presque
déchargée et a besoin d’être chargée.
Chargez l’appareil lorsque vous avez ni
de l’utiliser.
Remarque :Si l’appareil est complètement
chargé, mais reste branché sur la prise
de courant, le témoin de charge clignote
plusieurs fois lorsque vous appuyez sur le
bouton marche/arrêt. pour vous rappeler
de débrancher l’appareil avant de l’utiliser.
Utilisation de l’appareil
Mise en marche et arrêt
1 Mettez l’appareil en marche en
appuyant une fois (g. 5) sur le bouton
marche/arrêt.
2 Éteignez l’appareil en appuyant
une deuxième fois sur le bouton
marche/arrêt.
Fixation et retrait des têtes
1 Pour xer une tête, enfoncez-la sur le
manche (vous entendrez un déclic).
(g. 6)
2 Pour retirer la tête, appuyez sur le
bouton de déverrouillage situé à l’arrière
du manche (g. 7).
Fixation et retrait des accessoires
1 Pour xer un accessoire, alignez
l’indentation de l’accessoire sur l’encoche
de la xation. Enclenchez l’accessoire
sur la xation (vous entendrez un déclic)
(g. 8).
2 Pour retirer un accessoire, saisissez ses
deux faces et retirez-le de la xation
(g. 9) en tirant vers le haut. Pour
détacher un peigne, ne tirez pas sur
l’avant ni sur l’arrière, mais sur les côtés
(g. 10).
Rasage et nition
L’appareil peut être utilisé dans la baignoire
et sous la douche, mais vous pouvez aussi
l’utiliser à sec. Si vous souhaitez utiliser des
crèmes ou lotions pour le corps, appliquez-
les après avoir utilisé l’appareil.
Remarque : L’appareil est uniquement
conçu pour une utilisation sans l.
Remarque : Lorsque vous utilisez l’appareil
pour tailler les poils, utilisez-le au sec pour
un résultat optimal.
1 Placez l’appareil sur votre peau de sorte
que l’élément ou l’accessoire xé soit
totalement en contact avec la peau
(g. 11).
2 Lorsque vous utilisez l’appareil sur les
zones sensibles, tendez la peau avec
votre main libre. Lorsque vous l’utilisez
sur les aisselles, levez le bras et placez
votre main à l’arrière de votre tête pour
étirer la peau (g. 12).
3 Déplacez l’appareil lentement dans
le sens inverse de la pousse des poils
(g. 13).
Remarque : Si vous déplacez l’appareil
trop vite, vous risquez de ne pas obtenir un
résultat parfaitement lisse.
Tête de rasage
Vous pouvez utiliser la tête de rasage pour
épiler vos jambes ou d’autres parties du
corps.
Remarque : Vous pouvez déplacer l’appareil
dans deux directions pour faciliter l’épilation
des aisselles.
Remarque : Vériez toujours la grille
avant utilisation. Si elle est endommagée
d’une quelconque façon, remplacez
le bloc tondeuse immédiatement (voir
‚Remplacement‘).
Peigne de coupe
Vous pouvez xer le peigne de coupe pour
tondre les poils jusqu’à une longueur de
3 mm.
Tête d‘ecacité
Vous pouvez xer la tête d’ecacité sur
la tête de rasage pour redresser les poils
lorsque vous vous rasez. Ainsi, ils seront
plus faciles à enlever.
Capuchon de glisse douce
Vous pouvez xer le capuchon de glisse
douce sur la tête de rasage pour couvrir
la tondeuse arrière de la tête de rasage
et garantir ainsi plus de sécurité dans les
zones incurvées. Le matériau souple qui le
compose lui permet de glisser sans eort
sur votre peau.
Assurez-vous de bien xer le capuchon de
glisse douce de manière à couvrir (g. 14) la
tondeuse arrière de la tête de rasage.
Nettoyage et rangement
Gardez le cordon d’alimentation sec
(g. 2).
1 Éteignez l’appareil.
2 Utilisez la brosse pour éliminer les poils
restés emprisonnés sous les peignes-
guides de la tête de rasage.
3 Retirez l’élément de coupe de la tête de
rasage (g. 15).
4 Nettoyez toutes les pièces de la tête de
rasage à l’aide de la brosse de nettoyage,
à l’exception de la grille.
5 Rincez le bloc tondeuse, la tête de
rasage et les accessoires sous le robinet.
Secouez-les énergiquement pour enlever
les gouttes d’eau.
6 Laissez toutes les pièces sécher
complètement.
7 Replacez le bloc tondeuse sur la tête de
rasage jusqu’à entendre un déclic.
8 Placez le peigne-guide sur la tête de
rasage pour éviter d’endommager celle-
ci lorsque vous la rangez.
9 Conservez le manche, les têtes et les
accessoires dans la pochette.
Remarque : Pour des performances
optimales, lubriez les dents de la tondeuse
et les grilles avec une goutte d’huile pour
machine à coudre toutes les six semaines.
Remplacement
Si l’élément de coupe est usé ou
endommagé, il ne doit être remplacé
que par un élément de coupe Philips
d’origine, que vous trouverez à l’adresse
www.philips.com/parts-and-accessories.
Composez le 1-800-243-7884 (aux États-
Unis uniquement) ou le 1-866-800-9311 (au
Canada uniquement) pour obtenir de l’aide.
Cet appareil ne contient aucune pièce
réparable par l’utilisateur.
Remplacement de l’élément de coupe sur
la tête de rasage
Pour obtenir un rasage maximal, remplacez
l’unité de coupe de la tête de rasage une
fois par année.
1 Éteignez l’appareil et débranchez-le de
la prise de courant.
2 Appuyez sur le bouton de dégagement
à l’arrière du manche et retirez la tête de
rasage du manche.
3 Retirez l’élément de coupe de la tête
(g. 15) de rasage.
4 Placez une nouvelle unité de coupe dans
la tête de rasage (vous entendrez un
déclic).
5 Fixez la tête de rasage sur le manche.
Assistance
Pour obtenir de l’aide, visitez notre site Web :
www.philips.com/support ou composez
le numéro sans frais 1 800 243-7884 (aux
États-Unis uniquement) ou le 1 866 800-
9311 (au Canada uniquement).
Mise au rebut
- Cet appareil contient une pile
rechargeable au lithium-ion qui doit être
mise au rebut de façon appropriée (g. 16).
- Communiquez avec les responsables
locaux de votre ville pour obtenir des
renseignements sur la mise au rebut
des piles. Aux États-Unis, vous pouvez
également appeler au 1 800 822-8837 ou
visiter le site www.call2recycle.org pour
connaître les emplacements (g. 16) où
vous pouvez mettre la pile au rebut. Au
Canada, vous pouvez également appeler
au 1 888 224-9764 ou visiter le site
www.call2recycle.ca pour connaître les
emplacements où vous pouvez mettre la
pile au rebut.
- Pour obtenir de l’aide, visitez le site Web
www.philips.com/support ou composez
le numéro sans frais 1-800-243-7884.
- Votre produit a été conçu et fabriqué
avec des matériaux et composants
de grande qualité, qui peuvent être
recyclés et réutilisés. Pour obtenir
des informations sur le recyclage,
contactez vos installations locales de
gestion des déchets ou visitez le site
www.recycle.philips.com.
Garantie complète de deux ans
Philips North America LLC (États-Unis)
et Philips Electronics Ltd (Canada)
garantissent ce nouveau produit contre
les défauts de matériaux ou de fabrication
pour une période de deux ans à partir de
la date d’achat, et acceptent de réparer
ou de remplacer sans frais tout produit
défectueux.
IMPORTANT : Cette garantie ne couvre
pas les dommages causés par un accident,
un usage abusif, un manque d’entretien,
l’ajout d’accessoires non fournis avec le
produit, la perte de pièces ou l’alimentation
de l’appareil à une tension autre que celle
spéciée.*
L’ENTREPRISE NE POURRA EN AUCUN
CAS ÊTRE TENUE RESPONSABLE DE
DOMMAGES SPÉCIFIQUES, ACCESSOIRES
OU INDIRECTS.
Pour obtenir un service d’entretien couvert
par cette garantie, il sut de visiter le site
www.philips.com/support an d’obtenir
de l’aide. Pour votre protection, nous vous
recommandons d’eectuer vos envois
de retour par courrier avec assurance
prépayée. Tout dommage résultant de
l’expédition n’est pas couvert par cette
garantie. REMARQUE : Aucune autre
garantie, écrite ou orale, n’est autorisée
par Philips Electronics North America LLC
et Philips Electronics Ltd (Canada). Cette
garantie vous confère des droits légaux
précis; il est possible que vous ayez d’autres
droits pouvant varier d’un État à l’autre,
d’une province à l’autre ou d’un pays à
l’autre. Certains États et certaines provinces
n’autorisent pas l’exclusion ou la limitation
des dommages indirects ou consécutifs; par
conséquent, il est possible que certaines
limitations ou exclusions présentées ci-
dessus ne s’appliquent pas à votre cas.
*Veuillez lire attentivement les instructions
fournies.
Garantie de remboursement de
45 jours
Si vous n’êtes pas entièrement satisfait
de l’appareil, retournez-le et nous vous
rembourserons le prix d’achat complet.
Le produit doit être expédié port payé par
poste assurée avec assurance prépayée,
et l’envoi doit comprendre le reçu original
indiquant le prix et la date de l’achat, ainsi
que le formulaire d’autorisation de retour
en vertu de la garantie de remboursement.
Nous n’assumons aucune responsabilité en
cas de perte par la poste.
L’envoi de l’appareil doit être fait au plus
tard 45 jours suivant la date d’achat, le
cachet de la poste en faisant foi. Philips se
réserve le droit de vérier le prix d’achat
de l’appareil et de limiter le montant du
remboursement au prix de détail suggéré.
Pour obtenir le service de garantie de
remboursement, visitez le site www.
PhilipsMoneyBack.com et suivez le
processus simple en trois étapes.
Le chèque de remboursement sera envoyé
6 à 8 semaines après réception du produit
retourné.
BRL140-US_3000.038.8277.1_LEAFLET_gevouwen_A7_bl.indd 2 02-07-19 14:20