Loading ...
Loading ...
Loading ...
14
The number on the surface cooking area heat-setting display will
flash if no pan is placed on the surface cooking area, the pan is
not made of the right material, or it is not the right size. It will stop
flashing once a suitable pan is placed on the surface cooking area.
If you take longer than 30 seconds to place the correct pan on the
surface cooking area, the surface cooking area will turn off. If there
is no activity for 90 seconds, the cooktop will turn off.
Ideal cookware should have a flat bottom, straight sides, and a
well-fitting lid, and the material should be of medium-to-heavy
thickness.
Choose the correct pan size for each surface cooking area. The
diameter of the pan’s base should correspond to the size of the
surface cooking area.
NOTE: Cookware manufacturers often give the diameter across
the top of the pan. This is usually larger than the diameter of
the base.
Pans with rough finishes may scratch the cooktop.
Home Canning
Canning can be performed on the induction cooktop. See the
“Cookware” section to check if the canner will work on the
induction cooktop. When canning for long periods, alternate the
use of surface cooking areas or elements between batches. This
allows time for the most recently used areas to cool.
■ Center the canner on the largest surface cooking area or
element. On electric cooktops, canners should not extend
more than
1
/
2
" (1.3 cm) beyond the surface cooking area
or element.
■ Do not place canner on 2 surface cooking areas or elements
at the same time.
■ On ceramic glass models, use only flat-bottomed canners
to avoid damage to the cooktop and elements.
■ For more information, contact your local agricultural extension
office or refer to published home canning guides. Companies
that manufacture home canning products can also offer
assistance.
Odors and smoke are normal when the oven is used the first few
times or when it is heavily soiled.
IMPORTANT: The health of some birds is extremely sensitive to
the fumes given off by the oven. Exposure to the fumes may result
in death to certain birds. Always move birds to another closed and
well-ventilated room.
Aluminum Foil
IMPORTANT: To avoid permanent damage to the oven bottom
finish, do not line the oven bottom with any type of foil or liner.
For best cooking results, do not cover entire oven rack with foil
because air must be able to move freely.
Positioning Racks and Bakeware
IMPORTANT: To avoid permanent damage to the porcelain
finish, do not place food or bakeware directly on the oven door
or bottom.
Bakeware
To cook food evenly, hot air must be able to circulate. Allow
2" (5 cm) of space around bakeware and oven walls. Make sure
that no bakeware piece is directly over another.
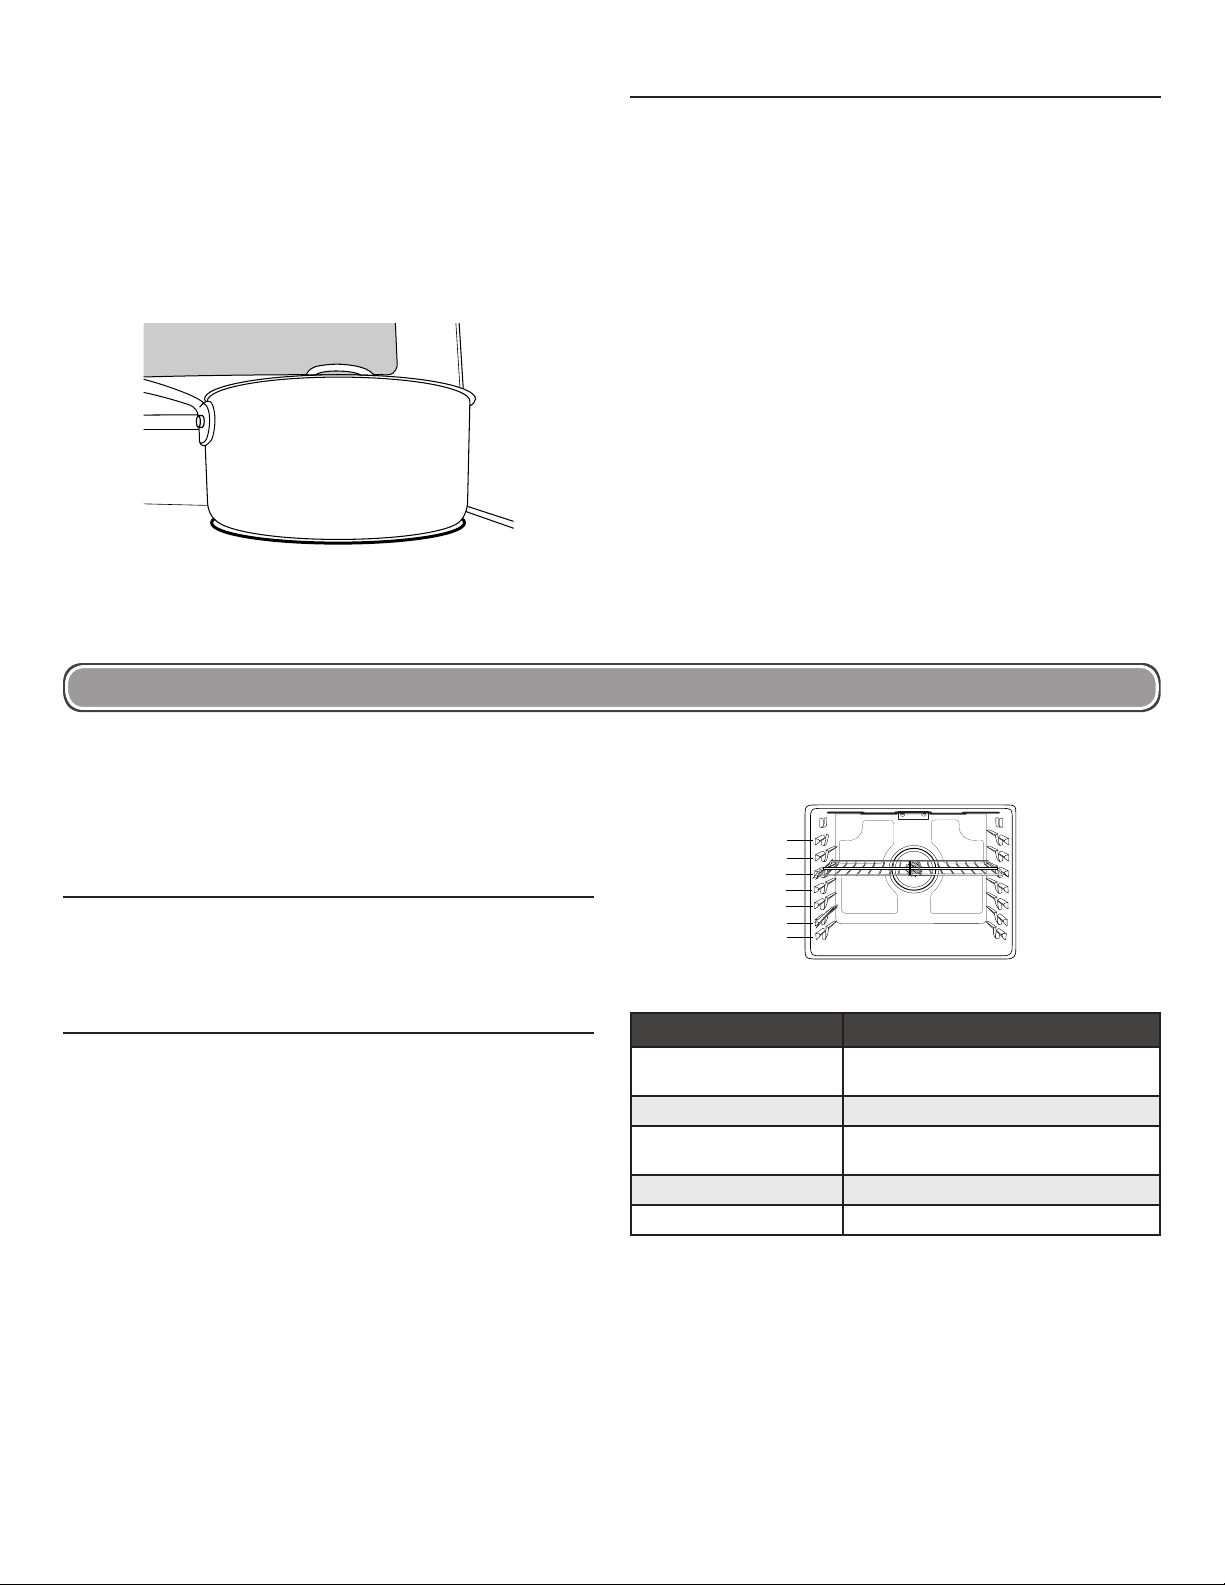
Racks
■ Position racks before turning on the oven.
■ Do not position racks with bakeware on them.
■ Make sure racks are level.
To position a rack, pull it out to the stop position, raise the front
edge, and then lift out. Use the following illustration and charts
as guides.
The oven has 7 positions for a flat rack, as shown in the previous
illustration and the following table.
Flat Rack Position* Type of Food
7 Broiling/searing meats, hamburgers,
steaks
6 Broiled meats, poultry, fish
3 or 4 Most baked goods, casseroles,
frozen foods
2 Roasted meats
1 Large roasts or poultry
For hamburger patties to have a well-seared exterior and a rare
interior, use a flat rack in rack position 7. Side 1 should cook
for approximately 2
1
/
2
to 3
1
/
2
minutes. Side 2 should cook for
approximately 4 to 5 minutes. Expect a moderate degree of smoke
when broiling.
* If your model has a Max Capacity Oven Rack, the recessed
ends must be placed in the rack position above the desired
position of the food. See the following illustration.
7
6
5
4
3
2
1
OVEN
Loading ...
Loading ...
Loading ...