Loading ...
Loading ...
Loading ...
11
Non-steam
model
ADDITIONAL FEATURES
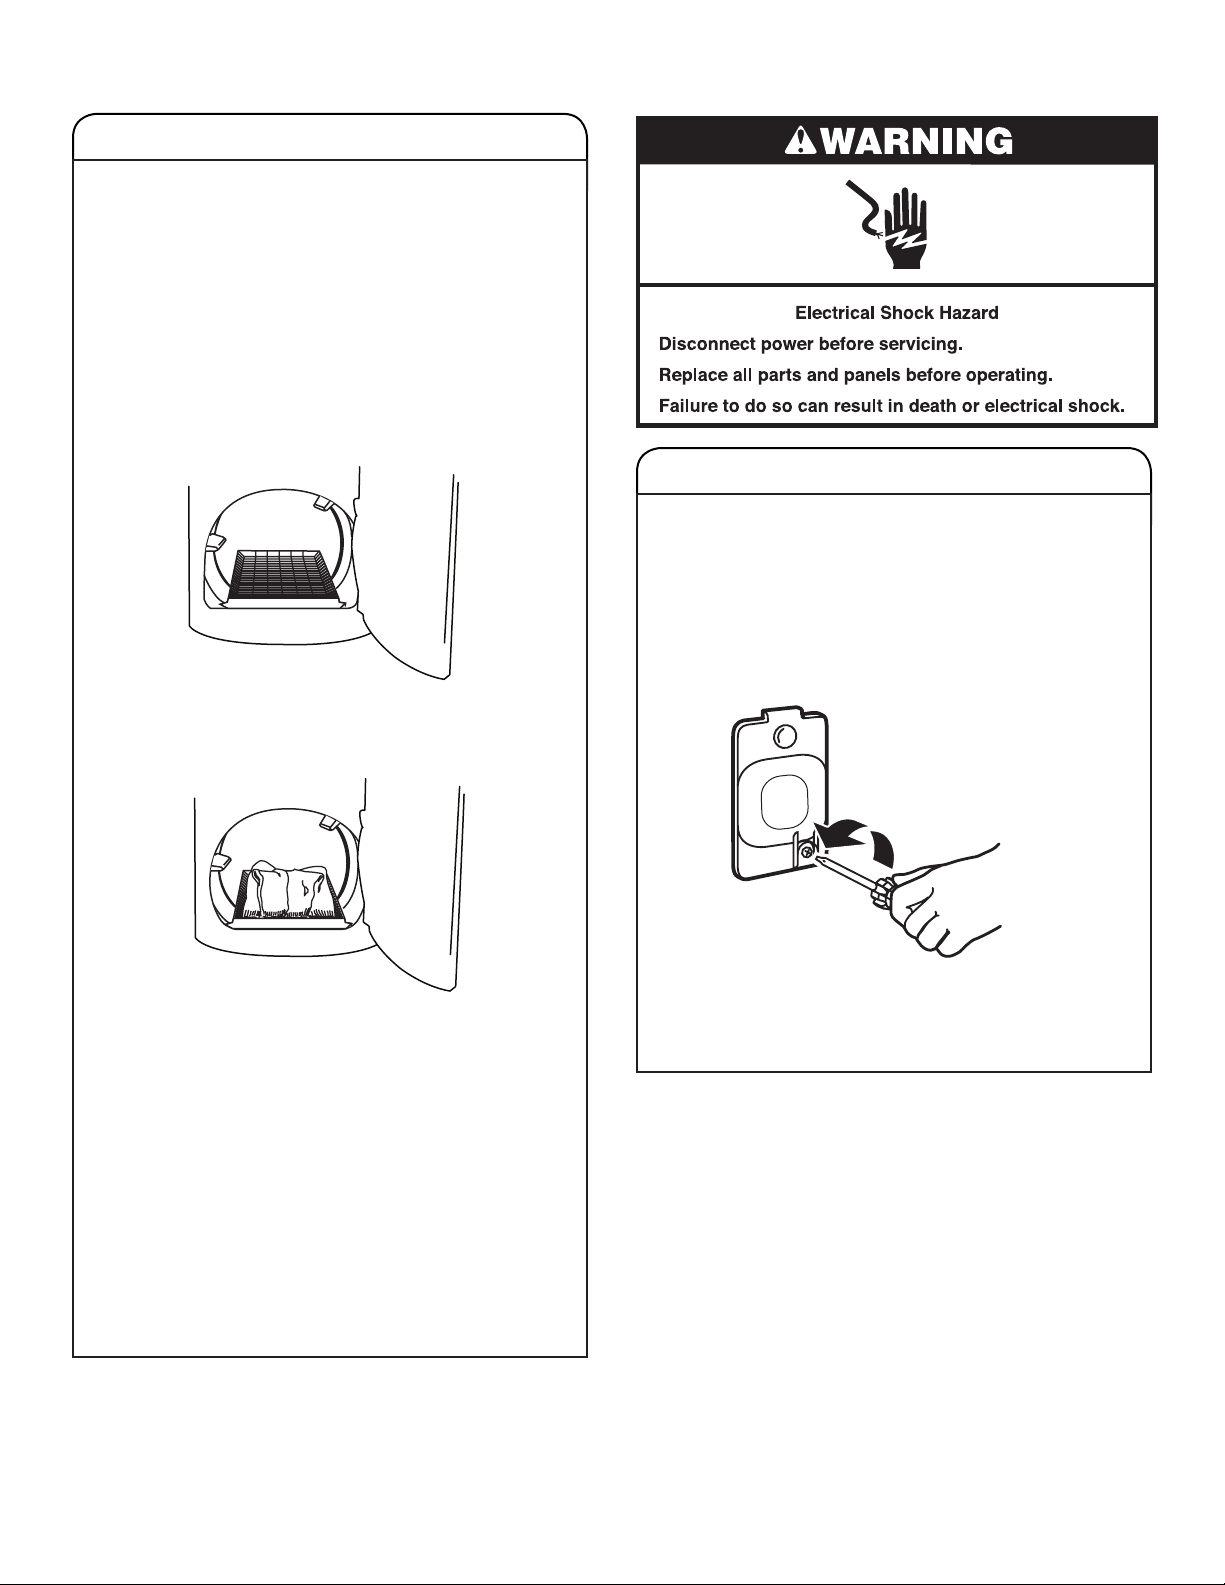
2. Align the two hooks on the front of the drying rack with the
holes in the dryer door opening and press down fully into
holes. Rest the rear support on the dryer back ledge.
USING THE DRYING RACK
To obtain a drying rack for your dryer, follow the instructions
included in your dryer drum. Remove and discard any
packing material before use.
Use the Drying Rack for items that you do not want to tumble
dry, such as sweaters and tennis shoes. When you use the
drying rack, the drum continues to turn, but the rack remains
stationary.
The drying rack is intended for use with the Timed Dry cycles
only. The drying rack cannot be used with Sensor cycles.
To use the drying rack:
IMPORTANT: Do not remove the lint screen.
1. Open dryer door.
3. Place wet items on top of the drying rack. Allow space
around items for air to circulate. The drying rack does not
move, but the drum will rotate; be sure to leave adequate
clearance between items and the inside of the dryer drum.
Make sure items do not hang over the edges or between
drying rack grille.
4. Close the door.
5. Select a Timed Dry/Air Only, or Low Temperature cycle.
Items containing foam, rubber, or plastic must be dried on a
clothesline or by using the Air Only setting.
6. When the cycle is selected, the Estimated Time Remaining
display shows the default time. You can change the actual
time in the cycle by increasing or decreasing the cycle time.
7. Start the dryer.
NOTE: Check the lint screen and remove any lint accumulated
from items dried on the drying rack after the cycle is finished.
3. Turn bulb counterclockwise. Replace the bulb with
a 10-watt appliance bulb only. Replace the cover and
secure with the screw.
4. Plug in dryer or reconnect power.
CHANGING THE DRUM LIGHT
The dryer light automatically turns on inside the dryer drum
when you open the door.
To change the drum light:
1. Unplug dryer or disconnect power.
2. Open the dryer door. Locate the light bulb cover on the back
wall of the dryer. Remove the screw located in the lower
right corner of the cover. Remove the cover.
Loading ...
Loading ...
Loading ...