Loading ...
Loading ...
Loading ...
13
Complete Installation
1. Check that all parts are now installed. If there is an extra
part, go back through the steps to see which step was
skipped.
2. Check that you have all of your tools.
3. Dispose of/recycle all packaging materials.
4. Check that the range is level. See the “Level Range” section.
5. Use a mild solution of liquid household cleaner and warm
water to remove waxy residue caused by shipping material.
Dry thoroughly with a soft cloth. For more information, read
the “Range Care” section of the Use and Care Guide.
6. Read the range Use and Care Guide.
7. Plug power cord into appropriate outlet. Slide range into its
nal location. Check that the exible conduit or power supply
cord is not bent.
8. Turn power on. Turn on surface elements and oven. See
the Use and Care Guide for specic instruction on range
operation.
If range does not operate, check the following:
■ Household fuse is intact and tight, or circuit breaker has not
tripped.
■ Range is plugged into a grounded outlet.
■ Electrical supply is connected.
■ See the “Troubleshooting” section in the Use and Care
Guide.
When the range has been on for 5 minutes, check for heat.
If range is cold, turn off the range and contact a qualied
technician.
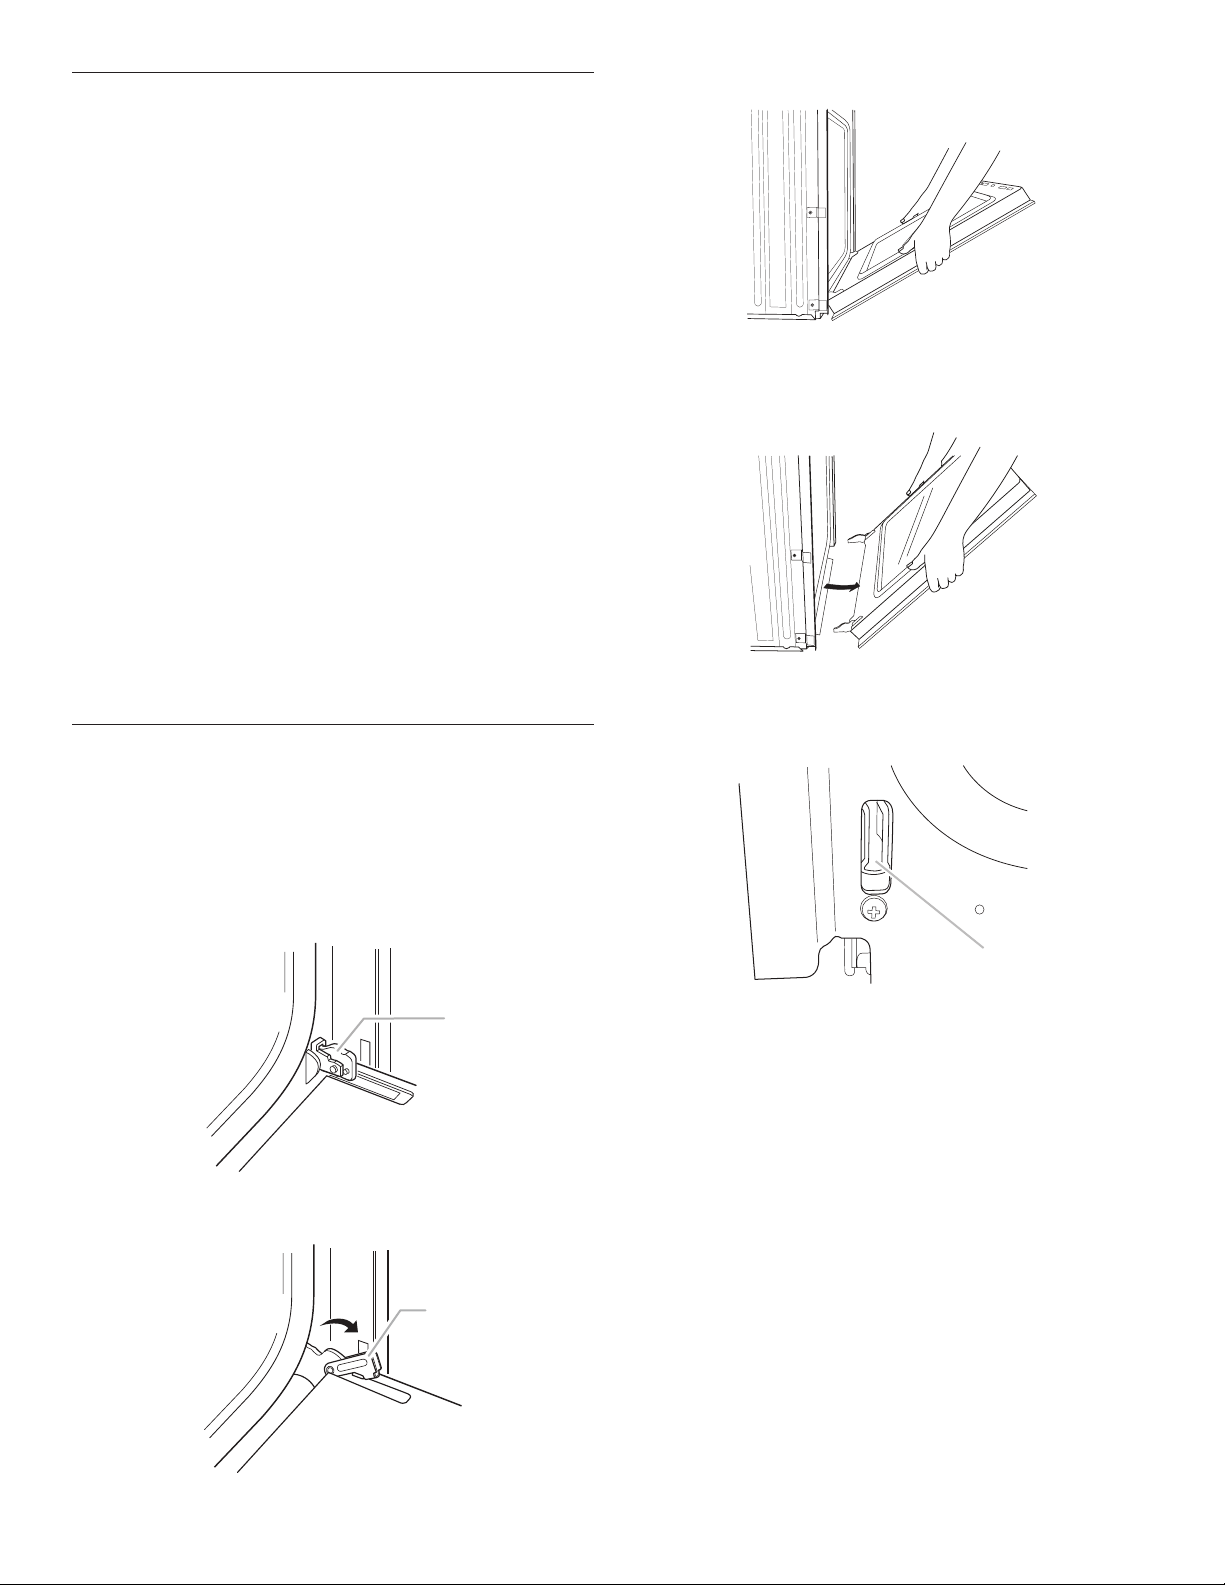
Remove Oven Door(s)
■ The range is designed to not need the oven doors removed
for standard usage and cleaning, however, they can be
removed if necessary.
■ Do not lift or move the range by the door handle(s).
■ Prepare a surface where you will place the door(s). This
surface should be at and covered with a soft blanket, or use
the corner posts from the packaging material.
■ To replace the oven door(s), locate the slots in the oven
cavity for the hinge locks and repeat the steps above in
reverse order. Make sure the door closes properly and there
is no interference from the door latch. If necessary, remove
the door and repeat the steps above. If power is connected
to the range, open and close the door to make sure the oven
light comes on and goes off appropriately.
■ Follow the installation instructions found in the bag
containing the literature.
A
A. Oven door hinge in the
locked position
B
B. Oven door hinge in the
unlocked position
Partially close the door to engage
the door latch locks. The door will
stop at this point.
Use two hands to remove and replace
the oven door(s). It may be necessary to
gently shift door from side to side.
A
A. Slot in the oven frame for the
door hinge lock
Loading ...
Loading ...
Loading ...