Documents: Go to download!
- Owner's manual - (English, French, Spanish)
- CONTROL PANEL AND FEATURES
- CYCLE GUIDE – AUTO MOISTURE SENSING™ CYCLES
- CYCLE GUIDE – TIME DRY CYCLES
- USING YOUR DRYER
- DRYER CARE
- TROUBLESHOOTING
Table of contents
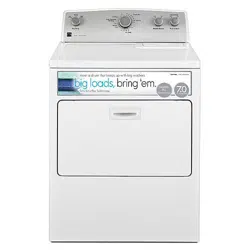
User manual Gas Dryer
CONTROL PANEL AND FEATURES

Not all features and options are available on all models.
Appearance may vary
1. Dry Temp
Select a drying temperature based on the fabrics in your load. If you are unsure of the temperature to select for a load, select the lower setting rather than the higher setting. See “Cycle Guide.”
2. CYCLE KNOB
Use your cycle knob to select available cycles on your dryer. Turn the knob to select a cycle for your laundry load. See “Cycle Guide” for detailed descriptions of cycles.
Timed Dry
Will run the dryer for the specified time on the control. On models with a selectable temperature knob, you may choose a setting based on the fabrics in your load. Drying time and temperature will vary depending on your dryer model.
Auto Moisture Sensing™
Auto Dry cycles give the best drying in the shortest time. Drying time will vary based on fabric type, load size, and dryness setting.
Air Only
Use the Air Only setting to dry foam, rubber, plastic, or heat-sensitive fabrics.
3. Wrinkle Guard™ option
When you are unable to remove a load of clothes from the dryer as soon as it stops, wrinkles can form. The WRINKLE GUARD™ option periodically tumbles, rearranges, and fluffs the load to help keep wrinkles from forming.
- Get up to 40 minutes of heat-free, periodic tumbling at the end of a cycle. Turn the WRINKLE GUARD™ knob to select ON or OFF at any time before the cycle has ended.
4. Cycle Signal/PUSH TO START
The Cycle Signal produces an audible sound when the drying cycle is finished. On some models, this knob is combined with the PUSH to START button. Promptly removing clothes at the end of the cycle reduces wrinkling.
Turn the CYCLE SIGNAL knob to select the desired setting (On or Off). With combined buttons, Press and hold the CYCLE SIGNAL/PUSH to START button to start the dryer. On models without the cycle signal, press the PUSH to START button to start the dryer.
NOTE: When the Wrinkle Guard™ setting is selected and the Signal is on, the tone will sound every 5 minutes until the clothes are removed, or the Wrinkle Guard™ setting ends.
CYCLE GUIDE – AUTO MOISTURE SENSING™ CYCLES
AUTO MOISTURE SENSING™ – Senses moisture in the load or air temperature and shuts off when the load reaches the selected dryness level. Depending on model, temperature may be selected on cycle knob or be a separate control. Choose Normal to save energy

NOTE: If loads do not seem as dry as you would like, select More next time you dry a similar load. If loads seem drier than you like, select Less next time you dry a similar load.
CYCLE GUIDE – TIME DRY CYCLES
TIMED DRY – Will run the dryer for the specified time on the control. Depending on model, temperature may be selected on cycle knob or be a separate control.

Setting the Drying Temperature
If your dryer has multiple temp settings:
A High Cotton temp setting may be used for drying heavyweight items such as towels and work clothes.
A Low Delicates or Medium Casual temp setting may be used for drying medium-weight items such as sheets, blouses, dresses, underwear, permanent press fabrics, and some knits.
Use a Air Only (no heat) setting for foam, rubber, plastic, or heat-sensitive fabrics.
Line dry bonded or laminated fabrics.
NOTE: If you have questions about drying temperatures for various loads, refer to the care label directions on the items.
USING YOUR DRYER
WARNING: To reduce the risk of fire, electric shock, or injury to persons, read the IMPORTANT SAFETY INSTRUCTIONS before operating this appliance.
1. Clean the lint screen
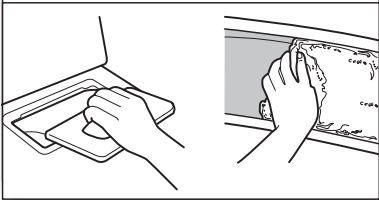
Clean the lint screen before each load. Pull the lint screen out of its holder. Roll lint off the screen with your fingers. Do not rinse or wash screen to remove lint. Push the lint screen firmly back into place. For additional cleaning information, see “Dryer Care.”
2. Load the dryer
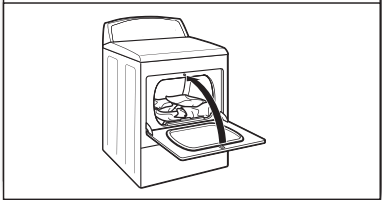
Place laundry in the dryer. Close the door. Do not tightly pack the dryer; clothes should be able to tumble freely
3. Select the desired cycle

Select the desired cycle for your load. See the “Cycle Guide” for more information about each cycle.
Auto Moisture Sensing™ cycles
You can select a different dry level, depending on your load, by turning the knob to More, Normal, or Less.
Selecting More, Normal, or Less automatically adjusts the dryness level at which the dryer will shut off. Once a dry level is set, it cannot be changed without stopping the cycle.
Auto Moisture Sensing™ cycles give the best drying in the shortest time. Drying time varies based on fabric type, load size, and dryness setting.
NOTE: More Dry removes more load moisture. Normal Dry is used for a starting point for Auto Moisture Sensing™ cycles. Choose normal to save energy. Less Dry removes less moisture and used for loads you may want to put on a hanger to complete drying.
4. Set cycle options
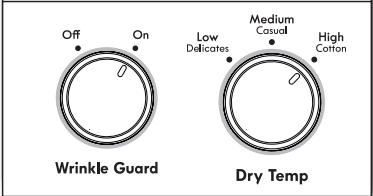
Select the cycle options by turning the knob to the desired position.
NOTE: Not all options and settings are available with all cycles.
Wrinkle Guard™ option
Get up to 40 minutes of heat-free, periodic tumbling at the end of a cycle. Turn the WRINKLE GUARD™ knob to select ON or OFF at any time before the cycle has ended.
Dry Temp
Turn the DRY TEMP knob to change the drying temperature setting. See “Setting the Drying Temperature.”
5. Select Cycle Signal, if desired
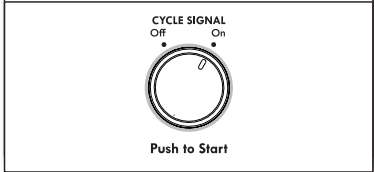
Turn the CYCLE SIGNAL knob to select the desired setting (On or Off). The Cycle Signal produces an audible sound when the drying cycle is finished. Promptly removing clothes at the end of the cycle reduces wrinkling.
NOTE: When the Wrinkle Guard™ option is selected and the Cycle Signal is on, the tone will sound every 5 minutes until the clothes are removed, or the Wrinkle Guard™ option ends.
6. Press and hold PUSH to START to begin cycle
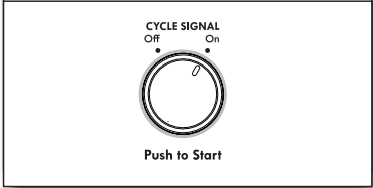
Press and hold the PUSH to START button to begin the cycle.
Promptly remove items after cycle has completed to reduce wrinkling. Use the Wrinkle Guard™ option to avoid wrinkling when you are unable to remove a load from the dryer as soon as it stops.
DRYER CARE
Cleaning the dryer location
Keep dryer area clear and free from items that would block the air flow for proper dryer operation. This includes clearing piles of laundry in front of the dryer.
Cleaning the dryer interior
To clean dryer drum
- Apply a liquid, nonflammable household cleaner to the stained area of the drum and rub with a soft cloth until stain is removed.
- Wipe drum thoroughly with a damp cloth.
- Tumble a load of clean cloths or towels to dry the drum.
NOTE: Items that contain loose dyes, such as denim blue jeans or brightly colored cotton items, may discolor the dryer interior. These stains are not harmful to your dryer and will not stain future loads of clothes. Dry these items inside out to avoid drum staining.
Removing accumulated lint
From Inside the Dryer Cabinet
Lint should be removed every 2 years, or more often, depending on dryer usage. Cleaning should be done by a qualified servicer.
From the Exhaust Vent
Lint should be removed every 2 years, or more often, depending on dryer usage.
Cleaning the lint screen
Every load cleaning
The lint screen is located in the dryer. A screen blocked by lint can increase drying time.
To clean:
1. Pull the lint screen out of its holder. Roll lint off the screen with your fingers. Do not rinse or wash screen to remove lint.
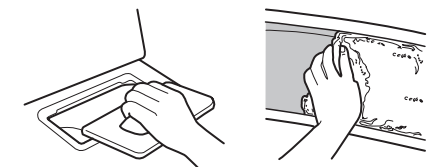
2. Push the lint screen firmly back into place.
IMPORTANT:
- Do not run the dryer with the lint screen loose, damaged, blocked, or missing. Doing so can cause overheating and damage to both the dryer and fabrics.
- If lint falls off the screen into the dryer during removal, check the exhaust hood and remove the lint. See “Venting Requirements.”
As needed cleaning
Laundry detergent and fabric softener residue can build up on the lint screen. This buildup can cause longer drying times for your clothes, or cause the dryer to stop before your load is completely dry. The screen is probably clogged if lint falls off while the screen is in the dryer.
Clean the lint screen with a nylon brush every 6 months, or more frequently, if it becomes clogged due to a residue buildup.
To wash:
- Roll lint off the screen with your fingers.
- Wet both sides of lint screen with hot water.
- Wet a nylon brush with hot water and liquid detergent. Scrub lint screen with the brush to remove residue buildup.

4. Rinse screen with hot water.
5. Thoroughly dry lint screen with a clean towel. Reinstall screen in dryer.
Vacation, storage, and moving care
Non-Use or Storage Care
Operate your dryer only when you are at home. If you will be on vacation or not using your dryer for an extended period of time, you should:
- Unplug dryer or disconnect power.
- (For gas dryers only): Close shutoff valve to gas supply line.
- Clean lint screen. See “Cleaning the Lint Screen.”
Moving Care
For power supply cord-connected dryers:
- Unplug the power supply cord.
- Make sure leveling legs are secure in dryer base.
- Use tape to secure dryer door.
For direct-wired dryers:
- Turn off power at fuse or breaker box.
- Disconnect wiring.
- Make sure leveling legs are secure in dryer base.
- Use tape to secure dryer door.
For gas dryers:
- Unplug or disconnect power to dryer.
- Close shutoff valve in gas supply line.
- Disconnect gas supply line pipe and remove fittings attached to dryer pipe.
- Cap the open fuel supply line.
- Make sure leveling legs are secure in dryer base.
- Use tape to secure dryer door.
Reinstalling the Dryer
Follow the “Installation Instructions” to locate, level, and connect the dryer.
Changing the drum light (on some models)
1. Unplug dryer or disconnect power.
2. Open the dryer door. Locate the light bulb cover on the back wall of the dryer. Using a Phillips head screw driver, remove the screw located in the lower right-hand corner of the cover. Remove the cover.
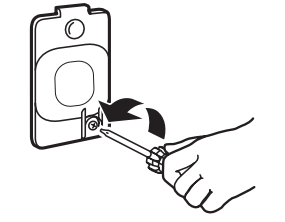
3. Turn bulb counterclockwise. Replace the bulb with a 10-watt appliance bulb only. Replace the cover and secure with the screw.
4. Plug in dryer or reconnect power.
TROUBLESHOOTING
If you experience | Possible Causes | Solution |
| Clothes are not drying satisfactorily, drying times are too long. | Lint screen clogged with lint. | Lint screen should be cleaned before each load. |
| The Air Only cycle has been selected. | Select the right cycle for the types of items being dried. See “Cycle Guide.” | |
| Load too large and heavy to dry quickly. | Separate the load to tumble freely. | |
| Exhaust vent or outside exhaust hood clogged with lint, restricting air movement. | Run the dryer for 5–10 minutes. Hold your hand under the outside exhaust hood to check air movement. If you do not feel air movement, clean exhaust system of lint or replace exhaust vent with heavy metal or flexible metal vent. Make sure vent is not crushed or kinked. See “Installation Instructions.” | |
| Fabric softener sheets blocking the grill. | Use only one fabric softener sheet, and use it only once. | |
| Exhaust vent not the correct length. | Check that the exhaust vent is not too long or has too many turns. Long venting will increase drying times. Make sure vent is not crushed or kinked. See “Installation Instructions.” | |
| Exhaust vent diameter not the correct size. | Use 4" (102 mm) diameter vent material. | |
| Dryer located in a room with temperature below 45ºF (7ºC). | Proper operation of dryer cycles requires temperatures above 45ºF (7ºC). | |
| Dryer located in a closet without adequate openings. | Closet doors must have ventilation openings at the top and bottom of the door. The front of the dryer requires a minimum of 1" (25 mm) of airspace, and, for most installations, the rear of the dryer requires 5" (127 mm). See “Installation Instructions.” | |
| Dryer will not run | Door not closed completely. | Make sure the dryer door is closed completely. |
| PUSH to START button not pressed firmly or held long enough. | Press and hold the PUSH to START button until you hear the dryer drum moving. | |
| Household fuse is blown or circuit breaker has tripped. | Electric dryers use 2 household fuses or circuit breakers. The drum may be turning, but you may not have heat. Replace both fuses or reset the circuit breaker. If the problem continues, call an electrician. | |
| Incorrect power supply | Electric dryers require 240-volt power supply. Check with a qualified electrician. | |
| Wrong type of fuse | Use a time-delay fuse. | |
| Unusual sounds | Dryer had a period of non-use. | If the dryer hasn’t been used for awhile, there may be a thumping sound during the first few minutes of operation. |
| A coin, button, or paper clip is caught between the drum and front or rear of the dryer. | Check the front and rear edges of the drum for small objects. Clean out pockets before laundering. | |
| It is a gas dryer. | The gas valve clicking is a normal operating sound. | |
| The four legs are not installed, and the dryer is not level front to back and side to side. | The dryer may vibrate if not properly installed. See “Installation Instructions.” | |
| Clothing knotted or balled up. | When balled up, the load will bounce, causing the dryer to vibrate. Separate the load items and restart the dryer. | |
| No heat | Household fuse is blown or circuit breaker has tripped. | The drum may be turning, but you may not have heat. Electric dryers use 2 household fuses or circuit breakers. Replace both fuses or reset the circuit breaker. If the problem continues, call an electrician. |
| Supply line valve not open. | For gas dryers, make sure the supply line valve is open. | |
| Incorrect power supply. | Electric dryers require 240-volt power supply. Check with a qualified electrician. | |
| Cycle time too short | Automatic cycle ending early. | The load may not be contacting the sensor strips. Level the dryer. Use Timed Dry for very small loads. Change the dry level setting on Auto Moisture Sensing™ cycles. Increasing or decreasing the dry level setting will change the amount of drying time in a cycle. |
| Lint on load | Lint screen clogged. | Lint screen should be cleaned before each load. |
| Stains on load or drum | Dryer fabric softener not properly used. | Add dryer fabric softener sheets at the beginning of the cycle. Fabric softener sheets added to a partially dried load can stain your items. Drum stains are caused by dyes in clothing (usually blue jeans). These will not transfer to other clothing. |
| Loads are wrinkled | The load was not removed from dryer at the end of the cycle. | Select Wrinkle Guard™ option to tumble the load without heat to avoid wrinkling. |
| Dryer tightly packed. | Dry smaller loads that can tumble freely reduce wrinkles from forming. | |
| Odors | You have recently been painting, staining, or varnishing in the area where your dryer is located. | If so, ventilate the area. When the odors or fumes are gone from the area, rewash and dry the clothing. |
| The electric dryer is being used for the first time. | The new electric heating element may have an odor. The odor will be gone after the first cycle. | |
| Load is too hot | Laundry items werer removed from the dryer before the end of the cycle. | Allow Cool Down to finish before removing laundry from dryer. All cycles are cooled slowly to reduced wrinkling and make it easier to handle. Items removed before Cool Down may feel very warm. |
| A high temperature cycle was used or the Dry Temp was set on high. | Select a lower temperature, and use an automatic drying cycle. These cycles sense the temperature or the moisture level in the load and shut off when the load reaches the selected dryness. This reduces overdrying. |
See other models: 14813 62332 75202 31553 81452
