User Manual Electric Shaver
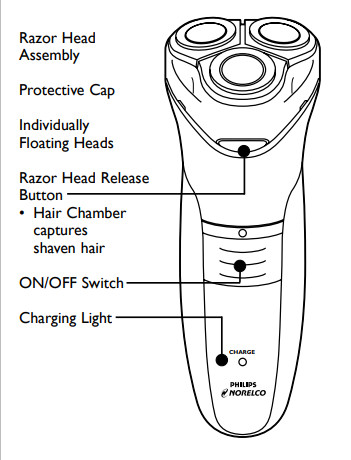
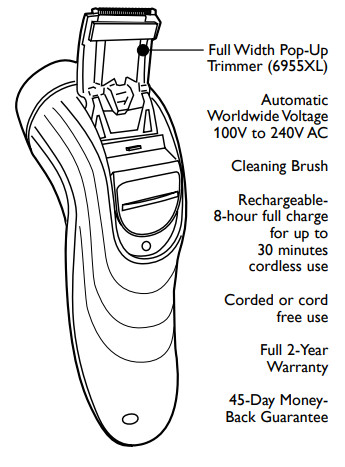
Features
Before First Use
- Charge the razor before you start using it (see ‘Charging’). Make sure the razor is switched off before you start charging it.
Important
- Only use the power cord provided to charge the razor.
Charging
- Battery performance is best if you recharge only when the batteries are (almost) completely empty.
- Charging or recharging at temperatures below 40°F and higher than 95°F adversely affects lifetime of batteries.
- Continuously recharging or continuously using as a corded razor will reduce life of batteries.
- You may also shave using the power cord provided. This razor will not recharge while being used corded.
- Charging and recharging requires a full 8 hours.
- If razor has not been used for at least 1 month, razor must be recharged for 8 full hours.
- Connect cord directly to razor. Connect the charging plug into any 100V to 240V AC outlet. Use only the power cord provided.
- An adaptor plug may be necessary for charging plug usage in some foreign countries. Use an attachment plug adaptor of the proper configuration for the power outlet.
- The razor will automatically convert to work on 100V to 240V AC systems.
- As you charge razor, the Charging Light will light up to indicate razor is charging
- Charging and recharging requires 8 full hours. A fully charged razor has a cordless shaving time of up to 30 minutes.
Recharging
- Recharging requires 8 hours.
- When razor is fully charged, disconnect the charging plug from outlet.
- Do not keep razor permanently plugged into outlet.
Put It To The Test & Shaving Tips
- 21 Day Trial and Conversion Process. It is a fact that your skin and beard need time to adjust to any new shaving system.
- Use your new razor exclusively for 3 weeks to fully enjoy the closeness of a Philips Norelco shave.
- At first you may not get as close a shave as you expect, or your face may even become slightly irritated. This is normal since your beard and skin will need time to adjust. Invest 3 weeks and you'll soon experience the full joy of your new razor.
- Stick with it! If you alternate shaving methods during the adjustment period, it may make it more difficult to adapt to the Philips Norelco shaving system.
- If you are not convinced after 21 days, Philips Norelco will refund you the full purchase price as long as the request is received within 45 days of purchase.
How To Shave With An Electric Razor
- Use this razor for its intended household use as described in this manual.
- Shaving with a clean, dry face gives the best results.
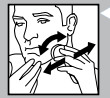
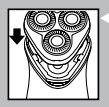
- Turn razor to ON (1) position. Shave against the direction of beard growth using both straight and circular movements.
- Stretch your skin with your free hand so blades can cut whiskers. Gently press razor to skin, so the floating heads can follow the contours of your face. DO NOT press too hard. Too much pressure can pinch the skin into the heads.
- Turn razor to OFF (O) position.
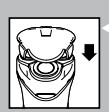
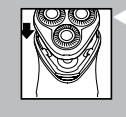
- Put the protective cap on the razor to protect razor heads.
Trimming (6955XL)
To groom sideburns and moustache:
- Turn razor to ON (1) position.
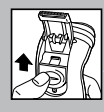
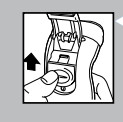
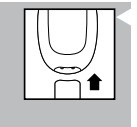
- Push up trimmer slide switch. The trimmer can be activated while the razor is running.
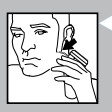
- Hold trimmer as shown and move in downward strokes with gentle pressure.
- Close trimmer by sliding trimmer switch down.
- Turn razor to OFF (O) position.
Cleaning
Once a week: Razor
- Always clean your razor after each use.
- Regular cleaning guarantees better shaving results.
- Always switch razor OFF, unplug and remove power cord before cleaning.
- Never clean, remove or replace head assembly while motor is on.
- Do not apply pressure to shaving head combs. Do not touch razor heads with hard objects as this may dent or damage precision-made slotted combs.
- Do not use razor if combs are damaged or broken. Facial injury may occur.
- Do not use abrasives, scourers or aggressive liquids such as gasoline or acetone to clean the razor.
- Clean the top of the razor with the supplied brush.
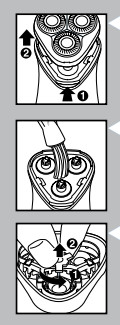
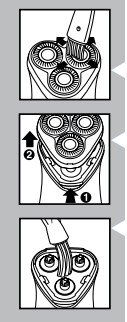
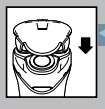
- Press the Razor Head Release Button (1) and remove Razor Head Assembly from the razor unit (2)
- Brush out hairs from the inside of Razor Head Assembly and hair chamber.
- Replace the Razor Head Assembly back on razor
Every Two Months: Razor Head
Do not mix up the cutters and combs asthe shaving performance may be adversely affected for several weeks before optimalshaving performance isrestored.
- Turn razor to OFF (O) position and disconnect from outlet
- Press the Razor Head Release Button (1) and remove Razor Head Assembly from the razor unit (2).
- Brush the inside of the razor housing.
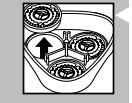
- Turn Razor Head Assembly over so that underside is exposed.
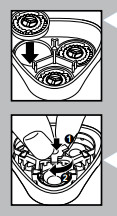
- Turn wheel of frame counterclockwise.
- Remove the frame and brush clean.
- Remove and clean one cutter and comb at a time.
- Do not clean more than one cutter and comb at a time, since they are all matching sets. If you accidentally interchange the cutters and combs, it could take several weeks before optimal shaving performance is restored.
-
- Separate the cutter from the comb.
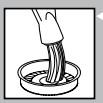
- Only brush the cutter in an upward motion. Use the short bristled side of the brush.
- Brush the slots of the comb.
- For optimum performance,razor cutters and combs should be cleaned in a degreasing liquid (e.g. Philips Norelco Shaving Head Cleaning Spray, model HQ110 or alcohol). This helps prevent wear of the shaving heads.
- Replace the cutter and comb into the Razor Head Assembly.
- Repeat the process for the other two sets of cutters and combs.
- Replace the frame.
- Turn the wheel clockwise until it locks into place.
- Replace the Razor Head Assembly back on razor.
- Put the protective razor head cap on the razor to protect heads.
After Each Use: Trimmer (6955XL)
- Turn razor to OFF (O) position.
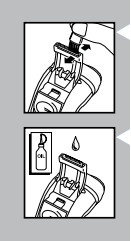
- Push trimmer slide switch up to pop up trimmer.
- Clean trimmer with the brush every time you use it.
- Lubricate the trimmer teeth with one drop of mineral oil every 6 months.
- Close trimmer by sliding trimmer switch down.
This razor has no other user-serviceable parts. For assistance call 1-800-243-3050.
Replacing the Razor Heads
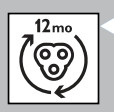
- Replace the razor heads once a year for optimal shaving results.
- Replace damaged or worn razor heads with model HQ56 Philips Norelco razor heads only.
Storage
- Be sure razor is turned off. Remove cord from outlet and razor before storing in a safe, dry location where it will not be crushed, banged, or subject to damage.
- Do not wrap power cord around razor when storing.
- Store cord in a safe location where it will not be cut or damaged.
- Do not place or store razor where it can fall or be pulled into a tub or sink, water or other liquid while plugged in
- Put the Protective Cap on razor to protect heads.
Battery Removal

- This Philips Norelco razor contains a rechargeable Nickel Metal Hydride battery which must be disposed of properly.
- Battery should only be removed when razor is to be discarded.
- For assistance, visit our website, www.philips.com/support or call toll free: 1-800-243-3050.
- Turn razor ON.
- Allow razor to run until the battery is empty/depleted.
- Turn razor OFF.
- Use a screwdriver to remove the screws in the back of the razor and open it.
- Cut the battery strips with a cutter and pull the battery loose from the glued strip.
- Be careful, the battery strips are very sharp.
- Remove the rechargeable battery.
- Do not attempt to replace battery. Insulate battery ends by covering with tape and/or place battery in a small plastic bag.
- Discard your razor. Do not attempt to plug power cord into the outlet or recharge the razor after the battery has been removed.
- Contact your local town or city officials for battery disposal information or call 1-800-8-BATTERY or www.rbrc.com for battery drop-off locations.
Accessories
NOTE: Model HQ5 Reflex Action Replacement Heads DO NOT fit this razor
- Replacement Heads Model HQ56 - For maximum razor performance, replace your Philips Norelco razor heads once a year.
- Shaving Head Cleaning Spray Model HQ110 - Philips Norelco Shaving Head Cleaning Spray
- Philips Norelco Razor Accessories may be purchased at a store near you or on our website www.philips.com/store