Loading ...
Loading ...
Loading ...
11
Vacation, storage, and moving care
Non-Use or Storage Care
Operate your dryer only when you are at home. If you will be
on vacation or not using your dryer for an extended period of
time, you should:
1. Unplug dryer or disconnect power.
2. Clean lint screen. See “Cleaning the Lint Screen.”
Moving Care
For power supply cord-connected dryers:
1. Unplug the power supply cord.
2. Make sure leveling legs are secure in dryer base.
3. Use tape to secure dryer door.
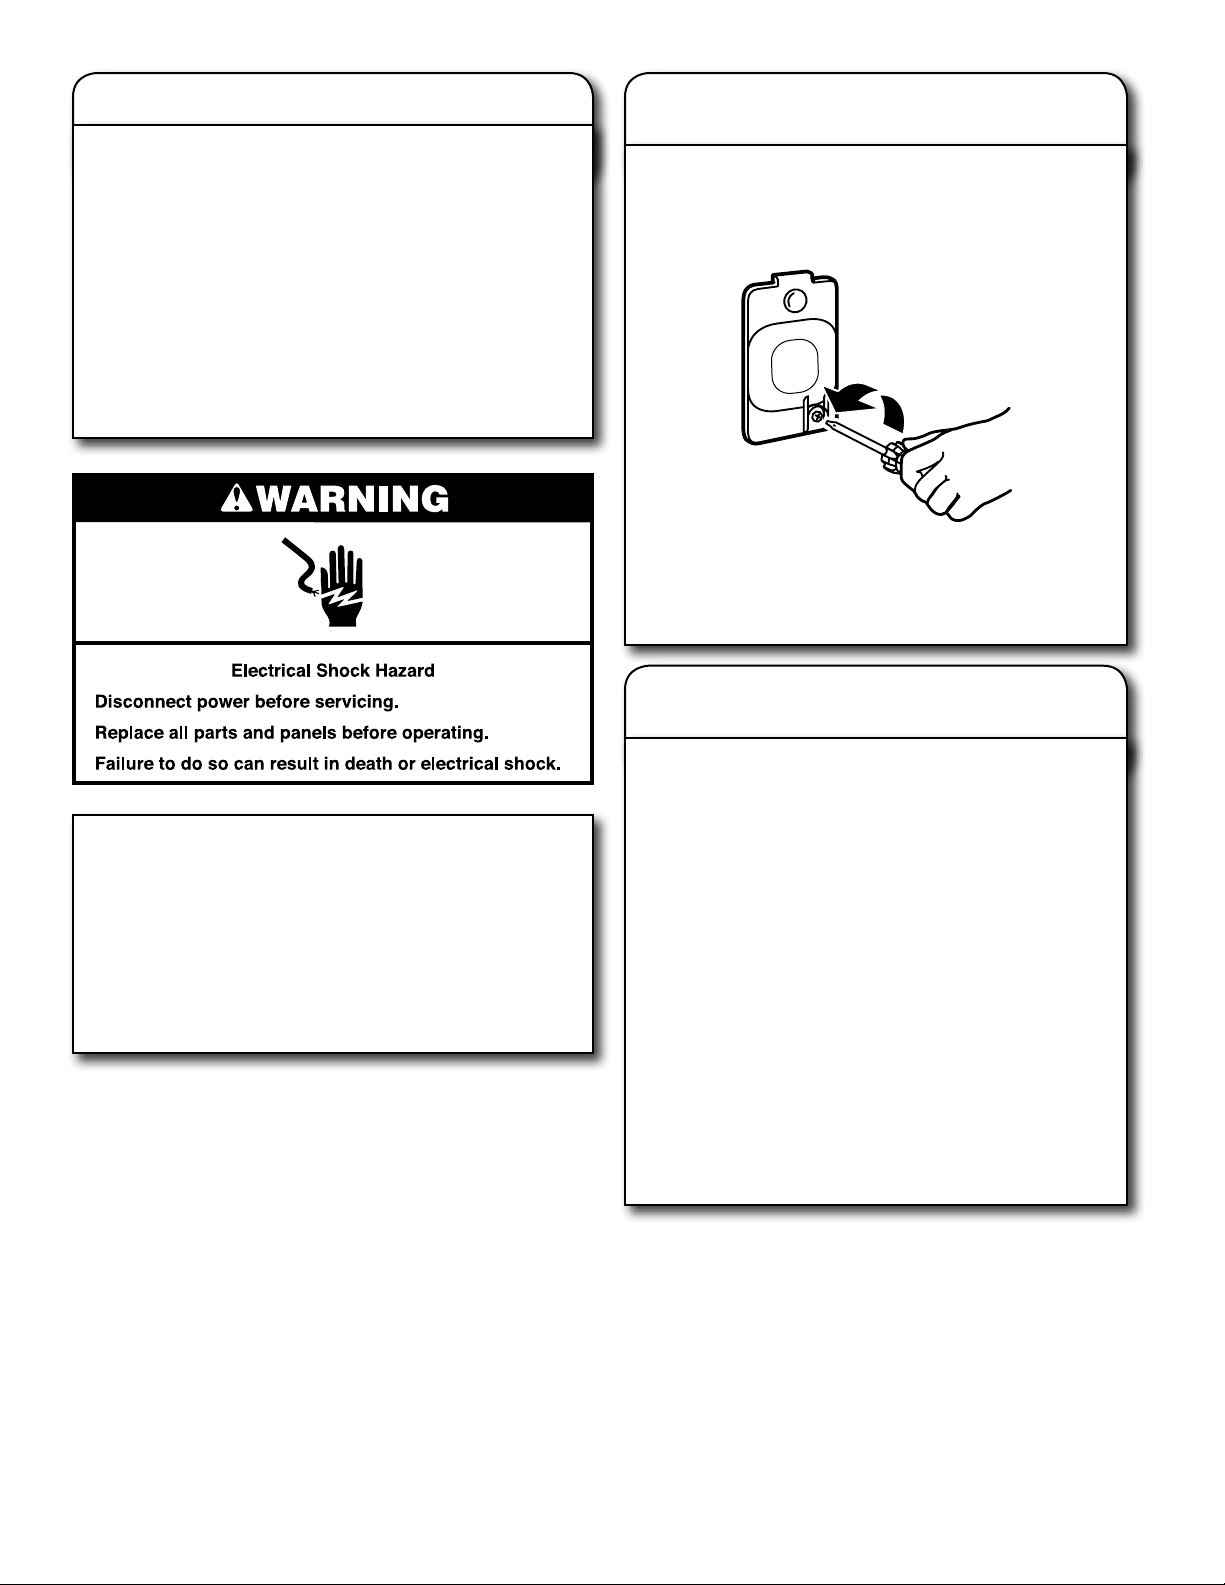
Changing the drum light
(on some models)
1. Unplug dryer or disconnect power.
2. Open the dryer door. Locate the light bulb cover on the
back wall of the dryer. Using a Phillips head screw driver,
remove the screw located in the lower right-hand corner
of the cover. Remove the cover.
3. Turn bulb counterclockwise. Replace the bulb with
a 10-watt appliance bulb only. Replace the cover and
secure with the screw.
4. Plug in dryer or reconnect power.
Changing the Sensor Cycle
Settings to Increase Drying Time
If all your loads on all Sensor cycles are consistently not as
dry as you would like, you may change the default settings to
increase the default dryness level.
Your sensor drying settings can be adjusted to adapt to
different installations, environmental conditions or personal
preference. This change is retained and will affect all of your
Sensor cycles, not just the current cycle/load. There are
3 drying settings, which are displayed using the time display:
01 Factory preset dryness level.
02 Slightly drier clothes, 15% more drying time.
03 Much drier clothes, 30% more drying time.
To change the drying settings:
NOTE: The settings cannot be changed while the dryer is
running or paused. The dryer must be in standby mode (the
power button is off) to adjust the default settings.
1. Before starting a cycle, press and hold the TEMP LEVEL
button for 6 seconds.
2. Press the TEMP LEVEL button to select the dryness level
shown in the time display: 01, 02, or 03.
3. Press START/PAUSE to save the new dryness level setting.
For direct-wired dryers:
1. Disconnect power.
2. Disconnect wiring.
3. Make sure leveling legs are secure in dryer base.
4. Use tape to secure dryer door.
Reinstalling the Dryer
Follow the “Installation Instructions” to locate, level,
and connect the dryer.
Loading ...
Loading ...
Loading ...