Distributes water evenly over coffee, reducing temperature loss as water passes through grounds.
4. Water Filter (not shown)
Charcoal water filter eliminates chlorine, calcium and bad tastes and odors from tap water.
5. Filter Basket (not shown)
Holds a #4 paper filter or a permanent filter.
6. Filter Basket Holder (not shown)
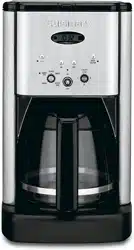
7. LCD Digital Clock
Displays time of day and set time for automatic functions.
8. Hour and Minute Buttons
Used to set time of day and automatic functions.
9. Function Knob and Flip Switch
Used to initiate programming of automatic functions.
a. Heater Plate Control Knob
For controlling the temperature of the coffee after brewing. There are three temperature settings.
b. 1-4 Cup Setting
For brewing smaller pots of coffee. It provides double heating of the water, so coffee is piping hot.
c. Self-Clean Setting
Tells you when it’s time to clean your coffeemaker. Remove built-up calcification from the water reservoir, to help extend the life of your coffeemaker.
10.Brew Pause™
Stops flow of coffee from basket when carafe is removed (30 seconds maximum) from the heater plate, so a cup can be poured in mid-brew. Since the extraction rate varies during the brew cycle, we recommend allowing the brewing cycle to finish before pouring the coffee.
11. Ready Tone (not shown)
Signals the end of the brew cycle with five beeps.
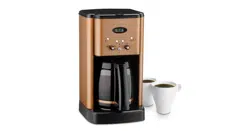
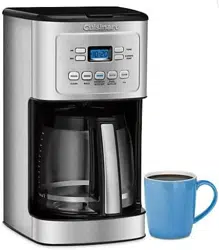
12. Carafe
The easy pour, no drip carafe has an ergonomic handle and brewed coffee markings for two to twelve cups.
13. Heating Plate
Scratch-resistant with black, nonstick coating.
14. BPA Free
All materials that come in contact with coffee or water are BPA free.
CONTROL PANEL
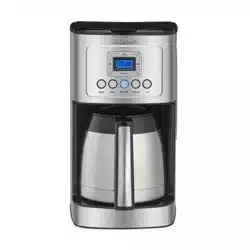
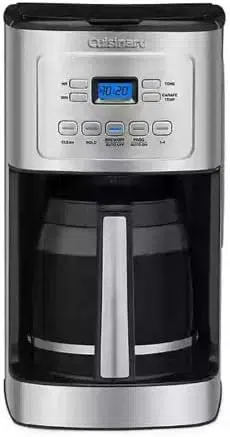
1.Clock Display
Displays time of day and auto on and off times.
2.Function Knob
For setting time of day, and auto on and auto off times.
a. Auto On
The Auto On feature is used to program the start time of the brew cycle. The auto on time can be set for any time, day or night. “PM” is displayed on the LCD for nighttime program times.
b. Auto Off
The Auto Off feature is used to shut off the coffeemaker at a preset time, anywhere from 0 to 4 hours.
c. Program Set
The Program Set function is used to set the time for the Auto On function.
d. Brew
The Brew function is used to start the brew cycle directly.
e. Clock Set
Used to program the time of day.
f. Audible Tone (not shown)
The Brew Central® Coffeemaker is equipped with an audible tone which will sound 5 times when the coffee has completed brewing (coffee will continue to stream from the filter for a few seconds after tone).
3. Flip Switch
Retro-style flip switch is used to turn your coffeemaker on and off and works in tandem with the function knob.
4. Heater Plate Control Knob
For controlling the temperature of the coffee after brewing. It has high, medium and low settings.
5. Hour and Minute Buttons
For use in setting hour and minute for time of day, auto on time, and auto off time.
6. On and Auto On Indicator Lights
7. Self Clean Setting
Used for removing calcium buildup.
8. 1-4 Cup Setting
For brewing smaller pots of coffee -it provides double heating of the water, so coffee is piping hot.
PROGRAMMING YOUR COFFEEMAKER
TO BREW COFFEE
1. Turn the Function Knob to the Brew position.
2. Lift the Flip Switch up to the On position and release. The red On indicator light will illuminate and brew cycle will begin.
TO TURN THE COFFEEMAKER OFF
Simply press the Flip Switch down to the Off position and release.
Note: To program the coffeemaker to shut off automatically, see To program the Variable Auto Off instructions below.
PROGRAMMING YOUR COFFEEMAKER FOR DELAYED BREW TIME
To set the time
1.Turn the Function Knob to Clock.
a. Hours: Press and hold the Hour button to scroll through numbers quickly. When number displayed approaches the desired setting, press and release (pulse) the button to advance one digit at a time. After setting the correct hour, the default will be the last time set unless power is shut off.
Note: When the number count passes 12, the PM light will be displayed on the LCD.
b. Minutes: Press and hold the Minute button to scroll through numbers quickly. When number displayed approaches the desired setting, press and release (pulse) the button to advance one digit at a time. After setting the correct minute, the default will be the last time set unless power is shut off. To finish setting time, turn the Function Knob to any other setting or simply wait until the numerals stop blinking.
To program the Auto On
1. Set the desired Brew-Start time.
a. Turn the Function Knob to Prog.
b. Set the time you want coffee to begin brewing by using the minute and hour push-buttons. Follow the same instructions you used to set the time of day, in the To set the time section above.
2. Turn the Function Knob to the Auto On position. LCD will display the current time.
3. Lift and release the Flip Switch. The green indicator light will come on to remind you that the programming function is in use.
At the programmed time, the red light will come on as well, indicating that the brew cycle is starting. Both lights will go off when keep warm cycle ends.
Note: To reactivate the auto-on feature to start brew cycle at the same time another day, simply lift and release the Flip Switch. The green auto-on light will illuminate.
To program the Variable Auto Off
1. Turn the Function Knob to the Auto Off position. Press and hold the Hour button for 2 seconds. The clock display will start blinking.
2. Program the coffeemaker to shut off from zero to four hours after brew cycle is finished by using the Hour and Minute push-buttons. (See To set the time)
Decalcification
Decalcification refers to the removal of calcium deposits which form over time on the metal parts of the coffeemaker.
For best performance from your Brew Central® Coffeemaker, decalcify the base unit from time to time. The frequency depends upon the hardness of your tap water and how often you use the coffeemaker. The flashing self clean light will indicate when you should clean your coffeemaker.
Self Cleaning
If the self clean light begins to flash when the coffeemaker is turned on, it is telling you that the calcium buildup is interfering with the functioning of your coffeemaker and the flavor of your coffee. To clean, fill the water reservoir to capacity with a mixture of 1/3 white vinegar and 2/3 water. Press the Self Clean button. When the self clean light glows, turn the coffeemaker on by pressing the flip switch to On. The self clean light will shine steadily. The coffeemaker is now in self clean mode. One cycle should be sufficient
to adequately clean the coffeemaker. When the cycle is completed and the five beeps sound, the coffeemaker will shut off. Turn the coffeemaker on to see if the self clean light continues to flash. If it does, turn it off and then repeat the cleaning procedure with a fresh solution of vinegar and water.
If the self clean light no longer flashes, turn the coffeemaker off and then run one cycle of fresh cold water through the unit before using the unit again to brew coffee.
Notes on the Self Clean Function
Pressing the Self Clean button cancels all other settings. If it is pressed accidentally, press it again to return the coffeemaker to all its previous settings. Pressing On/Off will also exit the self clean mode and turn the coffeemaker off.
1-4 Cup Setting
The 1-4 cup setting button is used when you make small amounts of coffee. Normal coffeemakers will produce a colder batch of coffee when smaller amounts are made, because the heater doesn’t have enough time to properly warm up to heat a small amount.
The 1-4 setting basically double heats the water, making your smaller amount as piping hot as a full pot would be.
To use: When making a smaller amount, press the 1-4 button on the control panel after turning on the unit.
Heater Plate ‘Keep Warm’ Control
The knob on the right of the control panel is the heater plate control setting for after brewing temperature. You can choose one of three heat settings to keep your coffee warm: low, medium, or high.
MAKING COFFEE
Before you make the first pot of coffee in your new Cuisinart® Brew Central® Coffeemaker, we recommend operating the coffeemaker once using only water and a paper filter. This will remove any dust or residues that remain in the system from the manufacturing process.
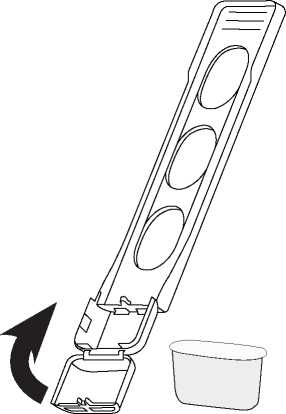
1.Insert the Water Filter
a. Remove the filter from polybag and soak in cold tap water for 15 minutes.
b. Remove the water filter holder from the coffeemaker by lifting it out of the reservoir area with your thumb and forefinger.
c. Grasp stem in one hand. Using thumb of other hand, gently press down and pull toward you. Compartment will flip open.
d. Place the filter in the holder and close the water filter holder; you will hear a snap indicating it is in place.
NOTE: Caution must be used when inserting the charcoal filter. Improper placement in the holder can cause tearing of the filter skin.
e. Hold the filter under cold running tap water for 10 seconds to flush. You should place the hole openings in the side of the unit directly under the water stream.
f. Allow the filter to drain completely.
g. Replace the water filter holder in the reservoir area of the coffeemaker, pushing it all the way down to the base of the unit, along the reservoir wall.
Replacement water filters can be purchased in stores or by calling customer service or through the Cuisinart web site.
2. Fill the water reservoir
When filling the coffeemaker with water, refer to the carafe height markings and fill to the desired number of cups. Be sure to add a small amount of extra water to account for the amount of water lost in wetting the grounds and lost as steam during the brewing process.
3. Add the ground coffee
Remove the filter basket by grasping the handle and lifting straight up, and then place it on the countertop. Insert a #4 paper filter or permanent filter. Be sure that the paper filter is completely open and fully inserted in the basket. It may help to fold and flatten the seams of a paper filter beforehand. Add the desired amount of ground coffee, corresponding to the number of cups being brewed. We recommend using 1 tablespoon of ground coffee per cup, but use more or less to suit your taste.
NOTE: The maximum capacity for ground coffee is 15 tablespoons for this 12-cup coffeemaker. Exceeding this amount may cause overflow if the coffee is too finely ground.
Replace the filter basket in the filter basket holder and flip the water reservoir lid closed. Press firmly on top where it says “Press to Close.” Be sure that it closes securely in place.
Before brewing coffee
Make sure you have replaced the glass carafe in its position on the heating plate and closed the top cover. Plug the cord into an electrical outlet.
4. Power unit:
Turn the function knob to brew, lift flip switch up to On position, and the red indicator light will turn on. Or, set the Auto On function and the green indicator will light.
5. During and after brewing
The Brew Pause™ feature allows you to remove the carafe from the plate during mid-brew. The brewing process does
not stop during this period - only the flow of coffee from the basket stops. Do not remove the carafe for longer than 30 seconds or the coffee may overflow the basket. While we offer this feature, we do not recommend that you pour the coffee before the cycle has reached completion, since the coffee brewed at the beginning of the cycle has a flavor profile which is very different from the flavor at the end of the cycle. Removing a cup during the brewing cycle will alter the flavor of the finished pot.
Once the coffee has finished brewing, stir it before serving to blend the flavors. The coffee at the bottom of the carafe will be somewhat stronger than the coffee at the top.
CLEANING AND MAINTENANCE
Always turn coffeemaker off and remove the plug from the electrical outlet before cleaning.
Lift up the reservoir cover. Remove and discard the paper filter and ground coffee.
The filter basket can be washed in warm, soapy water and rinsed thoroughly, or cleaned in the upper rack of the dishwasher. Dry all parts after use.
Do not put any water in the unit once the filter basket has been removed. Wipe the area under the filter basket with a damp cloth.
Remove the carafe from the heating plate. Discard any remaining coffee. The carafe and lid can be washed in warm, soapy water and rinsed thoroughly, or placed in a dishwasher. The carafe and carafe lid should be placed on the upper rack only.
Do not use any scouring agents or harsh cleansers on any part of the coffeemaker.
Never immerse base unit in water or other liquid. To clean base, simply wipe with a clean, damp cloth and dry before storing.
Fingerprints and other blemishes on the housing can be washed off with soap and water or a nonabrasive cleaning solution. Wipe warming plate with a clean, damp cloth. Never use rough, abrasive materials or cleansers to clean the warming plate. Do not dry the inside of the water reservoir with a cloth, as lint may remain.
Maintenance: Any other servicing should be performed by an authorized service representative.
WARRANTY
LIMITED THREE-YEAR WARRANTY
This warranty is available to consumers only. You are a consumer if you own a Cuisinart® Brew Central® Coffeemaker that was purchased at retail for personal, family or household use. Except as otherwise required under applicable law, this warranty is not available to retailers or other commercial purchasers or owners.
We warrant that your Cuisinart® Brew Central® Coffeemaker will be free of defects in materials and workmanship under normal home use for 3 years from the date of original purchase.
We recommend that you visit our website efficient way to complete your product registration. However, product registration does not eliminate the need for the consumer to maintain the original proof of purchase in order to obtain the warranty benefits. In the event that you do not have proof of purchase date, the purchase date for purposes of this warranty will be the date of manufacture.
If your Cuisinart® Brew Central® Coffeemaker should prove to be defective within the warranty period, we will repair it, or if we think necessary, replace it. To obtain warranty service, simply call our toll-free number 1-800-726-0190 for additional information from our Customer Service Representatives, or send the defective product to Customer Service at Cuisinart, 7811 North Glen Harbor Blvd., Glendale, AZ 85307.
To facilitate the speed and accuracy of your return, please enclose $10.00 for shipping and handling of the product.
Please pay by check or money order (California residents need only supply proof of purchase and should call 1-800-726-0190 for shipping instructions).
NOTE: For added protection and secure handling of any Cuisinart® product that is being returned, we recommend you use a traceable, insured delivery service. Cuisinart cannot be held responsible for in-transit damage or for packages that are not delivered to us. Lost and/or damaged products are not covered under warranty. Please be sure to include your return address, daytime phone number, description of the product defect, product model number (located on bottom of product), original date of purchase, and any other information pertinent to the product’s return.
CALIFORNIA RESIDENTS ONLY:
California law provides that for In-Warranty Service, California residents have the option of returning a nonconforming product (A) to the store where it was purchased or (B) to another retail store which sells Cuisinart products of the same type.
The retail store shall then, at its discretion, either repair the product, refer the consumer to an independent repair facility, replace the product, or refund the purchase price less the amount directly attributable to the consumer’s prior usage of the product.
If the above two options do not result in the appropriate relief to the consumer, the consumer may then take the product to an independent repair facility if service or repair can be economically accomplished. Cuisinart and not the consumer will be responsible for the reasonable cost of such service, repair, replacement, or refund for nonconforming products under warranty.
Your Cuisinart® Brew Central® Coffeemaker has been manufactured to the strictest specifications and has been designed for use only in 120-volt outlets and only with authorized accessories and replacement parts. This warranty expressly excludes any defects or damages caused by attempted use of this unit with a converter, as well as by use with accessories, replacement parts or repair service other than those authorized by Cuisinart. This warranty does not cover any damage caused by accident, misuse, shipment or other than ordinary household use. This warranty excludes all incidental or consequential damages. Some states do not allow the exclusion or limitation of these damages, so these exclusions may not apply to you. You may also have other rights, which vary from state to state.
Important: If the nonconforming product is to be serviced by someone other than Cuisinart’s Authorized Service Center, please remind the servicer to call our Consumer Service Center at 1-800-7260190 to ensure that the problem is properly diagnosed, the product is serviced with the correct parts, and the product is still under warranty.