Loading ...
Loading ...
Loading ...
6
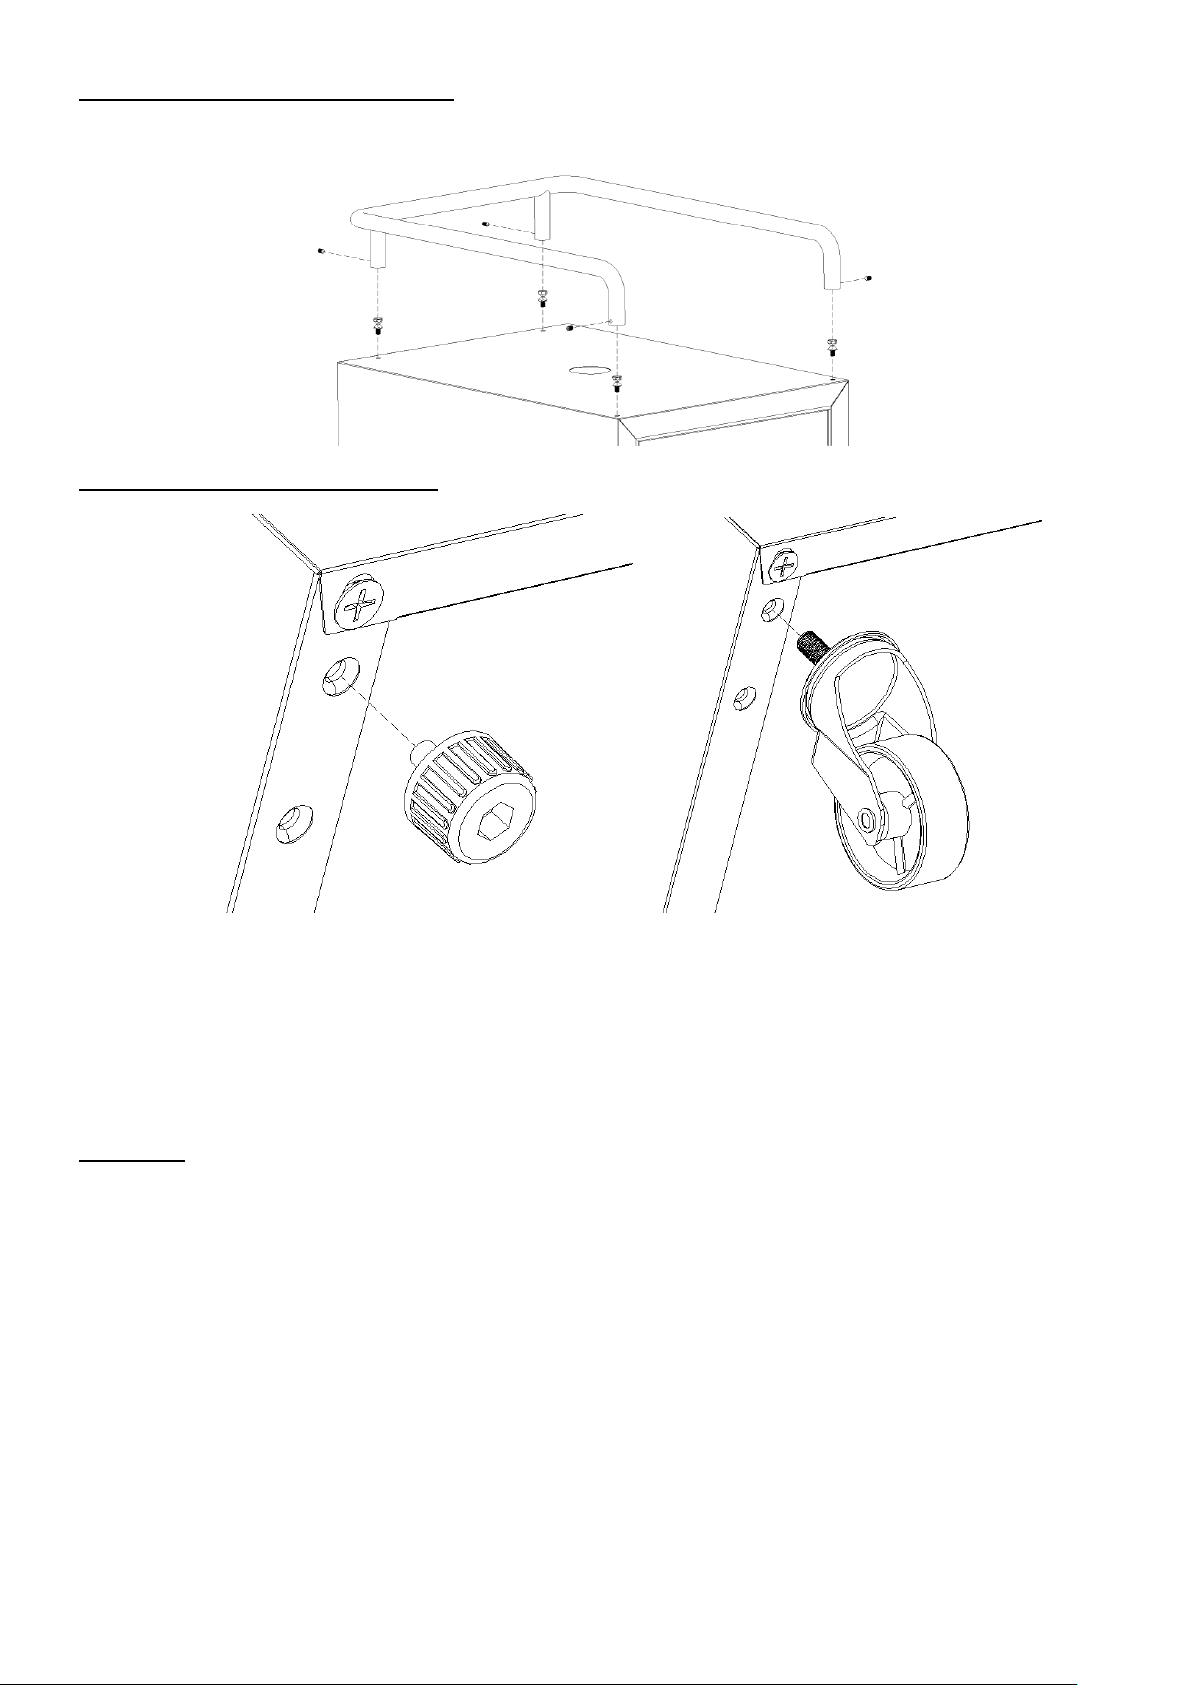
Installation of the Guardrail (optional)
1. Place the guardrail on top of the beer dispenser and line up the feet with the holes on top of the cabinet
2. Using the screws provided, secure each foot to the cabinet
Installation of the Casters (optional)
1. Remove everything from the cabinet and lay the unit on a clean, dry, and padded surface.
2. Remove the four feet at the bottom of the unit as shown, install caster into the holes and tighten with a
wrench.
3. The two casters equipped with locks should be installed on the front of the unit.
4. Once all four casters are attached, return the beer dispenser to an upright position.
5. Allow the unit to sit for 8-10 hours before plugging in to allow the refrigerant to settle.
Defrosting
The unit defrosts automatically in normal operating conditions.
The evaporator behind the rear wall of the unit defrosts automatically. The condensate collects in the drainage
channel behind the rear wall of the unit, and flows through the drainage hole into the drip tray by the
compressor where it evaporates.
However, frost may accumulate on the evaporator if the unit is repeatedly opened in a high heat or high
humidity location. If this frost pattern does not clear within 24 hours, your unit will require manual defrosting.
NOTE: You may notice condensation on the outer surface of the glass door. This occurs when water vapor from
the air contacts the cold surface of the door and the vapor condenses on the glass, causing a fogging effect.
In extreme situations, water can even drip off the door, indicating excessive humidity in the environment.
Loading ...
Loading ...
Loading ...