Loading ...
Loading ...
Loading ...
English - 17
CONNECTING THE INLET HOSE (DV48(5)H7400E(G)* ONLY)
METHOD1
The dryer must be connected to the cold water faucet using the new inlet hoses. Do not use old hoses.
1. If space permits, attach the brass female end of the “Y” connector to the cold water faucet.
2. Turn the cold water faucet o .
3. Attach the straight end of long hose to “Y’ connector.
4. Using pliers, tighten the coupling with an additional two-thirds turn.
Do not overtighten, as it may damage the coupling.
5. Attach angled end of long hoses to fi ll the valve at the
bottom of the dryer’s rear frame. Screw on coupling by hand
until it is seated on fi ll valve connector.
6. Using pliers, tighten the coupling with an additional two-thirds turn.
Do not overtighten, as it may damage the coupling.
7. Check that the water faucets are on.
8. Check for leaks around “Y” connector, faucets and hoses.
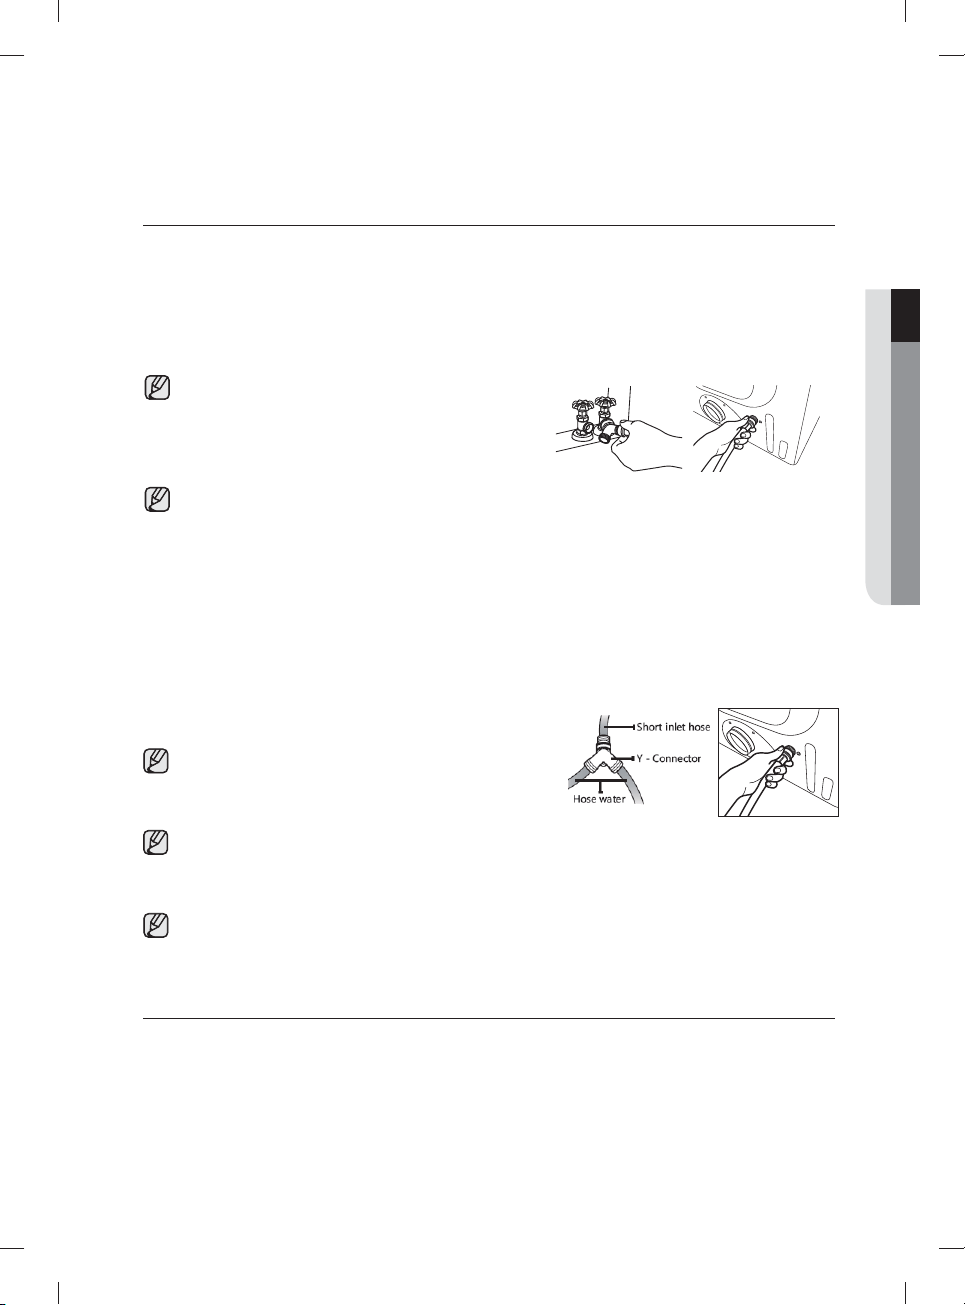
METHOD2
The dryer must be connected to the cold water faucet using the new inlet hoses. Do not use old hoses.
1. If “Y” connector cannot be attached directly to the cold water
faucet, the short hose must be used.
2. Turn the cold water faucet o .
3. Attach short inlet hose to cold water faucet.
Screw on coupling by hand until it is seated on the faucet.
4. Using pliers, tighten the coupling with an additional
two-thirds turn.
Do not overtighten, as it may damage the coupling.
5. Attach ‘Y” connector to brass male end of small hose.
Screw on coupling by hand until it is seated on connector.
6. Using pliers, tighten the coupling with an additional two-thirds turn.
Do not overtighten, as it may damage the coupling.
7. Attach angled end of long hoses to the fi ll valve at the bottom of the dryer rear frame. Screw on
coupling by hand until it is seated on fi ll valve connector.
8. Using pliers, tighten the coupling with an additional two-thirds turn.
Do not overtighten, as it may damage the coupling.
9. Check that the water faucets are on.
10. Check for leaks around “Y” connector, faucets and hoses.
FINAL INSTALLATION CHECK LIST
The dryer is plugged into an electrical outlet and grounded properly.
The exhaust ductwork is hooked up and the joints are taped.
You have used rigid or sti -walled fl exible metal duct material, not plastic fl exible duct.
The dryer is level and is sitting fi rmly on the fl oor.
For gas models: The gas is turned on and there are no gas leaks.
Start your dryer to confi rm that it runs, heats, and shuts o .
01 installing your dryer
DV7000H_DC68-03170J-14_EN.indd Sec3:17DV7000H_DC68-03170J-14_EN.indd Sec3:17 2019-06-03 4:30:122019-06-03 4:30:12
Loading ...
Loading ...
Loading ...