Loading ...
Loading ...
Loading ...
8
PREPARATION
PREPARATION
A
R
L(MONO)
AUDIO
VIDEO
B
1
2
SERVICE ONLY
3
RGB IN (PC)
AUDIO IN
RGB/DVI
SERVICE ONLY
IR BLASTER
A
B
COMPONENT / AV IN 1
COMPONENT / AV IN 2
R
L(MONO)
AUDIO
VIDEO
OPTICAL DIGITAL
AUDIO OUT
DC IN 12V
L
R
L
R
/ DVI IN
■ Image shown may differ slightly from your device.
3
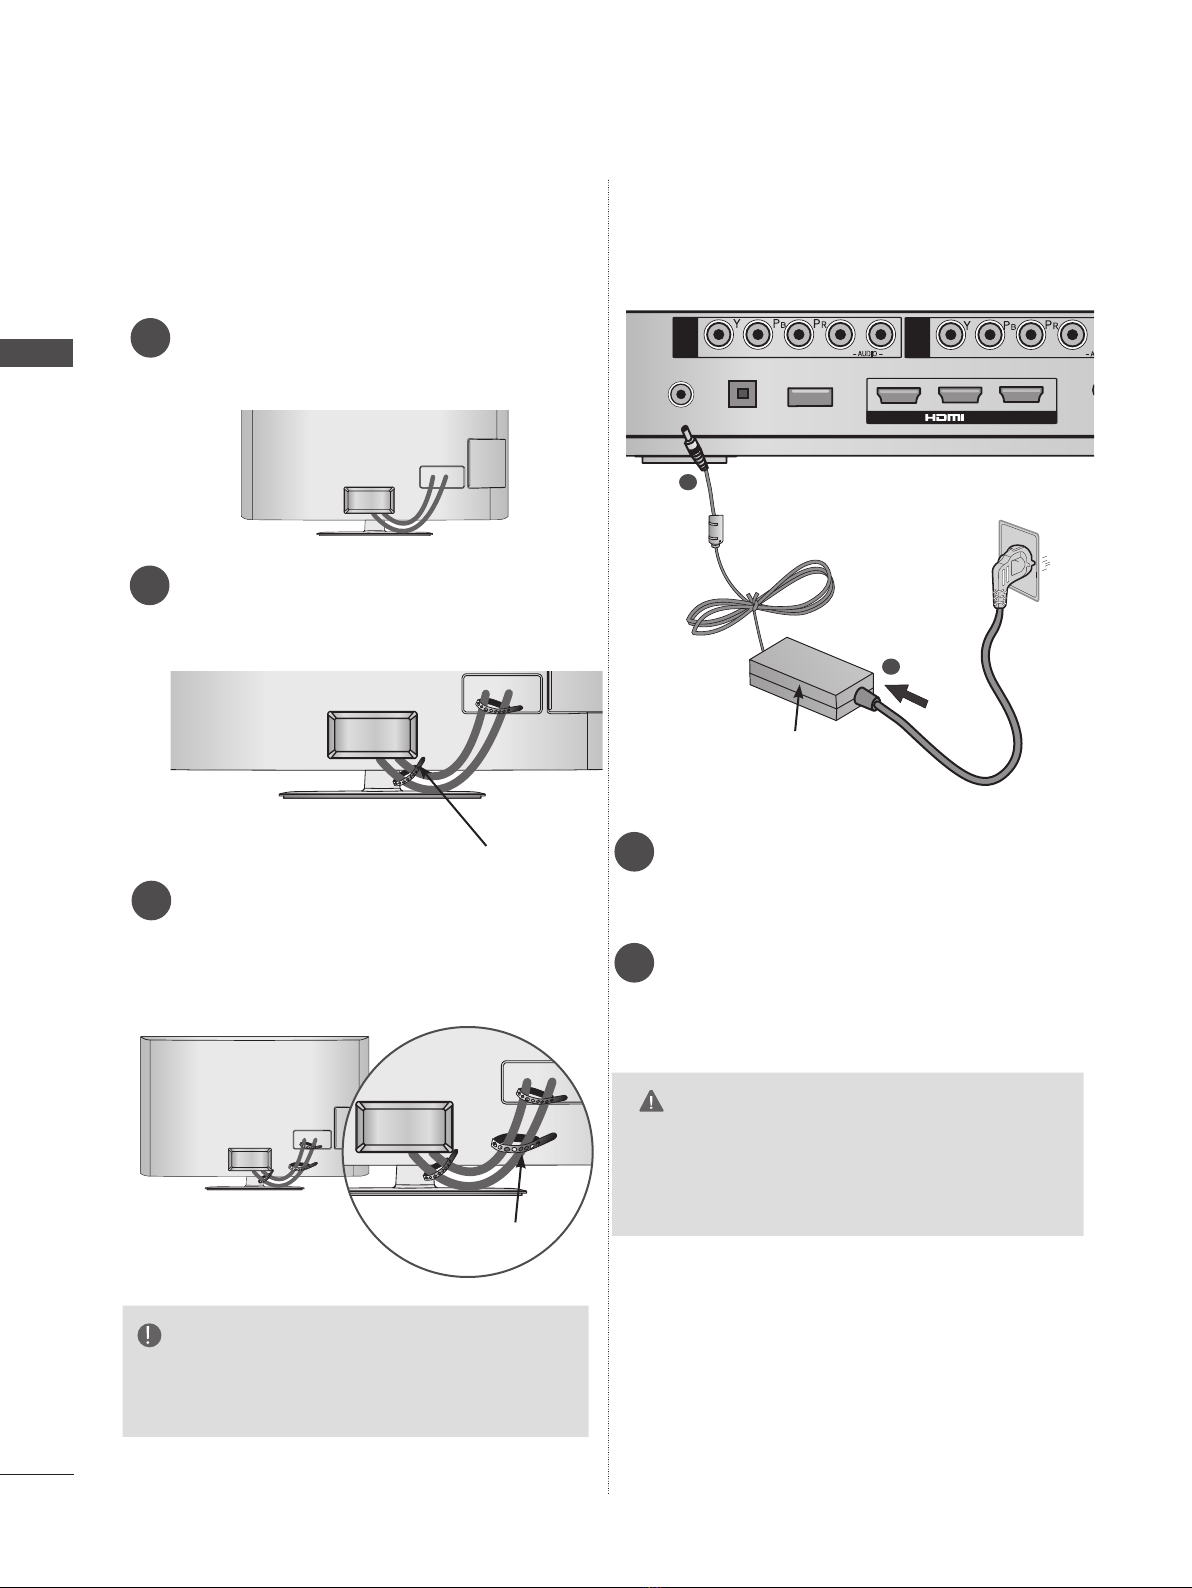
Now install the Cable Management Clip
which will attach to the back of the TV.
NOTE: The Cable Management Clip attach-
ment location on the TV can differ by
model.
NOTE
►Do not use the Cable Management Clip to
lift the TV. If the TV is dropped, you may be
injured or the TV may be damaged.
Connect the cables as necessary.
(Refer to the p.6 to 7)
1
After connecting the cables, bundle
the cables and install the Cable Holder as
shown.
2
Cable Holder
Cable
Management Clip
1
1
2
Connect the 12 V AC/DC adapter plug to
the DC IN 12V input jack on the Wireless
Media Box.
Connect the power cord to the 12 V AC/DC
adapter first, then plug the power cord into
the wall power outlet.
CAUTION
►Please be sure to connect the Wireless
Media Box to the AC/DC power adapter
before connecting the power plug of the
Wireless Media Box to a wall power outlet.
■ Image shown may differ slightly from your device.
2
12V AC/DC Adapter
BACK COVER FOR WIRE
ARRANGEMENT
CONNECTION OF 12 V AC/
DC ADAPTER
Loading ...
Loading ...
Loading ...