Loading ...
Loading ...
Loading ...
English - 08
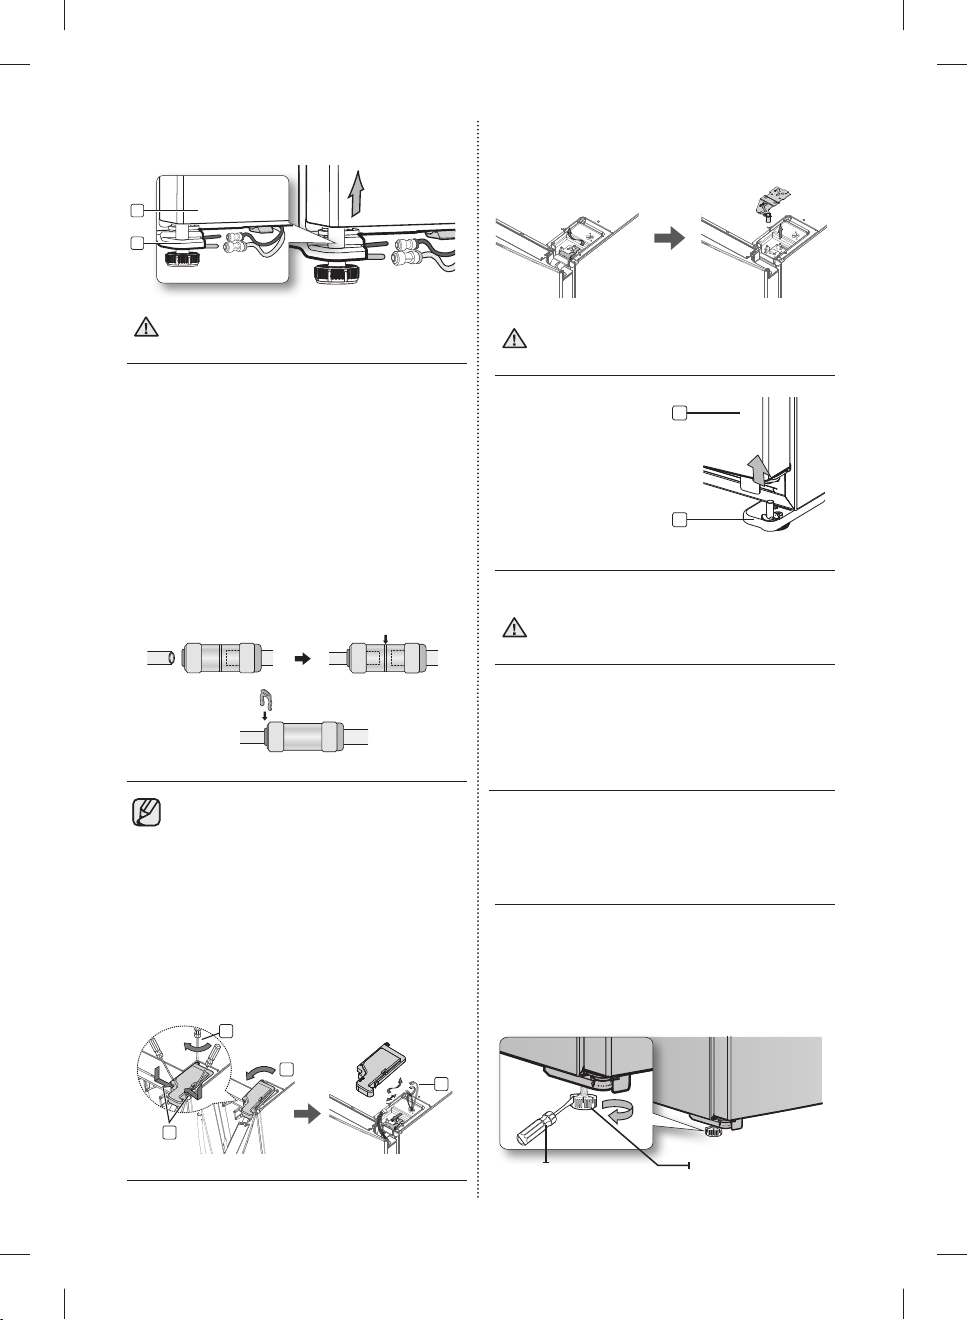
3. Next, remove the door from the lower hinge (5)
by carefully lifting the door straight up (6).
6
5
Be careful not to pinch the water tubing
and wire harness on the door.
Reattaching the freezer doors
To reattach the freezer doors, replace parts in
reverse order
Reattaching the Water Supply Line
1. The Water Line must be fully Inserted to the
center of transparent coupler to prevent water
leakage from the dispenser.
2. Insert the 2 clips in the install pack and check
that each clip holds the line firmly.
Center of transparent coupler
Center of transparent coupler
clip A (¼”)
clip A (¼”)
(6.35mm)
(6.35mm)
Do not cut the water line. Gently separate
it from the coupler.
Removing the Fridge Door
1. Remove a screw on the upper hinge cover (1).
With the door open, disengage the two locking
tabs with a flat-head screw driver (2) and
remove it while the lifting up the rear of the
cover (3), and then disconnect the wires by
gently pulling them apart (4).
3
2
4
1
2. Removing the FIXER HINGE ,and next take o
the upper hinge. Be careful that the door does
not fall on you as you are removing it.
Be sure to keep track of all parts you are
removing.
3. Remove the door
from the lower hinge
(5) by lifting the door
straight up (6).
6
5
Reattaching the Fridge door
To reattach the fridge doors, replace parts
in reverse order.
LEVELLING THE
REFRIGERATOR
Now that the doors are back on the refrigerator,
you want to make sure the refrigerator is level
so that you can make fi nal adjustments. If the
refrigerator is not level, it will not be possible to get
the doors perfectly even.
When the Freezer part is lower than
the Fridge part.
Insert a fl at-blade screwdriver into a slot on the
Freezer Leg, then turn it clockwise.
Freezer Leg
Freezer Leg
Screw Driver
Screw Driver
DA68-02500A-11.indb 08DA68-02500A-11.indb 08 2013. 12. 2. 9:482013. 12. 2. 9:48
Loading ...
Loading ...
Loading ...