Loading ...
Loading ...
Loading ...
49-80549-4
15
5
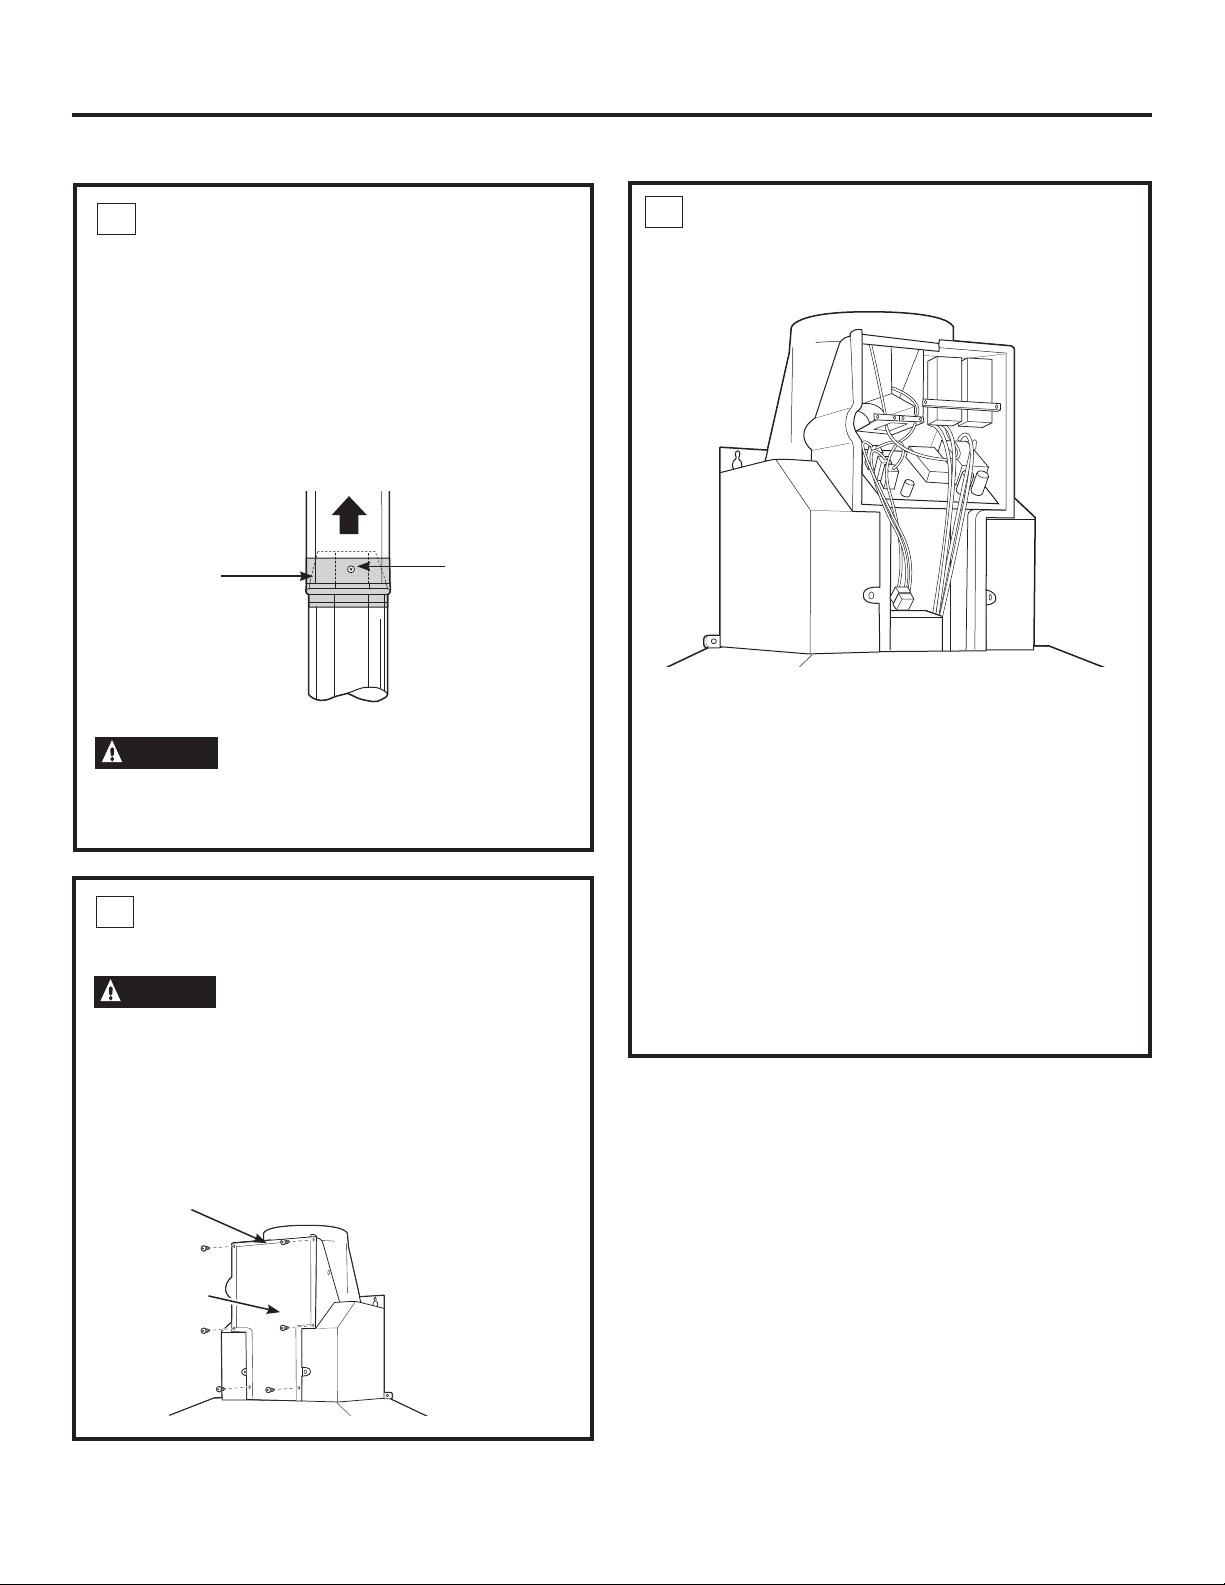
CONNECT DUCTWORK
• Remove shipping tape from the damper.
• Install ductwork, making connections in the
direction of airflow as illustrated.
3XVKGXFWRYHUWKHH[KDXVWRXWOHWDQGGDPSHU
• Secure joints in ductwork with sheet metal screws.
• Wrap all duct joints and the flange connections
with aluminized duct tape for an airtight seal.
CAUTION
Do not use sheet metal screws at
the hood flange connection. Doing so will prevent
proper damper operation. Seal connection with tape
only.
6 CONNECT ELECTRICAL
Verify that power is turned off at the source.
WARNING
If house wiring is not 2-wire with a
ground wire, a ground must be provided by the
installer. When house wiring is aluminum, be sure
WRXVH8/DSSURYHGDQWLR[LGDQWFRPSRXQGDQG
aluminum-to-copper connectors.
• 5HPRYHWKHVFUHZVRQWKHMXQFWLRQER[FRYHUDQG
the knockout on the top left side.
Junction
ER[FRYHU
Knockout
Duct tape
over seam
and screw
Screw
Airflow
• 6HFXUHWKHKRXVHZLULQJWRWKHMXQFWLRQER[
with a strain relief (not provided).
• Connect the white lead to the branch circuit white
lead.
• Connect the black lead to the branch circuit black
lead.
&RQQHFWWKHJUHHQ\HOORZOHDGWRWKHEUDQFK
circuit green lead or bare ground lead.
• Secure all the connections with wire nuts on
each electrical connector.
3XVKWKHZLUHVLQWRWKHMXQFWLRQER[DQG
replace the cover. Be sure the wires are not
pinched.
• Secure the MXQFWLRQER[FRYHUZLWKthe 6
original screws.
6
CONNECT ELECTRICAL
,167$//$7,21³9(17('727+(2876,'(
Installation Instructions
Loading ...
Loading ...
Loading ...