Loading ...
Loading ...
Loading ...
Vax Careline: AU: 1300 361 505
NZ: 0800 800 900
vax.com.au
vax.co.nz 6
Operation
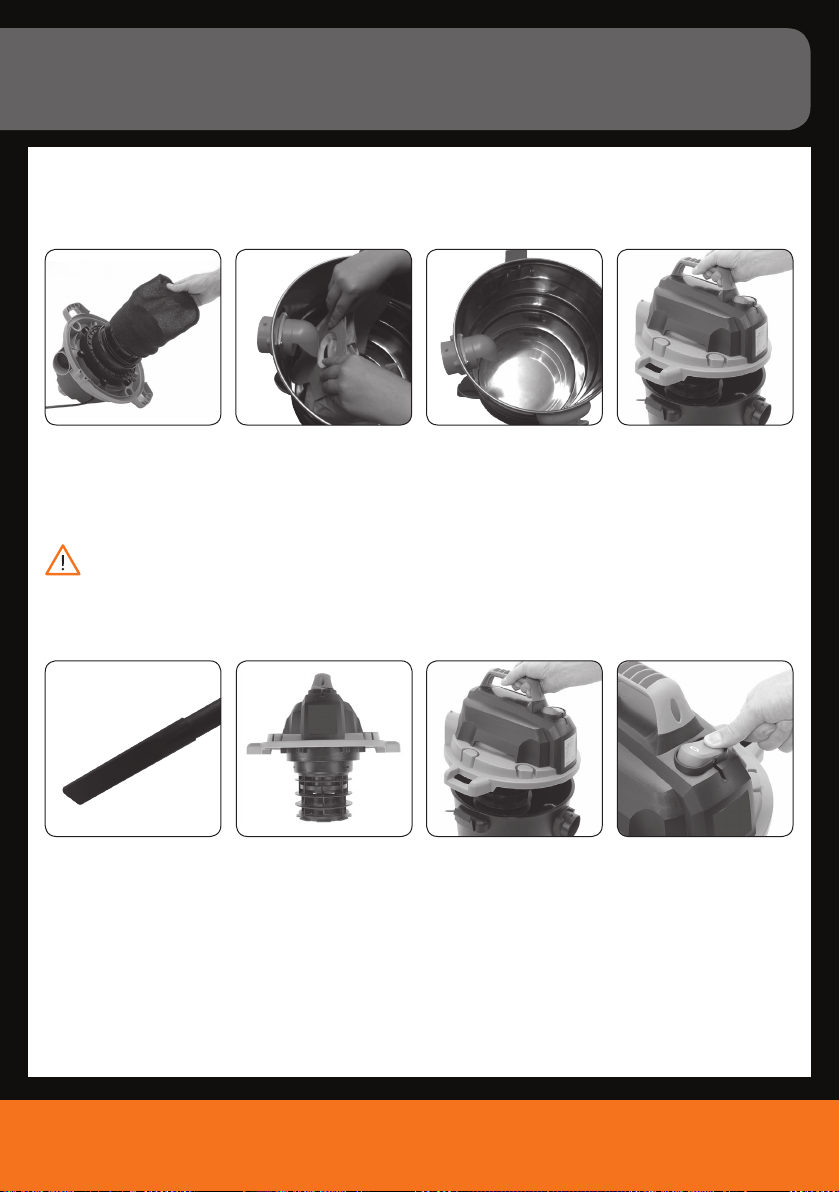
SETUP the Cleaner from DRY to WET Vacuuming
Empty the tank and dispose of any dirt/dust which may have been picked up previously in dry mode.
Remove the dry lter and
replace it with the foam
lter – this slides over the
oat cage as shown.
When vacuuming up uids
– the crevice nozzle can
be used when the water
level is too high to use the
oor tool. To ensure the
air ow is adequate, we
recommend that the end
of the nozzle is not totally
immersed.
Once the water tank is
emptied, place the top
motor housing cover back
onto the main tank and
secure into position with
the two retaining clips.
Connect the vacuum
cleaner to the power
supply and switch ON
by pushing the on/o
switch “I” to continue
to vacuum in wet mode.
NOTE: Clean and dry the inside and outside of the
machine before storage.
Place the top motor
housing cover onto the
main tank and secure into
position with the two
retaining clips.
Remove dust bag from tank.
When the uids have
reached the maximum tank
capacity, the oat regulator
will cover the motor lter
causing the motor to work
harder and it will become
noticeably nosier. At this
point turn o the machine
and unplug it from the mains
power and empty the tank.
NOTE: Never vacuum dry dust and dirt with just
this foam lter tted as it will provide little or no
protection, resulting in motor damage. To be used in wet
mode only.
Loading ...
Loading ...
Loading ...