Loading ...
Loading ...
Loading ...
MAINTENANCE
WARNING
Fig. 6 Fig. 7
N.B.:
- Only use 25-40W/230V type E-14, T300°C incandescent lamps, or 20-40W/230 V type G9, T300°C halogen lamps (depending on model).
- The lamp used in the appliance is specically designed for electrical appliances and is not suitable for household room illumination (Commission Regulation (EC)
No 244/2009).
- Lamps are available from our After-sales Service.
IMPORTANT:
- If using halogen lamps, do not handle with bare hands since ngerprints can damage them.
- Do not use the oven until the lamp cover has been repositioned.
EN5
Fig. 1 Fig. 2
MOVING THE TOP HEATING ELEMENT (SOME MODELS ONLY)
1. Remove the side accessory holder grilles (Fig. 3).
2. Pull the heating element out a little (Fig. 4) and lower it (Fig. 5).
3. To reposition the heating element, lift it up, pulling it slightly towards you, be sure it comes to rest on the lateral supports.
Fig. 3 Fig. 4 Fig. 5
REPLACING THE OVEN LAMP
To replace the rear lamp (if present):
1. Disconnect the oven from the power supply.
2. Unscrew the lamp cover (Fig. 6), replace the lamp (see note for lamp type) and screw the lamp cover back on (Fig. 7).
3. Reconnect the oven to the power supply.
- Use protective gloves.
- Ensure the oven is cold before carrying out the following operations.
- Disconnect power before servicing.
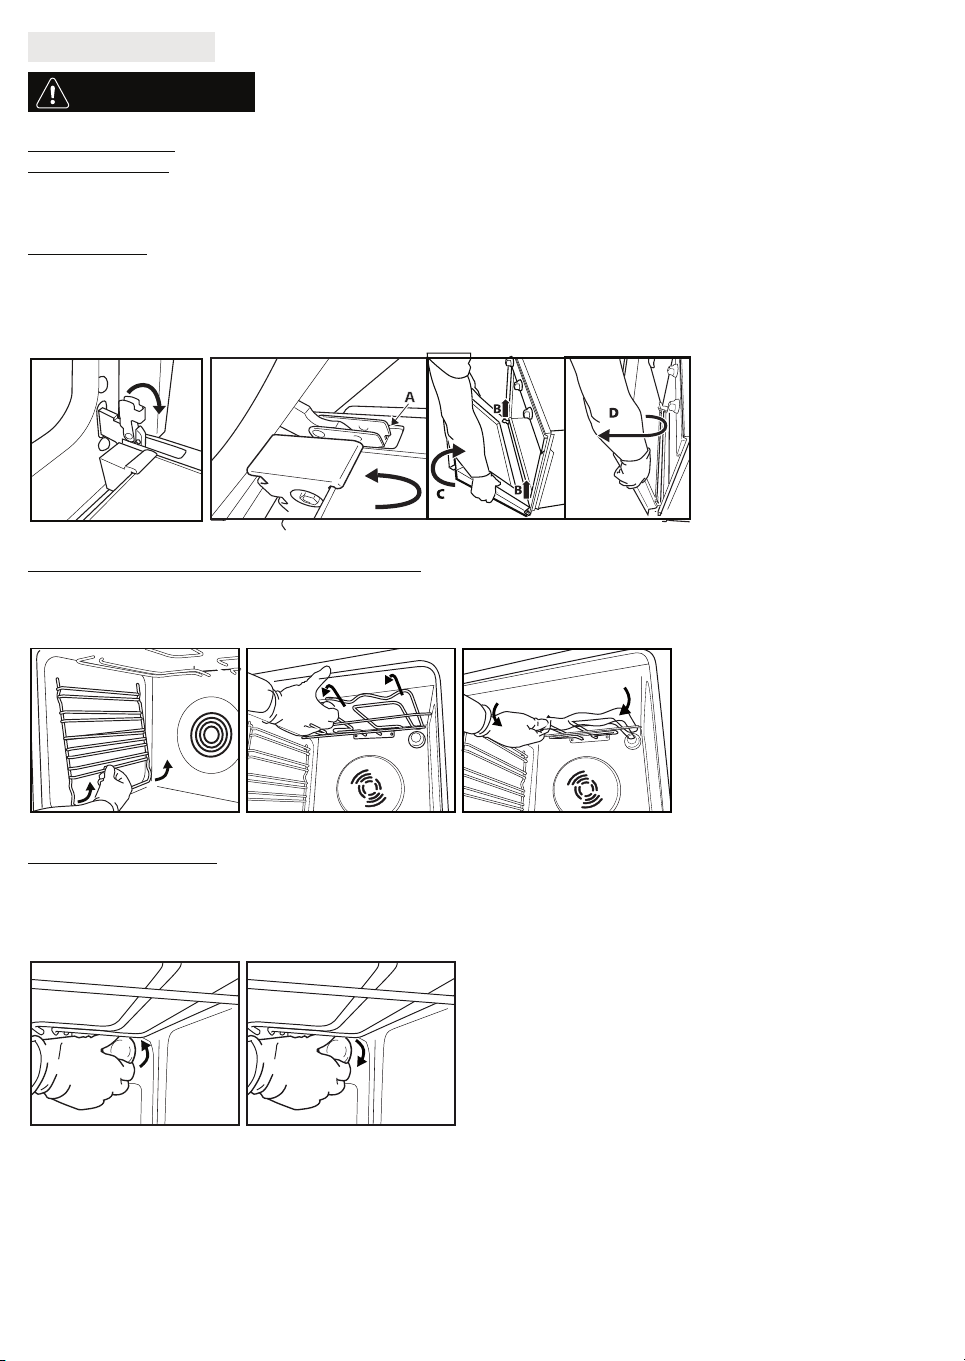
REMOVING THE DOOR
To remove the door:
1. Open the door fully.
2. Lift the catches and push them forwards as far as they will go (g. 1).
3. Close the door as far as it will go (A), lift it up (B) and turn it (C) until it is released (D) (g. 2).
To ret the door:
1. Insert the hinges in their seats.
2. Open the door fully.
3. Lower the two catches.
4. Close the door.
Loading ...
Loading ...
Loading ...