Loading ...
Loading ...
Loading ...
9 ENGLISH
If the head of the pin nail remains above the workpiece
surface, drive the pin nail while holding the pin nailer
head rmly against the workpiece.
NOTE: If the head of the pin nail still remains above
the workpiece even you hold the pin nail head,
the material may not be suitable for the pin nailer.
Continuing to use the pin nailer on such material may
result in a damage to the driver of the pin nailer and/
or pin nailer jamming.
Anti dry re mechanism
WARNING: Always make sure that your
ngers are not placed on the switch trigger or
the contact element and the battery cartridge is
removed before loading the pin nailer.
When the number of remaining pin nails in the maga-
zine are 0 - 3 pieces, the switch trigger can no longer be
pulled. At this time, insert a new strip of pin nails in the
magazine and the switch trigger can be pulled again.
NOTE: When ring a different length of pin nails
shortly after the anti-dry ring device has actuated,
insert a new strip of pin nails into the magazine and
re away all the prior pin nails that have remained on
junk material.
Checking remaining pin nails
You can check the amount of remaining pin nails
through the sight window.
The red indicator moves toward fastening opening with
the amount of remaining pin nails become smaller.
1
2
► 1. Sight window 2. Indicator
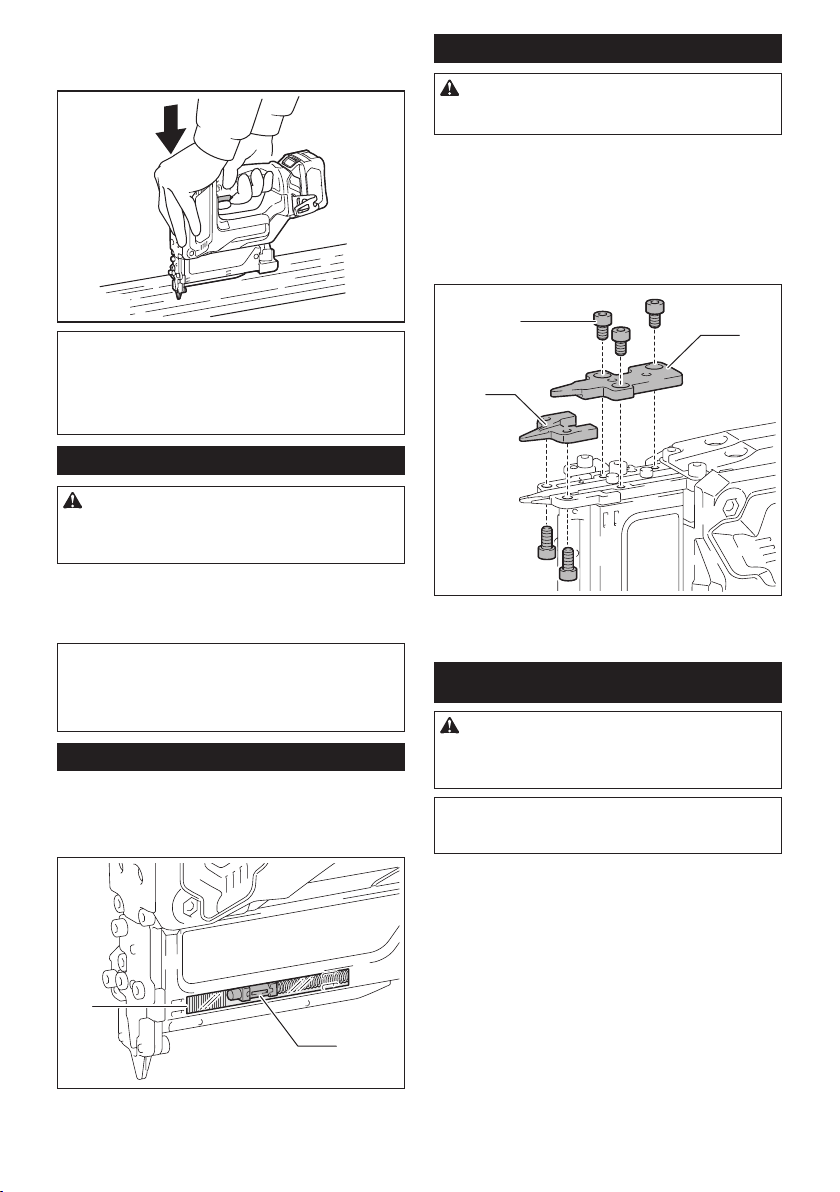
Removing jammed pin nails
WARNING: Always make sure that the battery
cartridge is removed before removing jammed
pin nails.
Take out pin nails that remain inside the magazine.
Remove three screws with the hex wrench that are
securing the driver guide cover.
Take the jammed nails from the nail guide groove that
has appeared.
When it is difcult to take out the jammed nails, further
remove two screws with the hex wrench that are secur-
ing the contact top cover. Then take them out.
1
2
3
► 1. Driver guide cover 2. Screw 3. Contact top cover
MAINTENANCE
CAUTION: Always be sure that the tool is
switched off and the battery cartridge is removed
before attempting to perform inspection or
maintenance.
NOTICE: Never use gasoline, benzine, thinner,
alcohol or the like. Discoloration, deformation or
cracks may result.
To maintain product SAFETY and RELIABILITY,
repairs, any other maintenance or adjustment should
be performed by Makita Authorized or Factory Service
Centers, always using Makita replacement parts.
Loading ...
Loading ...
Loading ...