Loading ...
Loading ...
Loading ...
6 ENGLISH
Trigger-lock button
CAUTION: Before installing the battery car-
tridge into the tool, always check to see that the
switch trigger actuates properly and returns to
the "OFF" position when released.
CAUTION: When not operating the tool,
depress the trigger-lock button from B side to
lock the switch trigger in the OFF position.
1
2
► 1. Trigger-lock button 2. Switch trigger
A
B
To prevent the switch trigger from accidentally pulled,
the trigger-lock button is provided.
To pull the switch trigger, depress the trigger-lock button
from A side.
After use, always press in the trigger-lock button from
B side.
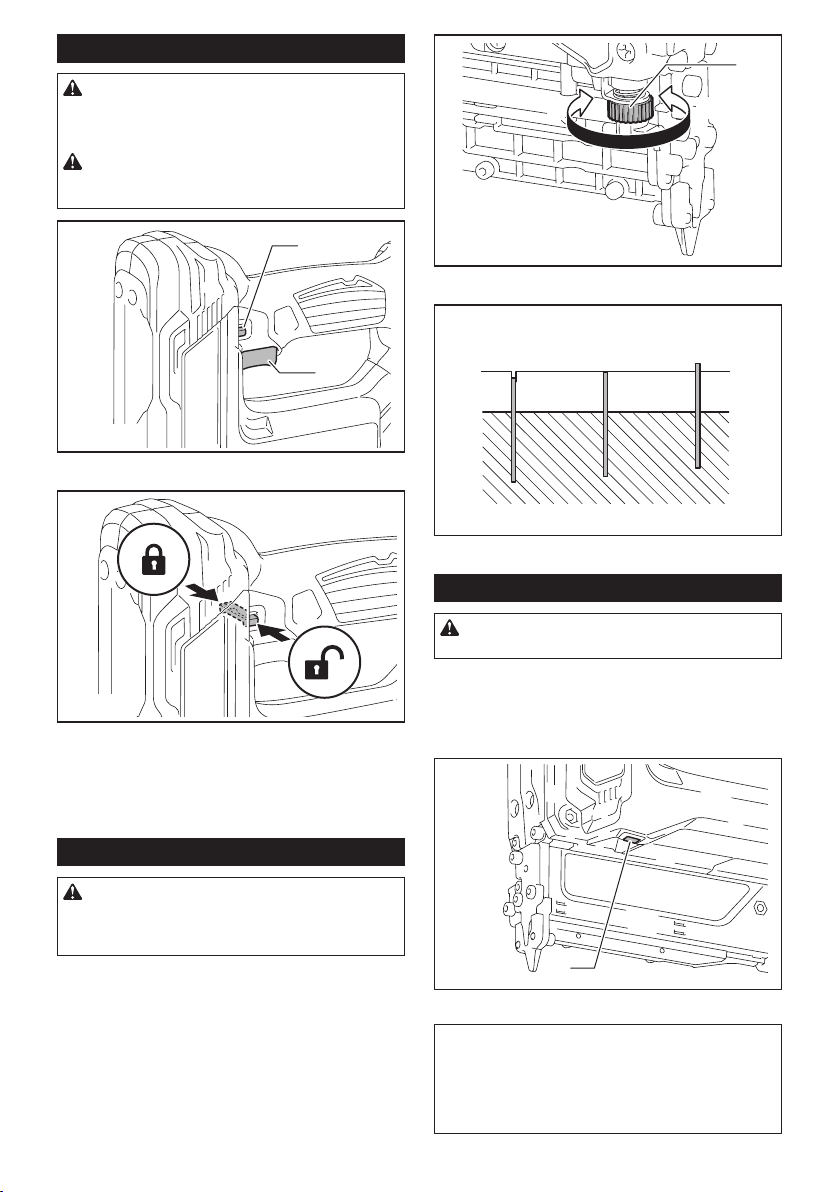
Adjusting the depth of pin-nailing
WARNING: Always make sure that your
ngers are not placed on the switch trigger or
the contact element and the battery cartridge is
removed before adjusting the depth of nailing.
Depth of pin-nailing can be adjusted on this pin nailer.
To adjust the depth of nailing, turn the adjuster. The
depth of nailing is the deepest when the adjuster is
turned fully in the A direction shown in the gure. It
will become shallower as the adjuster is turned in
the B direction. Depth can be adjusted 1.5 mm to the
maximum.
A
B
1
► 1. Adjuster
2
13
► 1. Too deep 2. Flush 3. Too shallow
Lighting up the lamp
CAUTION: Do not look in the light or see the
source of light directly.
Pull the switch trigger or actuate the contact element to
light up the lamp. The lamp keeps on lighting while pull-
ing the switch trigger or actuating the contact element.
The lamp goes out approximately 10 seconds after
releasing the switch trigger and the contact element.
1
► 1. Lamp
NOTE: Use a dry cloth to wipe the dirt off the lens of
the lamp. Be careful not to scratch the lens of lamp, or
it may lower the illumination.
NOTE: Even in the lamp lights up when the battery
power residual gets small, pin nailer may not re pin
nails. In this case, charge the battery cartridge.
Loading ...
Loading ...
Loading ...