Loading ...
Loading ...
Loading ...
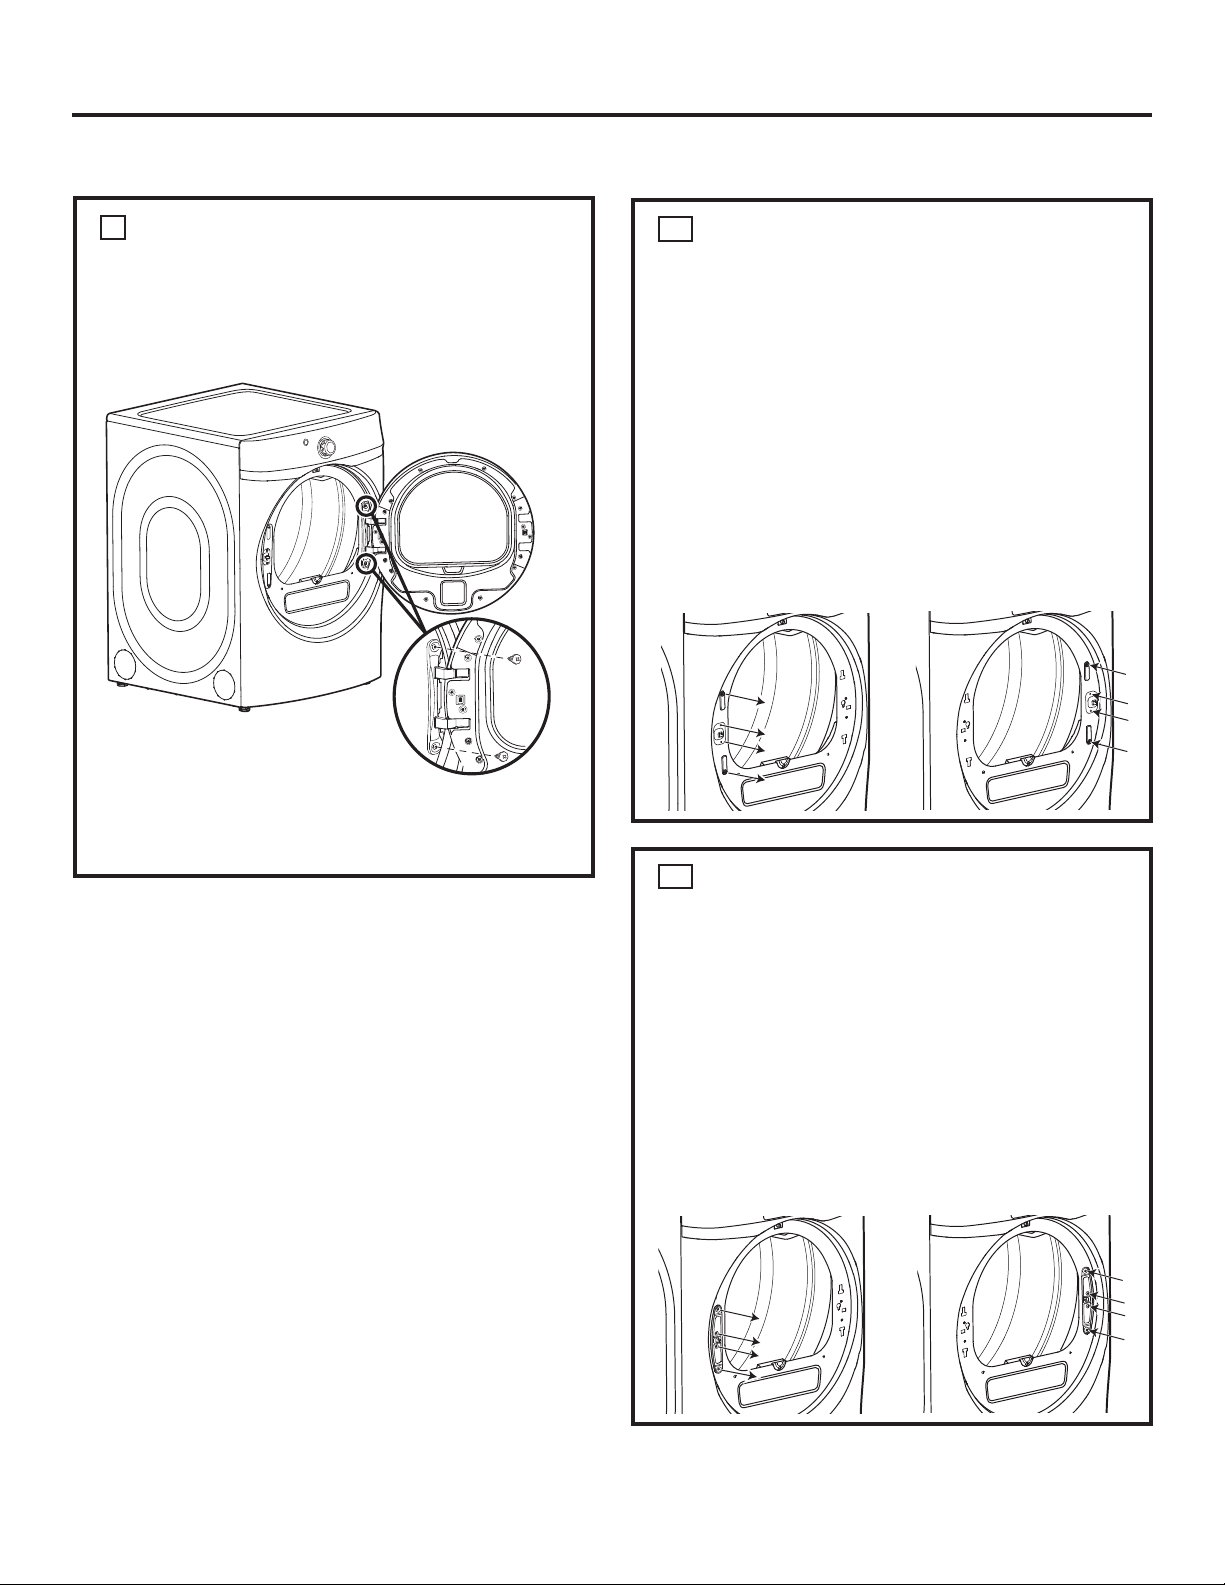
REMOVE THE DOOR ASSEMBLY
A. Open the door fully.
1
RE-LOCATE THE HINGE STRIKER AND
FRONT PANEL PLUGS (on some models
- see step 2B below for other models)
2A
IMPORTANT: Note the location of the hinge (left or
right) before removing.
A. Remove 2 screws (#10 x 5/8”) and front panel
plugs from the front panel.
B. Re-install front panel plugs and screws on
opposite side of the door opening.
C. Remove 2 screws (#8 x 1/2”) and hinge striker
from the front panel.
D. Rotate hinge striker 180 degrees and re-install
with screws on the opposite side of the door
opening.
REVERSING THE DOOR SWING (if desired)
Installation Instructions
32
B. Remove 2 screws (#10 x 5/8”) from the hinge,
starting with the bottom screw. The door will tilt
away from the front panel, but will come to rest
in place.
C. Lift the door slightly and unhook if from the front
panel.
D. Place the door on a soft and flat surface.
RE-LOCATE THE HINGE STRIKER
(on some models - see step 2A above
for other models)
IMPORTANT: Note the location of the hinge (left or
right) before removing.
A. Remove 2 screws (#10 x 5/8”) from top and
bottom of door striker.
B. Remove 2 screws (#8 x 1/2”) from center of door
striker and remove door striker from front panel.
C. Rotate door striker 180 degrees and re-install
with screws on the opposite side of the door
opening.
2B
Loading ...
Loading ...
Loading ...