Loading ...
Loading ...
Loading ...
EN12 EN13
English
Baking bread
Turn to
P. EN18–EN19 for
bread recipes
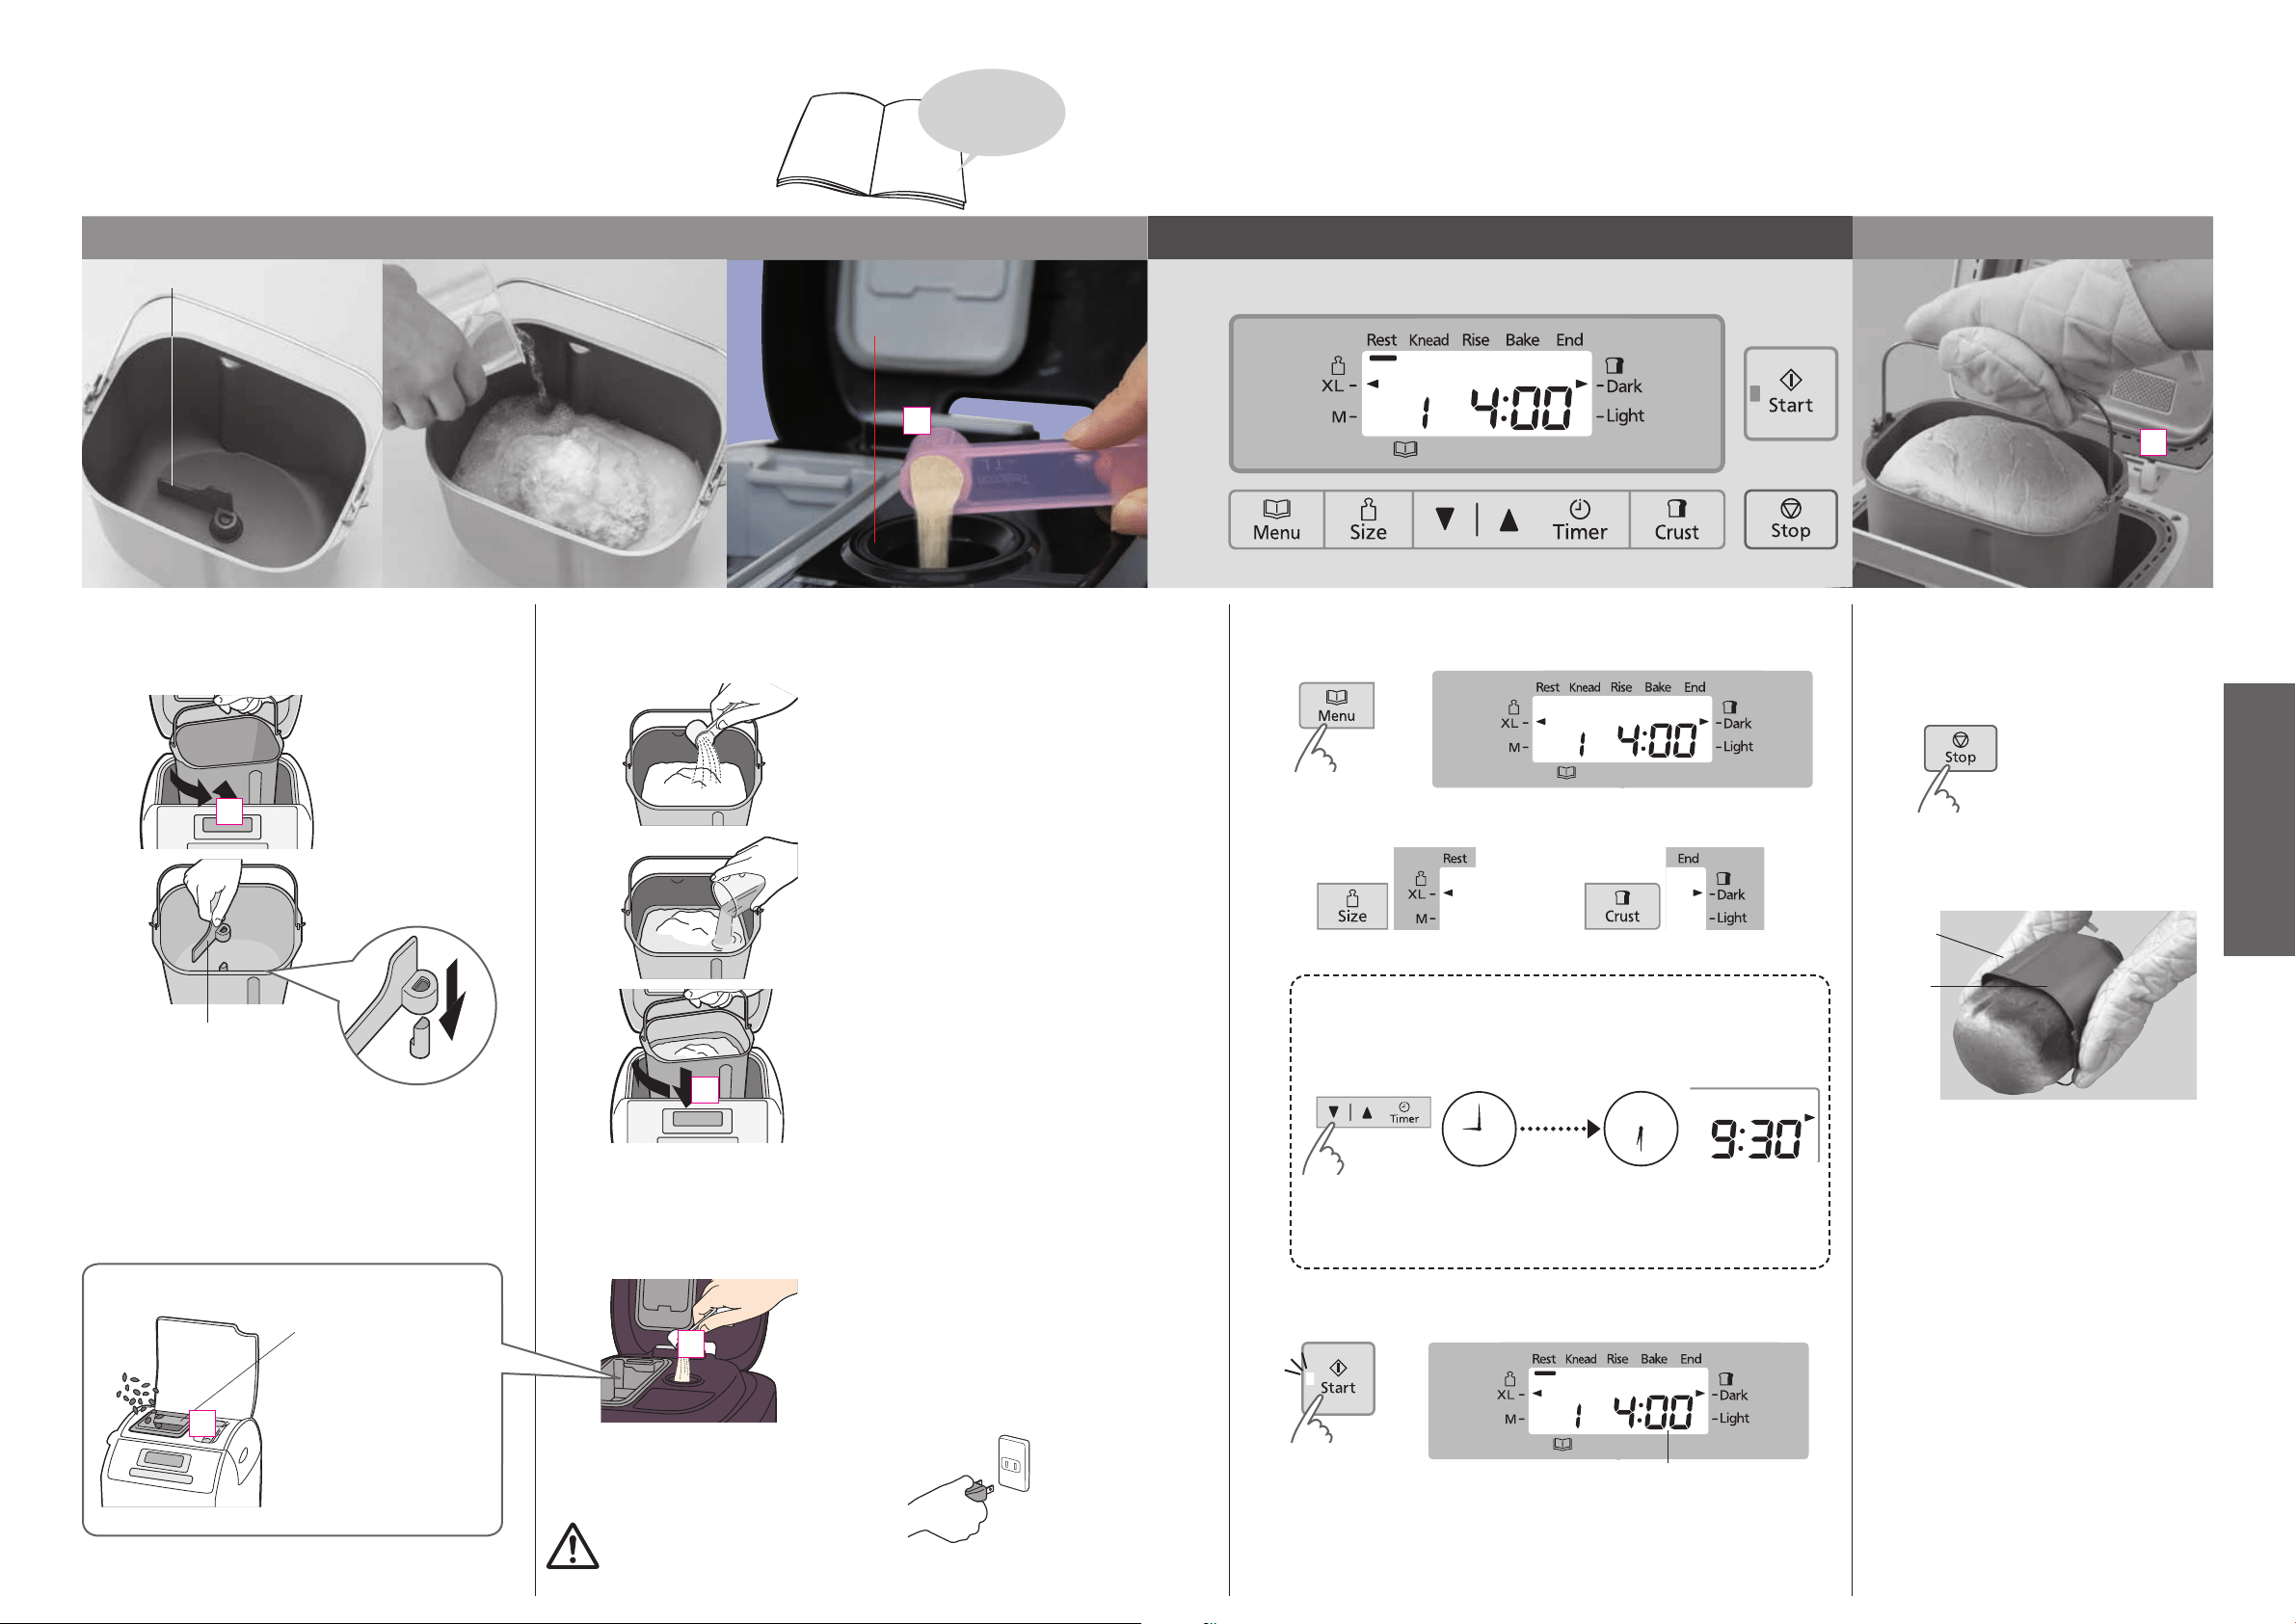
Insert the ingredients in the bread pan Set the program and start Remove the bread
Kneading blade
Yeast dispenser
1
Remove the bread pan and
set the kneading blade
1
Twist the bread pan
counter-clockwise.
2
Remove the bread pan.
Check around the shaft and inside
the kneading blade and ensure
that they are clean. (P. EN27)
3
Place the kneading
blade firmly into the
shaft.
•
The blade fits loosely into place, but it must touch the
bottom of the bread pan.
2
Place the measured ingredients
in the bread pan
1
Place the dry ingredients except
dry yeast. (flour, sugar, salt, etc.)
• Flour must be weighed on
scales.
2
Pour in the water and any other
liquids.
3
Wipe off any moisture and flour
from the outside of the bread
pan.
Place the bread pan inside the
breadmaker by turning it slightly
clockwise. Fold the handle down.
Close the lid.
•
Don’t open the lid until bread is
complete (affects bread quality).
3
Insert the dry yeast in the yeast
dispenser
If the yeast dispenser is wet, absorb
wetness with tissue etc.
(Do not rub the yeast dispenser,
otherwise the yeast will not drop
into the bread pan due to static.)
4
Plug the breadmaker
into a 120 V outlet
Caution:
To prevent electric shock, be sure your hands are dry.
5
Choose a bake menu
(The display shows when menu ‘1’ is selected.)
n
To change the size
n
To change the crust color
See P. EN7 for availability of size and crust.
n
To set the timer
e.g. It is 9:00 PM now, and you want the bread to be ready at 6:30 the next
morning.
Set the timer to ‘9:30’ (9 hours 30 minutes from now).
12
9
6
3
12
9
6
3
9hr 30min
from now
Current time Ready time
•
Pressing the button once will advance the timer by 10 minutes up to
13 hours (hold to advance more quickly).
6
Press ‘Start’ button
Estimated time until the selected program is complete
When ‘Start’ is first pressed, menu 1 will start.
7
Turn off the power
when the bread is ready
(machine beeps 8 times and the bar at
‘End’ flashes.)
8
Remove the bread
immediately,
Bread pan
Oven glove
allow to cool, for example, on a wire rack
9
Unplug (holding the
plug) after use
If you do not press ‘stop’ and remove the
bread from the unit to cool it, the
breadmaker will proceed to keep warm
to reduce condensation of steam within
the loaf.
This will accelerate the browning of the
crust, therefore, upon completion of
baking, switch off the unit and remove
the bread immediately from the unit to
cool it.
If you leave the bread to cool down in
the bread pan, it will cause
condensation. Therefore, cool on a wire
rack to ensure better quality loaf.
Baking bread with added ingredients
Clean and dry
beforehand
1
Open the dispenser lid.
2
Insert the ingredients
inside.
3
Close the lid.
(P. EN15)
仮
仮
仮
仮
仮
仮
Loading ...
Loading ...
Loading ...