|
If you experience
|
Possible Causes
|
Solution
|
|
Vibration or Off-Balance
|
|
Vibration, rocking, or “walking”
|
Feet may not be in contact with the floor and locked.
|
Front and rear feet must be in firm contact with floor, and washer must be level to operate properly.
|
|
Washer may not be level.
|
Check floor for flexing or sagging. If flooring is uneven, a 3/4" (19 mm) piece of plywood under your washer will reduce sound.
|
|
See “Level the Washer” in the Installation Instructions.
|
|
Vibration during spinning or washer stopped
|
Load could be unbalanced.
|
Load items in loose heaps evenly around the agitator. Adding wet items to washer or adding more water to basketcould unbalance washer.
|
|
Avoid washing single items. Balance a single item such as a rug or jeans jacket with a few extra items. Redistribute the load, close the lid, and touch and hold START/PAUSE.
|
|
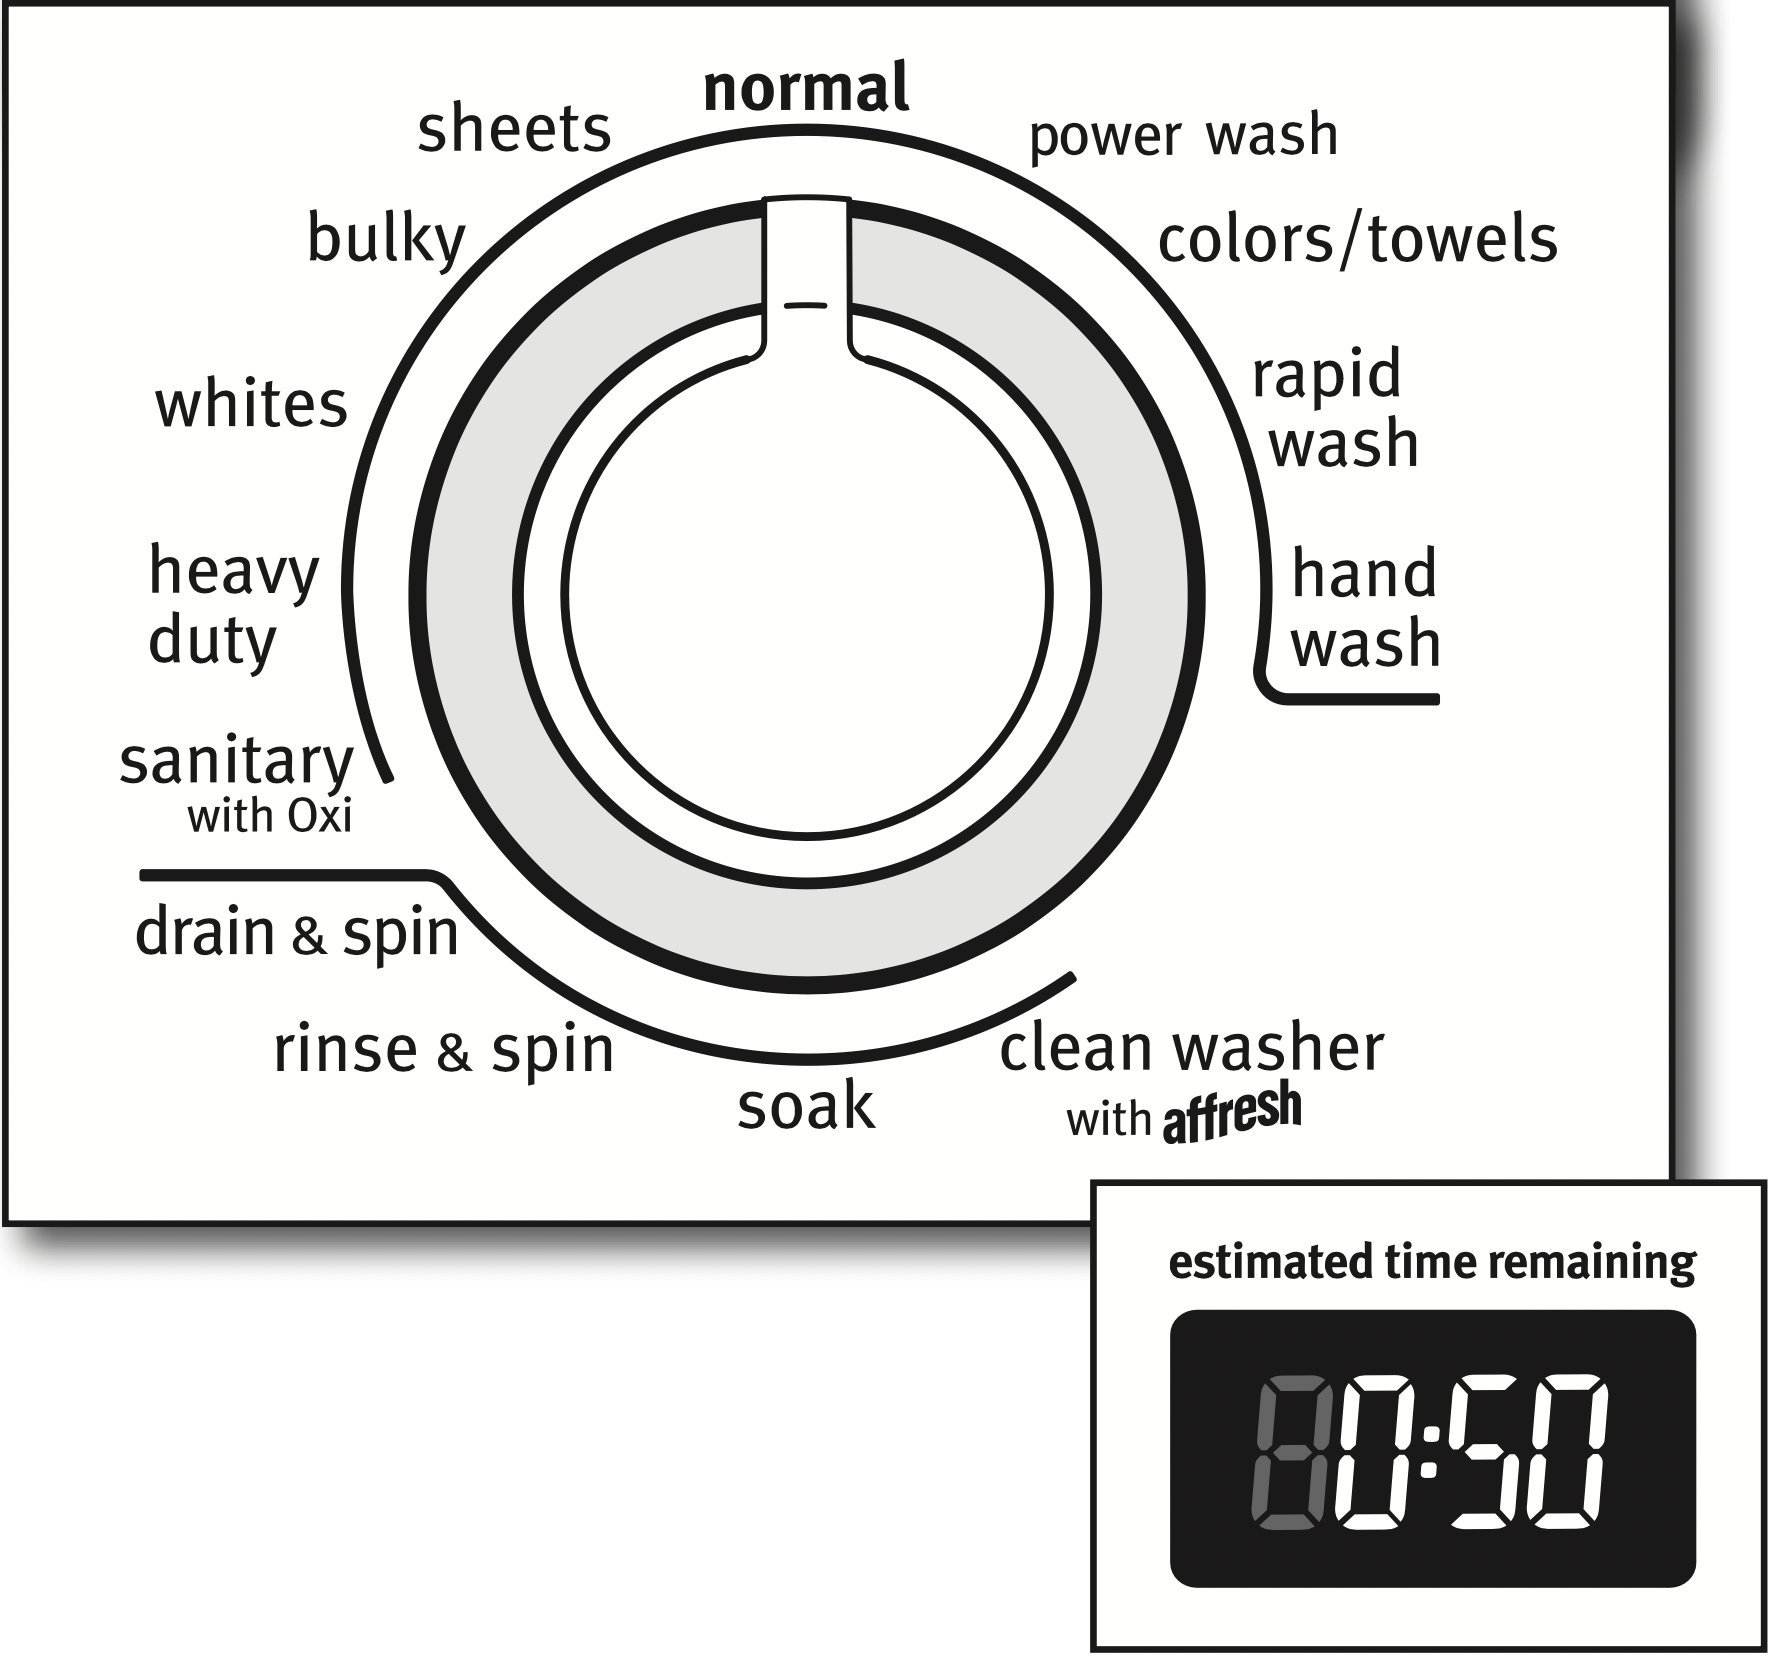
Use Bedding cycle for oversized, non-absorbent items such as comforters or poly-filled jackets. Other items are not appropriate for Bedding cycle. See the “Cycle Guide.”
|
|
Item or load not suitable for selected cycle. See “Cycle Guide” and “Using Your Washer.”
|
|
Noises – For normal operating sounds
|
|
Clicking or metallic noises
|
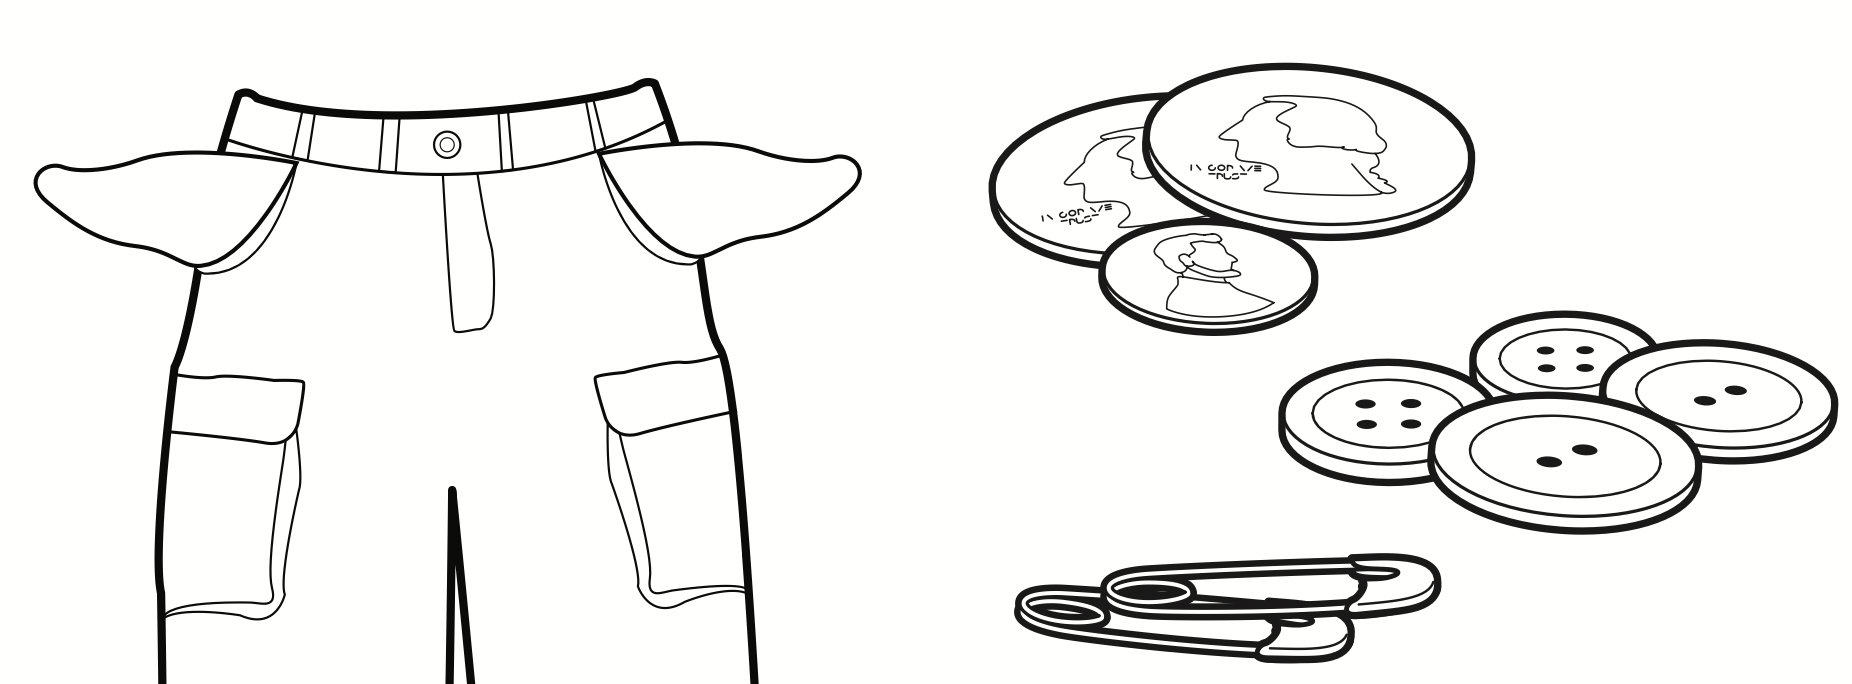
Objects may be caught in washer drain system.
|
Empty pockets before washing. Loose items such as coins could fall between basket and tub or may block pump. It may be necessary to call for service to remove items.
|
|
It is normal to hear metal items on clothing such as metal snaps, buckles, or zippers touch against the stainless steel basket.
|
|
Gurgling or humming
|
Washer may be draining water.
|
It is normal to hear the pump making a continuous humming sound with periodic gurgling or surging as final amounts of water are removed during the spin/drain cycles.
|
|
Humming
|
Load sensing may be occurring.
|
You may hear the hum of the sensing spins after you have started the washer. This is normal. Sensing spins will take several minutes before water is added to the washer.
|
|
Water Leaks
|
|
Check the following for proper installation:
|
Washer not level.
|
See Installation Instructions for details on how to level your washer.
|
|
Fill hoses not attached tightly.
|
Tighten fill-hose connection.
|
|
Fill hose washers.
|
Make sure all four fill hose flat washers are properly seated.
|
|
Drain hose connection.
|
Pull drain hose from washer cabinet and properly secure it to drainpipe or laundry tub.
|
|
Do not place tape over drain opening.
|
|
Check household plumbing forleaks or clogged sink or drain.
|
Water can back up out of a clogged sink or drainpipe. Check all household plumbing for leaks (laundry tubs, drainpipe, water pipes, and faucets.)
|
|
Washer not loaded as recommended.
|
An unbalanced load can cause basket to be out of alignment and cause water to splash off tub. See “Using Your Washer” for loading instructions.
|
|
Washer Not Performing As Expected
|
|
Not enough water in washer
|
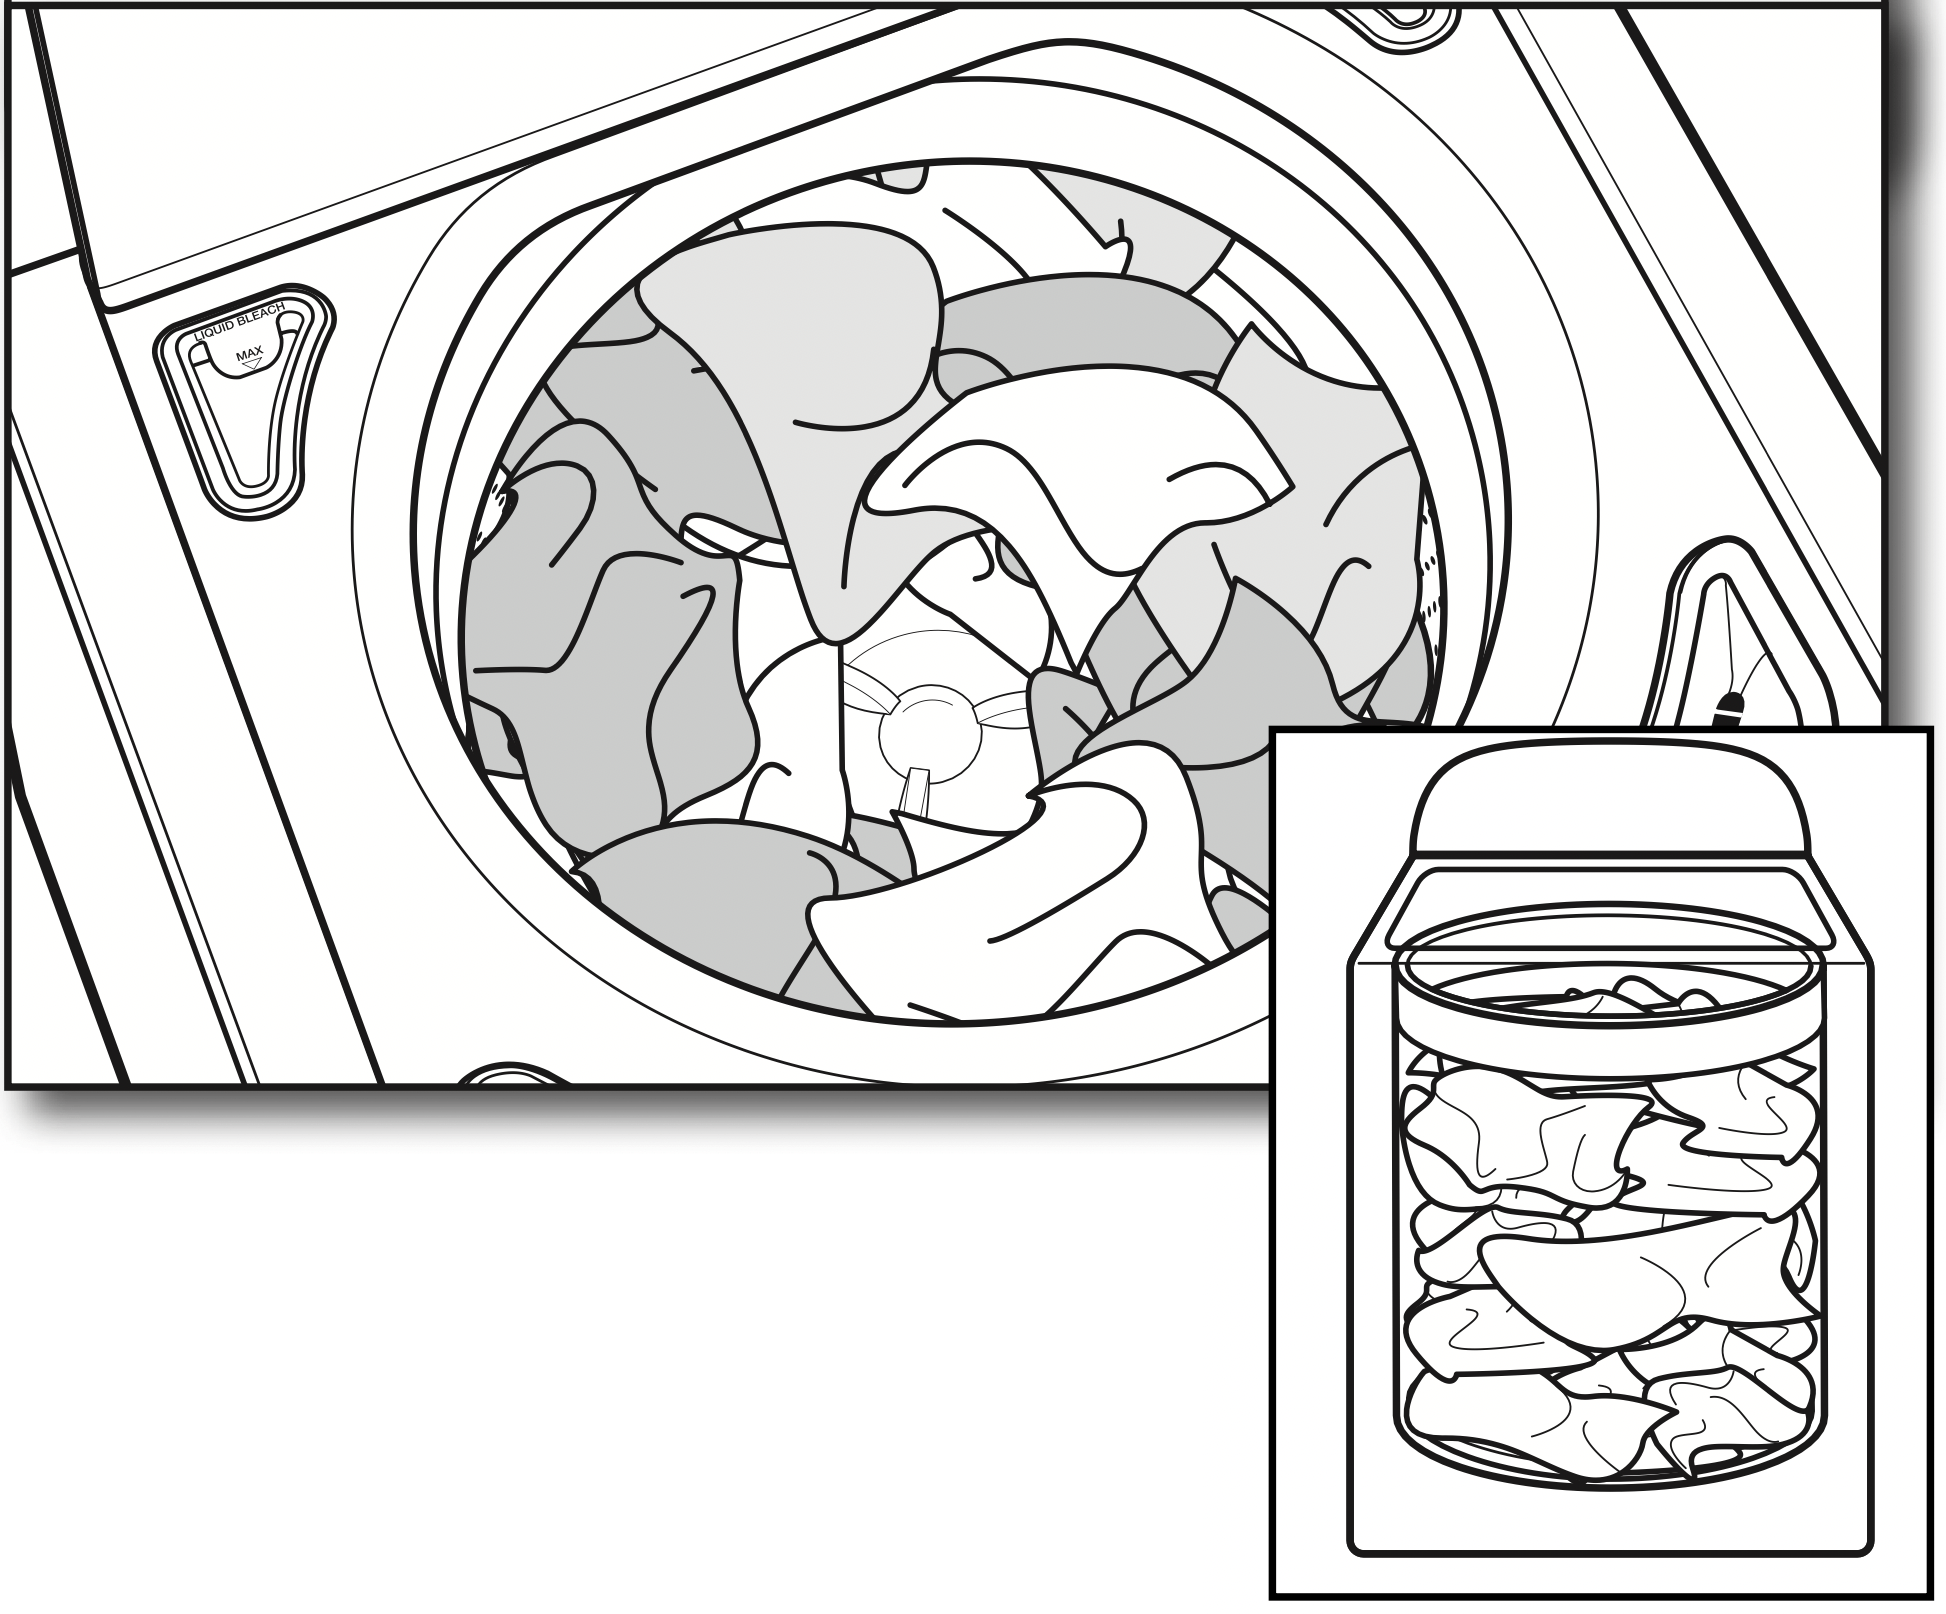
Load not completely covered in water.
|
This is normal operation for an HE low-water washer. The load will not be completely underwater. The washer senses load sizes and adds correct amount of water for optimal cleaning. See “What’s New under the Lid.”
IMPORTANT: Do not add more water to washer. The added water lifts the load off the wash plate, resulting in less cleaning.
|
|
Washer won’t run or fill, washer stops working
|
Check for proper water supply. |
Both hoses must be attached and have water flowing to inlet valve.
|
|
Both hot and cold water faucets must be turned on.
|
|
Check that inlet valve screens have not become clogged.
|
|
Check for any kinks in inlet hoses, which can restrict water flow.
|
|
Check proper electrical supply.
|
Plug power cord into a grounded 3 prong outlet.
|
|
Do not use an extension cord.
|
|
Ensure there is power to outlet.
|
|
Reset a tripped circuit breaker. Replace any blown fuses.
NOTE: If problems continue, contact an electrician.
|
|
Normal washer operation.
|
Lid must be closed for washer to run.
|
|
Washer will pause during certain phases of cycle. Do not interrupt cycle.
|
|
Washer may be stopped to reduce suds.
|
|
Washer may be tightly packed.
|
Remove several items, rearrange load evenly around the agitator. Close lid, touch and hold START/PAUSE button.
|
|
Add only one or two additional items after washer has started.
|
|
Do not add more water to the washer.
|
|
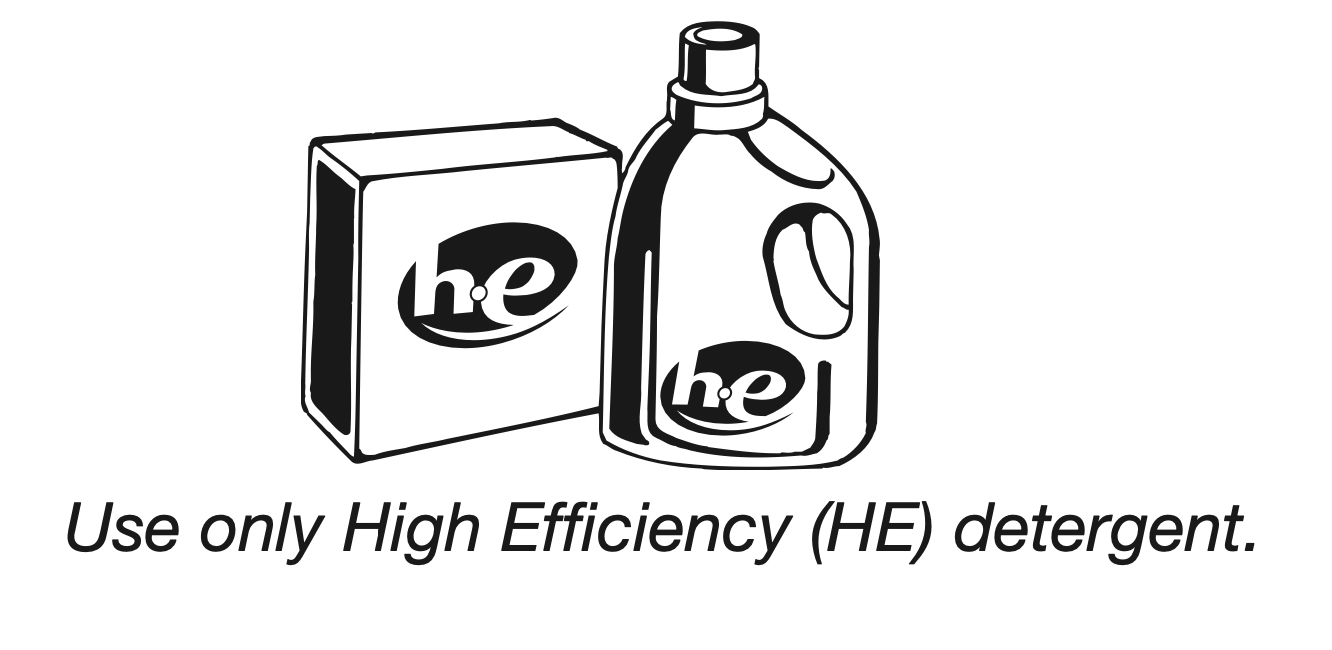
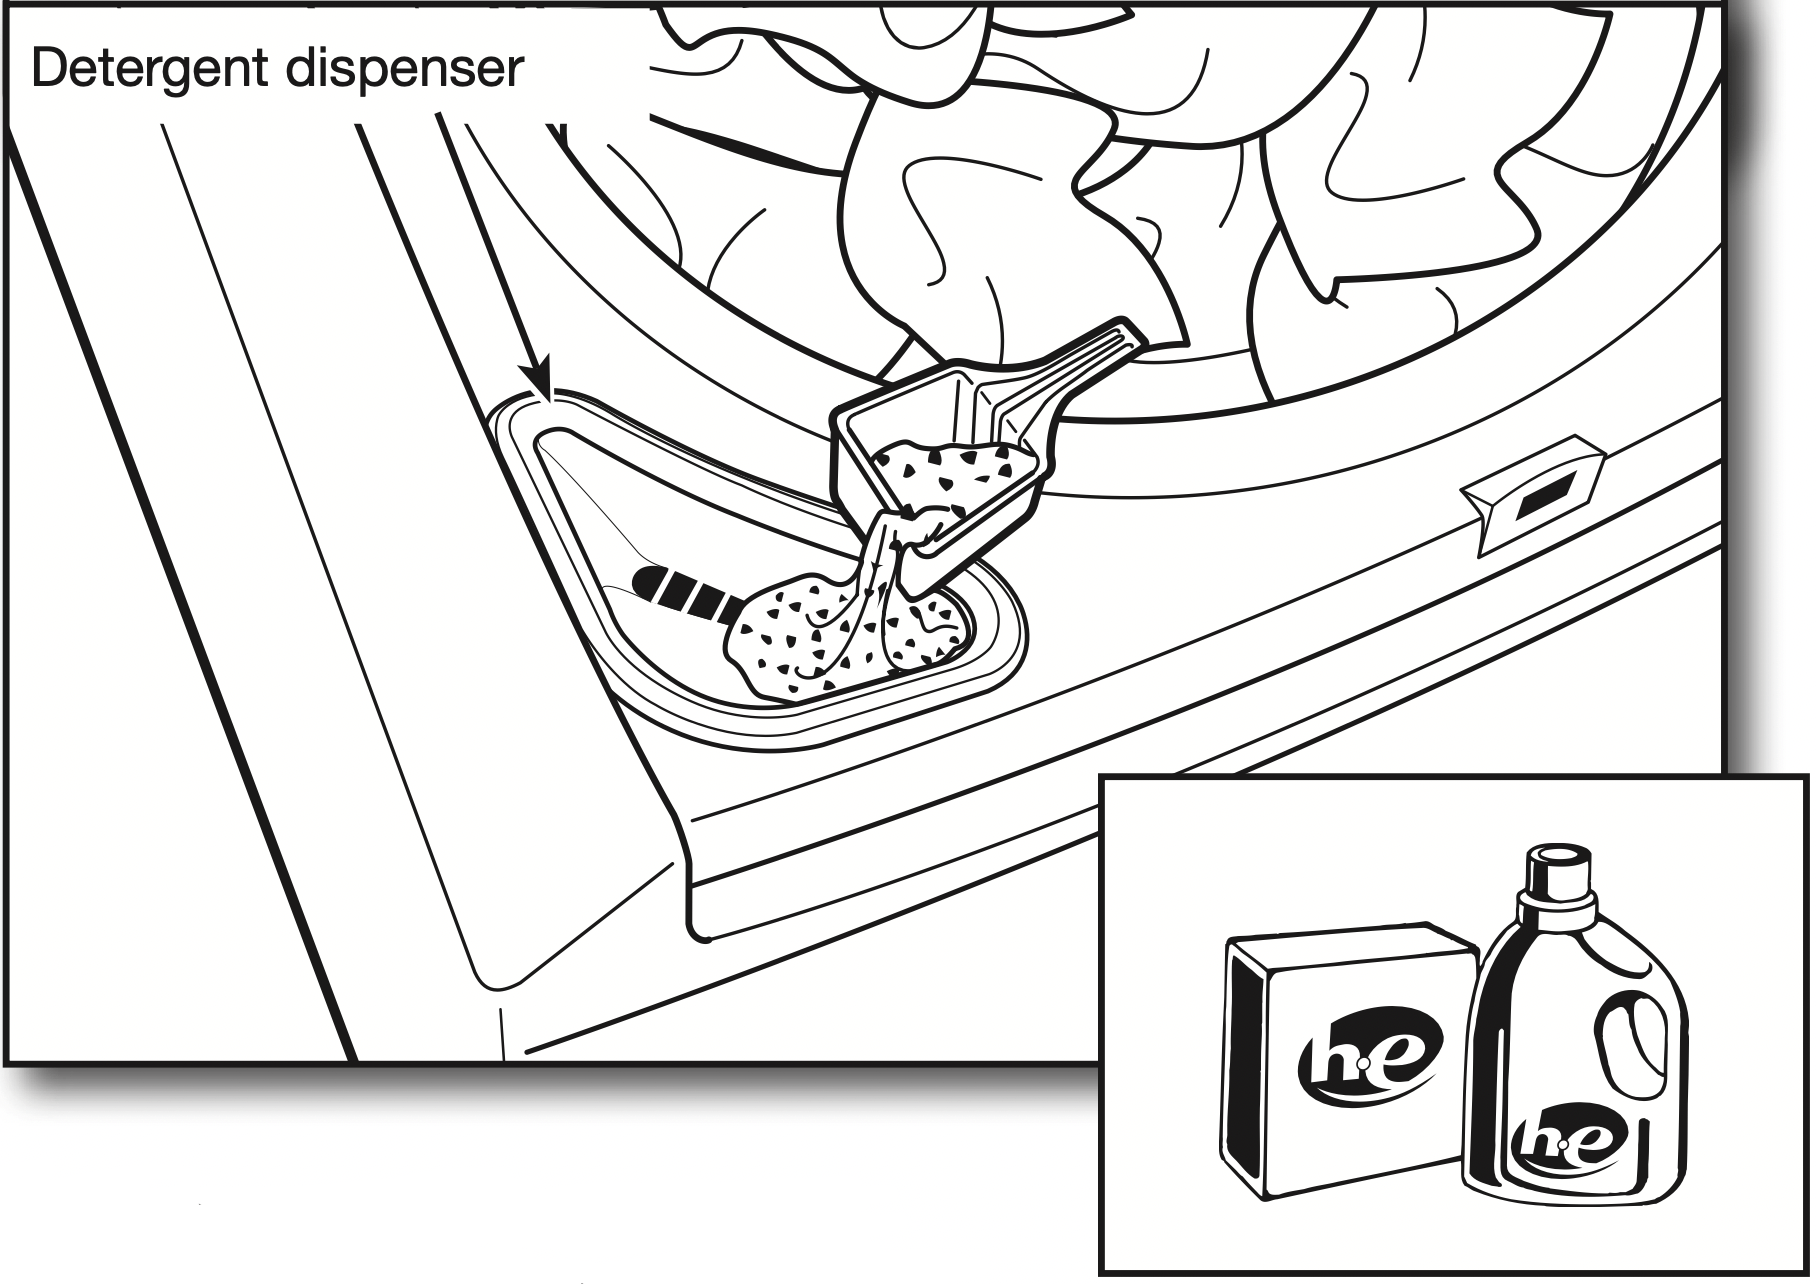
Not using HE detergent or using too much HE detergent.
|
Only use HE detergent (liquid only in the dispenser). Suds from regular detergents can slow or stop the washer. Always measure detergent and following detergent directions based on your load requirements.
|
|
To remove suds, cancel cycle. Select Rinse & Spin. Touch and hold START/PAUSE button. Do notadd more detergent.
|
|
Washer not draining/ spinning, loads are still wet
|
Empty pockets and use garment bags for small items. |
Small items may have been caught in pump or between basket and tub, which can slow draining. |
|
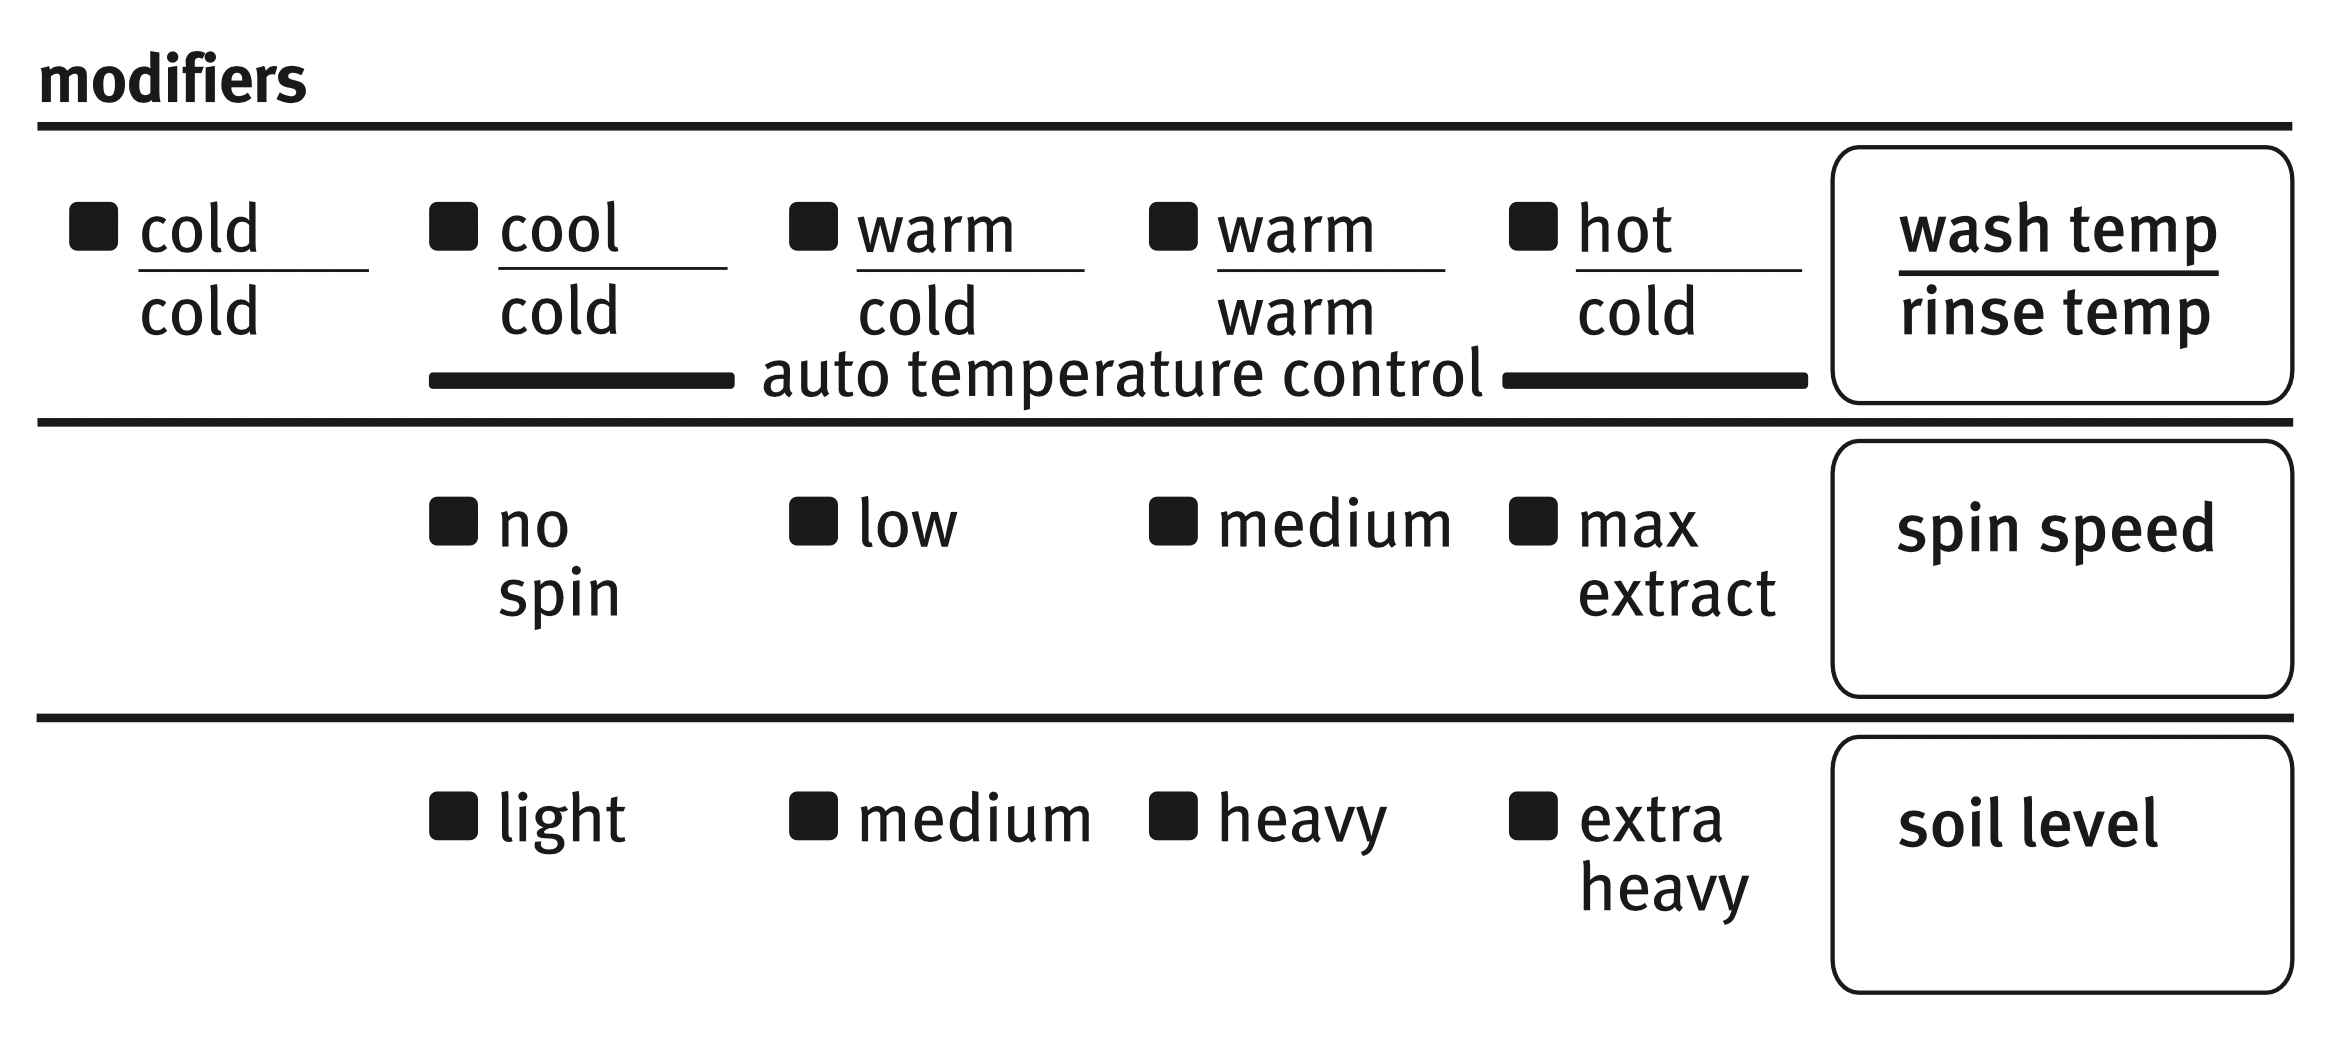
Using cycles with a lower spin speed.
|
Cycles with lower spin speeds remove less water than cycles with high spin speeds. Use the recommended cycle/speed spin for your garment. |
| Washer may be tightly packed or unbalanced. |
Tightly packed loads may not allow the washer to spin correctly, leaving the load wetter than normal. Evenly arrange the wet load for balanced spinning. Select DRAIN & SPIN to remove excess water. See “Using Your Washer” for loading recommendations.
|
| Check plumbing for correct drain hose installation. Drain hose extends into standpipe farther than 4.5" (114 mm). |
Check drain hose for proper installation. Use drain hose form and securely attach to drainpipe or tub. Do not tape over drain opening. Lower drain hose if the end is higher than 96" (2.4 m) above the floor. Remove any clogs from drain hose.
|
| Not using HE detergent or using too much HE detergent. |
Suds from regular detergent or using too much detergent can slow or stop draining or spinning. Use only HE detergent. Always measure and follow detergent directions for your load. To remove extra suds, Select RINSE & SPIN. Do not add detergent.
|
| Incorrect or wrong wash or rinse temperatures |
Check for proper water supply. |
Make sure hot and cold inlet hoses are not reversed.
|
|
Both hoses must be attached to both washer and faucet, and have both hot and cold water flowing to inlet valve.
|
|
Check that inlet valve screens are not clogged.
|
|
Remove any kinks in hoses.
|
| Energy-saving controlled wash temperatures. |
Energy Star ® qualified washers use cooler wash and rinse water temperatures than traditional top-load washers. This includes cooler hot and warm washes.
|
| Load not rinsed |
Check for proper water supply. |
Make sure hot and cold inlet hoses are not reversed.
|
|
Both hoses must be attached and have water flowing to the inlet valve.
|
|
Both hot and cold water faucets must be on.
|
|
Inlet valve screens on washer maybe clogged.
|
|
Remove any kinks in the inlet hose.
|
| Not using HE detergent or using too much HE detergent. |
The suds from regular detergent can cause the washer to operate incorrectly.
|
|
Use only HE detergent. Be sure to measure correctly.
|
|
Always measure detergent and follow detergent directions based on load size and soil level.
|
| Washer may be tightly packed. |
The washer is less efficient at rinsing when load is tightly packed.
|
|
Load garments in loose heaps evenly around the washplate. Do not load garments directly over the center of the washplate.
|
|
Use cycle designed for the fabrics being washed.
|
|
Add only 1 or 2 additional garments after washer has started.
|
|
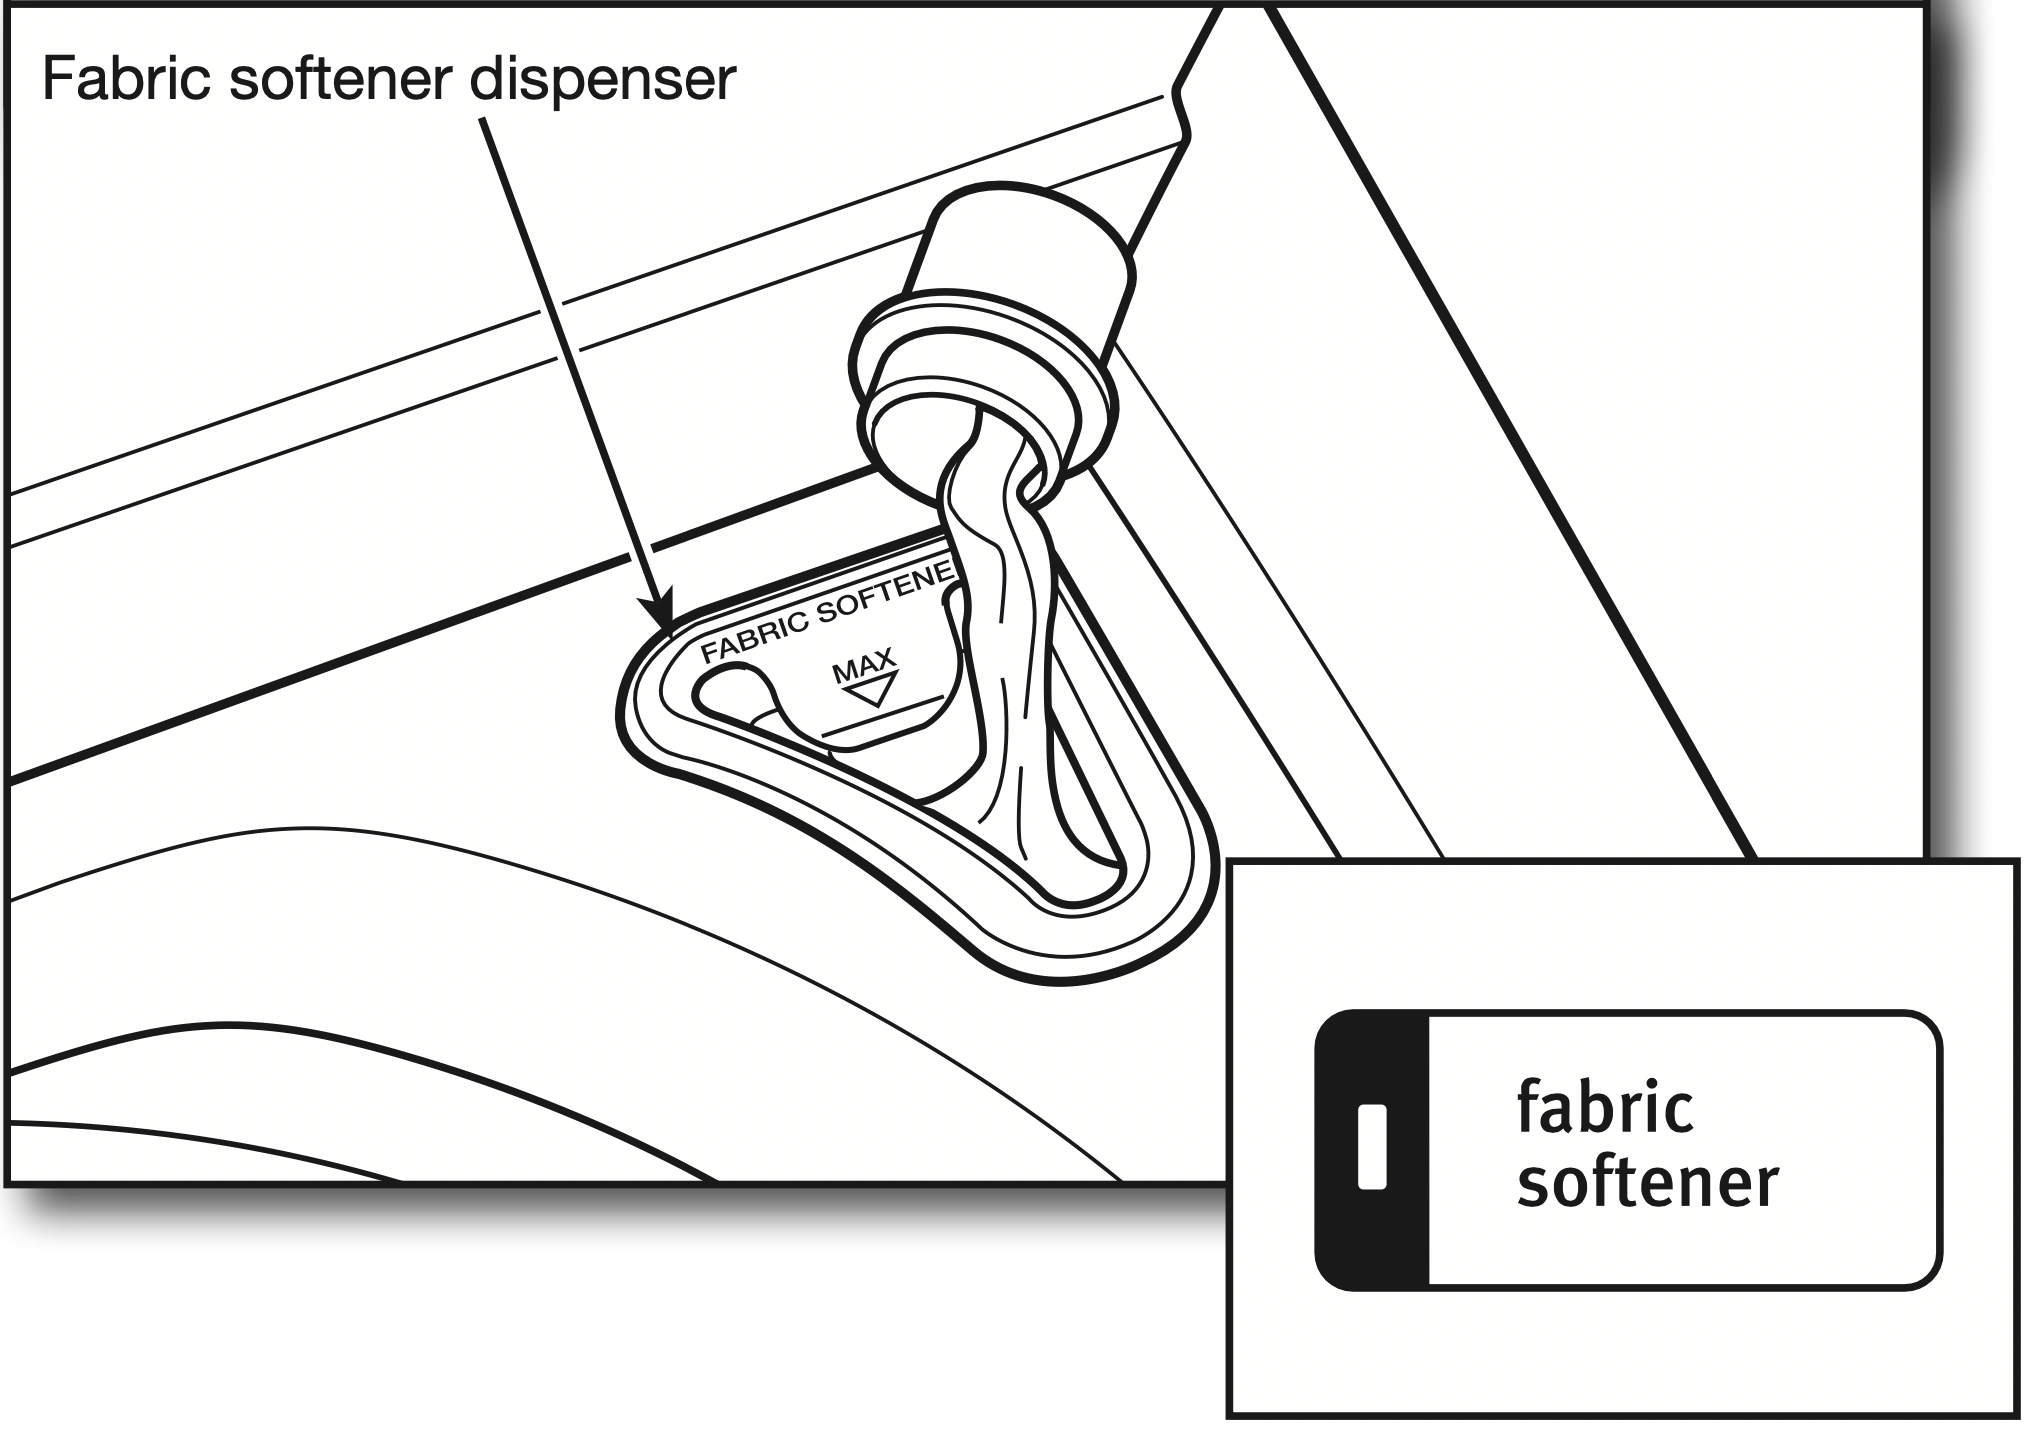
Fabric softener option not selected.
|
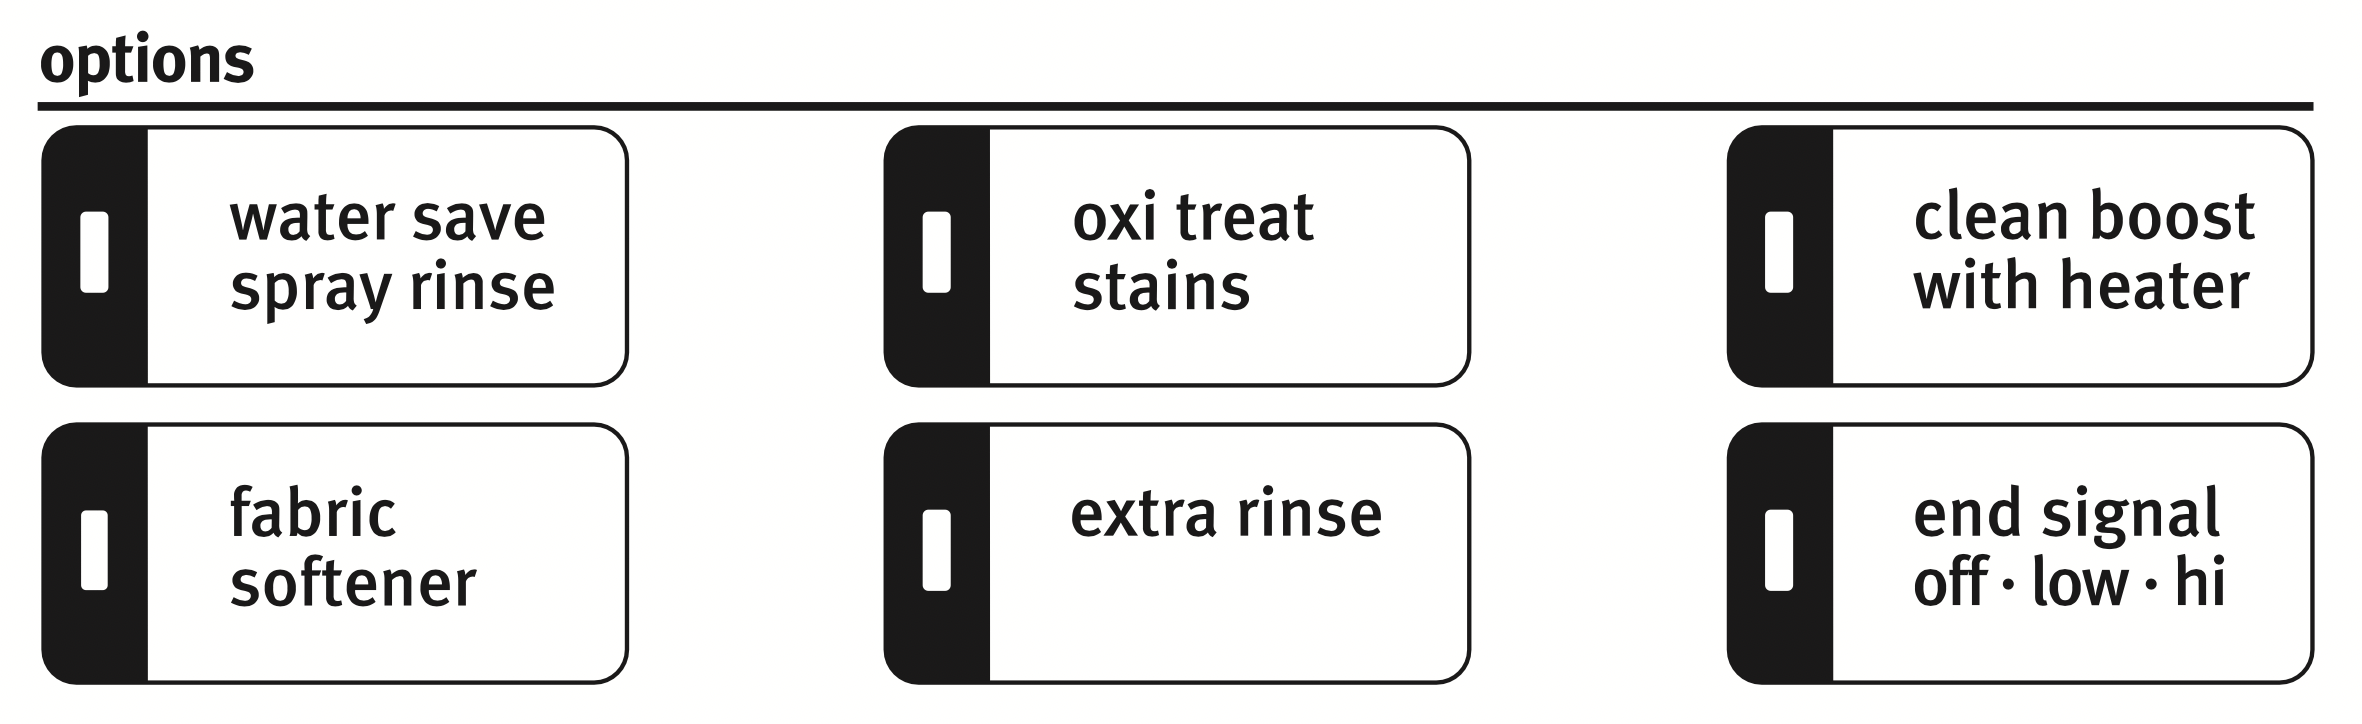
When using fabric softener, be sure the Fabric Softener option is selected. |
|
Sand, pet hair, lint, etc. on load after washing
|
Heavy sand, pet hair, lint, and detergent or bleach residues may require additional rinsing.
|
Add an Extra Rinse to the selected cycle.
|
|
Load is tangling
|
Washer not loaded as recommended.
|
Load garments in loose heaps evenly around the washplate. Do not load garments directly over the center of the washplate.
|
|
Reduce tangling by mixing types of load items. Use the recommended cycle for the type of garments being washed.
|
|
Wash action and/or spin speed too fast for load.
|
Select a cycle with a slower wash action and slower spin speed. Note that items will be wetter than when using a higher speed spin. |
| Not cleaning or removing stains |
Wash load not completely covered in water.
|
Washer senses load size and adds correct amount of water. This is normal and necessary for garments to move. |
| Added more water to washer. |
Do not add more water to washer. Adding water lifts the garments off the washplate, resulting in less effective cleaning.
|
| Washer not loaded as recommended. |
Load garments in loose heaps evenly around the washplate. Do not load garments directly over the center of the washplate.
|
|
Add only 1 or 2 additional garments after washer has started.
|
| Not using HE detergent or using too much HE detergent. |
The suds from regular detergent can prevent washer from operating correctly.
|
|
Use only HE detergent. Be sure to measure correctly.
|
|
Always measure detergent and follow detergent directions based on load size and soil level.
|
| Not using correct cycle for fabric type. |
Use a higher soil level cycle option and warmer wash temperature to improve cleaning.
|
|
If using Rapid Wash cycle (on some models), wash only a few items.
|
|
Use Whites and Heavy Duty cycle for tough cleaning.
|
|
See the “Cycle Guide” to match your load with the best cycle.
|
| Not using dispensers. |
Use dispensers to avoid chlorine bleach and fabric softener staining.
|
|
Load dispensers before starting a cycle.
|
|
Avoid overfilling.
|
|
Do not add products directly onto load.
|
| Not washing like colors together. |
Wash like colors together and remove promptly after the cycle is complete to avoid dye transfer.
|
|
Odors
|
Monthly maintenance not done as recommended.
|
Run the Clean Washer with AFFRESH™ cycle after every 30 washes. See “Cleaning Your Washer” in “Washer Maintenance”.
|
|
Unload washer as soon as cycle is complete.
|
|
Not using HE detergent or using too much HE detergent.
|
Use only HE detergent. Be sure to measure correctly.
|
|
Always follow the detergent directions.
|
|
See “Cleaning your Washer” section.
|
| Fabric Damage |
Sharp items were in pockets during wash cycle. |
Empty pockets, zip zippers, and snap or hook fasteners before washing to avoid snags and tears.
|
|
Strings and straps could have tangled.
|
Tie all strings and straps before starting wash load.
|
|
Items may have been damaged before washing.
|
Mend rips and broken threads in seams before washing. |
| Fabric damage can occur if the washer is tightly packed. |
Load garments in loose heaps evenly around the washplate. Do not load garments directly over the center of the washplate.
|
|
Use cycle designed for the fabrics being washed.
|
|
Add only 1 or 2 additional garments after washer has started.
|
| Garment care instructions may not have been followed. |
Always read and follow garment manufacturer’s care label instructions. See the “Cycle Guide” to match your load with the best cycle.
|
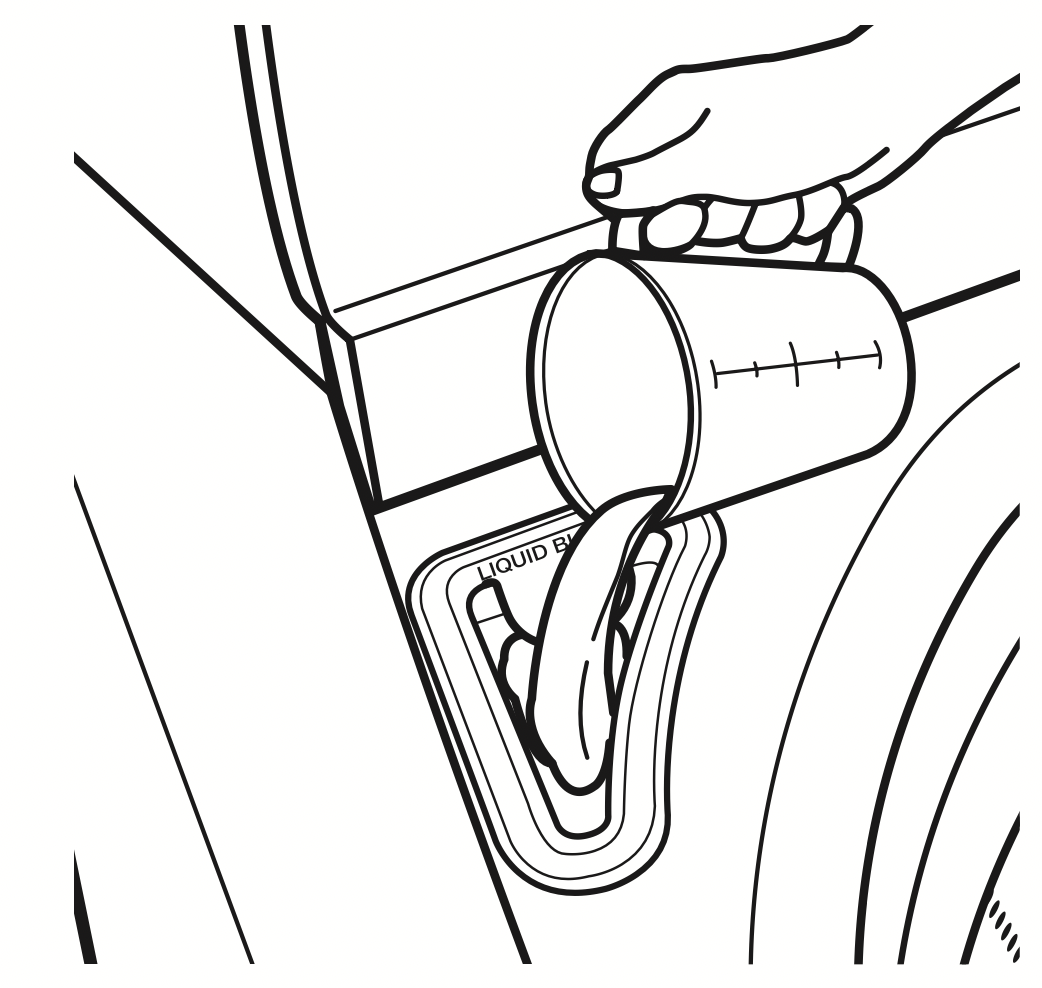
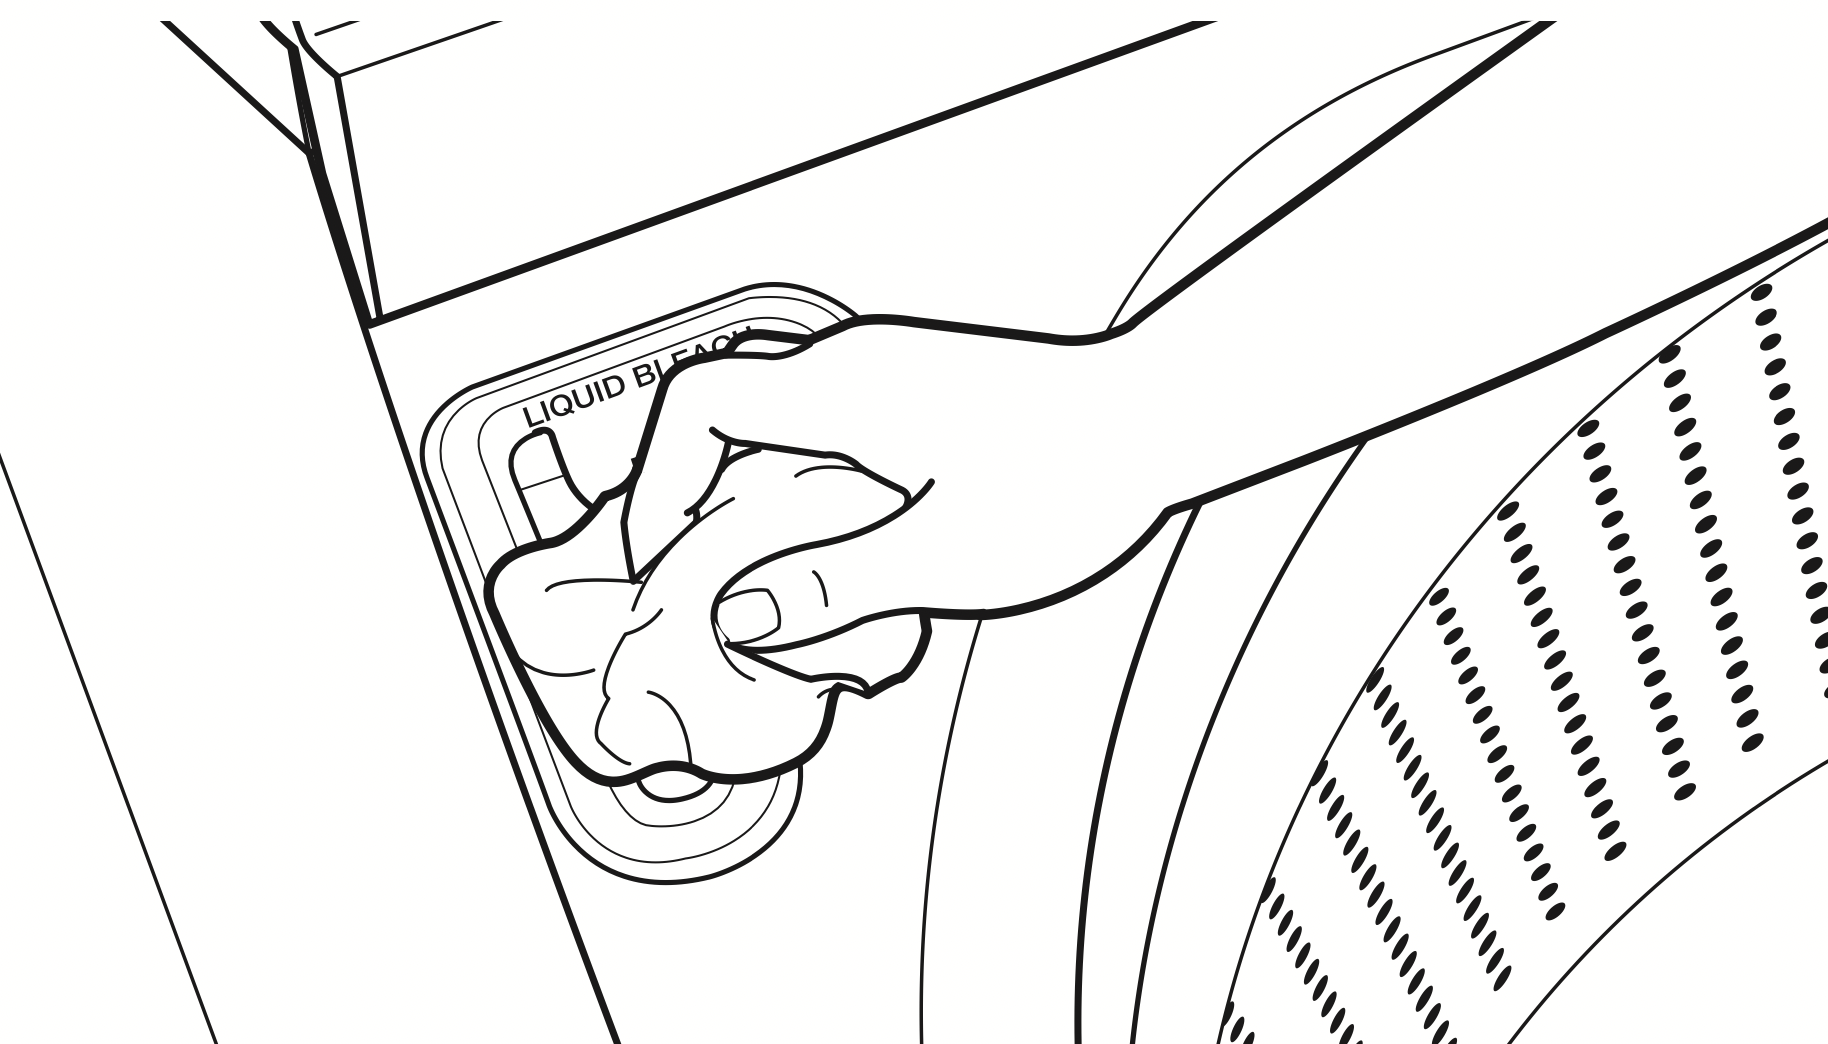
| Liquid chlorine bleach may have been added incorrectly. |
Do not pour liquid chlorine bleach directly onto load. Wipe up bleach spills.
|
|
Undiluted bleach will damage fabrics. Do not use more than recommended by manufacturer.
|
|
Do not place load items on top of bleach dispenser when loading and unloading washer.
|
|
Incorrect dispenser operation
|
Clogged dispensers or laundry products dispensing too soon.
|
Do not overfill dispenser. Overfilling causes immediate dispensing.
|
|
Always select Fabric Softener and/or Oxi Treat Stains options to ensure proper dispensing.
|
|
Load dispensers before starting a cycle.
|
|
It is normal for small amounts of water to be remain in dispenser at the end of the cycle.
|
|
Homes with low water pressure may result in residual powder in the dispenser. To avoid, select a warmer wash temperature if possible, depending on your load.
|
|
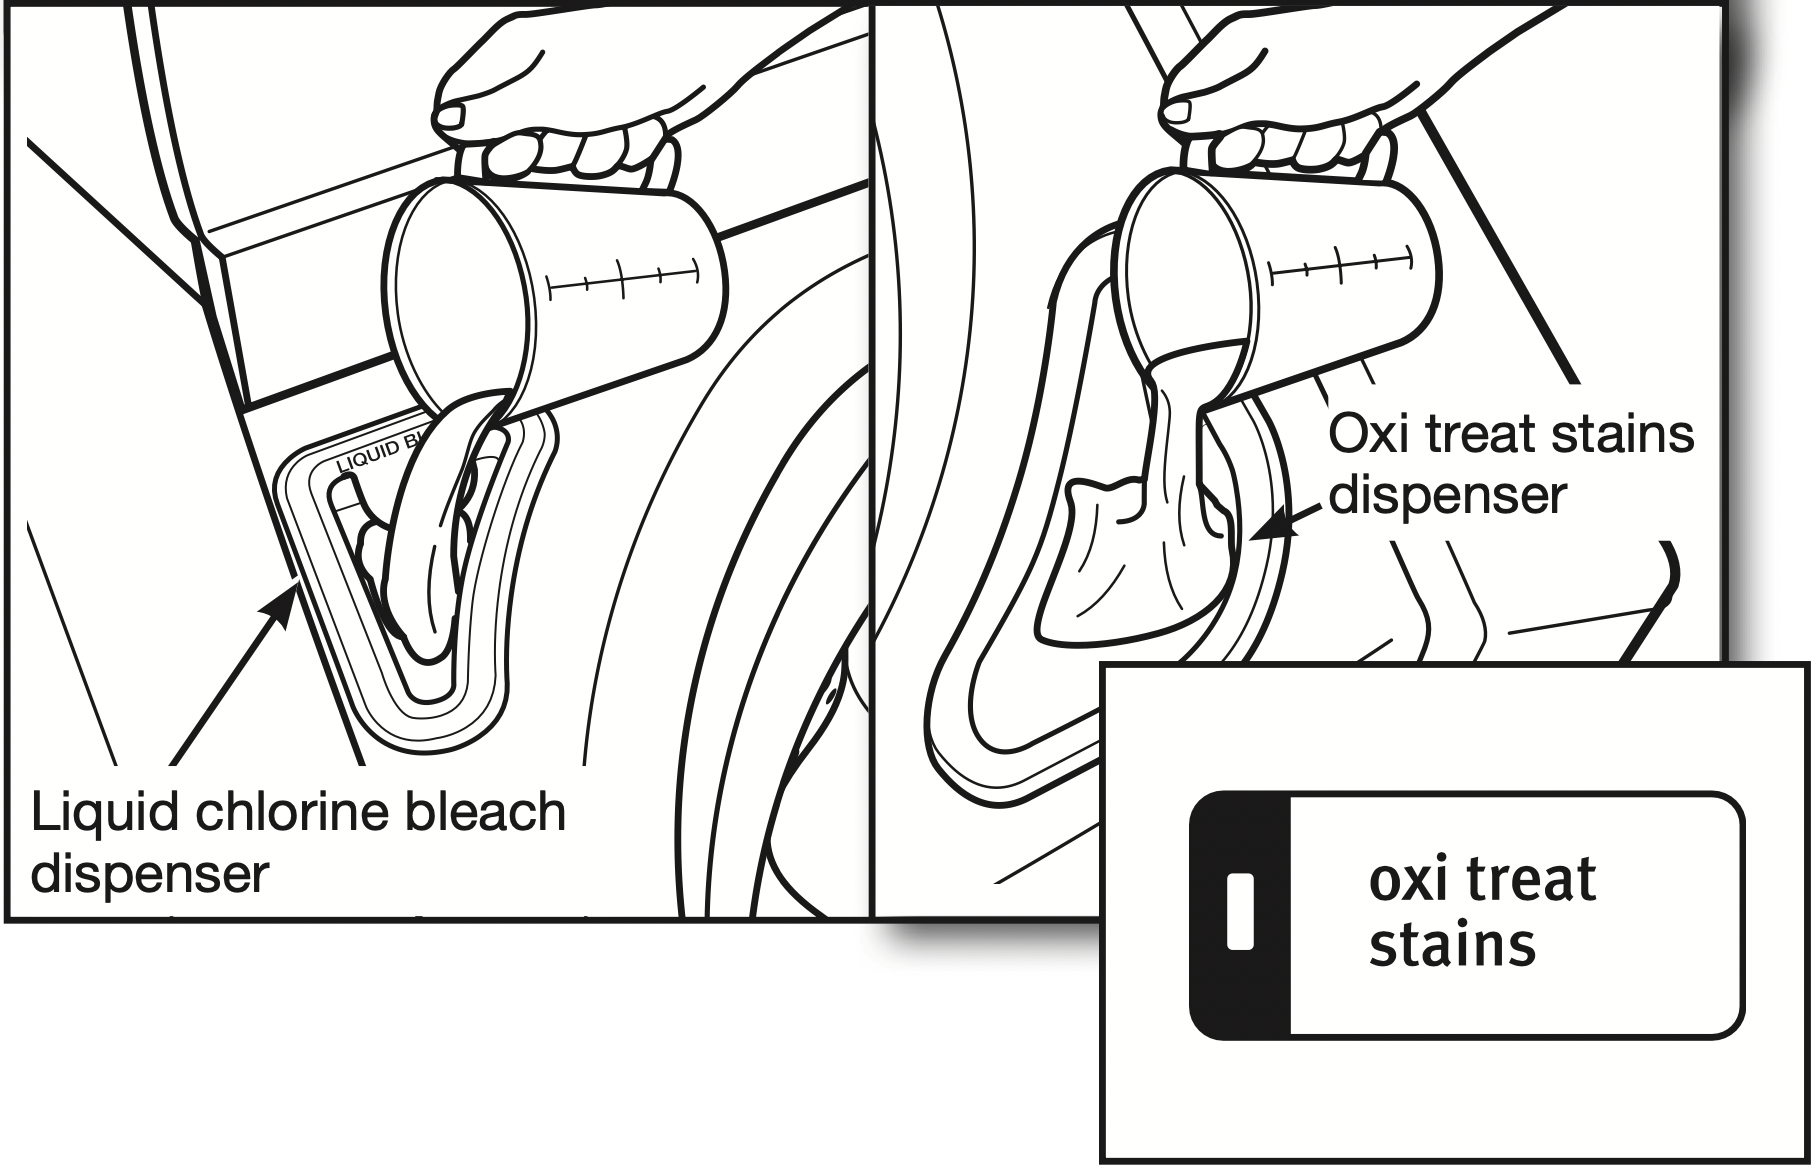
Liquid chlorine bleach notused in dispenser or Oxi Treat Stains option not selected.
|
Use only liquid chlorine bleach in the Bleach dispenser.
|
|
You may use powdered or liquid laundry boosters in the Oxi Treat Stains dispenser. Always select the Oxi Treat Stains option for proper flushing of Oxi products from dispenser. Left over powder may be wiped out by hand, if needed. Otherwise, select Oxi Treat Stains option with the next cycle to rinse out dispenser.
|
|
Error Code Appears in Display
|
|
oL (overloaded) appears in display
|
Load too large.
|
If an overload is detected, the washer will drain any water and detergent in the washer. Removeseveral items and add HE detergent. Close lid and press START/PAUSE.
|
|
uL (unbalanced load) appears in display
|
Load not balanced. The washer is running a load-balance correction routine.
|
Allow the machine to continue. If the dial is flashing and the machine has stopped, redistribute the load, close the lid, and press START/PAUSE.
|
|
LF (too long to fill) appears in display
|
Washer taking too long to fill. Drain extends more than 4.5" (114 mm) into stand pipe.
|
Check plumbing for correct drain hose installation. Use drain hose form and attach securely to drain pipe or tub. Do not tape over drain opening. See “Installation Instructions”.
|
|
Ld (too long to drainwater) appears in display
|
Washer taking too long to drain water. Drain extends more than 4.5"(114 mm) into stand pipe.
|
Check plumbing for correct drain hose installation. Use drain hose form and attach securely to drain pipe or tub. Do not tape over drain opening. See “Installation Instructions”.
|
|
Lower drain hose if the end is higher than 96" (2.4 m) above the floor. Remove any clogs from drain hose. See “Installation Instructions”.
|
|
HC (Hot and Cold hoses reversed) appears in display
|
Hot and cold inlet hoses have been installed in correctly.
|
This code will appear at the end of the wash cycle to indicate that cold water hose is connected tothe hot water inlet and hot water hose is connected to the cold water inlet.
|
|
Sd (Excess suds) appears in display
|
Excessive suds in washer. Washer is running a suds reduction routine.
|
Allow the washer to continue. Use only HE detergent.
Always measure detergent, and base detergent quantity on load size. Follow detergent manufacturer’s instructions. If the dial is flashing, reselect your desired cycle using a cold wash temperature, and press START/PAUSE. Do not add detergent.
|
|
dL (Lid cannot lock) appears in display
|
An item in the load may be keeping the lid from locking.
|
Check for items directly under the lid.
|
|
lid (Lid opened) appears in display
|
Washer lid left open.
|
Close the lid to clear the display. If the lid is left open for more than 10 minutes, the cycle will reset and water in the washer will drain.
|
|
dU (Lid cannot unlock) appears in display
|
Objects on washer lid prevent it from unlocking. |
Remove objects, such as a basket of laundry, from the top of the washer. |
|
F## code (F-type error code) appears in display
|
System error code. |
Press START/PAUSE once to clear the code. Then press START/PAUSE again to restart washer. If code appears again, call for service.
|
| Fd (Factory Default) |
Washer sets back to factory default. |
To return all options and modifiers to Factory Default, press POWER/CANCEL, select Drain & Spin cycle, and then press Extra Rinse, Fabric Softener, Extra Rinse, Fabric Softener within 5 seconds. When done correctly, the 7-segment displays show “Fd” for 3 seconds and then unit returns to Standby Mode.
|