Loading ...
Loading ...
Loading ...
49-1000585 Rev. 5 39
INSTALLATION INSTRUCTIONS
TURN ON THE WATER SUPPLY
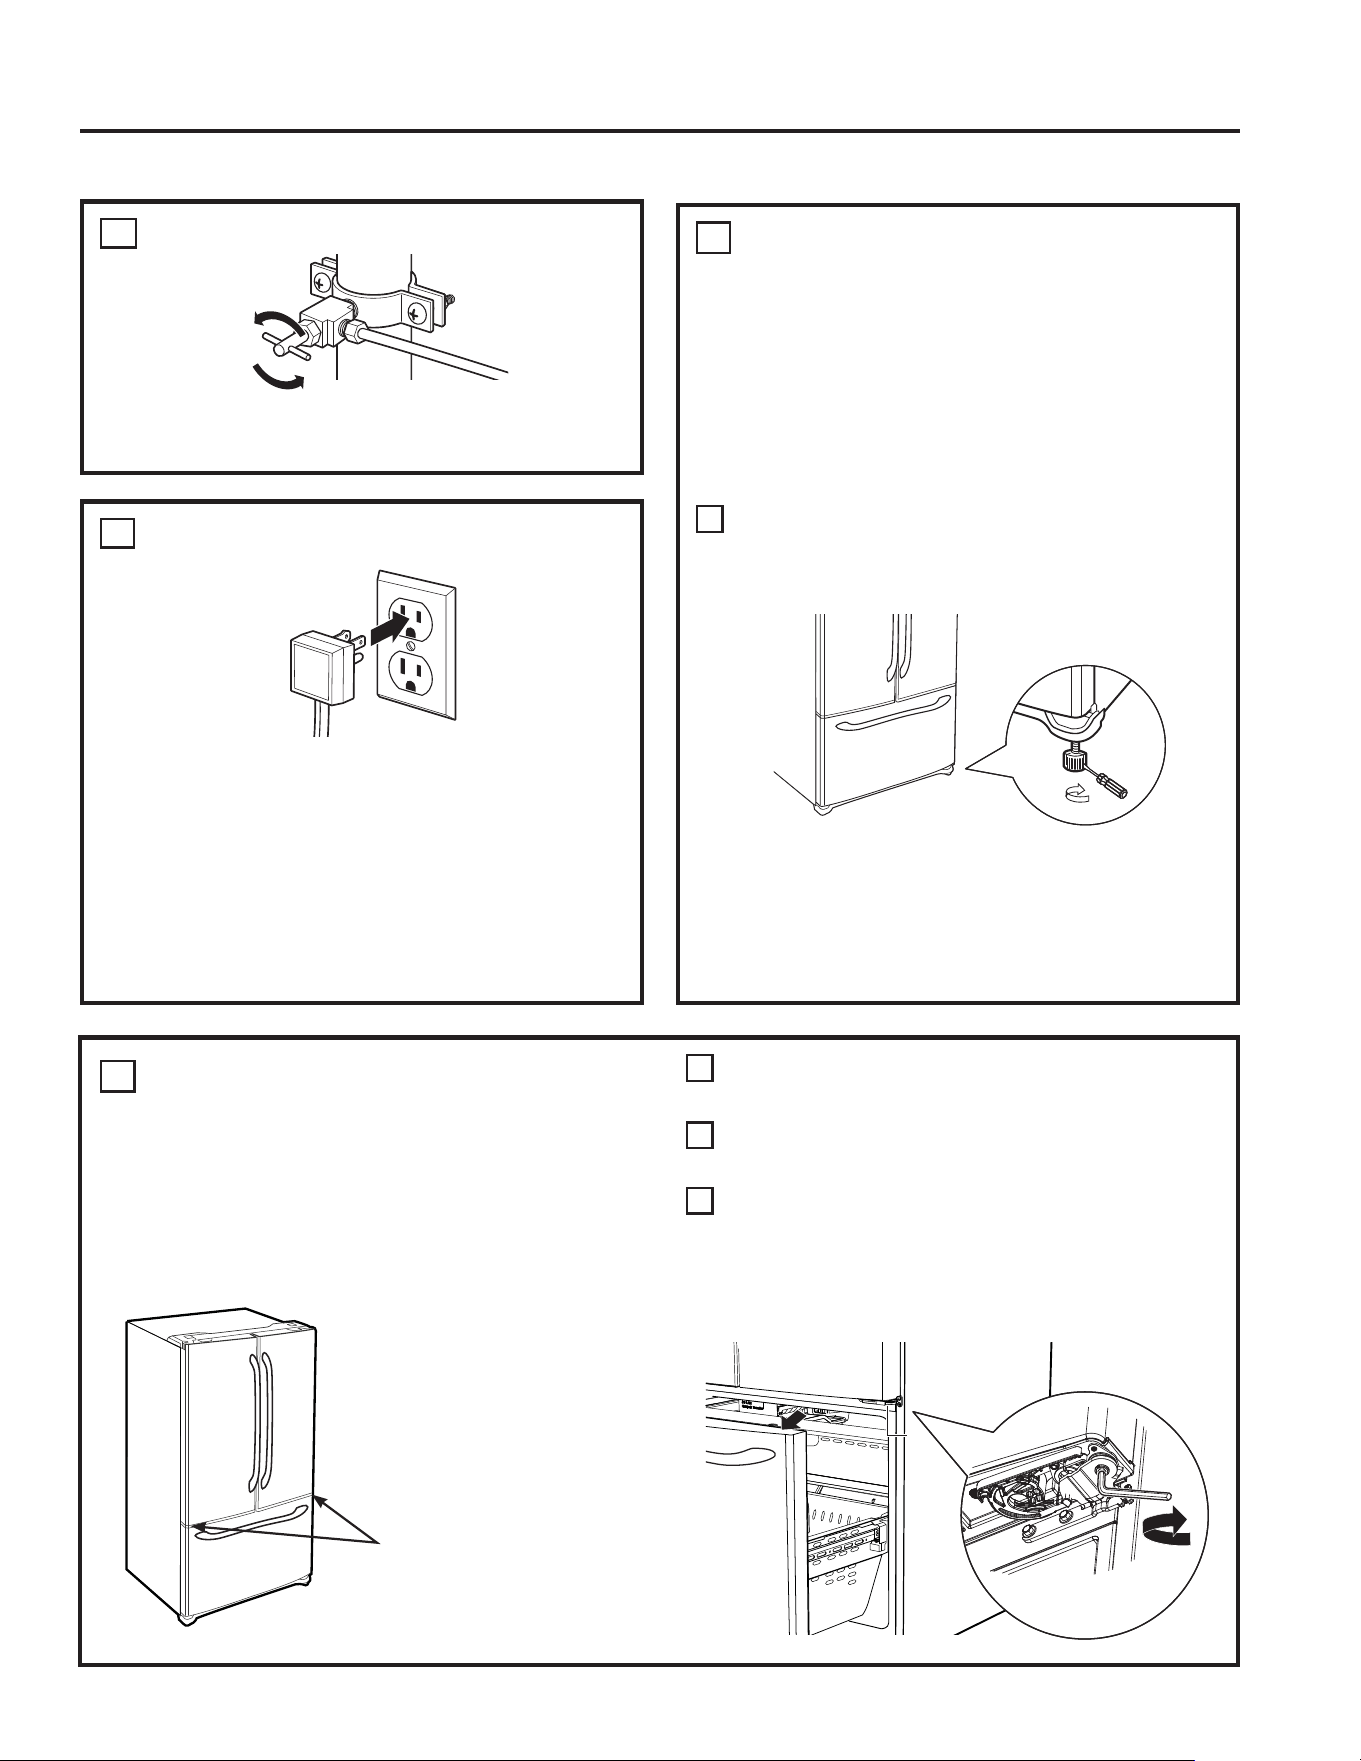
Turn the water on at the shutoff valve (house
water supply) and check for any leaks.
12
PLUG IN THE REFRIGERATOR
See the grounding information attached to the
power cord.
Once the unit is on, press the dispenser paddle
and dispense water for at least 5 minutes to
remove air from the water line, and flush the
filter. The first few batches of ice should also
EHGLVFDUGHG)RU1RQ'LVSHQVHPRGHOVWKURZ
away the first bin of ice production.
13
LEVEL THE REFRIGERATOR
The leveling legs have 2 purposes:
1. Leveling legs adjust so the refrigerator is
firmly positioned on the floor and does not
wobble.
/HYHOLQJOHJVVHUYHDVDVWDELOL]LQJEUDNH
to hold the refrigerator securely in position
during operation and cleaning. The leveling
legs also prevent the refrigerator from tipping.
Turn the leveling legs clockwise to raise the
refrigerator, counterclockwise to lower it.
NOTICE: To avoid possible property damage,
the leveling legs must be firmly touching the
floor.
14
A
)ODW+HDG6FUHZGULYHU
Raise
LEVEL THE REFRIGERATOR
DOORS
Remember a level refrigerator is necessary for
JHWWLQJWKHGRRUVSHUIHFWO\HYHQ,I\RXQHHG
help, review the previous section on leveling the
refrigerator.
A
,I\RXRSHQWKHIUHH]HUGRRU\RXFDQVHH
the center hinge.
B
,QVHUW´$OOHQZUHQFKLQWRWKHVKDIWRIWKH
center hinge.
C
Adjust the height by turning clockwise or
counterclockwise. When you turn
counterclockwise, the door will move up.
When you turn clockwise, the door will move
down.
15
Adjustment
points
Installation Instructions
INSTALLING THE REFRIGERATOR (Cont.)
RAISE
Loading ...
Loading ...
Loading ...