
English
User’s Guide
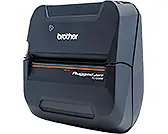
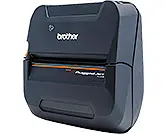
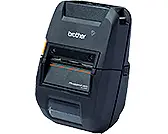
P715eBT
i
Please read this guide, including all Precautions, before using this label printer. After reading this guide, keep it in
a safe place.
For FAQs, Troubleshooting, and to download the label printer’s software and manuals, visit support.brother.com
.
PT-P715eBT
User’s Guide (English)
Supplies
Brother TZe Ribbon Cassette Compatible
widths
0.47, 0.94 in.
12, 24 mm
Brother TZe Tape Cassette
Compatible widths
0.13, 0.23, 0.35, 0.47, 0.70, 0.94 in.
3.5, 6, 9, 12, 18, 24 mm
Head Cleaning Tape Cassette TZe-CL4
Rechargeable Li-ion Battery PA-BT-005
• The available supplies may vary depending on the country or region.
• Brother reserves the right to make changes without notice in the specifications and materials contained herein
and shall not be responsible for any damages (including consequential) caused by reliance on the materials
presented, including but not limited to typographical and other errors relating to the publications.
• Unauthorized duplication or reproduction of any or all content of this document is prohibited.
• Please note that we cannot assume any responsibility for any damage or lost profit arising from the use of the
ribbon/label created with this label printer or the disappearance or change of data due to failure, repair or
consumables using battery, or any claim from a third party.
Version 03

ii
Table of Contents
1 Precautions 1
Safety Precautions ............................................................................................................................. 1
General Precautions .......................................................................................................................... 2
2 Set Up Your Label Printer 3
Parts Description ............................................................................................................................... 3
Insert the Ribbon Cassette or Tape Cassette ....................................................................................4
Charge the Battery ............................................................................................................................. 5
Remove Battery for Replacement or Disposal ............................................................................ 6
Turn Power On or Off ........................................................................................................................ 7
3 Print from Your Mobile Device 8
Pair the Label Printer with Your Mobile Device .................................................................................9
4 Print from Your Computer 10
Windows .......................................................................................................................................... 11
Create Ribbon/Labels with P-touch Editor ................................................................................. 11
Configure Settings Using the Printer Setting Tool ..................................................................... 12
Apply Settings Changes to Multiple Label Printers .................................................................... 13
Update Software ........................................................................................................................ 13
Update Firmware ....................................................................................................................... 13
Mac .................................................................................................................................................. 14
Create Ribbons/Labels with P-touch Editor ............................................................................... 14
Configure Settings Using the Printer Setting Tool ..................................................................... 14
Apply Settings Changes to Multiple Label Printers .................................................................... 15
Update Firmware ....................................................................................................................... 15
5 Appendix 16
Maintenance .................................................................................................................................... 16
Clean the Label Printer Exterior ................................................................................................ 16
Clean the Print Head ................................................................................................................. 16
Clean the Tape Cutter ............................................................................................................... 17
Troubleshooting ............................................................................................................................... 18
LED Indications ......................................................................................................................... 18
LED Troubleshooting ................................................................................................................. 19
Product Specifications ..................................................................................................................... 22
Trademarks ...................................................................................................................................... 23

1
Safety Precautions 1
Follow these guidelines to avoid the risk of heat generation, smoking, explosion, fire, or injury.
Rechargeable Li-ion Battery
• Do not allow the battery to come into contact with liquids.
• Do not charge, use, or leave the battery in high temperature (above 140 °F/60 °C) locations.
• Use the included USB cable to charge.
• Use the battery only for its intended purpose.
• Keep the battery away from heat and fire.
• Do not connect the + and - terminals with metal objects such as wire. Do not carry or store the battery with metal
objects.
• Do not throw, hit or damage the battery in any way.
• Do not solder any connections to the battery.
• Do not disassemble or modify the battery.
• Do not dispose of the battery with household waste.
Rechargeable Li-ion Battery
• Keep the battery away from infants. If the battery is ingested, seek immediate medical advice.
• Stop using the battery if there are noticeable abnormalities such as smell, heat, deformities, or discoloration.
• If liquid from the battery gets into your eyes, wash them with clean water and see a doctor immediately.
Label Printer and USB Cable
• Use the included USB cable to prevent any damage.
• Do not use during a thunderstorm.
• Do not damage.
• Do not place heavy objects on.
• Do not forcibly bend or pull.
• Do not disassemble or modify.
• Do not drop or hit.
• Do not allow to come into contact with liquids.
• If you notice abnormalities such as smell, heat generation, discoloration, or deformation while in use or storage,
stop using the label printer, disconnect the USB cable, and remove the battery.
• When the label printer is not being used, store it out of the reach of children. In addition, do not allow children to
put any label printer parts or ribbons/labels in their mouths. If ingested, seek immediate medical advice.
1
Precautions
DANGER
Failure to observe instructions and warnings will result in death or serious injuries.
WARNING
Failure to observe instructions and warnings could result in death or serious injuries.
Precautions
2
Rechargeable Li-ion Battery
If liquid from the battery gets onto skin or clothes, immediately rinse them with water.
Label Printer and USB Cable
• Use the dedicated battery (PA-BT-005).
• When opening and closing the Cassette Cover, use caution to prevent your fingers from being trapped.
• Do not touch the Print Head.
• Do not touch the cutter blade or insert your fingers inside the Tape Exit Slot.
General Precautions 1
Label Printer, Ribbon Cassette, Tape Cassette, or USB Cable
• Do not use in any way or for any purpose not described in this guide. Doing so may result in accidents or damage.
• Use Brother Ribbon Cassettes or Tape Cassettes.
• Do not put any foreign objects into the Tape Exit Slot, the USB Port, battery compartment, etc.
• DO NOT use, charge, or store the product:
- Where it may come into contact with liquids
- Where condensation forms
- Where there is a lot of dust
- Where the temperature or humidity are extreme. See Product Specifications
- Near flames, a heater or in direct sunlight
• Do not try to print if the cassette is empty; it will damage the Print Head.
• Do not pull the ribbon/tape while printing or feeding; it will damage the ribbon/tape and the label printer.
• The length of a printed ribbon/label may differ from the displayed ribbon/label length.
• Depending on the location, material, and environmental conditions, labels may unpeel or become irremovable, or
the color may change or be transferred to other objects. Before applying labels, check the environmental conditions
and the material.
• When printing multiple copies of a ribbon/label, the label printer will not detect the end of the Ribbon/Tape Cassette
and will continue printing.
• Printed characters may look different than previewed, as your device's or computer’s screen may have a higher
resolution than the label printer.
• Printed small text may not be as clear as it is displayed.
• White and Gold printed objects may not always print clearly.
• The backing of some types of tapes may be pre-cut to make it easier to peel the backing. To remove the backing,
simply fold the label lengthwise with the text facing inwards to expose the inside edges of the backing. Next, peel
off the backing one piece at a time.
• Labels may be difficult to attach to surfaces that are wet, dirty, or uneven. The labels may peel off easily from these
surfaces.
• For rough and textured surfaces, we recommend using Extra Strength Adhesive Tape.
• Be sure to read the instructions provided with Ribbon, Fabric Tapes, Extra Strength Adhesive Tapes, or other
special tapes and observe all precautions noted in the instructions.
CAUTION
Failure to observe instructions and warnings could result in minor or moderate injuries.
3
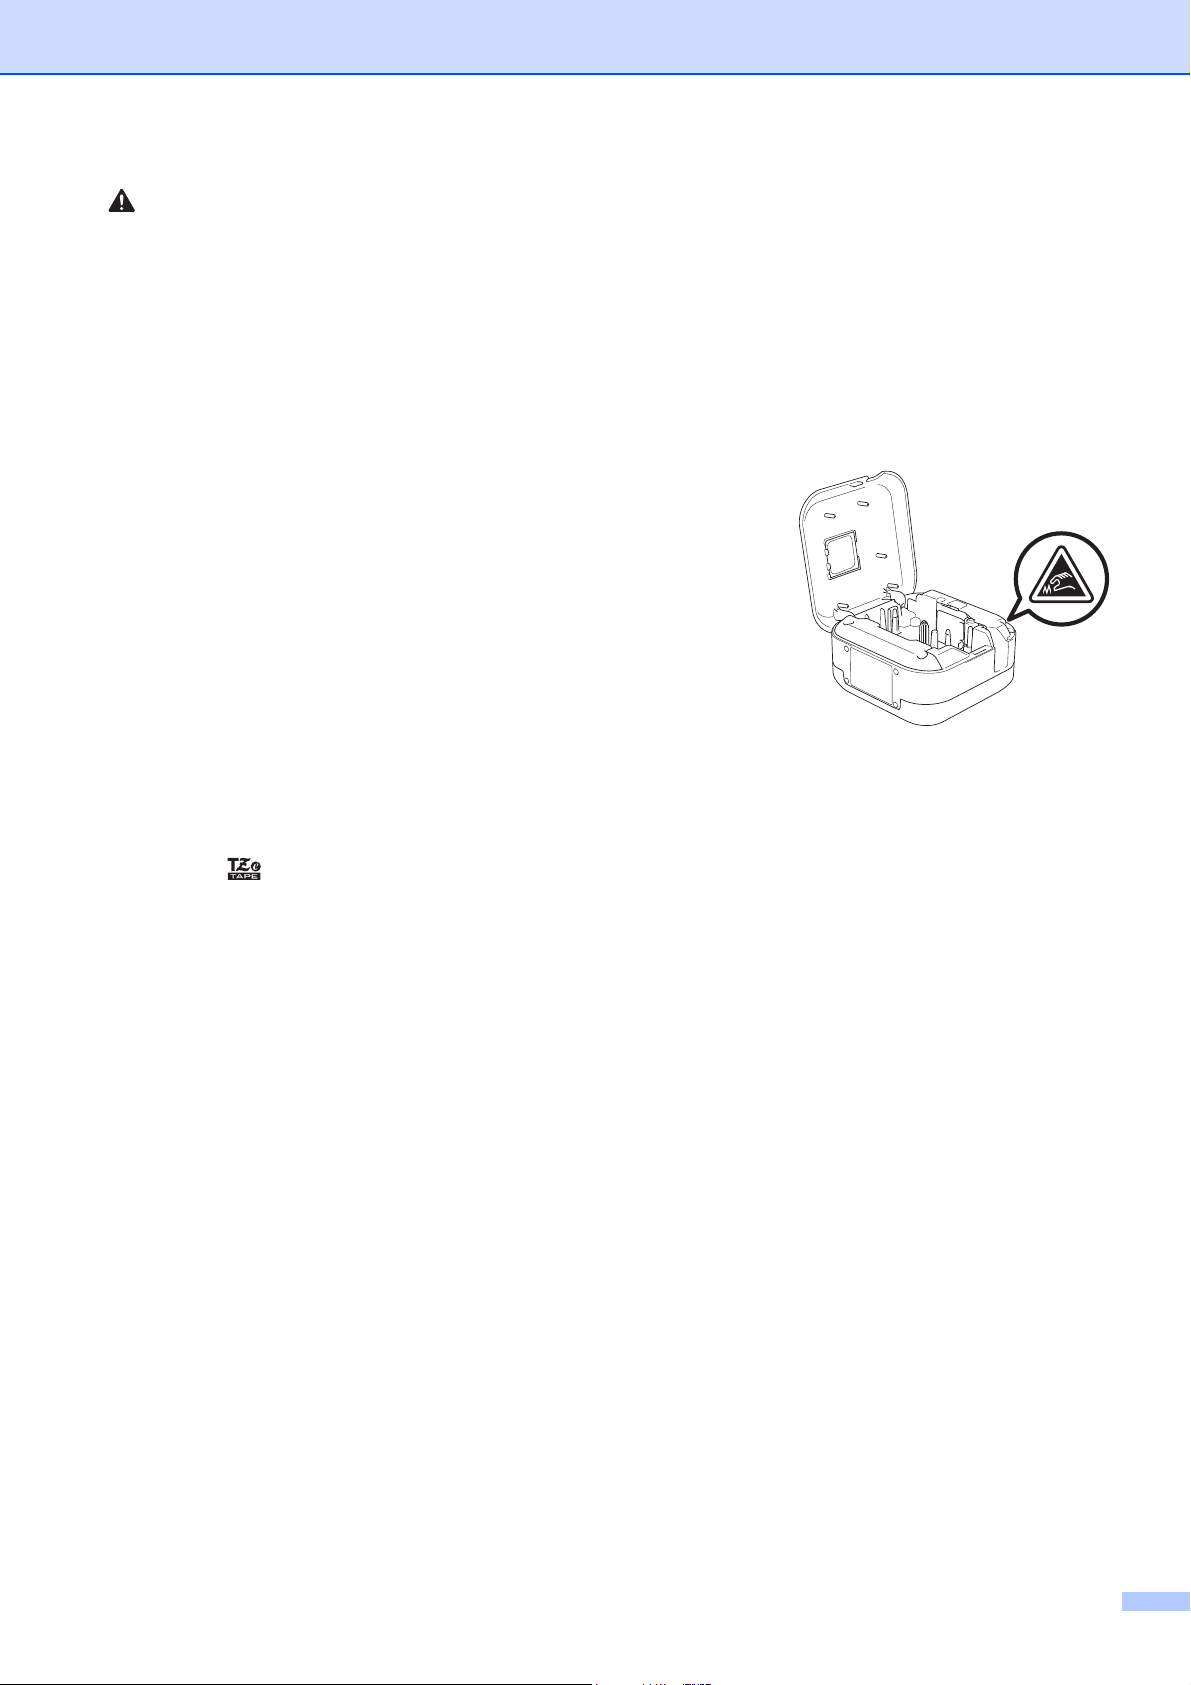
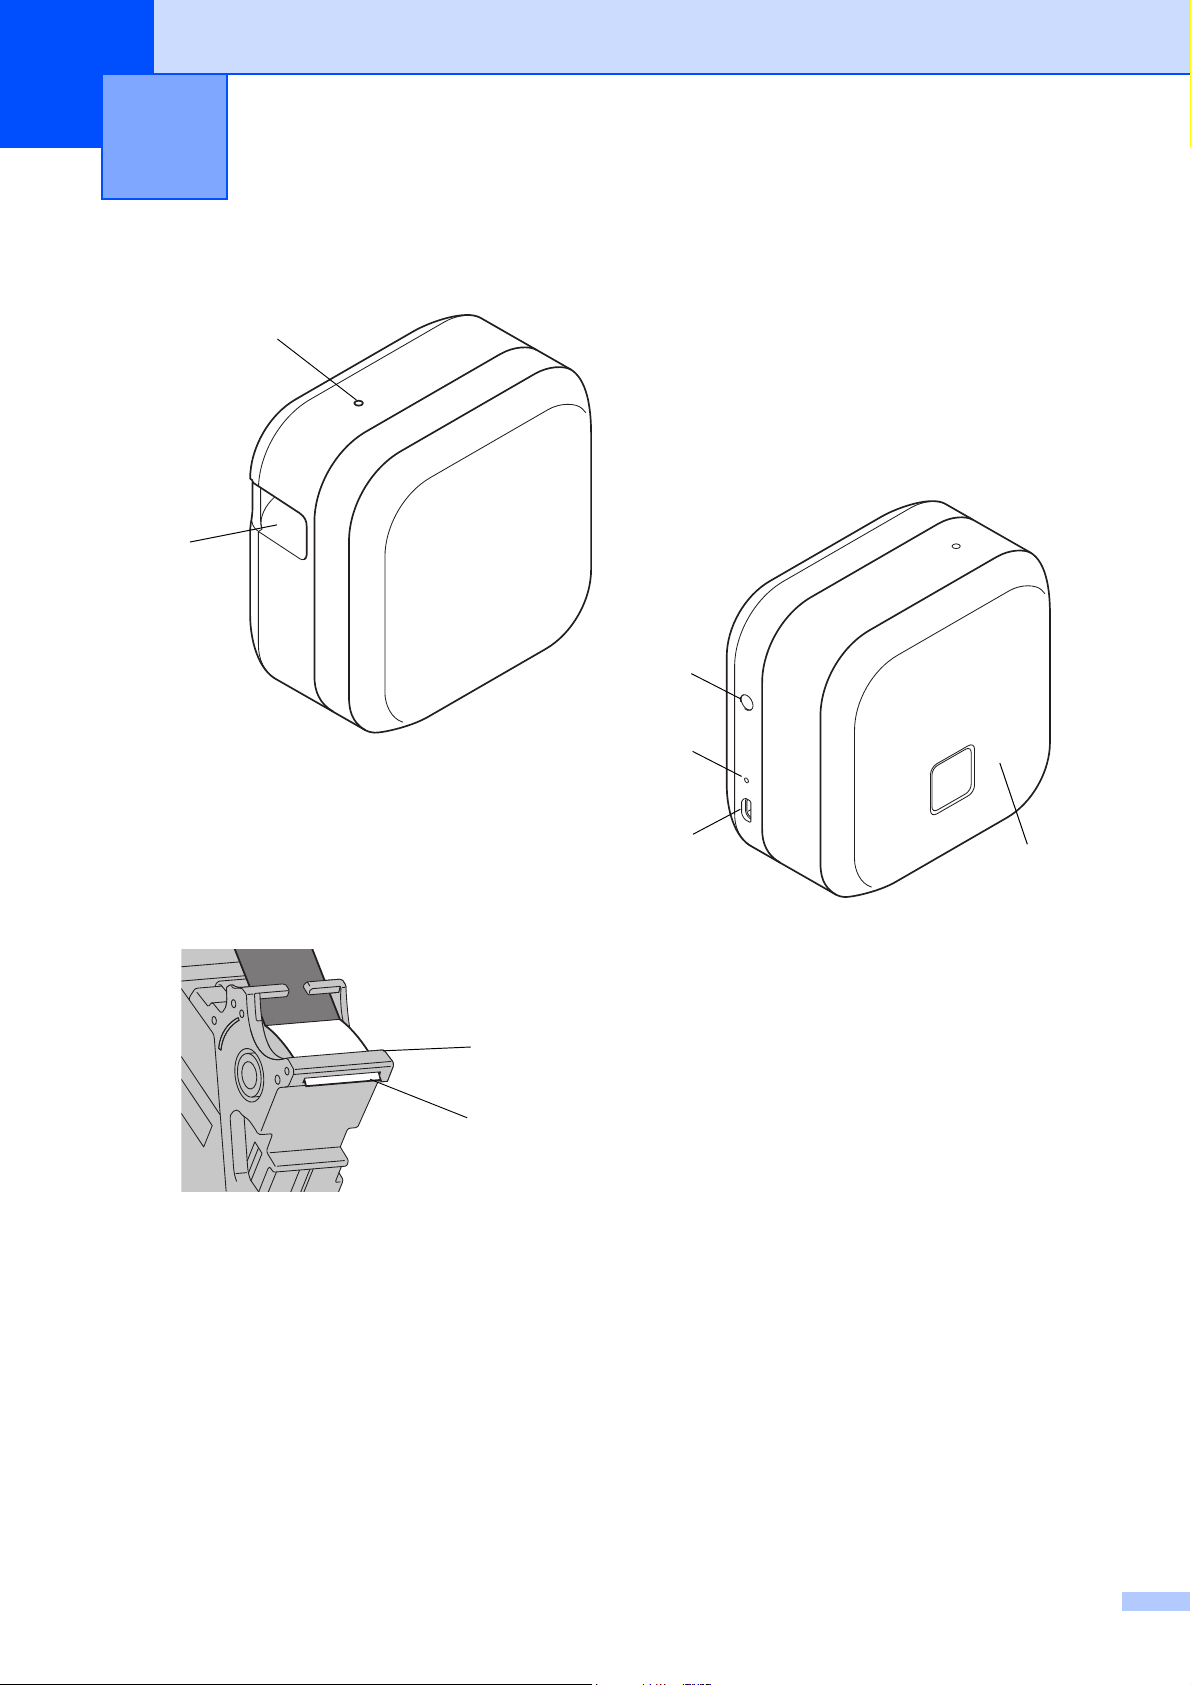
Parts Description 2
2
Set Up Your Label Printer
Power LED
Tape Exit Slot
Power Button
Battery LED
USB Port
Cassette Cover
Tape Guide
End of Tape
Set Up Your Label Printer
4
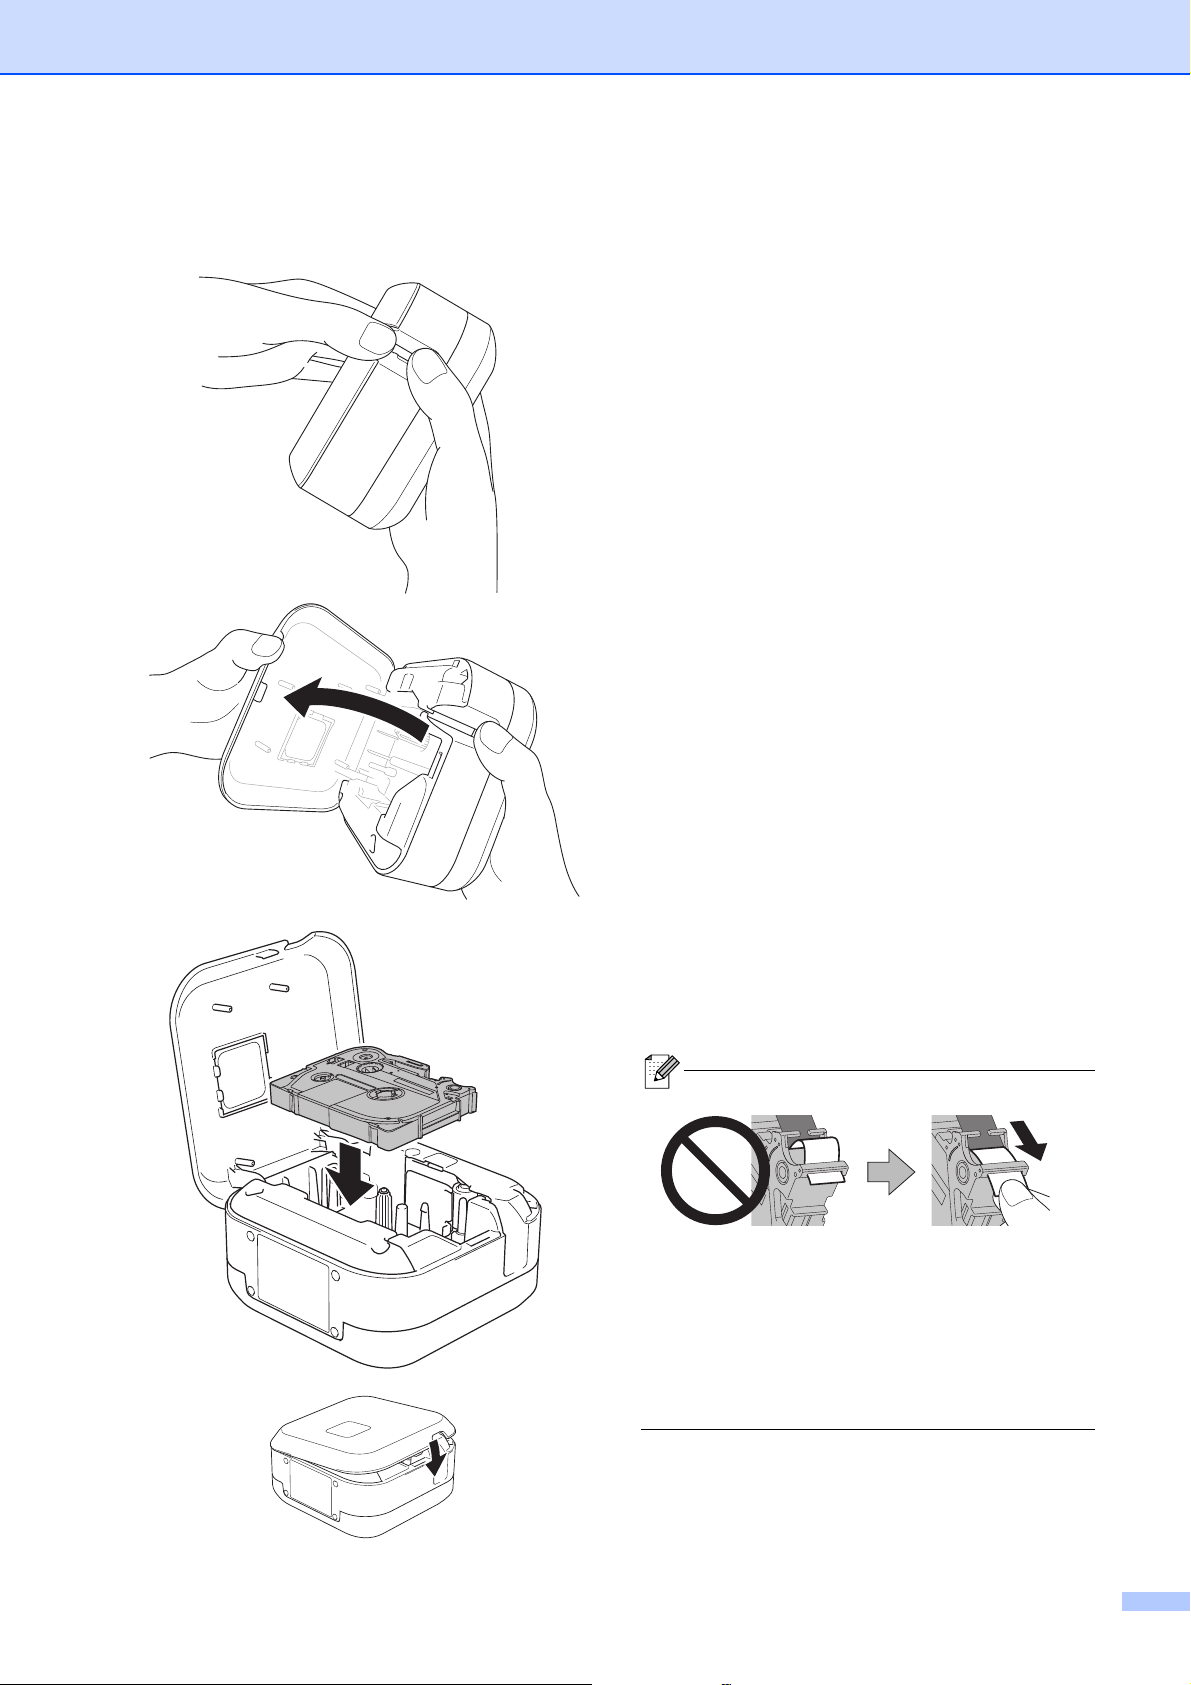
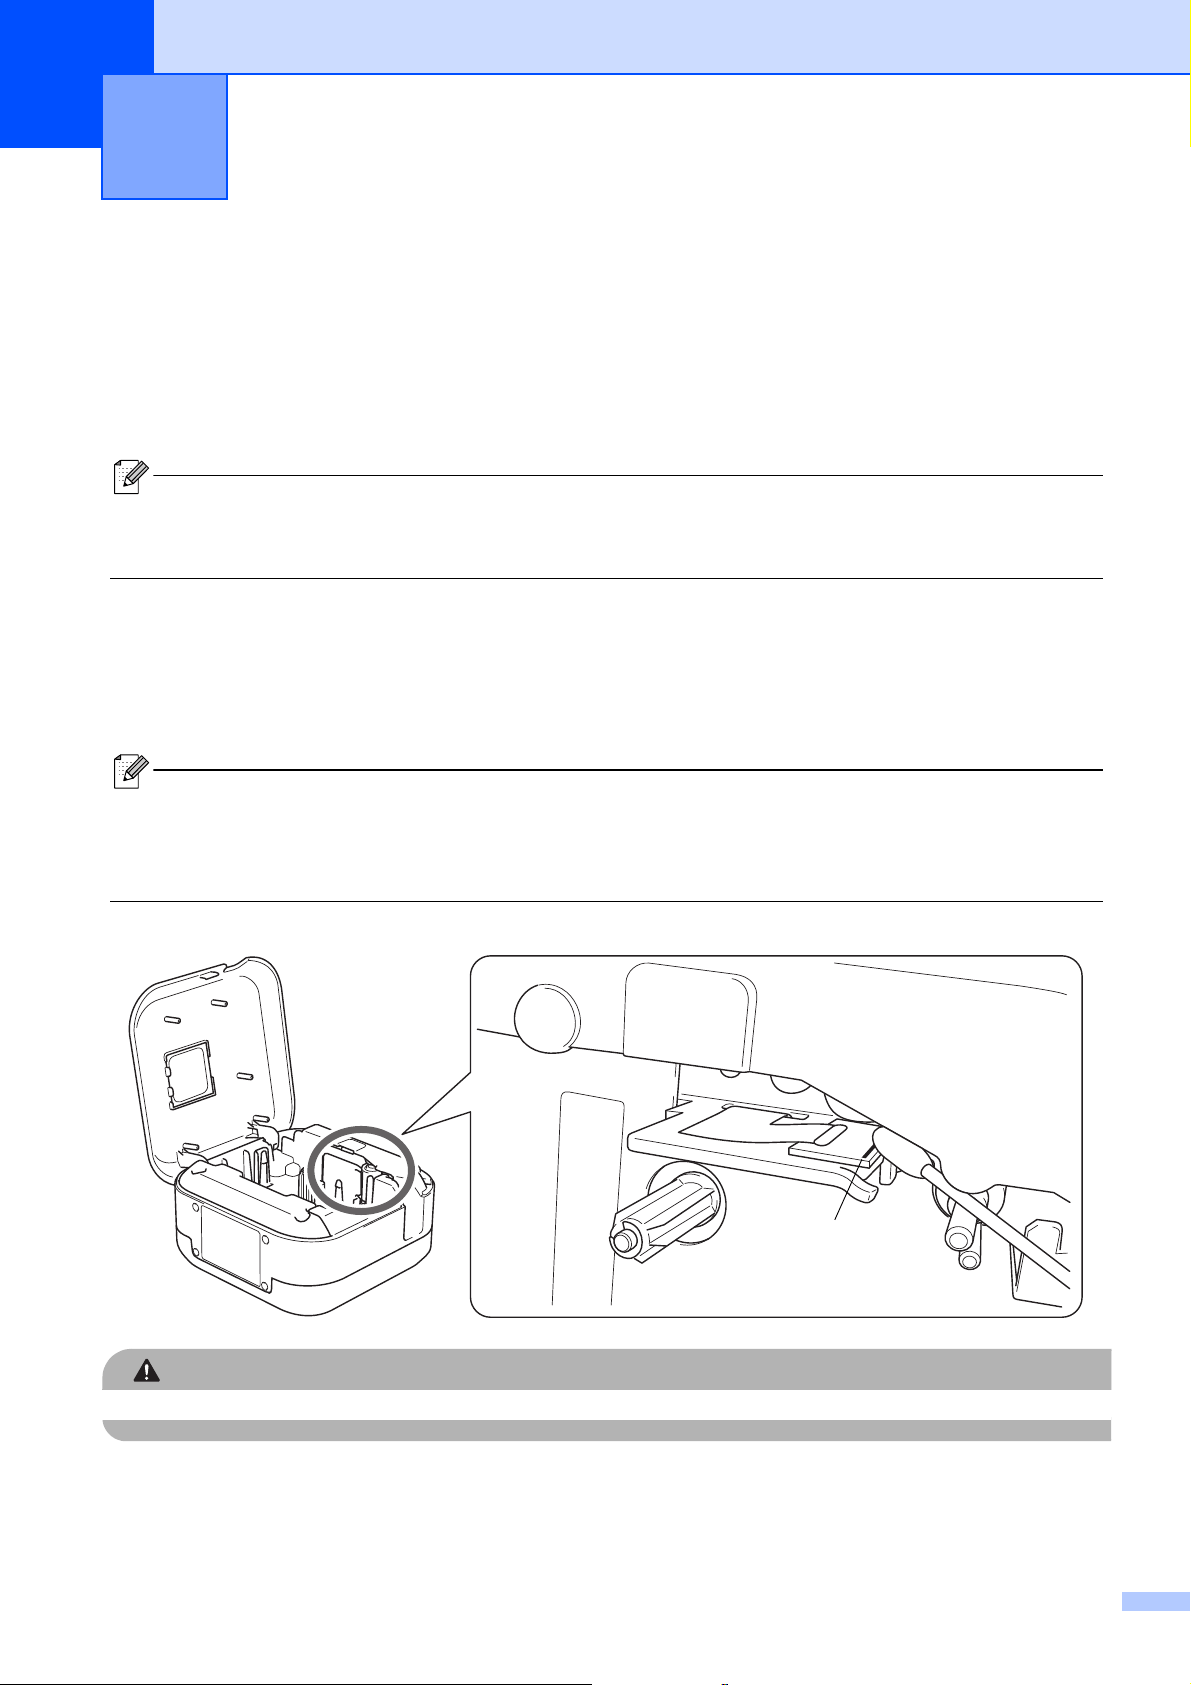
Insert the Ribbon Cassette or Tape Cassette 2
a Place your fingers on the Tape Exit Slot,
as shown.
b Open the Cassette Cover by pulling the Tape
Exit Slot to the left.
c Insert the Ribbon/Tape Cassette following the
drawing marked inside the case. Confirm that
the tip of the ribbon/tape is pointed at the Tape
Exit Slot.
d Press the Ribbon/Tape Cassette into the
label printer until it locks into place and close
the Cassette Cover.
• After the ribbon/tape passes under the Tape
Guide, pull the tip to remove any slack in the
ribbon/tape.
• Make sure the ribbon/tape is not caught in the
unit when inserting or removing the Tape
Cassette.
Set Up Your Label Printer
5
Charge the Battery 2
a Remove the protective sheet (first time only).
b
Connect the label printer to the computer using the included USB cable, or connect the USB cable to a USB AC
Adapter (not included) suitable for charging mobile devices, and plug the adapter into a power source. Charge
until the Battery LED turns off.
• Use the included USB cable.
• If charging the battery using a computer, make sure the computer is on.
Notes on Using the Rechargeable Li-ion Battery
• Charge the battery in environments between 50 °F and 95 °F/10 °C and 35 °C, otherwise the battery will not
charge, and the Battery LED will remain lit.
• If the label printer is used to print, feed, or perform another operation while charging, charging may stop even
though the battery is not fully charged. Charging resumes when the operation is completed.
Rechargeable Li-ion Battery Characteristics
To ensure the highest performance and longest life from the Rechargeable Li-ion Battery, when storing the label
printer for a long period of time:
• Charge once every six months.
• Store in a cool dry place out of direct sunlight, between 50 °F and 95 °F/10 °C and 35 °C.
USB AC Adapter
(not included)
5 V DC, 0.5 A – 2 A
USB Port
(on computer)
5 V DC, 0.5 A – 2 A
Set Up Your Label Printer
6
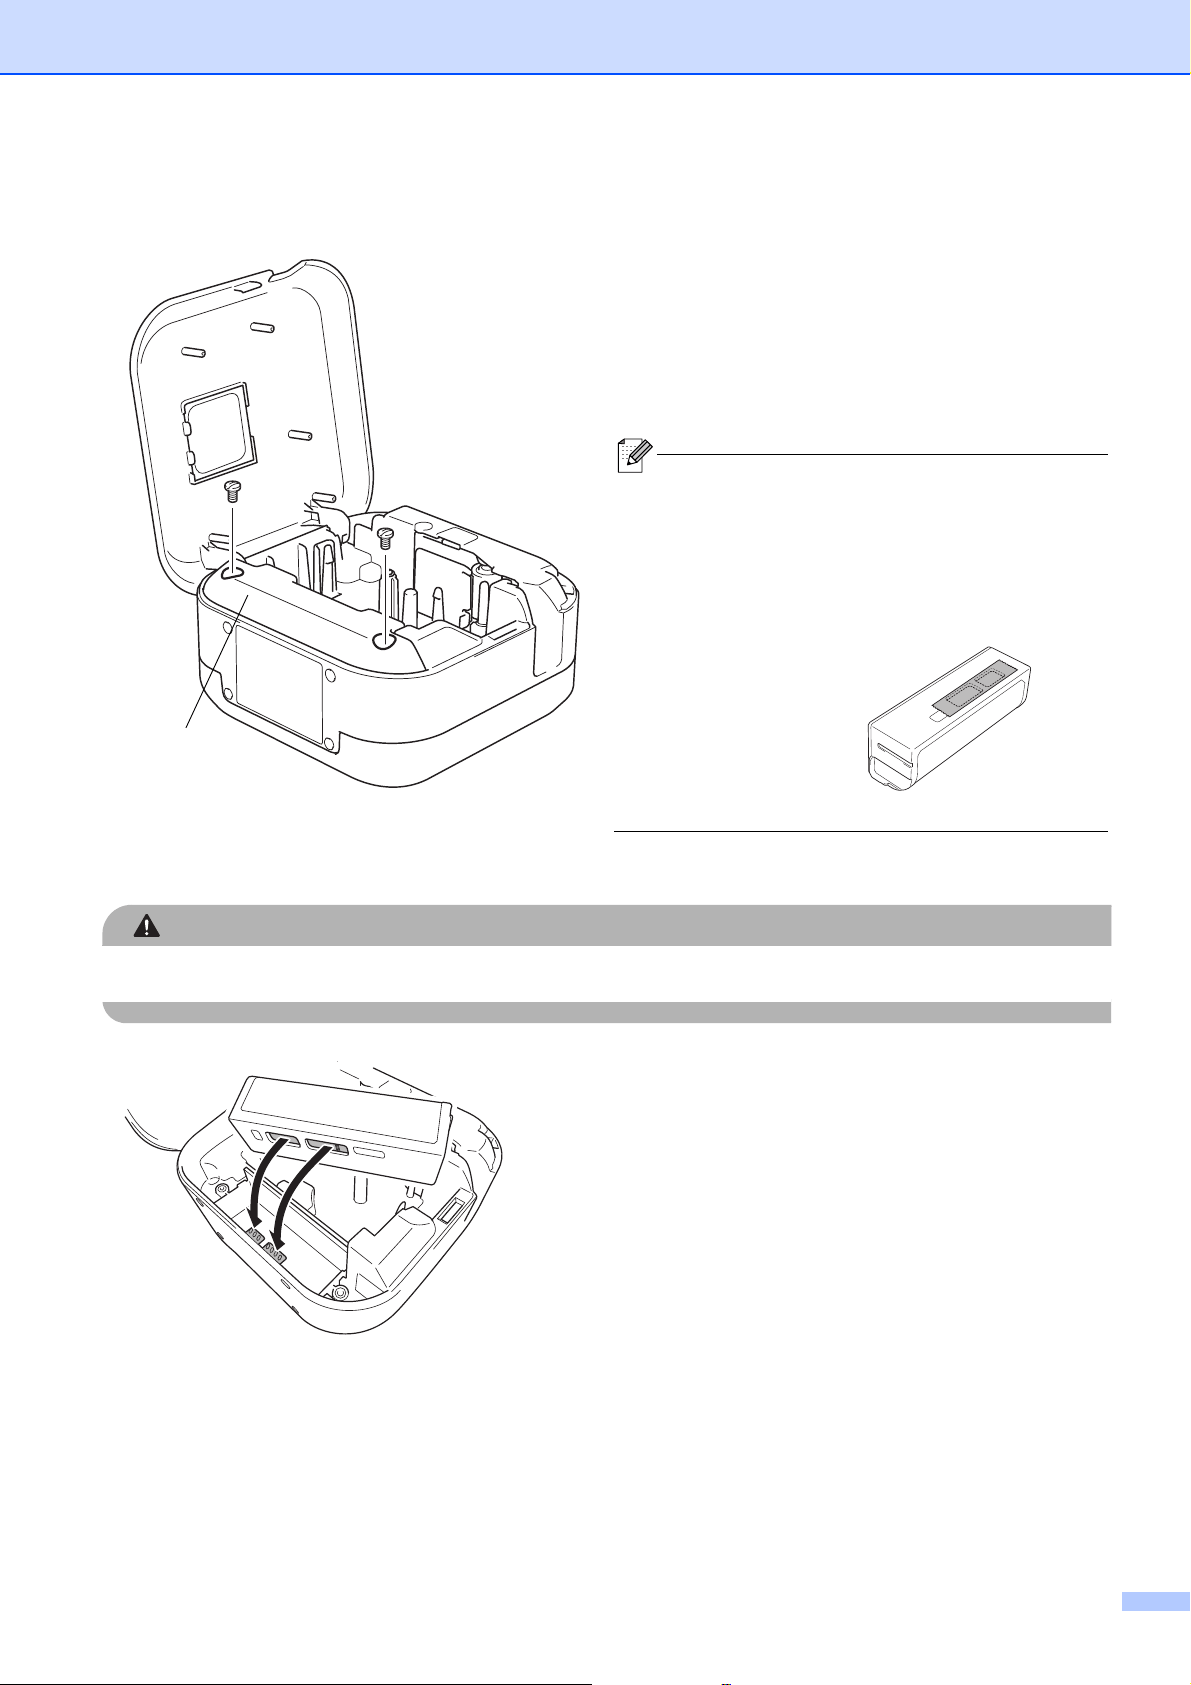
Remove Battery for Replacement or Disposal 2
a Turn the label printer off.
b Open the Cassette Cover.
c Remove the two screws from the Battery Cover
using a flat-bladed screwdriver.
d Remove the battery.
DANGER
Do not dispose of the battery with household waste.
There is a risk of environmental damage, explosion, or fire.
e When reinserting the battery, make sure the
battery's contacts are touching the contacts
inside the battery compartment.
f Replace the Battery Cover, reinsert the screws,
and tighten them with a flat-bladed screwdriver.
g Close the Cassette Cover.
Battery Cover
• Dispose of batteries at an appropriate collection
point. Be sure to observe all applicable local
regulations.
• When storing or discarding a battery, cover the
contacts with cellophane tape to prevent it from
short-circuiting.

Set Up Your Label Printer
7
Turn Power On or Off 2
Power On Press the Power Button.
Power Off Press and hold the Power Button until the Power LED turns off.
8
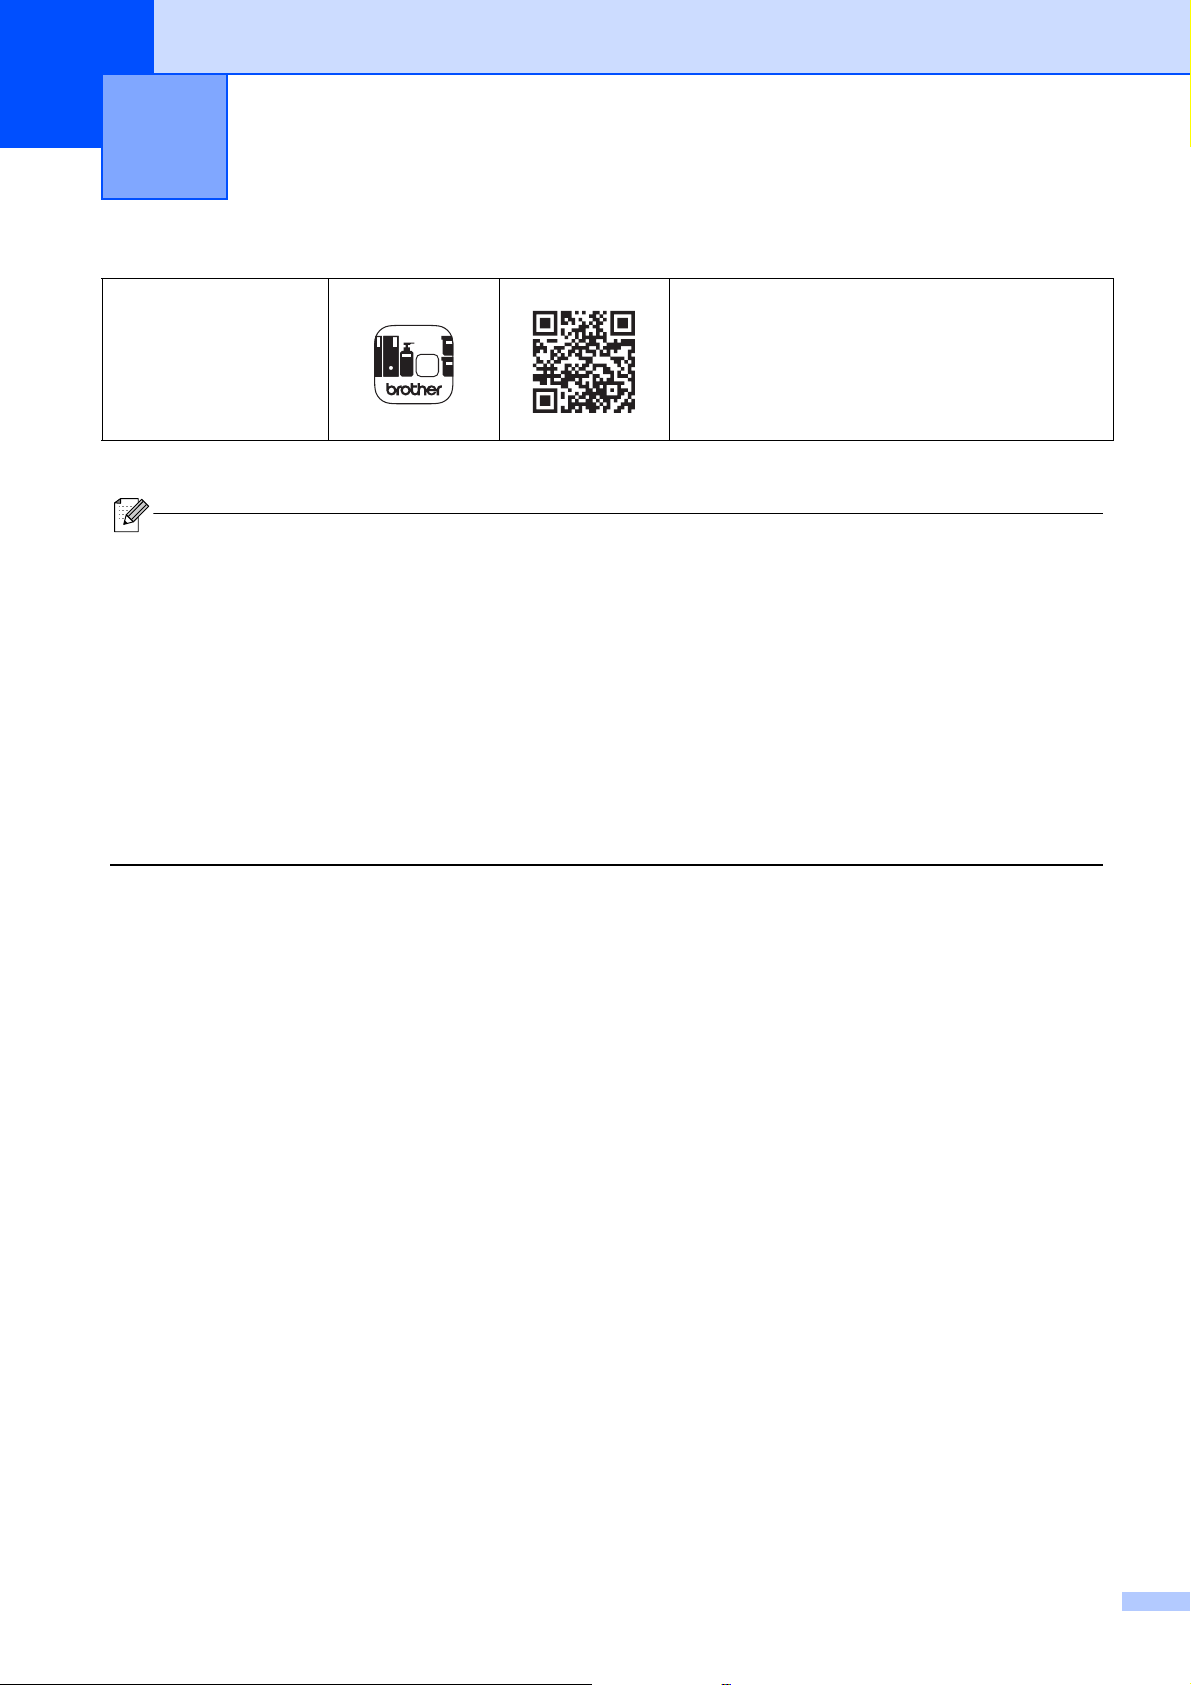
Download the P-touch application from the App Store or Google Play™.
3
Print from Your Mobile Device
P-touch Design&Print Design and create stylish labels for work or home.
• When using TZe-R*** ribbon, press Print, and then select Special Tape in Cut Options.
• Glue from previous labels may stick to the cutter, causing uneven cuts in the satin ribbon.
• We recommend cutting the ribbon manually.
• When using tape labels, after the last label prints, press the Power Button twice quickly to eject and cut the last
label. Note that the label printer will feed about 1 in./25 mm of leader tape before the next new label when you
use this method.
• Due to the structure of the laminate, when Auto Cut is ON, the label printer feeds approximately 1 in./25 mm of
leader tape before every new label.
• To save ribbon/tape, change these settings in the app:
P-touch Design&Print - Turn Cut the last label: OFF
Then print your labels and leave the last label in the label printer until you are ready to print a new label.
Print from Your Mobile Device
9
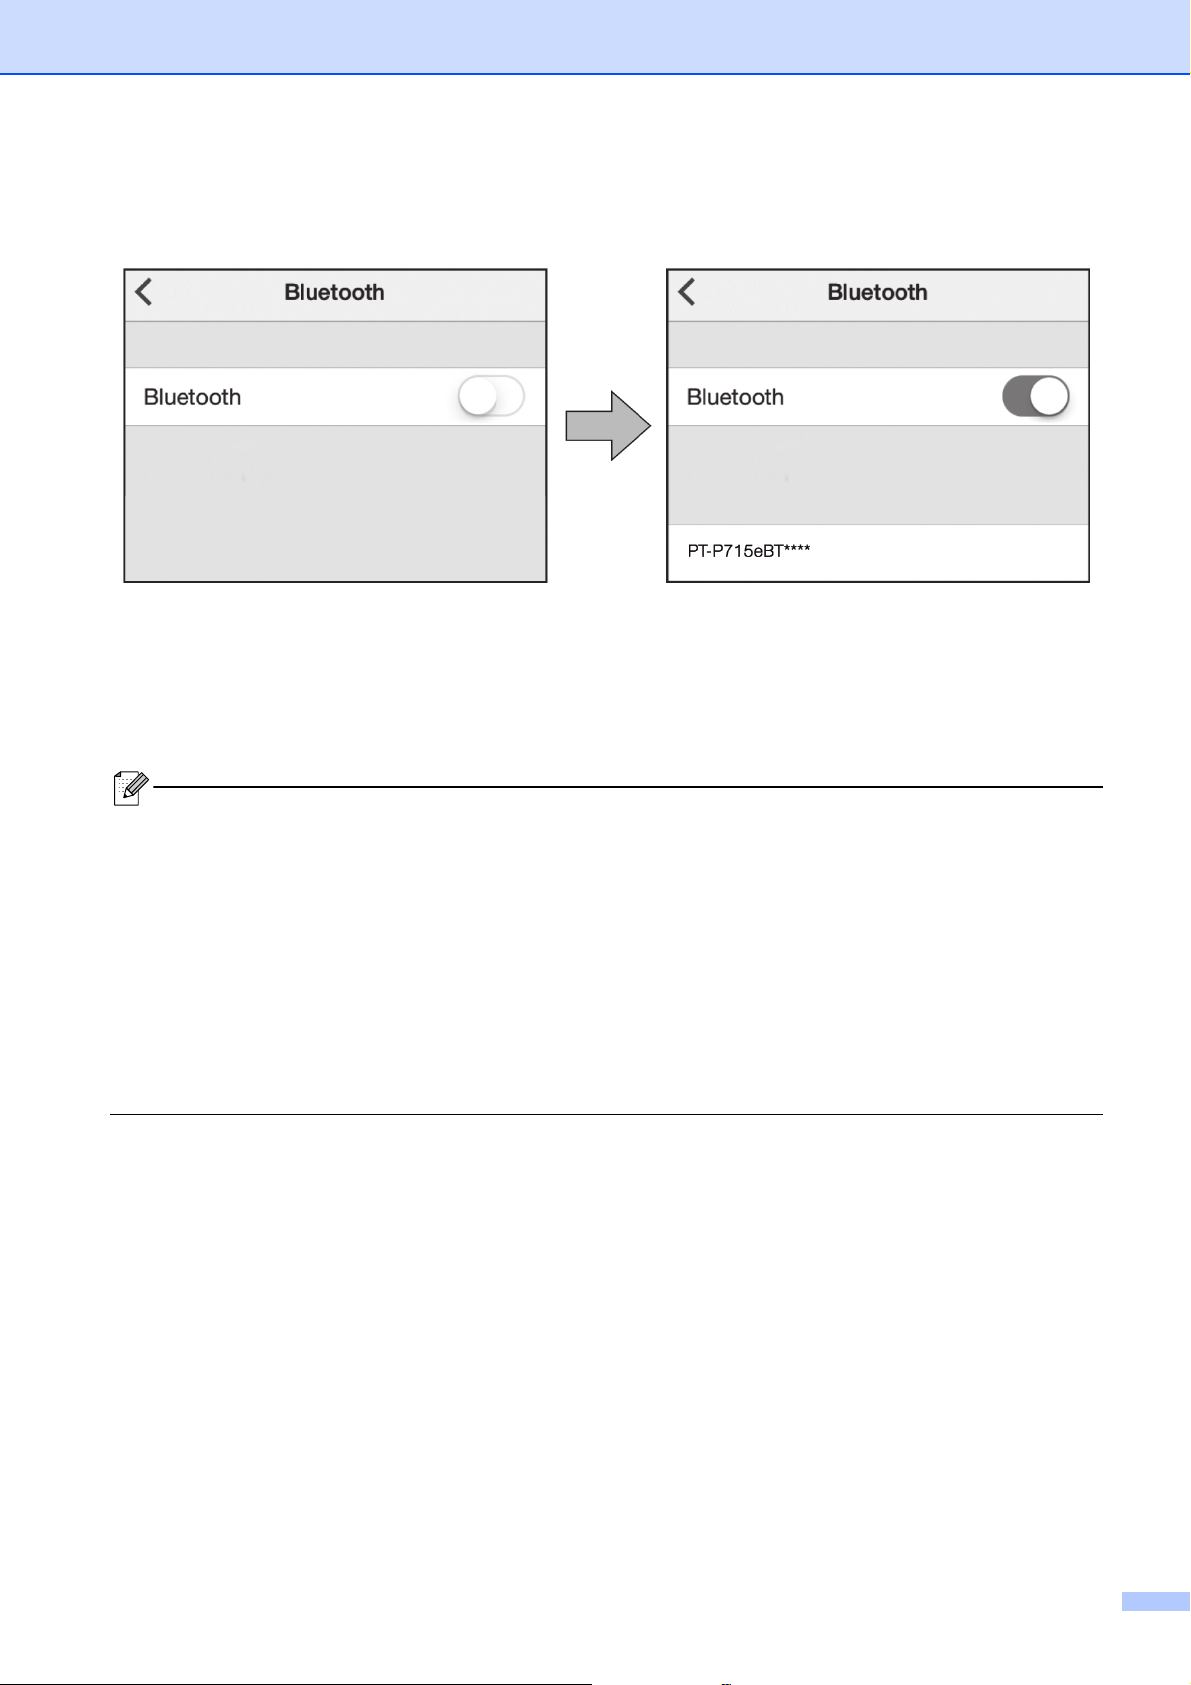
Pair the Label Printer with Your Mobile Device 3
On your mobile device:
a Go to the settings menu and make sure the Bluetooth
®
option is on.
b Select PT-P715eBT**** (where **** is the last four digits of your label printer’s serial number. The
unit's serial number is located inside the Cassette Cover, underneath the TZe Tape Cassette.).
• If asked to enter a PIN Code, enter "0000".
• Pairing instructions may differ slightly, depending on your mobile device.
• If the label printer is not discovered by your smartphone or tablet via Bluetooth, check the following:
- The label printer may be connected to another mobile device. If so, turn off Bluetooth on that device, or turn
the label printer off and then on again.
- Check that the label printer is not in sleep mode.
- Place your mobile device as close as possible to the label printer.
- Make sure there are no obstacles or items that emit radio waves, such as a microwave oven, between the label
printer and your mobile device. If such obstacles or items are present, use the label printer away from them.
• This label printer does not support Wi-Fi connections.
10
Visit install.brother and install the printer driver and P-touch Editor by following the on-screen instructions.
4
Print from Your Computer
The following software can be selected
for installation:
Features
Printer Driver Software required to print from a label printer.
P-touch Editor
Label creation software for computers. This application comes with
built-in drawing tools that allow you to print a wide variety of custom
labels in complex layouts with text of different fonts and styles, frames,
imported images, barcodes, etc.
P-touch Update Software
Update applications to the latest version.
Visit support.brother.com
to update P-touch Editor for Mac.
Printer Setting Tool Configure settings for the label printer.
Print from Your Computer
11
Windows 4
Create Ribbon/Labels with P-touch Editor 4
a Connect the label printer and your computer with the included USB cable.
b Double-click the P-touch Editor icon on the desktop.
c Create a new layout or open an existing layout.
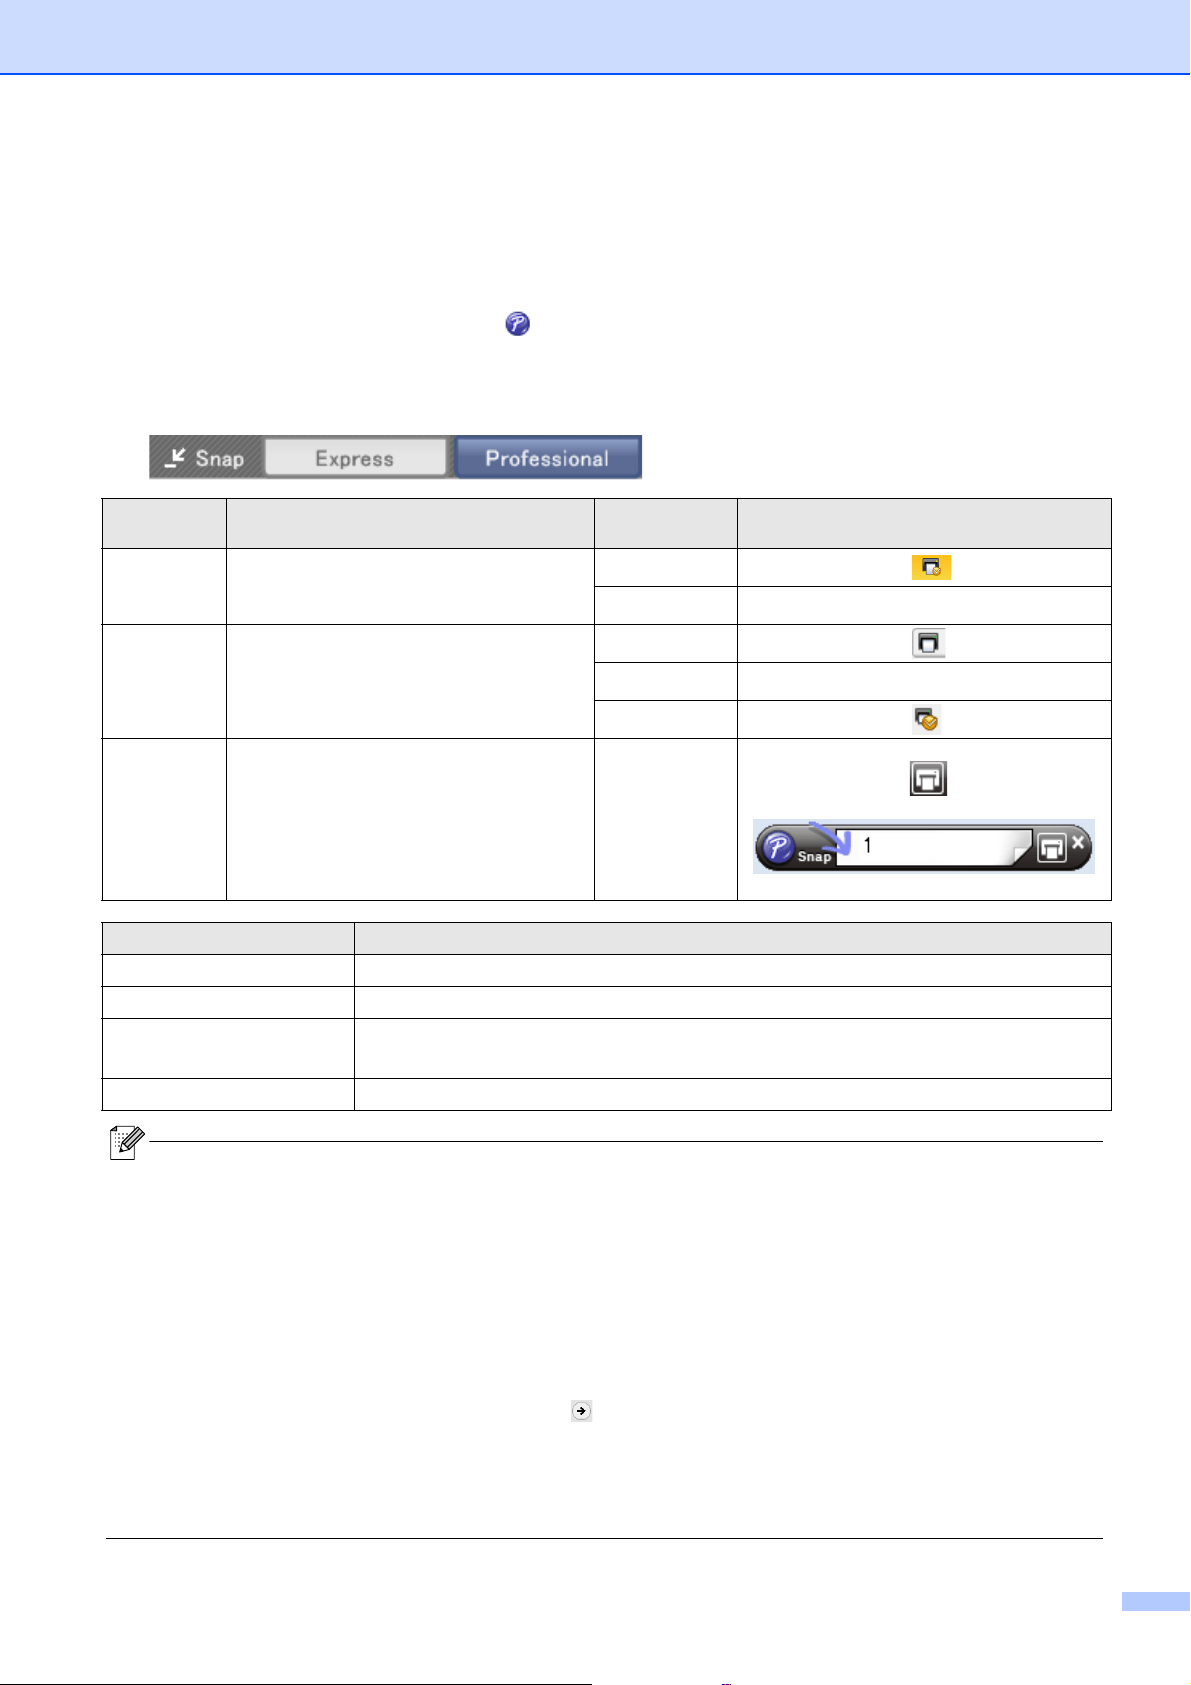
d Select the mode as necessary:
Mode Features
Print Settings
Change
How to Print
Express
This mode allows you to quickly create
layouts that include text and images.
Yes Click the print icon > Print
Yes File menu > Print > Print
Professional
This mode allows you to create layouts
using a wide-range of advanced tools
and options.
No Click the print icon
Yes File menu > Print > Print
Yes Click the print icon > Print
Snap
This mode allows you to create custom
layouts at any time by keeping the
P-touch Snap palette displayed on your
monitor.
• Screen Capture function
• Drag-and-Drop function
• Print Text function
No
Click the print icon
Options Functions (Multiple selection is possible for some options)
Auto Cut Cuts each label automatically.
Chain Printing Allows you to save tape by not cutting the last label.
Special Tape
Feeds tape for manual cutting. Use for special tapes, such as Ribbon, Fabric Tapes
and Extra Strength Adhesive Tapes.
Mirror Printing Print reverse.
• When using Special Tapes, such as ribbon, press Print and then select Special Tape in Cut Options.
• Glue from previous labels may stick to the cutter, causing uneven cuts in the satin ribbon.
• We recommend cutting the ribbon manually.
• When using tape labels, after the last label is printed, press the Power Button twice quickly to feed and cut the tape.
• Before each initial print, the label printer feeds an approximately 25 mm (1 in.) of blank tape.
•The Cable Labeling Wizard allows you to create layouts for electrical equipment management.
• This label printer does not support Bluetooth connections for computers.
• This label printer does not support Wi-Fi connections.
To select the layout:
- Double-click the layout icon.
- Select the layout icon, then click the arrow mark .
To change the P-touch Editor startup settings:
a Click the Tools menu, and select > Options.
b In the Options window, select General and select the startup setting you want from Operations.
Print from Your Computer
12
Configure Settings Using the Printer Setting Tool 4
a Connect the label printer and your computer with the included USB cable.
b Start the Printer Setting Tool.
c Click Device Settings.
The following settings can be changed:
d Click Apply > Exit.
e Click Exit in the main window.
Operating System
Version
How to Start
Windows 7 Start > All Programs > Brother > Label & Mobile Printer > Printer Setting Tool
Windows 8.1 Apps > Printer Setting Tool
Windows 10 Start > Brother > Printer Setting Tool
Auto Power On
Configure whether the label printer turns on automatically when it is connected to a
USB AC Adapter or a computer.
Auto Power Off
Set the period of time before the label printer turns off automatically when it is
connected to a USB AC Adapter or a computer.
Auto Power Off (Li-ion) Set the period of time before the label printer turns off automatically.
Contents Configure the label printer information that will be printed.
Length Adjustment
Adjust the length of the printed label to match the length of the label displayed on the
computer.
• Check that the label printer you want to configure appears next to Printer. If a different label printer appears,
select your label printer from the drop-down list.
• Do not perform another job while changing the settings.
Print from Your Computer
13
Apply Settings Changes to Multiple Label Printers 4
a After applying settings to the first label printer, disconnect the label printer from the computer.
b Connect the second label printer to the computer.
c Select the newly connected label printer from the Printer drop-down list.
d Click Apply.
Repeat steps a to d for all label printers whose settings you want to change.
Update Software 4
a Double-click the P-touch Update Software icon on the desktop.
b Click the Computer Software Update icon .
c Select the Printer and Language, select the check boxes next to the software you want to update,
and then click Install.
Update Firmware 4
a Turn on the label printer, and connect it to your computer with the included USB cable.
b Double-click the P-touch Update Software icon on the desktop.
c Click the Machine Update icon .
d Select the Printer, ensure that The machine is connected correctly. appears, and then click OK.
e Select the Language, select the check boxes next to the firmware you want to update to, and then
click Transfer.
f Click Start.
• To save the current settings in a file, click File > Export.
• The same settings can be applied to other label printers. Click File > Import, then select the exported file.
Close all other Brother applications.
• Do not power off or disconnect the USB cable while updating.
• Close all other Brother applications.
Print from Your Computer
14
Mac 4
Create Ribbons/Labels with P-touch Editor 4
a Connect the label printer and your computer with the included USB cable.
b Click Macintosh HD > Applications > P-touch Editor.
c Select a new template or a template category.
Configure Settings Using the Printer Setting Tool 4
a Connect the label printer and your computer with the included USB cable.
b Click Macintosh HD > Applications > Brother > Printer Setting Tool > Printer Setting Tool.
c Select any of the Settings tabs, and then configure the settings.
d Click Apply Settings to the Printer.
e Click Exit.
• When using Special Tapes, such as ribbon, press Print and then select Special Tape in Cut Options.
• Glue from previous labels may stick to the cutter, causing uneven cuts in the satin ribbon.
• We recommend cutting the ribbon manually.
• When using tape labels, after the last label is printed, press the Power Button twice quickly to feed and cut the
tape.
• Before each initial print, the label printer feeds an approximately 25 mm (1 in.) of blank tape.
• This label printer does not support Bluetooth connections for computers.
• This label printer does not support Wi-Fi connections.
• Check that the label printer you want to configure appears next to Printer. If a different label printer appears,
select the label printer from the drop-down list.
• Do not perform another job while changing the settings.
Auto Power On
Configure whether the label printer turns on automatically when it is connected to a
USB AC Adapter or a computer.
Auto Power Off
Set the period of time before the label printer turns off automatically when it is
connected to a USB AC Adapter or a computer.
Auto Power Off (Li-ion) Set the period of time before the label printer turns off automatically.
Length Adjustment
Adjust the length of the printed label to match the length of the label displayed on the
computer.
Print from Your Computer
15
Apply Settings Changes to Multiple Label Printers 4
a After applying settings to the first label printer, disconnect the label printer from the computer.
b Connect the second label printer to the computer.
c Select the newly connected label printer from the Printer drop-down list.
d Click Apply Settings to the Printer.
Repeat steps a to d for all label printers whose settings you want to change.
Update Firmware 4
a Turn on the label printer, and connect it to your computer with the included USB cable.
b Click Macintosh HD > Applications > P-touch Update Software.
c Click Machine update.
d Select the Printer, ensure that The machine is connected correctly. appears, and then click OK.
e Select the Language, select the check boxes next to the firmware you want to update to, and then
click Transfer.
f Click Start.
• To save the current settings in a file, click Export.
• The same settings can be applied to other label printers. Click Import, then select the exported file.
• Do not power off or disconnect the USB cable while updating.
• Close all other Brother applications.
16
Maintenance 5
Before performing any maintenance, disconnect the USB cable and power off the label printer.
Clean the Label Printer Exterior 5
Wipe the label printer’s exterior with a soft, dry cloth to remove dirt or dust. If the label printer is heavily soiled, wipe
it with a cloth dampened with some water.
Clean the Print Head 5
Streaks or poor-quality characters on printed labels generally indicate that the Print Head is dirty.
You can use either the optional dedicated Head Cleaning Tape Cassette (TZe-CL4) or a cotton swab to gently
wipe dirt from the Print Head.
5
Appendix
Do not use solvents or agents such as benzene, paint thinner, or alcohol, which may damage the label printer’s
surface.
Put the Head Cleaning Tape Cassette in the label printer, and press the Power Button twice quickly.
Approximately 25 mm (1 in.) of tape feeds each cleaning cycle. If the problem is not solved after repeating this
process three times, contact Brother customer service.
CAUTION
Do not touch the Print Head. You may get burned.
Print Head

Appendix
17
Clean the Tape Cutter 5
Tape adhesive can build up on the cutter blade after repeated use, which may dull the blade and result in the tape
jamming in the cutter. Wipe the cutter blades using a cotton swab moistened with ethanol or isopropyl alcohol.
CAUTION
Do not touch or insert your fingers into the cutter blade.
Appendix
18
Troubleshooting 5
LED Indications 5
Power LED Lit/Flashing Condition
Green
Lit
• Bluetooth connection established
• Feeding or cutting tape
•Printing
Flashing
(0.5 second intervals)
• Receiving data from a mobile device or a computer
• Transferring program
Lit for 3 seconds, then off
for 1 second
Standby
Orange
Lit Initializing
Flashing
(0.5 second intervals)
Cooling
Battery LED Lit/Flashing Condition
Orange
Not lit Fully charged
Lit Charging
Not lit for 3 seconds, then
lit for 0.5 seconds
Only half the battery charge remains.
Not lit for 2 seconds, then
flashing twice
The battery charge is low.
Flashing
(0.5 second intervals)
Insufficient charge or battery failure.
Refer to the LED troubleshooting table to solve the problem.
Appendix
19
LED Troubleshooting 5
Power
LED
Lit/
Flashing
Condition
How to Clear
an Error
Solution
Red
Flashing twice
per second,
then off for
1second
Battery failure
Lightly press the
Power Button.
If the problem is still not resolved,
replace the battery.
Flashing
(1 second
intervals)
• No Ribbon/Tape Cassette
installed.
• Incorrect Ribbon/Tape Cassette
installed.
• Incompatible Ribbon/Tape
Cassette installed.
Insert the correct Ribbon/Tape
Cassette.
Insufficient charge
Restart the label
printer.
Make sure you have removed the
protective sheet.
Charge the battery.
High temperature error
Lightly press the
Power Button.
Wait a short while, then try again
after the Power LED changes to
green.
Transmission error
Restart the label
printer.
When using a mobile device:
Establish a Bluetooth connection.
When using a computer:
• Reconnect the USB cable.
• Change the USB port.
Cutter error Restart the label printer.
Lit Program transfer failure
Transfer the program again.
If the problem is still not resolved, contact Brother
customer service.
Flashing
(0.3 second
intervals)
System error
Contact Brother customer service.
(The flashing pattern may change if you touch the
Power Button.)
Appendix
20
If you need additional help, visit support.brother.com.
Problem Solution
The label printer does not print.
• Check that the Ribbon/Tape Cassette is inserted correctly.
• If the Ribbon/Tape Cassette is empty, replace it.
• Check that the Cassette Cover is securely closed.
• Check that the charge is not low.
• Check that the label printer is on.
• Check that the mobile device is not in sleep mode.
• Check that the mobile device’s Bluetooth setting is on.
• Check that the label printer is connected to your mobile device via Bluetooth.
• Check that the label printer is selected in the P-touch app.
• Check that the label printer is not paired with another device.
• Make sure the label printer and your mobile device are close enough to
communicate.
• Make sure no devices that emit radio waves (for example, a microwave oven) are
located nearby.
• Check that the correct printer driver is installed when printing from a computer.
• Connect the label printer to your computer with the included USB cable when
printing from a computer.
• Check the ribbon/label is not blank.
• The ribbon/tape does not feed
correctly.
• The ribbon/tape gets stuck
inside the label printer.
• If the tape is bent, cut off the bent section.
• If the ribbon/tape is jammed, remove the ribbon/tape cassette, pull out the jammed
tape, and then cut it.
• Check that the end of the tape out of the Tape Guide.
• Confirm that the ribbon/tape is pointed at the Tape Exit Slot.
• Remove the ribbon/tape cassette and insert it again.
A tape jam error cannot be
cleared despite following the
troubleshooting steps.
Contact Brother customer service.
A horizontal gap runs through
the middle of the printed label.
Streaks or poor quality printed labels generally indicate that the Print Head is dirty.
See Maintenance: Clean the Print Head.
An error occurred when using a
mobile app.
Go to your mobile app’s settings menu > Support page > FAQs &
Troubleshooting.
I want to cancel the current
printing job.
Make sure that the label printer is on, and then lightly press the Power button.
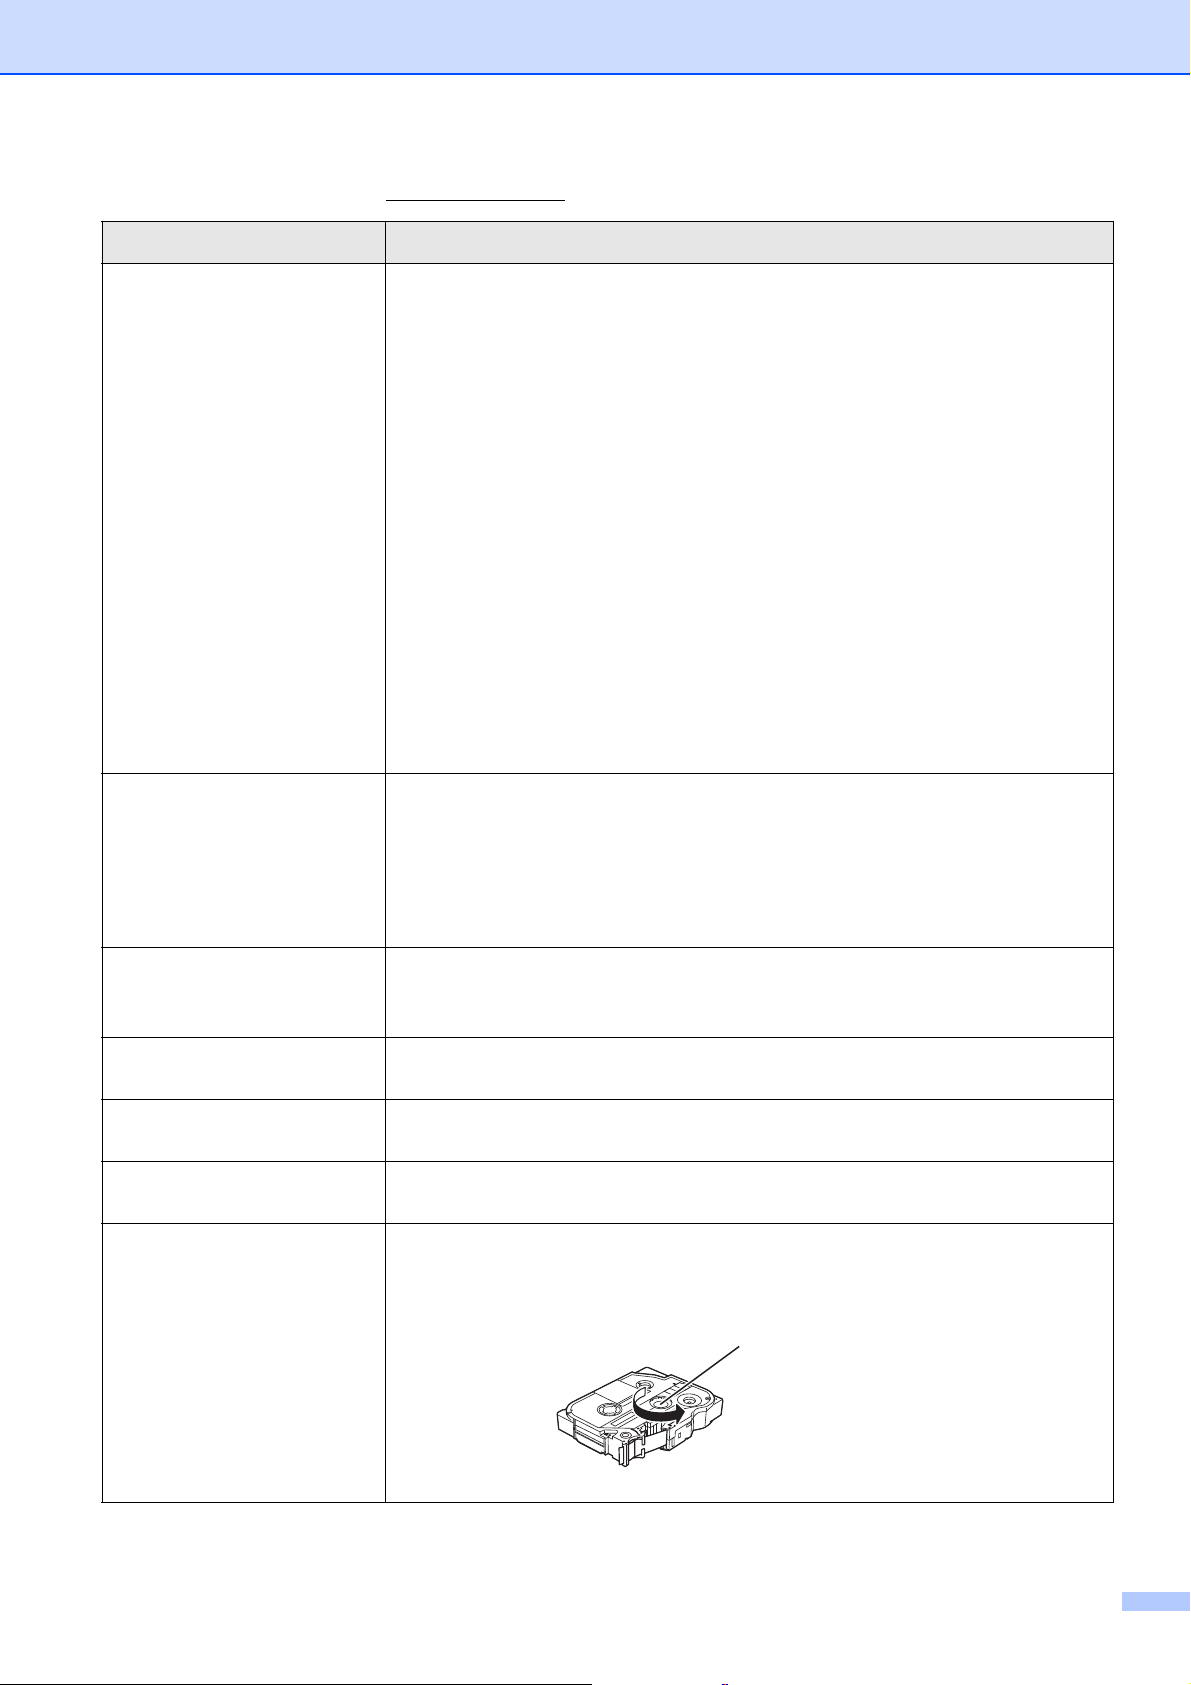
The ink ribbon is separated
from the ink roller.
If the ink ribbon is broken, replace the ribbon/tape cassette.
If not, leave the tape uncut and remove the ribbon/tape cassette, then wind the
loose ink ribbon back onto the spool.
Spool
Appendix
21
The label printer stops while
printing a ribbon/label.
Replace the ribbon/tape cassette if striped tape is visible, as this indicates that you
have reached the end of the tape.
While printing, striped tape
appears.
The ribbon/tape cassette is empty. Insert a new ribbon/tape cassette.
The ribbon/tape is not cut
automatically.
Select Auto Cut.
If using ribbon or special tapes, cut the ribbon/tape manually.
Printed barcodes or QR codes
cannot be read.
• Try using another barcode scanner.
• Try using another QR code reader application.
• Change the tape.
Recommended: Black on white tape
• Enlarge barcodes or QR codes using the application, if possible.
There is an approximately
25 mm (1 in.) of blank space
added to the left margin of each
printed label.
• Due to the structure of the laminate, when Auto Cut is ON, the label printer feeds
approximately 1 in./25 mm of leader tape before every new ribbon/label.
• To save ribbon/tape, change these settings in the app:
P-touch Design&Print - Turn Cut the last label: OFF
Then print your labels and leave the last ribbon/label in the label printer until you
are ready to print a new ribbon/label.
• When using TZe-R*** ribbon, we recommend cutting the ribbon manually.
When using tape labels, after the last label prints, press the Power Button twice
quickly to eject and cut the last label. Note that the label printer will feed about 1
in./25 mm of leader tape before the next new label when you use this method.
• I cannot turn on the label
printer.
• The label printer powers off
when I try to print.
• Charge the battery.
• Make sure you have removed the protective sheet. See Charge the Battery.
It is not possible to charge the
battery.
• Disconnect the USB cable and connect it again.
• Make sure you have removed the protective sheet. See Charge the Battery.
Battery life is short, even when
fully charged.
The battery may have reached the end of its life. Use a new battery.
I want to check I am using the
latest version of the software.
Windows:
Use the P-touch Update Software to confirm if you have the latest version. See
Windows: Update Software.
Mac:
Visit support.brother.com
.
Problem Solution
Appendix
22
Product Specifications 5
Dimensions Approximately 5 in. (W) × 2.6 in. (D) × 5 in. (H)
Approximately 128 mm (W) × 67 mm (D) × 128 mm (H)
Weight (with battery) Approximately 1.4 lb
Approximately 640 g
Operating temperature 50 °F to 95 °F
10 °C to 35 °C
Operating humidity 20 to 80% (without condensation)
Interface Label printer side
(for Windows/Mac)
USB 2.0 Full Speed
Bluetooth Version 2.1+EDR Class2

Appendix
23
Trademarks 5
Mac and Macintosh are trademarks of Apple Inc.
App Store is a service mark of Apple Inc.
Google Play is a trademark of Google LLC.
The Bluetooth
®
word mark and logos are registered trademarks owned by the Bluetooth SIG, Inc. and any use of
such marks by Brother Industries, Ltd. is under license.
Wi-Fi is a registered trademark of Wi-Fi Alliance
®
.
Any trade names and product names of companies appearing on Brother products, related documents and any
other materials are all trademarks or registered trademarks of those respective companies.