

2
LICENSES
LICENSES
Supported licenses may differ by model. For more information about
licenses, visit www.lg.com.
Manufactured under license from Dolby
Laboratories. Dolby and the double-D symbol are
trademarks of Dolby Laboratories.
This DivX Certied
®
device has passed rigorous
testing to ensure it plays DivX
®
video.
To play purchased DivX movies, rst register your
device at vod.divx.com. Find your registration
code in the DivX VOD section of your device
setup menu.
DivX Certied
®
to play DivX
®
video up to HD
1080p, including premium content.
DivX
®
, DivX Certied
®
and associated logos are
trademarks of DivX, LLC and are used under
license.
Covered by DivX Patents 7,295,673; 7,515,710;
RE45,052; and others available at
[www.divx.com/patents]
The terms HDMI and HDMI High-Denition
Multimedia Interface, and the HDMI Logo are
trademarks or registered trademarks of HDMI
Licensing LLC in the United States and other
countries.

3
LICENSES
This device meets the EMC requirements for home appliances (Class
B) and is intended for home usage. This device can be used in all
regions.
• Image shown may differ from your projector.
• Your projector’s OSD (On Screen Display) may differ slightly from
that shown in this manual.
NOTE

4
SAFETYPRECAUTIONS
SAFETYPRECAUTIONS
Please take note of safety instructions to prevent any potential accident or
misuse of the product.
• Safety precautions are given in two forms, i.e. WARNING and CAUTION.
WARNING and CAUTION are understood to mean as follows:
WARNING: Failure to follow the instructions may cause serious
injury and even death
CAUTION: Failure to follow the instructions may cause minor injury
to people or damage to the product
• Read the owner's manual carefully and keep it handy for future
reference.
WARNING/CAUTION
RISK OF ELECTRIC SHOCK
DO NOT OPEN
The lightning ash with
arrowhead symbol, within
an equilateral triangle, is
intended to alert the user to the
presence of uninsulated
“dangerous voltage” within the
product’s enclosure that may be of
sufcient magnitude to constitute a
risk of electric shock to persons.
The exclamation point
within an equilateral
triangle is intended to alert
the user to the presence of
important operating and
maintenance (servicing)
instructions in the literature
accompanying the appliance.
WARNING/CAUTION
- TO REDUCE THE RISK
OF FIRE AND ELECTRIC
SHOCK, DO NOT EXPOSE
THIS PRODUCT TO RAIN OR
MOISTURE.
Readtheseinstructions.
Keeptheseinstructions.
Heedallwarnings.
Followallinstructions.
IndoorInstallation
WARNING
• Do not use the projector outside
and do not expose the product
to any humidity or water.
- Since the product is not
waterproof, this may result in
a re or electric shock.
• Do not place the projector in
direct sunlight or near heat
sources such as radiators, fires,
stoves, etc.
- This may result in re.

5
SAFETYPRECAUTIONS
• Do not place flammable
materials such as aerosols near
the projector.
- This may result in re.
• Do not allow children to cling to
or climb up to the projector.
- This may cause the projector
to fall, causing injury or
death.
• Do not install the product in a
place with no ventilation (e.g.,
on a bookshelf or in a closet) or
on a carpet or cushion.
- This may result in re due
to the increase in internal
temperature.
• Do not place the product close
to sources of steam, oil or oil
mist, such as humidifiers and
kitchen counters.
- Failure to do so may result
in re, electric shock, or
corrosion.
• Do not install the product onto
a wall or ceiling that is close to
sources of oil or oil mist.
- The product may be
damaged and fall, resulting in
serious injury.
• Do not place the projector where
it might be exposed to dust.
- This may result in re.
• Do not use the projector in a
damp place such as a bathroom
where it is likely to get wet.
- This may result in re or
electric shock.
• Do not allow a tablecloth or
curtain to block the air vent.
- This may result in re due to
the increase in the internal
temperature.
• Ensure good ventilation around
the projector. The distance
between the projector and the
wall should be at least 30 cm.
- This will prevent re due to
the increase in the internal
temperature.
CAUTION
• When placing the projector on a
table or shelf, be careful not to
put it near the edge.
- The projector could fall due
to bal ance problems, which
may cause personal injury or
damage to the product. Make
sure to use the pro jector
cabinet or stand that ts the
projector.
• When moving the projector,
make sure to switch it off and
remove the power plug and
cords.
- The power cord may be
damaged, resulting in re or
electric shock.
• Do not place the projector on
an unstable or vibrating surface
such as a wobbly shelf or a
slope.
- It may fall and cause injury.
6
SAFETYPRECAUTIONS
• Be careful not to tip the projector
over when connecting external
devices to the projector.
- This may cause personal
injury or damage to the
projector.
Power
WARNING
• The appliance coupler is used
as the disconnect device.
- Please make sure the device
is installed near the wall
outlet to which it is connected
and that the outlet is easily
accessible.
• The grounding wire should be
con nected.
- Ensure that you connect the
ground ing cable to avoid
electric shock.If it is not
possible to ground the unit,
have a qualied electrician
install a separate circuit
breaker. Do not try to ground
the projector by connecting it
to telephone wires, lightning
rods or gas pipes.
• The power plug should be
inserted fully into the power
outlet.
- An unstable connection may
cause a re.
• Do not place heavy objects on
the power cord.
- This may result in re or
electric shock.
• Never touch the power plug with
wet hands.
- This may result in electric
shock.
• Do not plug too many devices
into one multi-power outlet.
- This may result in re due to
the power outlet overheating.
• Prevent dust from collecting on
the power plug pins or outlet.
- This may result in re.
• To turn off the main power,
remove the power plug, which
should be positioned so it is
easy to access for operation.
CAUTION
• Hold the plug firmly when
unplugging.
- A damaged wire may create
a re hazard.
• Ensure the power cord and plug
are not damaged, modified,
severely bent, twisted, pulled,
sandwiched or hot. Do not use
the product if the power outlet
is loose.
- This may result in re or
electric shock.
• Keep the power cord away from
heating devices.
- The wire's sheath may melt,
which may result in re or
electric shock.

7
SAFETYPRECAUTIONS
• Place the projector where
people will not trip over or tread
on the power cord to protect the
power cord and plug from any
damage.
- This may result in re or
electric shock.
• Do not turn the projector on or
off by plugging in the power plug
or unplugging it from the wall
outlet.
(Do not use the power plug as
a switch.)
- This may result in electric
shock or damage to the
product.
• Do not insert a conductor
into the other side of the wall
outlet while the power plug is
inserted into the wall outlet.
In addition, do not touch the
power plug immediately after it
is disconnected from the wall
outlet.
- This may result in electric
shock.
• Only use the official power cord
pro vided by LG Electronics. Do
not use other power cords.
- This may result in re or
electric shock.
WheninUse
WARNING
• Do not place anything containing
liquid on top of the projector
such as a vase, flower pot,
cup, cosmetics, or medicine; or
ornaments, candles, etc.
- This may result in re or
electric shock, or cause injury
due to falling.
• In the event that there is a
heavy impact or the cabinet is
damaged, switch it off, unplug
it from the power outlet and
contact an authorized ser vice
center.
- This may result in electric
shock.
• Do not insert pieces of metal
such as coins, hairpins or metal
debris, nor flammable materials
such as paper or matches into
the projector.
- This is to prevent electric
shock or re.
• In the event that liquid or a
foreign object falls into the
projector, switch it off and
unplug it from the power outlet
and contact our service center.
- This may result in re or
electric shock.
• Make sure that a child does not
swallow the batteries when you
replace the old remote control
batteries with new ones. Keep
batteries out of reach of children.
- If a child swallows a battery,
consult a doctor immediately.

8
SAFETYPRECAUTIONS
• Never open any cover on the
projector.
- There is a high risk of electric
shock.
• Do not look directly into the lens
when the projector is in use.
- The bright light may damage
your eyes.
• When the lamp is on or has just
been turned off, avoid touching
the air vent or lamp, because
these will be very hot.
• If there is a gas leak in the
room with the projector, do not
touch the projector or power
outlet. Open the windows for
ventilation.
- Sparks may cause re or
burns.
• Never touch the product or
power cord during storms with
thunder or lightning.
- This may cause electric
shock.
• Do not use the projector near
electronic devices that generate
a strong magnetic field.
• Keep the plastic film used for
packaging the product out of the
reach of children.
- If not handled safely, it can
cause suffocation.
• Do not keep your hand on the
projector for a long time when it
is running.
• When you play a game by
connecting a game console to
a projector, it is recommended
that you maintain a distance
of more than four times the
diagonal length of the screen.
- Make sure that the
connecting cable is long
enough. Otherwise, the
product may fall causing
personal injury or damage to
the product.
• Do not place the projector or its
remote control with battery in
an extremely high temperature
environment.
- This may result in re.
CAUTION
• Do not place heavy objects on
the projector.
- It may fall down and cause
personal injury.
• Be careful not to allow any impact
to the lens during transport.
• Do not touch the lens of the
projector.
- The lens may be damaged.
• Do not use any sharp tools on
the projector, such as a knife
or hammer, because this may
damage the casing.
• In the event that no image
appears on the screen or no
sound is heard, stop using the
projector. Switch off the projector,
unplug it from the power outlet
and contact our service center.
- This may result in re or
electric shock.
9
SAFETYPRECAUTIONS
• Do not drop anything onto the
projector or allow anything to
impact the projector.
- This may cause personal
injury or the projector to
malfunction.
• It is recommended that you
maintain a distance of more
than 5 - 7 times the diagonal
length of the screen.
- If you watch the screen at
a close distance for a long
time, your eye sight may
become worse.
• Do not block the light beam
emitted from the projector using
a book or other object.
- Lengthy exposure to the
projector beam may result in
re. In addition, the lens may
be overheated and damaged
by the reected heat.
• Do not start the projector with
the volume turned up high.
- High volume may damage
hearing.
• Do not use high voltage
electrical equipment near the
projector, (e.g. bug zapper).
- This may result in product
malfunction.
Cleaning
WARNING
• Do not spray water directly to
the projector when cleaning.
Do not allow water to get into
the product or do not allow it to
get wet.
- This may result in re or
electric shock.
• When there is smoke or a
strange smell coming out from
the projector or a foreign object
falls into the projector, switch it
off and unplug it from the power
outlet and contact our service
center.
- Otherwise, this may result in
re or electric shock.
• Use an air spray or soft cloth
or cotton swab moistened with
a lens cleaning chemical or
alcohol to remove dust or stains
from the front projection lens.
CAUTION
• Contact the sales representative
or service center for internal
cleaning of the projector about
once a year.
- If you do not clean the
projector, dust will accumulate
inside and may create a re
hazard or malfunction.

10
SAFETYPRECAUTIONS
• When cleaning plastic parts,
such as the projector case,
disconnect the product from the
power first and wipe with a soft
cloth. Do not spray with water
or wipe with a wet cloth. Never
use glass cleaner, automobile
or industrial shiner, abrasives
or wax, benzene, alcohol, etc.
when cleaning plastic parts,
such as the projector case as
they can damage the product.
- This may also create a re
hazard, result in electric
shock or product damage
(deformation, corrosion or
breakage).
• Remove the plug from the outlet
before cleaning the product.
- Otherwise, this may result in
electric shock.
Others
WARNING
• When you go out, place the
projector out of reach of
animals, and remove the power
plug from the wall outlet.
- Using a damaged power cord
may result in short circuit
or re.
• Do not use the projector near
high-precision electronic devices
or those that transmit weak
radio signal.
- This may affect the operation
of the product, causing an
accident.
• Only a qualified technician
can disassemble or modify
the projector. For diagnosis,
adjustment, or repair, contact
your seller or our service center.
- This may result in re or
electric shock.
• Do not stare directly into lens
when in operation, eye damage
can occur.
• No user serviceable parts
inside unit. High voltage parts
can cause shock and even
electrocution.
• Proper ventilation required, do
not block airflow around unit.
Doing so can cause injury and
internal overheating.
• Do not touch the lens; doing so
can result in burns or damage
to lens. Lens and unit may be
HOT during and immediately
after use. Use caution when
handling unit, allowing for proper
cool down.
• Only use a grounded electrical
outlet.
• Do not insert anything into or
cover up the exhaust vents.
- This may result in re or
electric shock.
• Follow all maintenance
guidelines for optimal use;
service only at an authorized
service center.

11
SAFETYPRECAUTIONS
• Keep it out of reach of children.
- Failure to do so may result in
personal injury and damage
to the product.
CAUTION
• Do not use or store the projector
outdoors for long periods of time.
• Be sure to unplug if the projector
is not to be used for a long
period.
- Accumulated dust may result
in re or electric shock due to
overheating, ignition, or poor
insulation.
• Only use the specified type of
battery.
- Burst or leaking batteries
may result in damage or
injury.
• Make sure you use the
same type of batteries for
replacement.
- Otherwise, the battery may
discharge early and the
remote control may not
work properly due to a bad
connection.
• The battery contains lithium-ion,
so it must be handled with care.
- This may result in explosion
or re.
• Dispose of used batteries
properly.
- This may result in explosion
or re. The correct method of
disposal may vary depending
on your country or region.
Dispose of the battery pack
as instructed.
• Do not throw or disassemble the
bat tery.
- This may result in re or
explosion due to damage to
the battery.
• Always use batteries approved
and certified by LG Electronics.
- This will prevent damage
or re.
• Store batteries away from
metallic ob jects, such as keys
and paper clips.
- Excess current may
cause a rapid increase in
temperature, resulting in re
or burns.
• Do not store the batteries near
any heat source, such as a
heater.
- This may result in re or
damage to the product.

12
SAFETYPRECAUTIONS
• Do not store batteries at
temperatures higher than 60 °C
or in high humidity.
- This may result in explosion
or re.
• Make sure that the battery is
connected correctly.
- This prevent explosion or re.
• Incorrect battery replacement
may cause fire.
• Make sure you use the same
type of battery for replacement.
(Battery type: CR2032 / 3 V)
- In the event of a battery
contact failure, the battery
may drain quickly or the
remote control may not work
properly.
Antenna
WARNING
• If you are using an outdoor
antenna, please install it away
from electrical wires to make
sure it does not touch any
nearby wires even when it falls
down due to heavy wind.
• Failure to do so may cause
electric shock or physical injury.
CAUTION
• To prevent any raindrops flow
into the product, bend the
outdoor antenna wire where it
comes indoors.
• Raindrops flowing into the
product may cause fire or
electric shock.
Antennagroundingaccording
totheNationalElectricalCode,
ANSI/NFPA70
Antenna Lead in Wire
Grounding Conductor
(NEC Section 810-21)
Antenna Discharge Unit
(NEC Section 810-20)
Power Service
GroundingElectrode
System (NEC Art
250, Part H)
NEC:NationalElectricalCode
Ground Clamp
Electric Service
Equipment
Ground Clamp

13
SAFETYPRECAUTIONS
ForUSA
NOTE TO CABLE/TV INSTALLER
This reminder is provided to
call the CATV system installer’s
attention to Article 820 - 40 of the
National Electric Code (U.S.A.).
The code provides guidelines
for proper grounding and, in
particular, species that the cable
ground shall be connected to the
grounding system of the building,
as close to the point of the cable
entry as practical.

14
SAFETYPRECAUTIONS
USA
FCCNotice
(For USA)
This equipment has been tested
and found to comply with the
limits for a Class B digital device,
pursuant to Part 15 of the FCC
Rules. These limits are designed
to provide reasonable protection
against harmful interference in
a residential installation. This
equipment generates, uses,
and can radiate radio frequency
energy and, if not installed
and used in accordance with
the instructions, may cause
harmful interference to radio
communications. However, there
is no guarantee that interference
will not occur in a particular
installation. If this equipment does
cause harmful interference to
radio or television reception, which
can be determined by turning the
equipment off and on, the user is
encouraged to try to correct the
interference by one or more of the
following measures:
- Reorient or relocate the receiving
antenna.
- Increase the separation between
the equipment and the receiver.
- Connect the equipment to an
outlet on a circuit different from
that to which the receiver is
connected.
- Consult the dealer or an
experienced radio/TV technician
for help.
This device complies with part
15 of the FCC Rules. Operation
is subject to the following two
conditions: (1) this device may not
cause harmful interference and
(2) this device must accept any
interference received, including
interference that may cause
undesired operation of the device.
Any changes or modications in
construction of this device which
are not expressly approved by the
party responsible for compliance
could void the user’s authority to
operate the equipment.
RiskGroup2
CAUTION Possibly hazardous
optical radiation emitted from this
product. Do not stare at operating
lamp. May be harmful to the eye.

15
CONTENTS
CONTENTS
LICENSES 2
SAFETYPRECAUTIONS 4
PREPARATION 17
Accessories 17
OptionalExtras 18
PartsandComponents 19
- Main Unit 19
- Back 20
Installation 21
- Installation Precautions 21
- Projection Distance per
Screen Size 22
- How to Install the Projector
On a Tripod 23
- Kensington Security
System 24
REMOTECONTROL 25
USINGTHEPROJECTOR27
ConnectingtheAntennaor
Cable 27
Usingthebattery 28
Batteryusingtime
information 28
WatchingProjector 30
- Turning the Projector On 30
- Focus of the Screen
Image 30
- Using the projector 31
SettingChannel 32
- Saving Currently
Broadcasting Channel 32
AdditionalOptions 35
- Adjusting Aspect Ratio 35
- Using the Keystone
Function 36
- Changing input device 36
- Blank Function 37
UsingtheQuickMenu 38

16
CONTENTS
MYMEDIA 39
BeforeUsing 39
- Connecting a USB Device 39
- Removing a USB Device 39
ToUseMyMedia 41
- Watching the Videos 43
- Viewing the Photos 49
- Listening to Music 52
- Viewing Files 55
CUSTOMIZING
SETTINGS 59
SETTINGS 59
PICTURESettings 60
AUDIOSettings 65
CHANNELSettings 67
TIMESettings 68
INFORMATION 69
LOCKSettings 70
OPTION1Settings 74
OPTION2Settings 76
CONNECTINGDEVICES 78
ConnectingHDReceiver,DVD
Player,orVCRPlayer 79
- HDMI Connection 79
ConnectingHeadphones 80
UsingtheMirroringFunction
ofaMobilePhone 81
- MHL/Slimport Connection 81
MAINTENANCE 82
Cleaning 82
- Cleaning the Lens 82
- Cleaning the Projector
Case 82
SPECIFICATIONS 83
17
PREPARATION
PREPARATION
The pictures may differ slightly from the actual product.
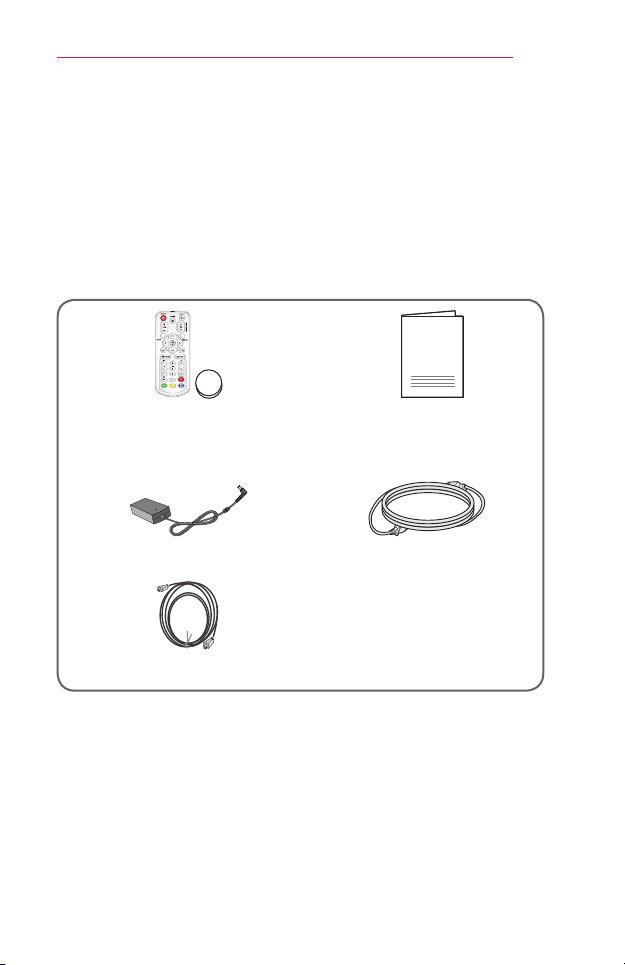
Accessories
Accessories included with the project are show below.
Accessories are subject to change without prior notice.
New accessories may be added or old ones removed.
Remote Control,
Lithium Battery (CR2032 / 3 V)
(See page 25)
Owner's Manual
AC-DC Adaptor Power cord
HDMI cable
18
PREPARATION
• When connecting an HDMI or USB
cable, or connecting a USB flash drive
to the HDMI or USB port, use a product
that has a width of 18 mm or less and
a height of 10 mm or less. If the USB
cable or USB flash drive does not fit
the USB ports of the projector, use an
extension cable that supports USB 2.0.
• Use a certified cable with the HDMI logo attached.
• If you do not use a certified HDMI cable, the screen may not display or a
connection error may occur. (Recommended HDMI cable types)
- High-Speed HDMI
®
/
TM
Cable
- High-Speed HDMI
®
/
TM
Cable with Ethernet
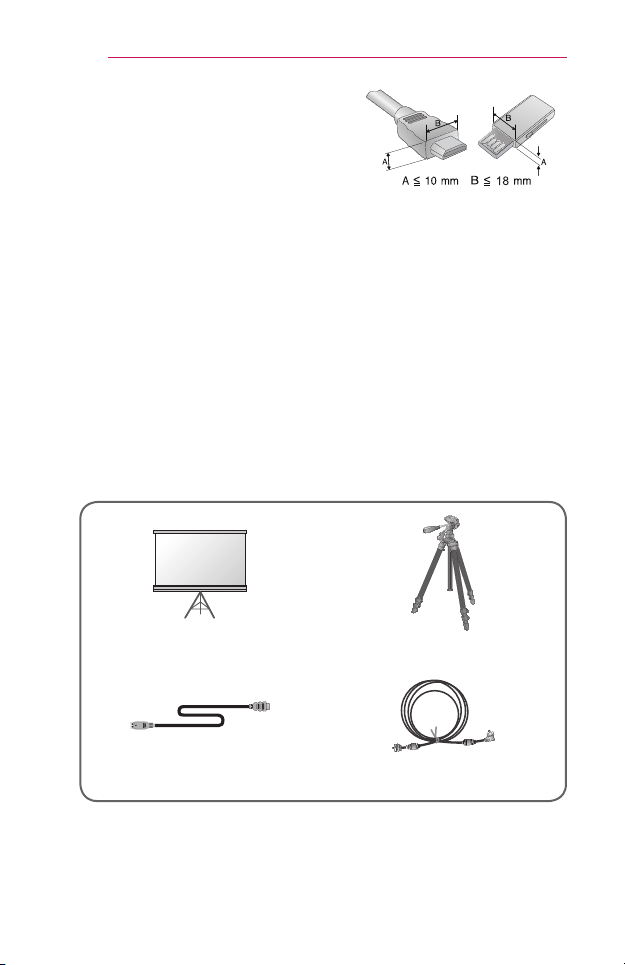
OptionalExtras
To purchase optional accessories, visit an electronics store or online
shopping site or contact the retail store where you purchased the product.
Optional accessories are subject to change without prior notice.
Projection Screen Tripod
MHL or Slimport Cable RF Cable
19
PREPARATION
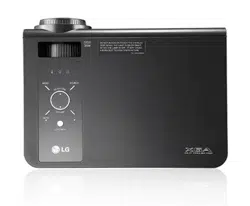
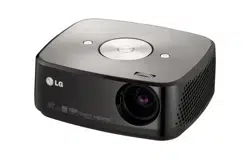
PartsandComponents
This projector is manufactured using high-precision technology. You may,
however, see tiny black dots and/or bright colored dots (red, blue or green)
that continuously appear on the projector screen. This is a normal result of
the manufacturing process and does not indicate a malfunction.
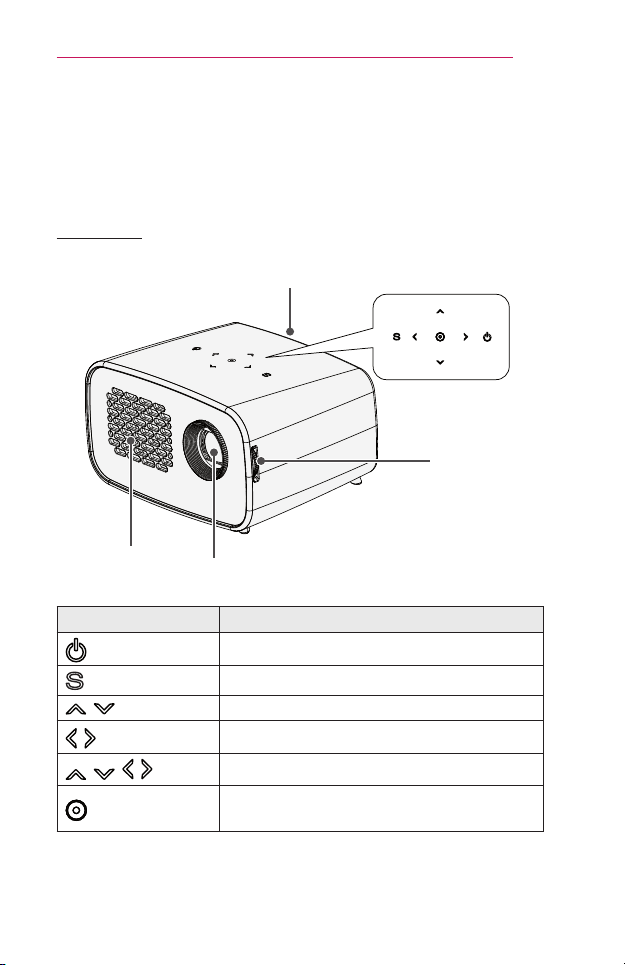
MainUnit
Control panel
Lens
2
Vent
1
Speaker
Focus Ring
Button Description
(POWER)
Turns the projector on or off.
(SETTINGS)
Displays or closes the Settings menu.
, (CHANNEL) Changes the TV channel.
, (VOLUME)
Adjusts the volume level.
, , ,
Sets the function or moves the cursor.
(OK)
Shows the current mode and saves changes to
the settings.
1 Due to the high temperature of vent area, do not get close to the vent area.
2 Do not touch the lens when using the projector. The lens may be damaged.
20
PREPARATION
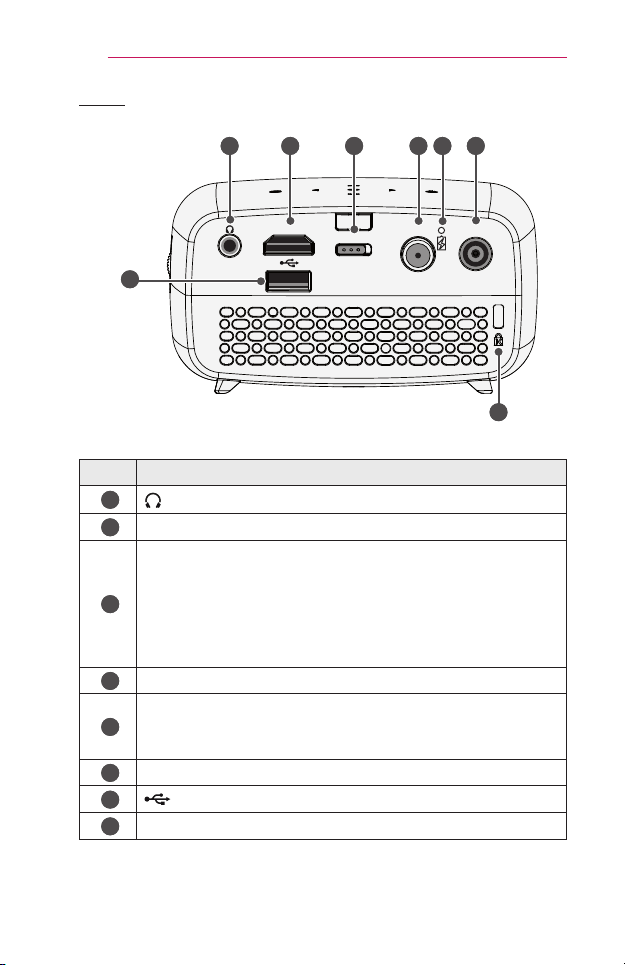
Back
HDMI / MHL
OFF / ON
ANTENNA IN
DC IN
2 3 4 5 6
8
7
1
No. Description
1
(Headphone Port)
2
HDMI/MHL Port
3
OFF/ON Switch
- OFF: Turns the projector off completely.
- ON: Turns the projector on and the projector goes into
Standby mode.
Place the switch to OFF when you move the projector or when
you intend not to use the projector for long periods of time.
4
ANTENNAIN Port
5
Battery Charge Indicator
- Red: Charging
- Green: Charging complete
6
DCIN Port
7
(USB port)
8
Kensington security system connector
21
PREPARATION
Installation
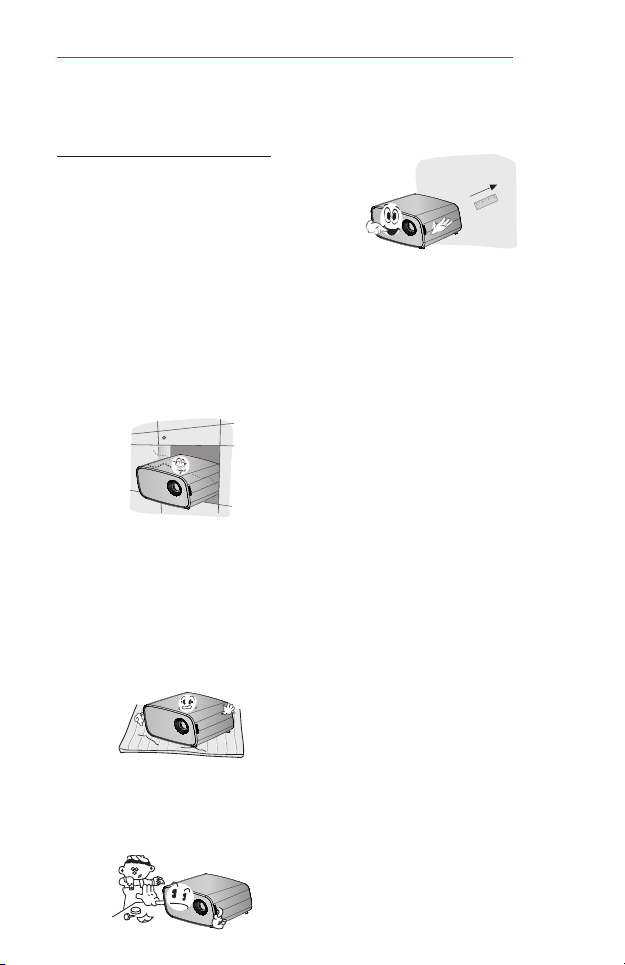
InstallationPrecautions
• Place the projector in a well-
ventilated environment.
- To prevent internal
overheating, install the
projector in a well-ventilated
place.
Do not place anything near
the projector. That may block
its air vents. If the air vents
are blocked, the internal
temperature of the projector
will increase.
- Do not place the projector
on a carpet or rug. If the
projector's inlet vent is on
the bottom, be careful not to
block the vent and always
use the projector on a solid,
level surface.
- Be sure to prevent foreign
objects such as paper debris
from entering the projector.
- Leave an adequate open
area (30 cm or more) around
the projector.
• Do not install the projector in a
hot or humid environment.
- Only install the projector
in a place of moderate
temperature and low
humidity.
• Do not install the projector in a
place where it can attract dust.
- There is a risk of re.
• Never open any cover on the
projector. There is a high risk of
electric shock.
• This projector is manufactured
using high-precision technology.
You may, however, see tiny
black dots and/or bright colored
dots that continuously appear
on the projector screen.
This is a normal result of the
manufacturing process and
does not indicate a malfunction.
• The remote control may not
work in an environment where
a lamp equipped with electronic
ballasts or a three-wavelength
fluorescent lamp is installed.
Replace the lamp with an
international standard lamp
for the remote control to work
normally.
22
PREPARATION
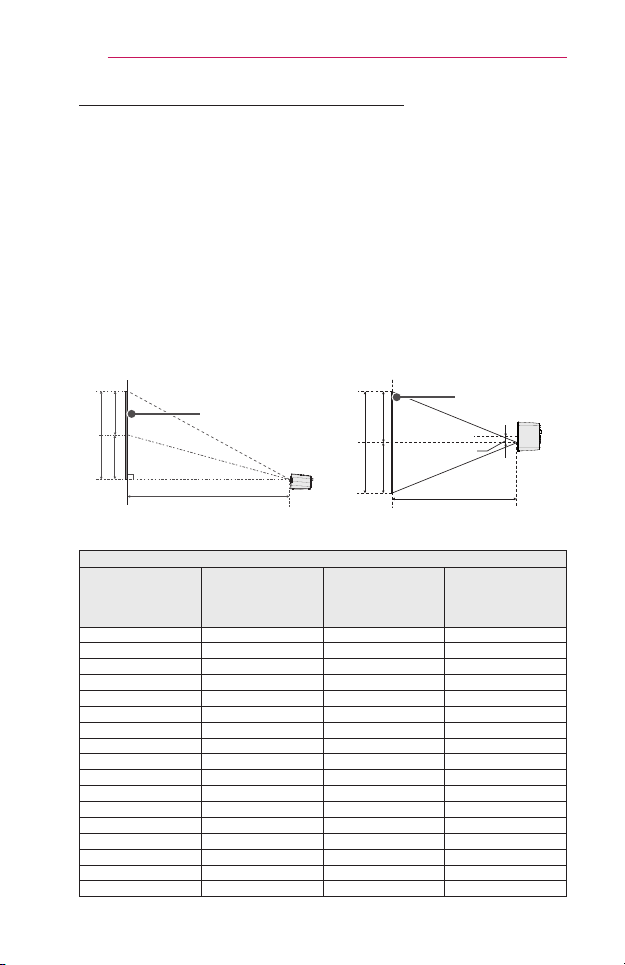
ProjectionDistanceperScreenSize
1 Place the projector on a sturdy, level surface, together with the
computer or audio/video source.
2 Place the projector an appropriate distance away from the screen.
The distance between the projector and the screen determines the
actual size of the image.
3 Position the projector so that the lens is at a right angle to the screen.
If the lens is not perpendicular to the screen, the projected image will
appear distorted. To correct the distortion, use the Keystone function.
(See page 36)
4 Connect the power cords of the projector and the connected devices to
the wall outlet.
X/2 X/2
Y/2 Y/2
27.0 mm
16:9AspectRatio
ScreenSize
(mm)
ScreenWidth
(Y)(mm)
ScreenHeight
(X)(mm)
Projection
Distance
(D)(mm)
508 443 249 742
635 553 311 931
762 664 374 1119
889 775 436 1308
1016 886 498 1497
1143 996 560 1686
1270 1107 623 1875
1397 1218 685 2063
1524 1328 747 2252
1651 1439 809 2441
1778 1550 872 2630
1905 1660 934 2818
2032 1771 996 3007
2159 1882 1058 3196
2286 1992 1121 3385
2413 2103 1183 3574
2540 2214 1245 3762
Ratioofupwardprojection:100%
Projection Distance (D)
Projection Distance (D)
Screen Height(X)
Screen Width (Y)
Screen
Screen
23
PREPARATION
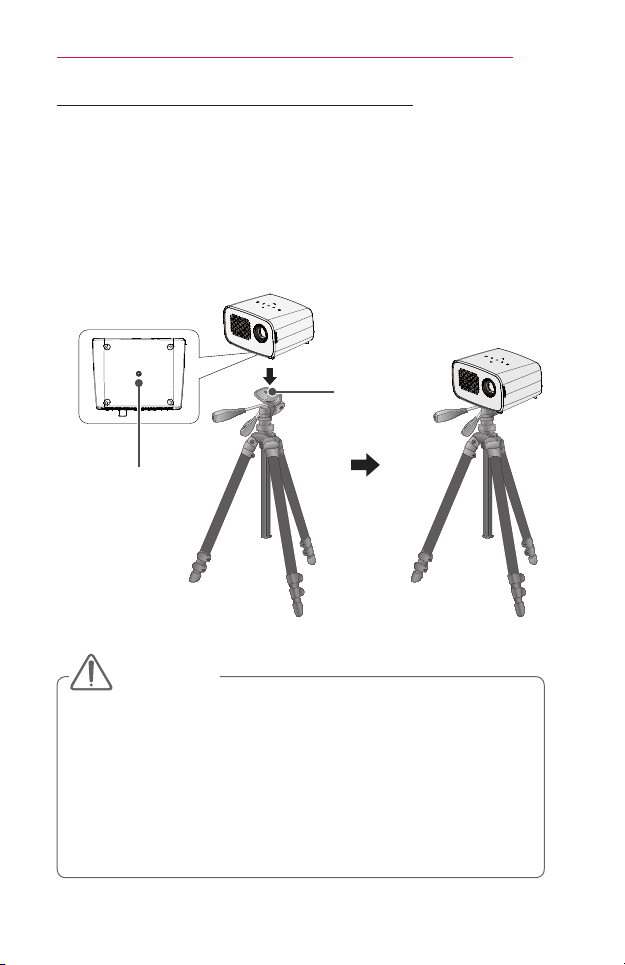
HowtoInstalltheProjectorOnaTripod
• You can install the projector using a camera tripod.
• As shown below, you can mount the projector instead of a camera on
the tripod.
• When stabilizing the tripod, we recommend using a locking bolt of
standard size 4.5 mm or less. The maximum size allowed for the locking
bolt is 5.5 mm. (If it is longer than the maximum allowed size, it may
damage the projector.)
Bottom of the
Projector
The projector is
connected to this part.
Tripod
Bolt used to
attach the
projector to
the tripod
• If you are using a tripod, be careful not to apply external force to the
tripod. Doing so may damage the projector.
• Do not place the tripod on an unstable surface.
• Be sure to use a tripod with a maximum load capacity of 3 kg or
more.
• To use the projector safely, position the tripod legs so that they are
as wide and stable as possible and be sure to securely attach the
projector to the tripod.
CAUTION
24
PREPARATION
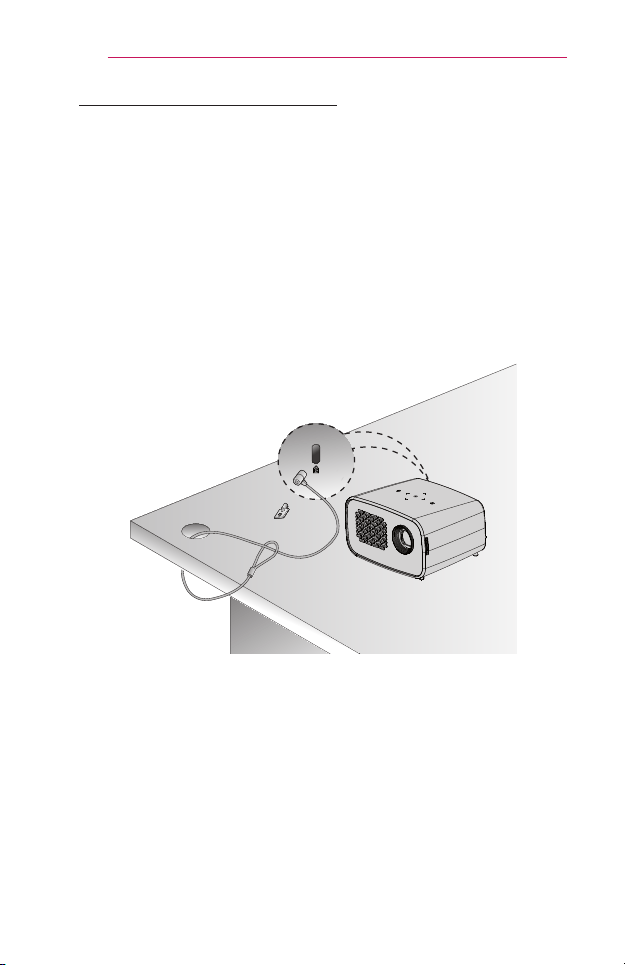
KensingtonSecuritySystem
• This projector has a Kensington Security Standard connector as an
anti-theft mechanism. Connect a Kensington Security System cable as
shown below.
• For more information on installation and use of the Kensington Security
System, refer to the user’s guide provided with the Kensington Security
System.
• The Kensington Security System is an optional accessory.
• What is Kensington?
Kensington is a company that provides safety systems for laptops and
other electronic devices.
Website: http://www.kensington.com
25
REMOTECONTROL
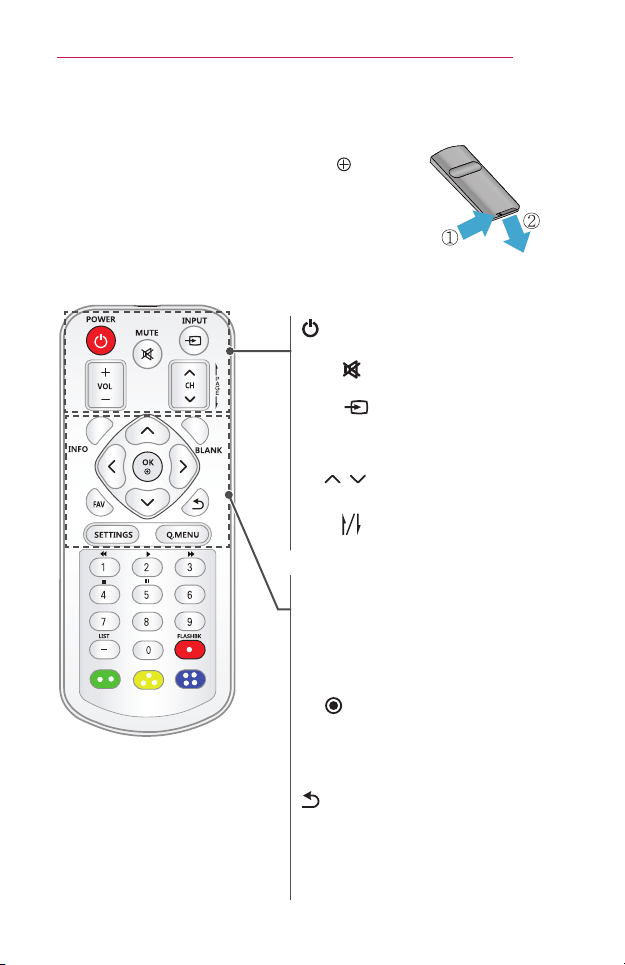
REMOTECONTROL
Open the lid at the back of the remote control
and insert the batteries as described in the
instructions. Use new batteries.
POWER
Turns the projector on or off.
MUTE
Mutes the sound of the projector.
INPUT
Changes the input source.
VOL+,-
Adjusts the volume level.
CH
,
Changes the channel or page.
PAGE
Moves to the previous/next page.
INFO
Views the information of the current
program and screen.
BLANK
Turns the projector screen on or off.
Up/Down/Left/Rightbuttons
Sets the function or moves the cursor.
OK
Shows the current mode and saves
changes to the settings.
FAV
Accesses your favorite channel.
Returns to the previous screen.
SETTINGS
Displays or closes the Settings menu.
Q.MENU
Enters the quick menu.
26
REMOTECONTROL
Numberbuttons
Enter a number.
PlaybackControlButtons
Controls playback of MYMEDIA.
LIST
Accesses the saved channel list.
-(Dash)
Inserts a dash between numbers such as
2 - 1 and 2 - 2.
FLASHBK
Tunes to the last channel viewed.
Colorbuttons
Sets detailed settings or gesture for each
menu.
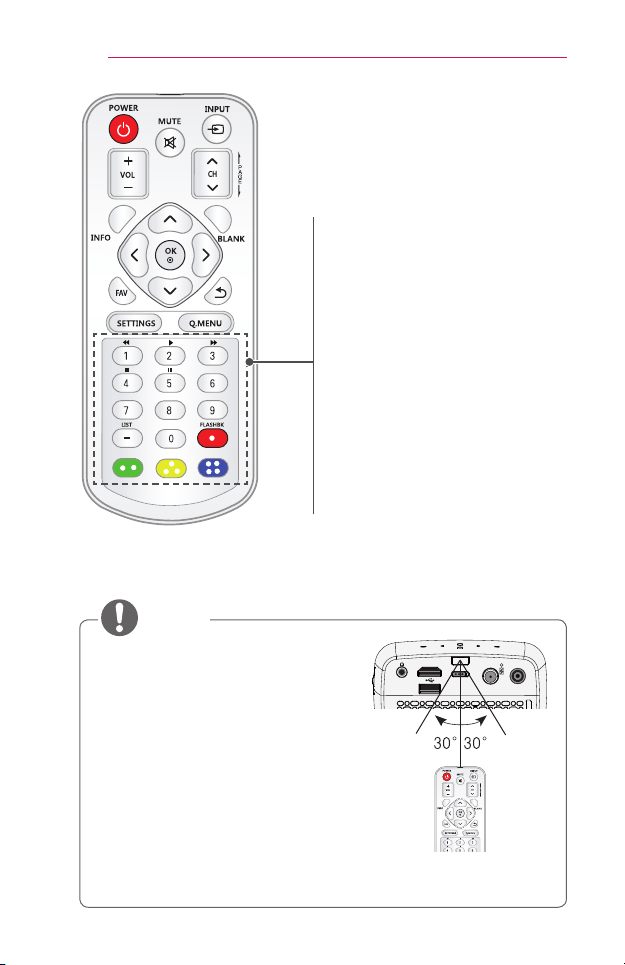
• When using the remote control, the
optimal operation range is 3 meters or
less (left/right) and within a 30 degree
arc of the remote control IR receiver.
• For seamless operation, do not block the
IR receiver.
• When you carry the remote control in the
portable bag, make sure that the buttons
on the remote control are not pressed by
the projector, cables, documents or any
other accessories in the bag. Otherwise,
it may significantly reduce the battery life.
NOTE
HDMI / MHL
OFF / ON
ANTENNA IN
DC IN
27
USINGTHEPROJECTOR
USINGTHEPROJECTOR
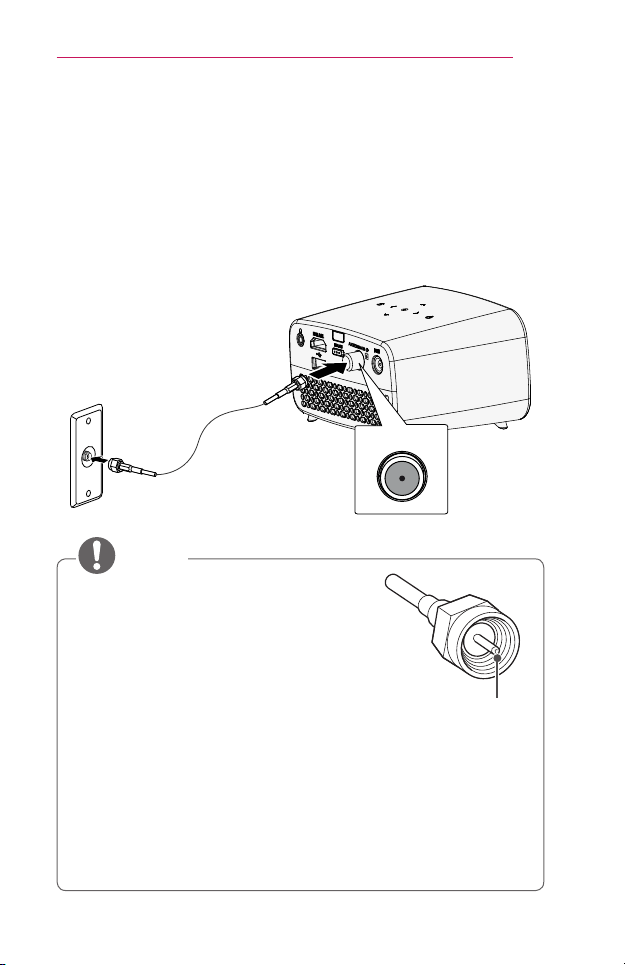
ConnectingtheAntennaorCable
To watch TV using an indoor/outdoor antenna, connect a wall terminal and
the ANTENNAIN port of the projector using an RF cable (75 Ω).
You can watch public TV or cable (analog, digital) TV. (The RF cable is
sold separately.)
ANTENNA IN
• Make sure not to bend the copper wire of
the RF cable (75 Ω). Turn the input jack to
the right to fasten it.
• Ensure you use a standard coaxial cable
(75 Ω, sold separately) when connecting to
the projector input.
• For better image quality in locations where
signal strength is low, purchase and install a
signal amplifier (booster).
• A signal splitter is required if you want to use two or more
projectors through one antenna.
• If you have any problems when installing the antenna, please
consult a suitable retailer or the store where you purchased the
antenna.
NOTE
Copper wire
28
USINGTHEPROJECTOR
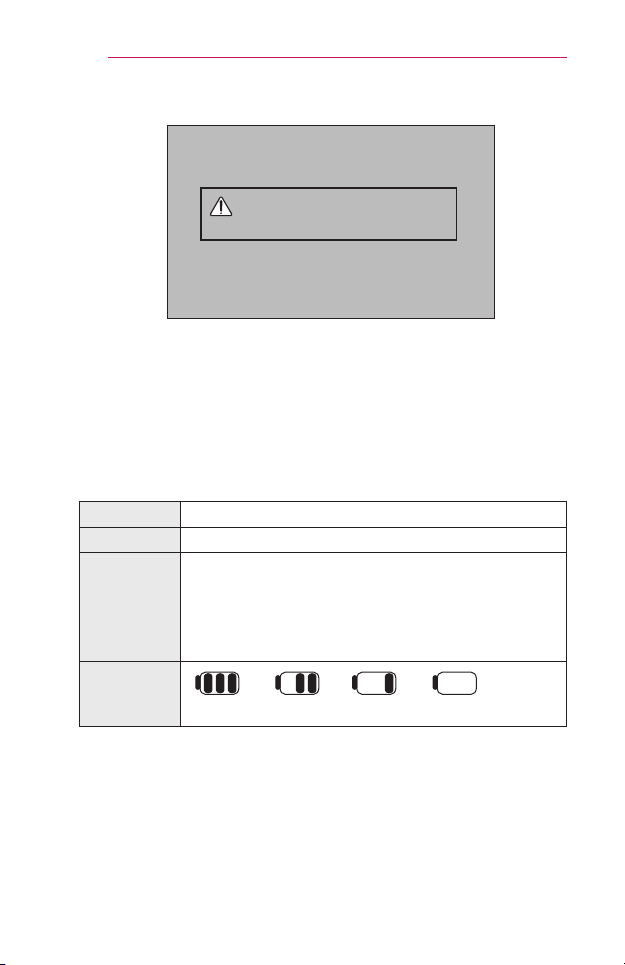
Usingthebattery
Low battery! The projector will
turn off soon.
• It is displayed when the battery is running out.
• As your battery is low, Projector will be turned off in a minute.
• If the screen shows a low battery message, be sure to charge the
battery.
Batteryusingtimeinformation
Status Time and Display
Charging About 3 hours
Usage
Hours
Up to 2.5 hours
(Available battery using time up to 2.5 hours when
Energy Saving mode set to Max.
Changing the Energy Saving mode default values will
reduce battery life.)
Battery
Level
Indicator
Step 1 Step 2 Step 3 Step 4

29
USINGTHEPROJECTOR
• If you intend not to use the projector for long periods of time, it is
recommended to have the battery charged at 40 % to 50 %.
• The battery is automatically recharged when the projector is connected
to a power supply.
• Charge the battery fully when you first use the projector.
• The battery standard usage time given in the manual is based on
measurements taken by LG; the actual time may vary depending upon
usage.
• Battery usage time may vary depending on broadcast type, operating
temperature, period of use, and user preferences.
• As the battery is consumable, its lifetime gradually decreases. When the
battery’s life is reduced by half, replace it with a new battery from an LG
Electronics customer center.
• Do not charge the battery using any equipment other than that supplied
with the product. This may damage the battery or cause a fire.
• Always use a battery that is approved and certified by LG Electronics,
Inc. Failure to do so may result in an explosion or fire.
• If the battery is leaking or giving off an odor, discontinue its use
immediately and contact LG Electronics Customer Support Center.
• The battery contains lithium-ion, so please handle with care. Failure to
do so may result in an explosion or fire.
30
USINGTHEPROJECTOR
WatchingProjector
TurningtheProjectorOn
The menu screen display in this owner's manual is an example to help
users understand how to operate the product and may look different from
the actual screen.
1 Connect the power cord correctly to turn the projector on.
2 Place the OFF/ON switch on the rear port area to ON and press the
POWER button on the control panel or on the remote control. (If the
switch is placed to OFF, the projector will not turn on.)
3 On the Language and Time Zone Selection screen, select the
language and Time Zone you want.
4 Select the input signal you want using the INPUT button on the remote
control.
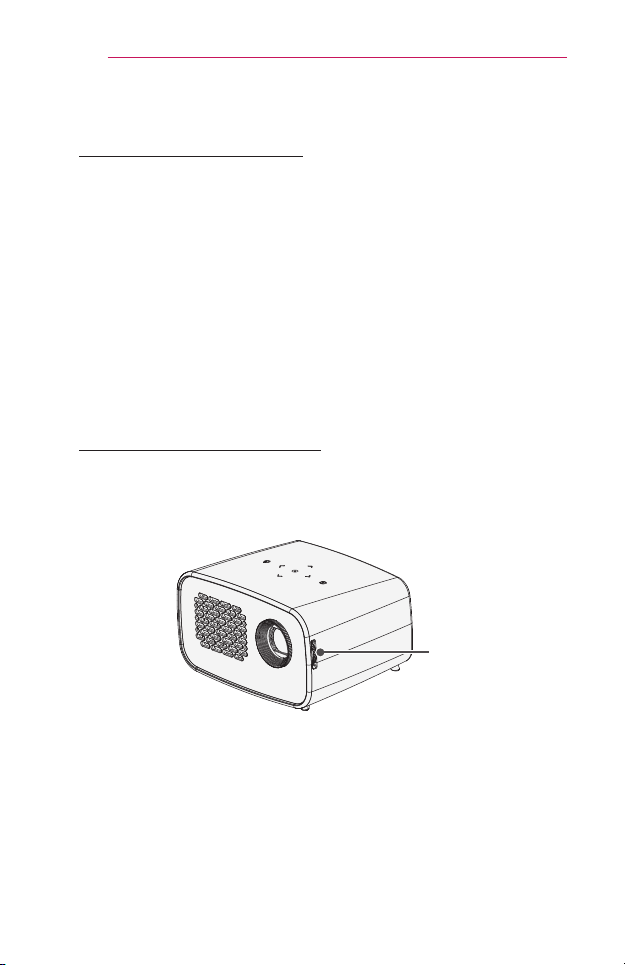
FocusoftheScreenImage
When an image appears on the screen, check if it is in focus and ts the
screen properly.
To adjust the focus of the image, rotate the focus ring.
Focus Ring
31
USINGTHEPROJECTOR
Usingtheprojector
1 When in standby mode, press the POWER button to turn the projector
on.
2 Press the INPUT button and select the input signal you want.
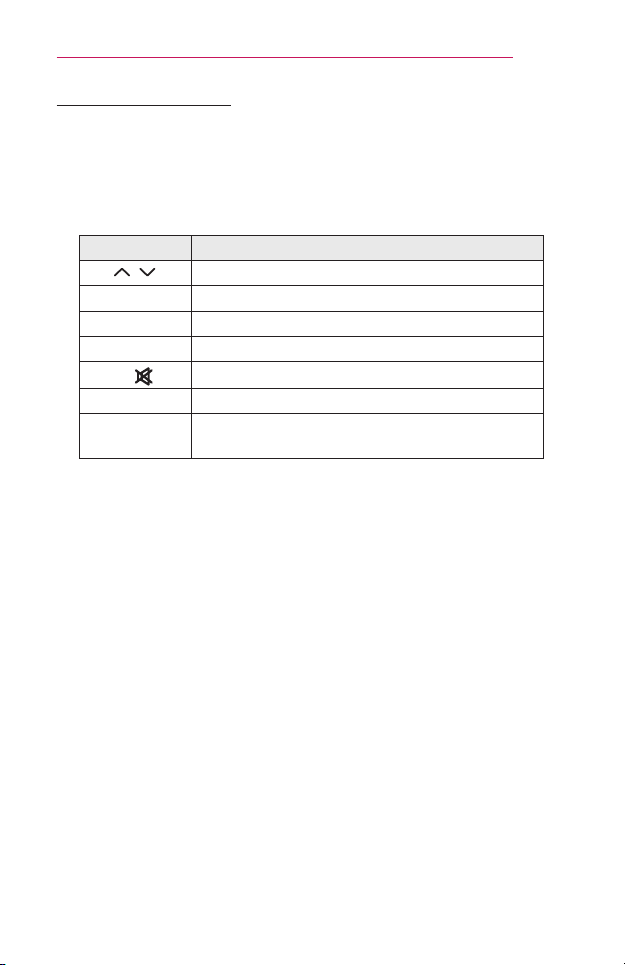
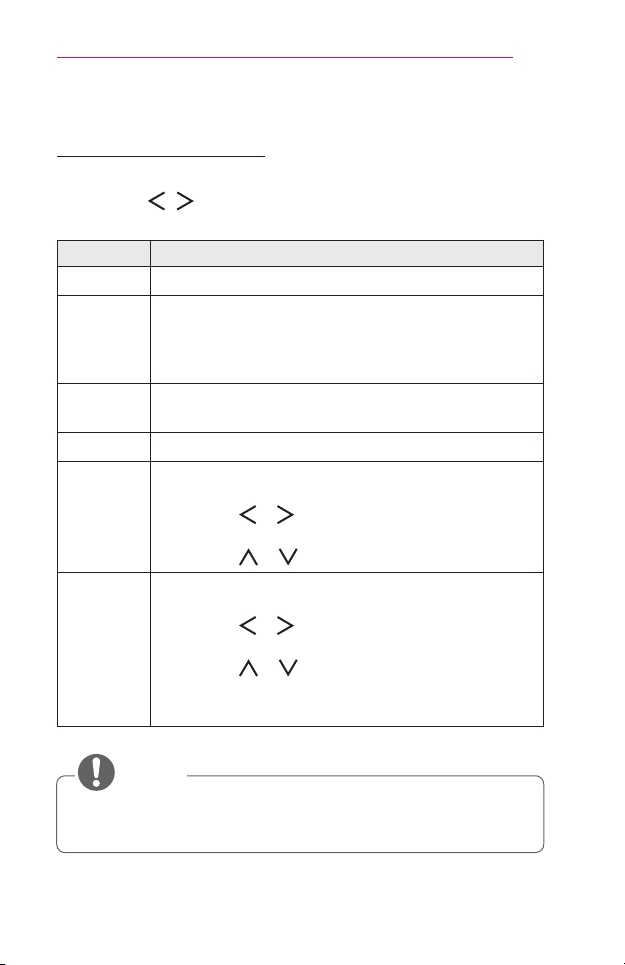
3 Control the projector using the following buttons while watching the
screen.
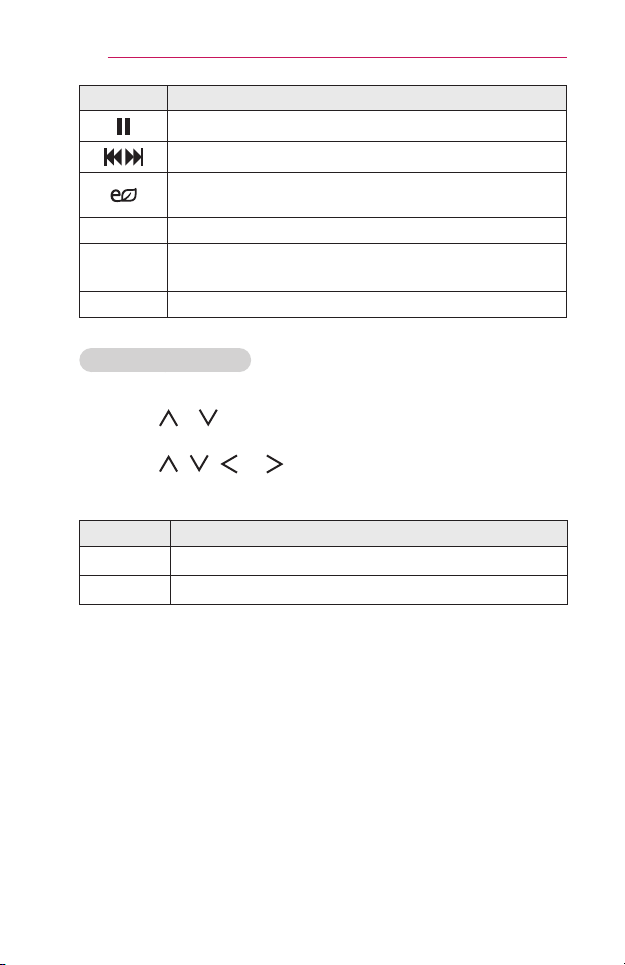
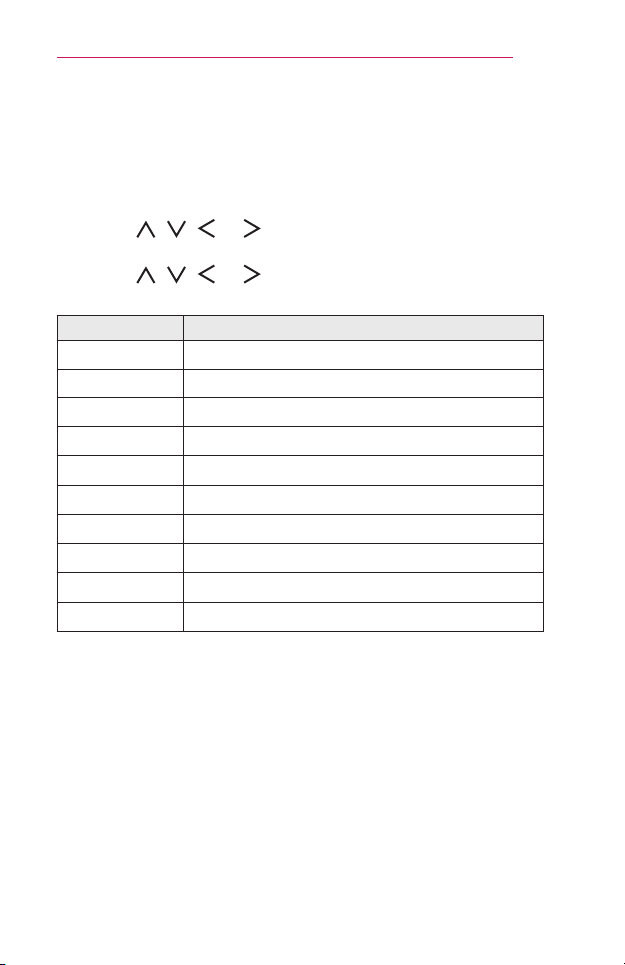
Button Description
CH
,
Changes the TV channel.
LIST Displays the channel list.
0-9 Enters a channel number.
VOL+,- Adjusts the volume level.
MUTE
Mutes the sound from the projector.
Q.MENU Enters the quick menu. (See page 38)
FLASHBK
Displays the channel you were watching
previously.
4 To turn the projector off, press the POWER button.
32
USINGTHEPROJECTOR
SettingChannel
Image shown may differ from your projector.
SavingCurrentlyBroadcastingChannel
UsingtheAutoTuningfunction
Saves a channel which is currently broadcasting. Be sure to activate Auto
Tuning when you move to a new home or change the position of your
projector. When you activate this function, make sure that the antenna is
connected and there are channels broadcasting signals.
1 Press the SETTINGS button.
2 Press the , , , or button to select CHANNEL and press
the OK button.
3 Press the , button to select AutoTuning and press the OK
button.
4 Select Start to start auto tuning. The projector scans and saves
available channels automatically.
5 When you are nished, press the SETTINGS button.
SavingorDeletingChannelsManually
1 Press the SETTINGS button.
2 Press the , , , or button to select CHANNEL and press
the OK button.
3 Press the , button to select ManualTuning and press the OK
button.
4 Scroll through the channel types, and then add or delete channels.
5 When you are nished, press the SETTINGS button.
• If LockSystem is turned on, a pop-up window will appear asking for
password.
• You can store up to 1000 channels. The number of channels that you
can store differs depending on the broadcasting signal environment.
• AutoTuning memorizes the channels that are currently being
broadcast.
• The channels are stored in the order of DTV, TV, Cable DTV and Cable TV.
NOTE
33
USINGTHEPROJECTOR
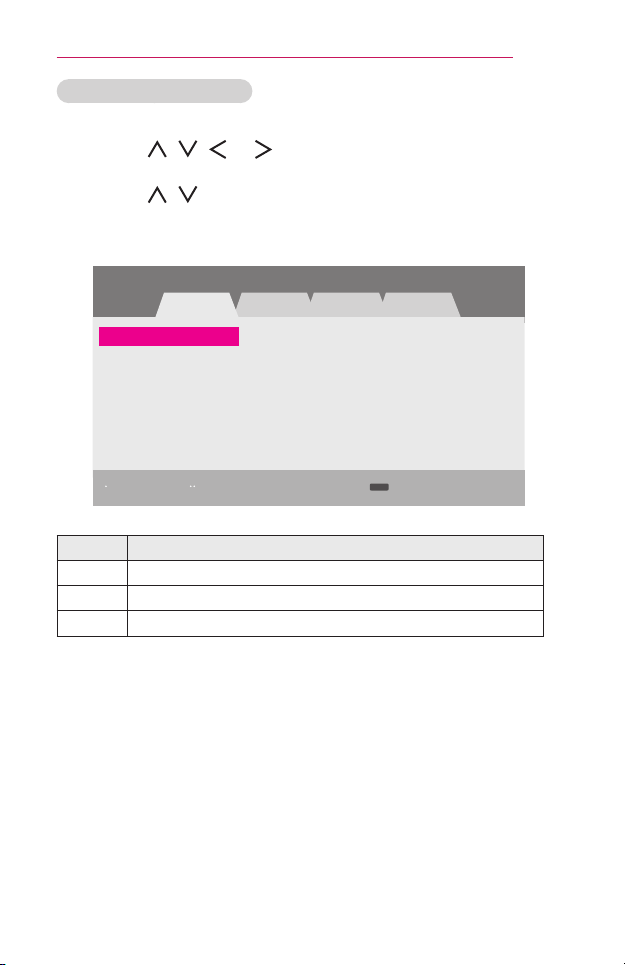
EditingYourChannelList
1 Press the SETTINGS button.
2 Press the , , , or button to select CHANNEL and press
the OK button.
3 Press the , button to select ChannelEditand press the OK
button.
4 Edit a channel by using the buttons below.
Channel Edit Antenna
Page 1/1
3-1 5-1 7-1
DTV TV Cable DTV Cable TV
ꔅ Add/Delete ꔅ Block/Unblock Favorite Ch.
ꔂ Move ꔉ OK
FAV
Button Description
Red Adds or deletes a channel.
Green Block or unblock a channel.
FAV Adds a favorite channel.
5 When you are nished, press the SETTINGS button.
34
USINGTHEPROJECTOR
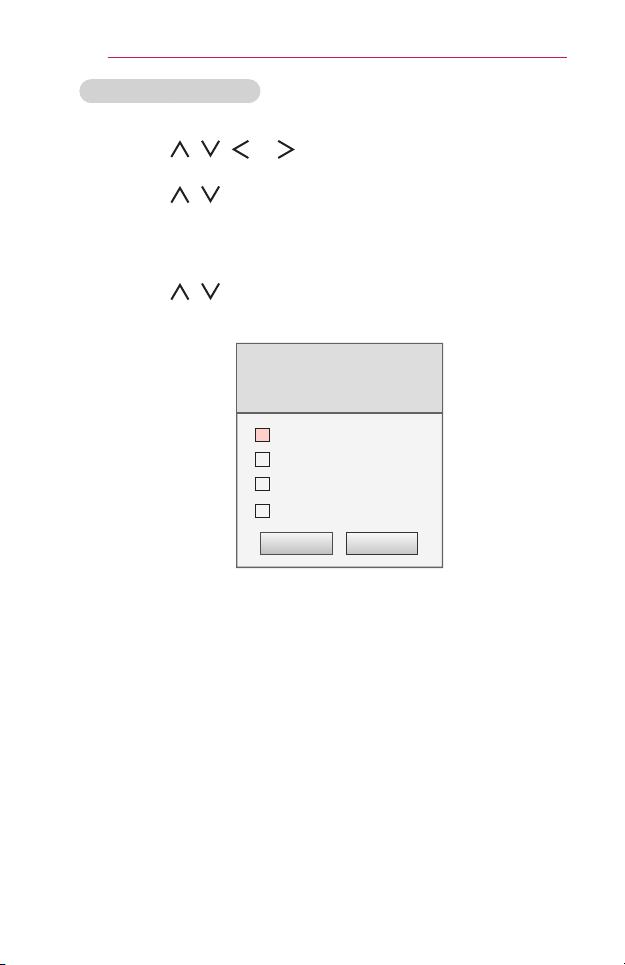
FavoriteChannelSetup
1 Press the SETTINGS button.
2 Press the , , , or button to select CHANNEL and press
the OK button.
3 Press the , button to select ChannelEditand press the OK
button.
4 Move to your desired channel.
5 Press the FAV button to access the SetasFavorite.
6 Press the , buttons to to scrolls through channel group.
7 Press the OK button.
Set as Favorite
Select a favorite channel group.
Multiple selection is available.
Group A
Group B
Group C
Group D
OK Cancel
35
USINGTHEPROJECTOR
AdditionalOptions
AdjustingAspectRatio
1 Press the Q.MENU button.
2 Press the , buttons to select AspectRatio and press the OK
button.
Menu Description
16:9 Resizes images to the 16:9 ratio.
JustScan
Displays video images in the original size without
removing parts of the edge of the image.
• If you select JustScan, you may see image noises at
the edge or edges of the screen.
SetBy
Program
Displays images in the same aspect ratio as the original
image.
4:3 Resizes images to the previous standard 4:3.
Zoom
Resizes the image to t the screen width. The top and
bottom parts of the image may be cut off.
• Press the or button to zoom in or out of the
image.
• Press the or button to move the image.
Cinema
Zoom1
Formats an image to the cinemascope ratio, 2.35:1. It
ranges from 1 to 16.
• Press the or button to zoom in or out of the
image.
• Press the or button to move the image.
• If you enlarge or reduce an image, the image may be
distorted.
• Available picture size may differ depending on the input signal.
• You can also use the SETTINGS button.
NOTE
36
USINGTHEPROJECTOR
UsingtheKeystoneFunction
To prevent the screen image from becoming trapezoidal, Keystone
adjusts the top and bottom width of the image if the projector is not set up
at a right angle to the screen.
Because the Keystone function may cause inferior screen image quality,
use this function only when it is not possible to set up the projector at an
optimal angle.
• Keystone 0
◀
L R
▶
Close
1 Press the SETTINGS button.
2 Use the , , , or buttons to select OPTION2 and press the
OK button.
3 Use
the or buttons to select Keystone and press the OK button.
4 Use the or buttons to adjust Keystone.
5 Keystone can be adjusted from -40 to 40.
6 Press the OK button when nished.
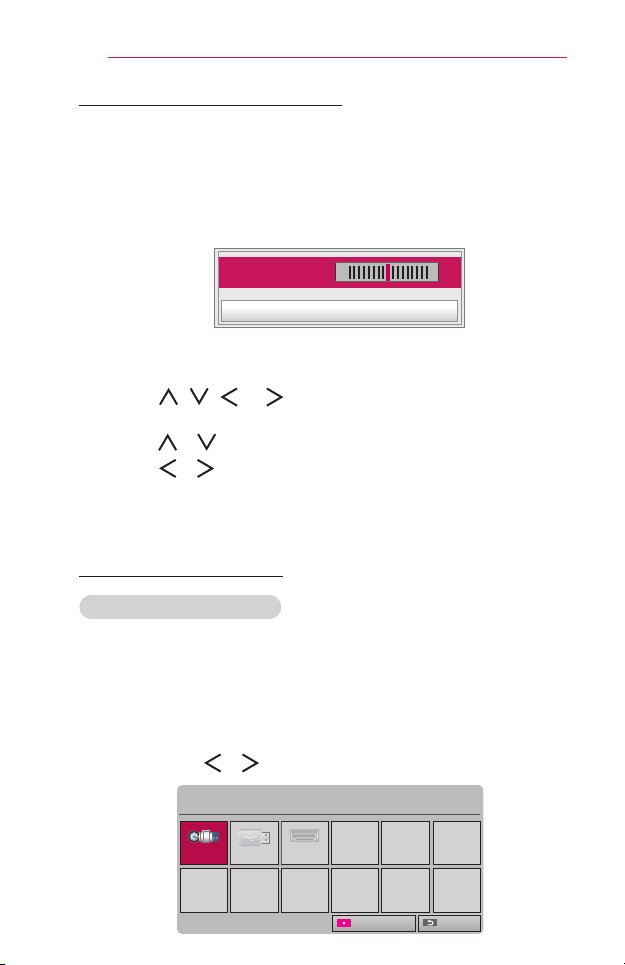
Changinginputdevice
Toselectanexternalinput
You can select inputs connected to the projector.
• Press the INPUT button on the remote control to display the input
selection screen.
- Connected inputs are displayed rst.
• Select an input signal using the remote control's INPUT button to
connect the projector to the desired input.
You can use the or button to switch between all the input modes.
Input List
TV USB HDMI
ꔂ Move ꔉ OK
Exit
Input Label
37
USINGTHEPROJECTOR
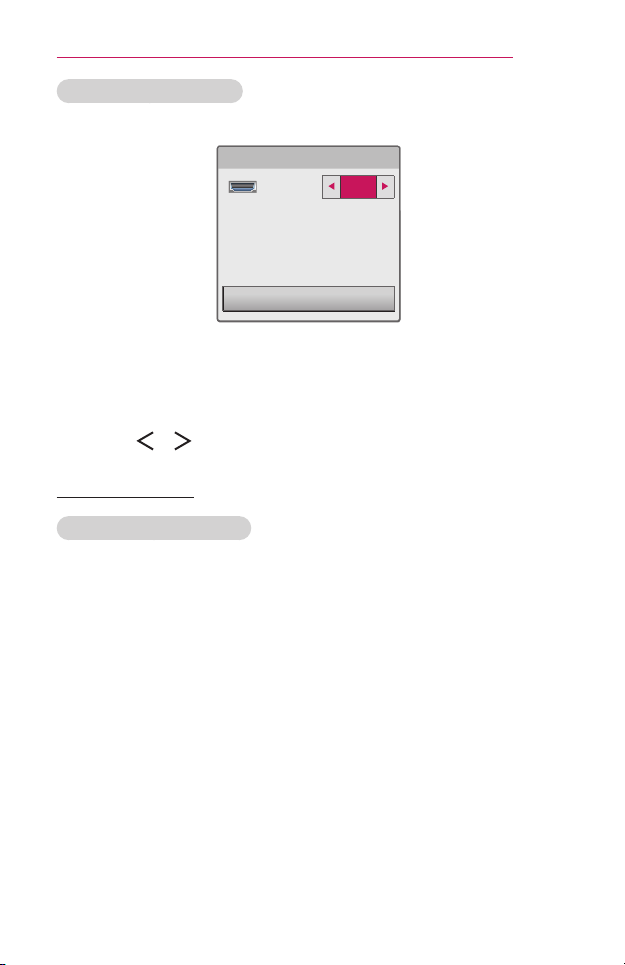
SelectinganInputLabel
Displays which devices are connected to which input ports.
Input Label
HDMI
Close
1 Press the INPUT button on the remote control to display the input
selection screen.
2 Use the Redbutton.
3 Use the or button to select one of the input labels.
BlankFunction
UsingtheBlankFunction
This function may be effective when you need to draw attention during a
meeting or training.
1 Press the BLANK button, and the screen is covered by the
background color. You can change the background color by referring to
"Selecting the background color of the blank image".
2 Press any button to clear the blank function. To cover the screen
temporarily, press the BLANK button on the remote control. Do not
block the lens with any object while the projector is running. It may
become overheated and deformed or even cause a re.
38
USINGTHEPROJECTOR
Selectingthebackgroundcoloroftheblankimage
1 Press the SETTINGS button.
2 Press the , , , or buttons to select OPTION2 and press
the OK button.
3 Press the , buttons to select BlankImage and press the OK
button.
4 Press the or button to move to the setting or option you want
and press the OK button.
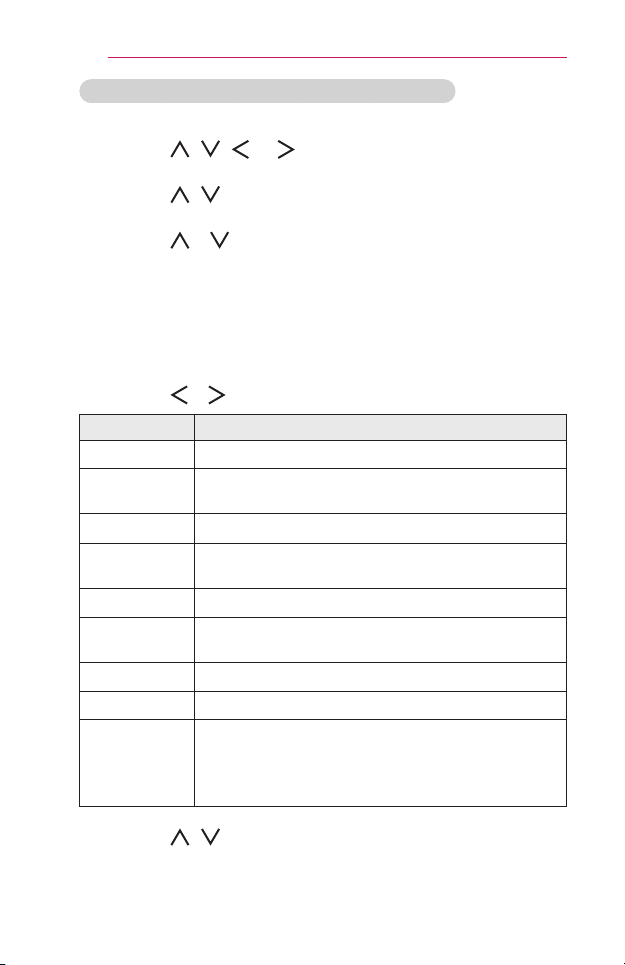
UsingtheQuickMenu
You can easily customize your frequently used menus.
1 Press the Q.MENU button.
2 Press the or button to select a menu and press OK button.
Menu Description
AspectRatio Resizes the picture.
PJTMode
Turns the projected image upside down or ips it
horizontally.
PictureMode Changes the picture mode.
MultiAudio
Sets MONO or STEREO, or a language for a bilingual
broadcast (Digital signal).
SAP Changes the MTS sound (Analog signal).
SleepTimer
Sets the projector to be turned off at the specied
time.
ClearVoiceII Makes the voice from the projector crisp and clear.
Del/Add Can delete or add channels.
USBDevice
Allows you to remove a connected USB device in a
safe manner.
(The menu is displayed only when the USB device is
connected.)
3 Press the , button to scroll through the following menus.
39
MYMEDIA
MYMEDIA
BeforeUsing
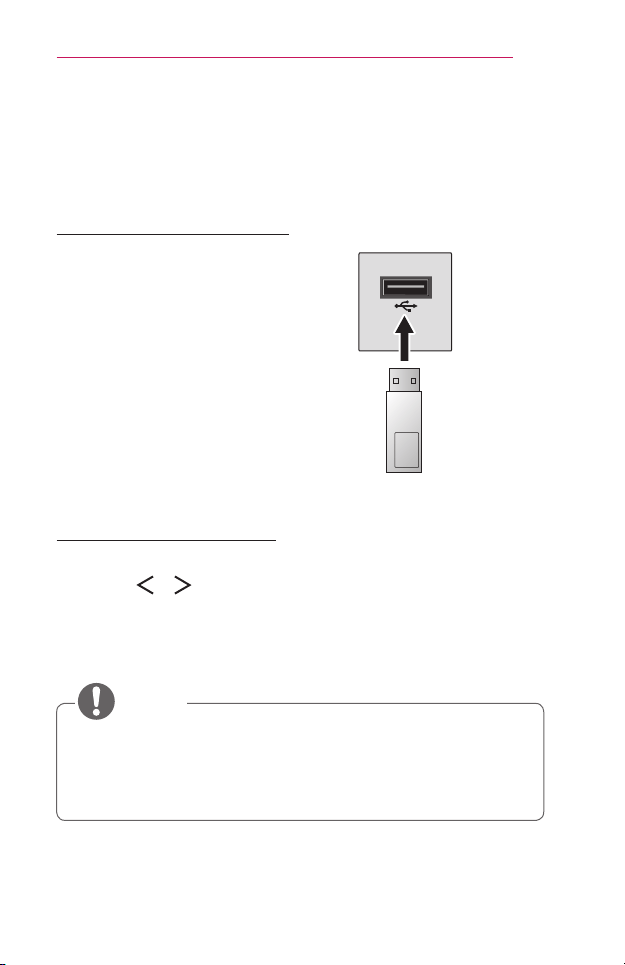
ConnectingaUSBDevice
Connect a USB device (external
HDD, USB memory) to the USB port
of projector to enjoy the content les
stored in the USB device with your
projector. You cannot write or delete
data in the USB device. Connect a
USB ash drive as shown below.
USB ash
Drive
RemovingaUSBDevice
1 Press the Q.MENU button.
2 Use the or button to move to USBDevice and press the OK
button.
3 Select a USB to remove. Wait for conrmation that the USB device has
stopped before removing the USB.
• If detached early, an error may occur on the projector or the USB
storage device.
• Once a USB device has been selected for removal, it can no longer
be read. Remove the USB storage device and then re-connect it.
NOTE

40
MYMEDIA
TipsforusingaUSBdevice
• If the USB storage device has a built-in auto recognition program or uses
its own driver, it may not work.
• Some USB storage devices may not work or may work incorrectly.
• If you use a USB extension cable, the USB device may not be
recognized or may not work properly.
• Use only USB storage devices formatted with the Windows FAT32 or
NTFS file system.
• For external USB HDDs, it is recommended that you use devices with a
rated voltage of less than 5 V and a rated current of less than 500 mA.
•
It is recommended to use a Hard Disk Drive with its own power supply.
(If the power being supplied is not sufficient, the USB storage device
may not be detected correctly.) Note, a USB Hub is not supported.
• It is recommended that you use USB flash drives of 32 GB or less and
USB HDDs of 1 TB or less.
• If a USB HDD with power-saving function does not work properly, turn
the power off and on. For more information, refer to the user manual of
the USB HDD.
• Data in USB storage device can be damaged so be sure to back
up important files to other devices. Data maintenance is the user's
responsibility and the manufacturer is not responsible for data loss.
41
MYMEDIA
ToUseMyMedia
1 Press the SETTINGS button on the remote control.
2 Select MYMEDIA.
Select desired le from the list. Watch the chosen le.
Sets play related settings by checking option during disk playback.
MyMediasupportingfile
• Maximum data transmission rate: 20 Mbps (Mega bit per second)
• External supported subtitle formats:*.smi, *.srt, *.sub (MicroDVD,
SubViewer 1.0/2.0), *.ass, *.ssa,*.txt (TMPlayer), *.psb (PowerDivX)
• Internal supported subtitle formats: SRT/ASS/SSA (Supports internal
subtitles generated from DivX6)
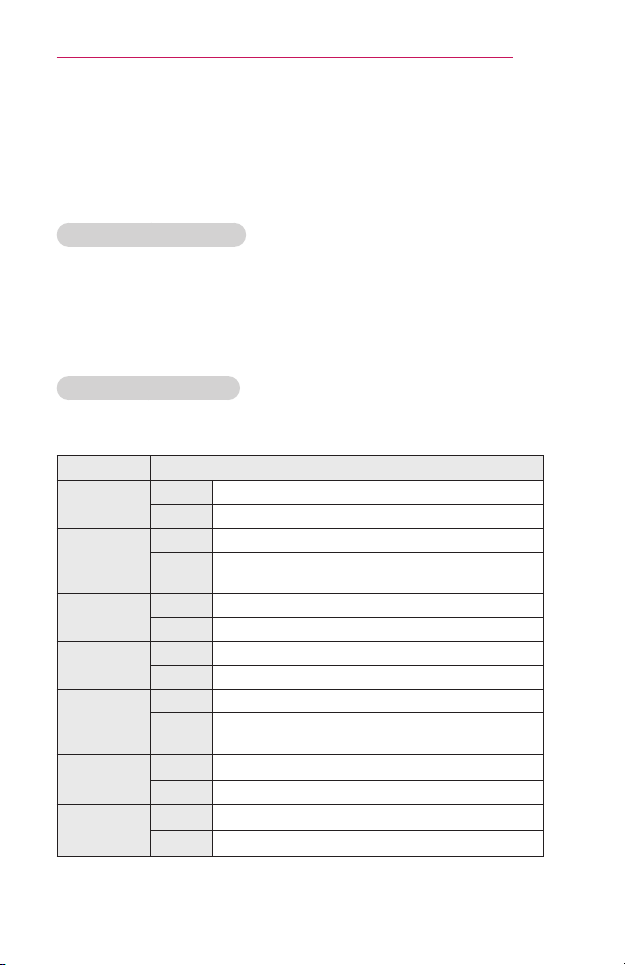
VideoSupportedCodec
Maximum resolution: 1920 x 1080 @ 30p
(only Motion JPEG 640 x 480 @ 30p)
Extension Codec
.asf,.wmv
Video VC-1 Advanced Prole, VC-1 Simple and Main Proles
Audio WMA Standard, WMA 9 Professional
.divx,.avi
Video DivX3.11, DivX4, DivX5, DivX6, XVID, H.264/AVC
Audio
MPEG-1 Layer I, II, MPEG-1 Layer III (MP3), Dolby
Digital
.mp4,.m4v,
.mov
Video H.264 / AVC, MPEG-4 Part 2
Audio AAC
.mkv
Video H.264 / AVC
Audio HE-AAC, Dolby Digital
.ts,.trp,.tp,
.mts,.m2ts
Video H.264 / AVC, MPEG-2, VC-1
Audio
MPEG-1 Layer I, II, MPEG-1 Layer III (MP3), Dolby
Digital, Dolby Digital Plus, AAC
.vob
Video MPEG-1, MPEG-2
Audio Dolby Digital, MPEG-1 Layer I, II, DVD-LPCM
.mpg
Video MPEG-1
Audio MPEG-1 Layer I, II
42
MYMEDIA
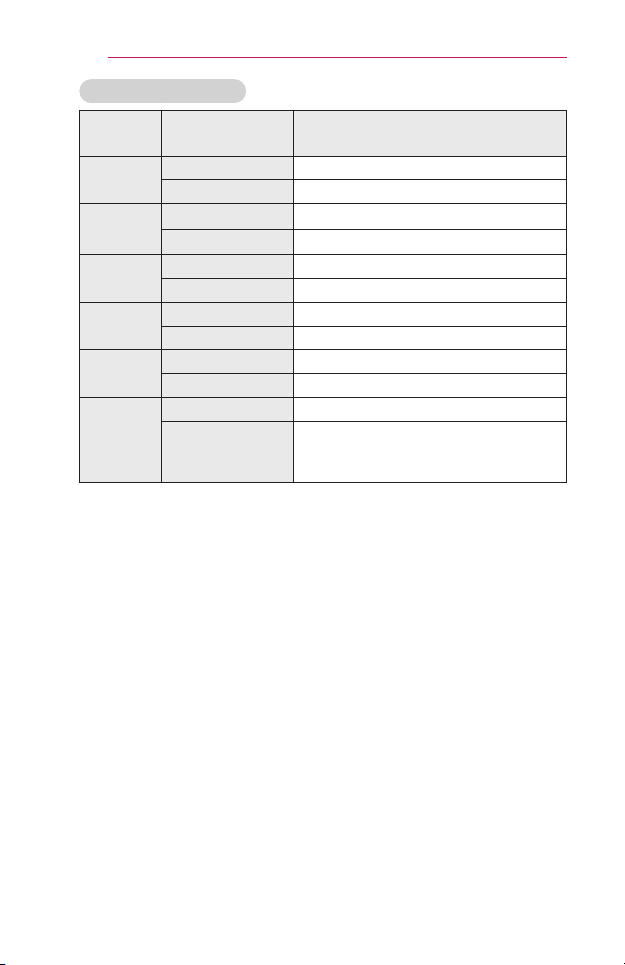
Supportedaudiofiles
File
Format
Item Info
MP3
Bitrate 32 Kbps to 320 Kbps
SamplingRate 32 kHz to 48 kHz
AC3
Bitrate 32 kbps to 640 kbps
SamplingRate 32 kHz, 44.1 kHz, 48 kHz
MPEG
Bitrate 32 kbps to 448 kbps
SamplingRate 32 kHz to 48 kHz
AAC,
HEAAC
Bitrate 24 kbps to 3844 kbps
SamplingRate 8 kHz to 96 kHz
CDDA
Bitrate 1.44 Kbps
SamplingRate 44.1 kHz
LPCM
Bitrate 1.41 Mbps to 9.6 Mbps
SamplingRate
Multi Channel: 44.1 kHz, 88.2 kHz /
48 kHz, 96 kHz
Stereo: 176.4 kHz, 192 kHz
43
MYMEDIA
WatchingtheVideos
In the MovieList, you can watch movies stored on the connected USB
device.
Controls playback and sets options while viewing videos.
TipsforPlayingVideoFiles
• Some subtitles created by users may not work properly.
• The video and subtitle files should be placed in the same folder. For
subtitles to display correctly, the video and subtitle files must have the
same name.
• We do not support any stream that contains GMC (Global Motion
Compensation) or Qpel (Quarterpel Motion Estimation).
• Only H.264 / AVC profile level 4.1 and lower is supported.
• Video files that exceed 50 GB (gigabyte) are not supported for playback.
The file size limit is dependent on the encoding environment.
• DTS audio codec is not supported.
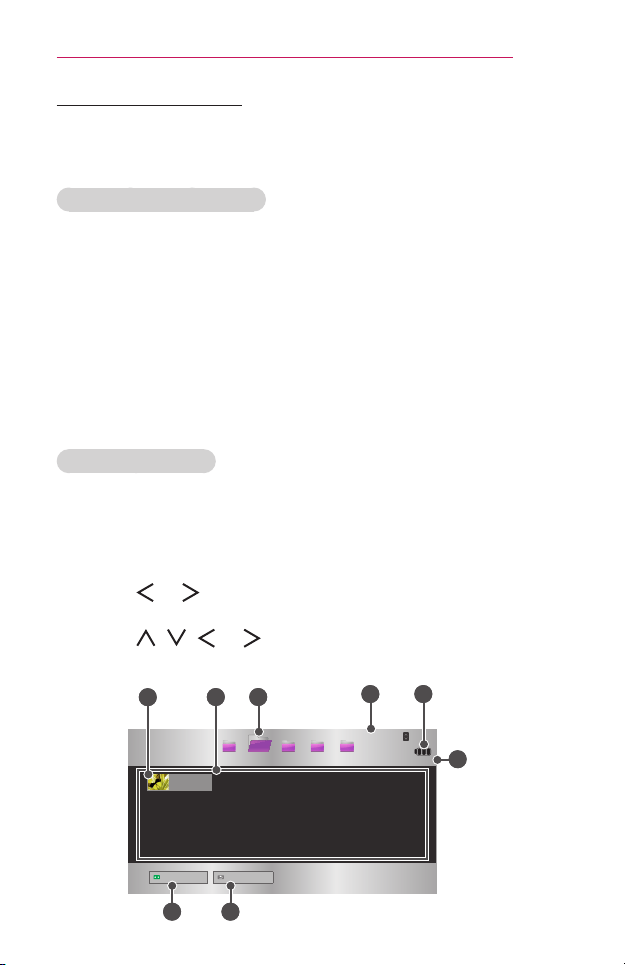
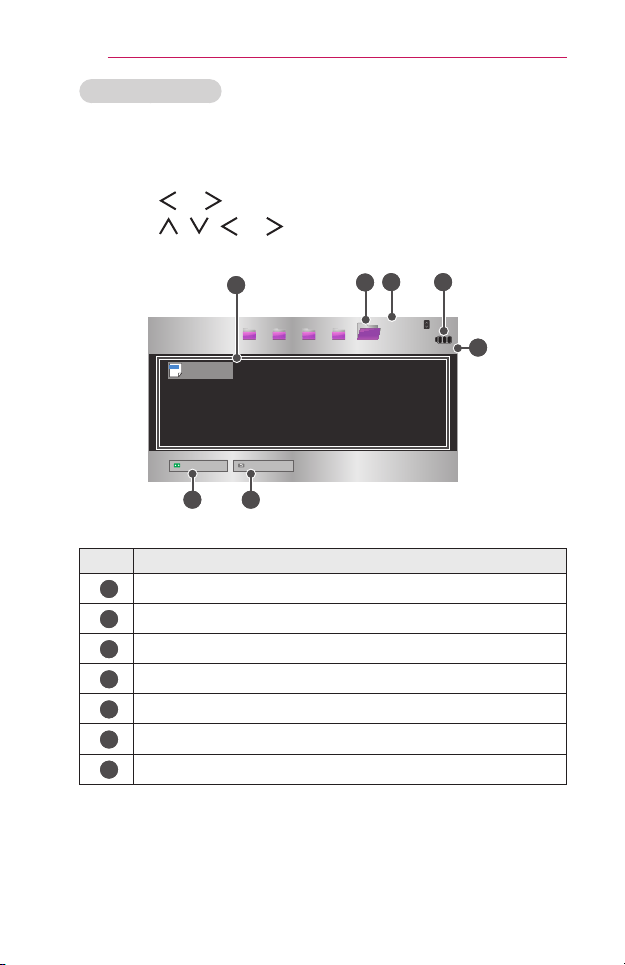
BrowsingMovieList
Play a video le stored from a connected device.
1 Connect a USB device.
2 Press the SETTINGS button.
3 Move to MYMEDIA.
4 Use the , or button to select MovieList and press the OK
button.
5 Use the , , , or button to select the le you want and press
the OK button.
USB STORAGE DEVICE
Page 1/1
Page 1/1
Drive1 Drive5Drive3 Drive4
Drive2
CH
Page Change
Movie List
Butterfly_...
01:34:33
Go to root folder
Go to upper folder
1
2
4
7 8
3
6
5
44
MYMEDIA
No. Description
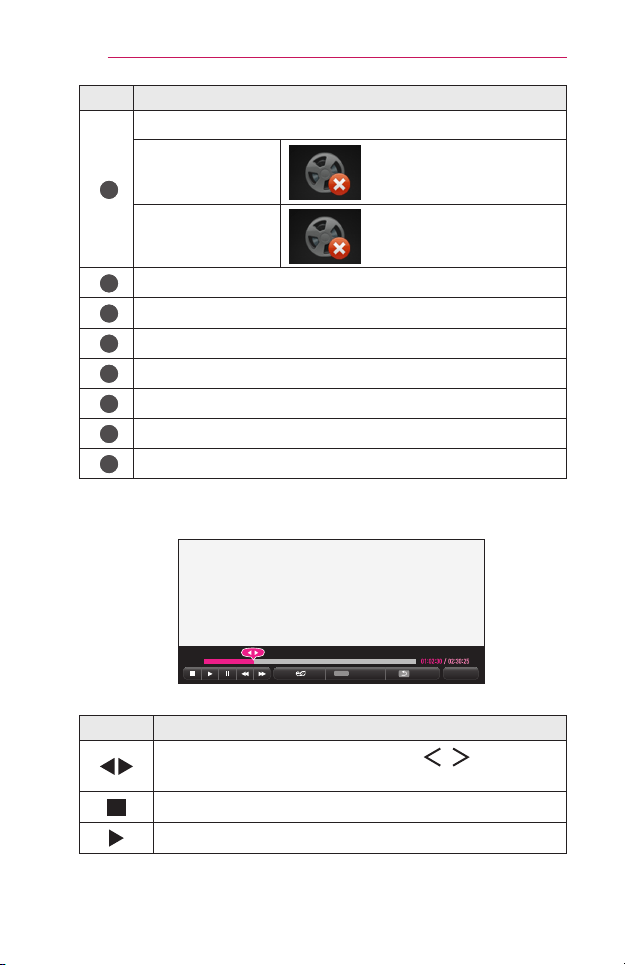
1
Thumbnails
Abnormal le
File not supported
2
File List
3
Moves to the upper level folder.
4
Current page/Total no. of folder pages
5
Displays the remaining battery life.
6
Current page/Total no. of le pages
7
Moves to the top level folder.
8
Moves to the upper level folder.
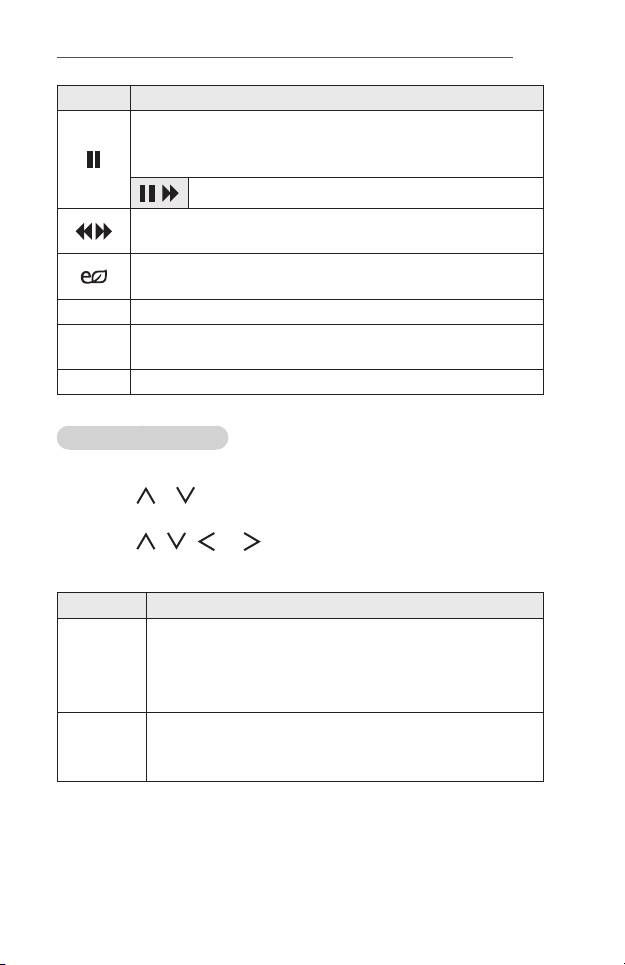
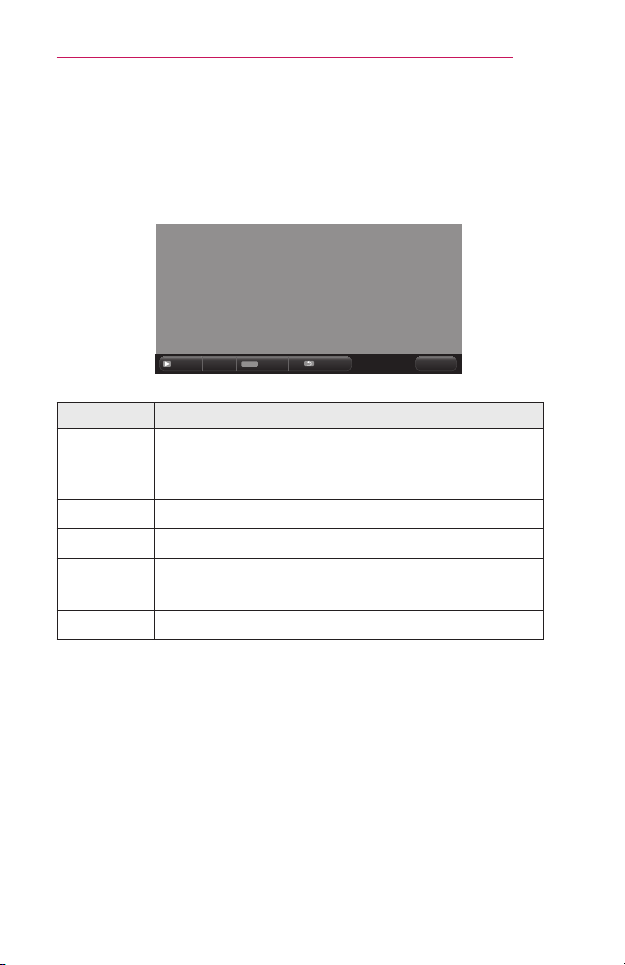
6 Control playback by using the following buttons.
나가기
Q.MENU
Option
Hide
Exit
Item Description
Shows the current playing position. Use , buttons to
move forward or backward.
Stops playing and returns to Movie List.
Returns to normal playback.
45
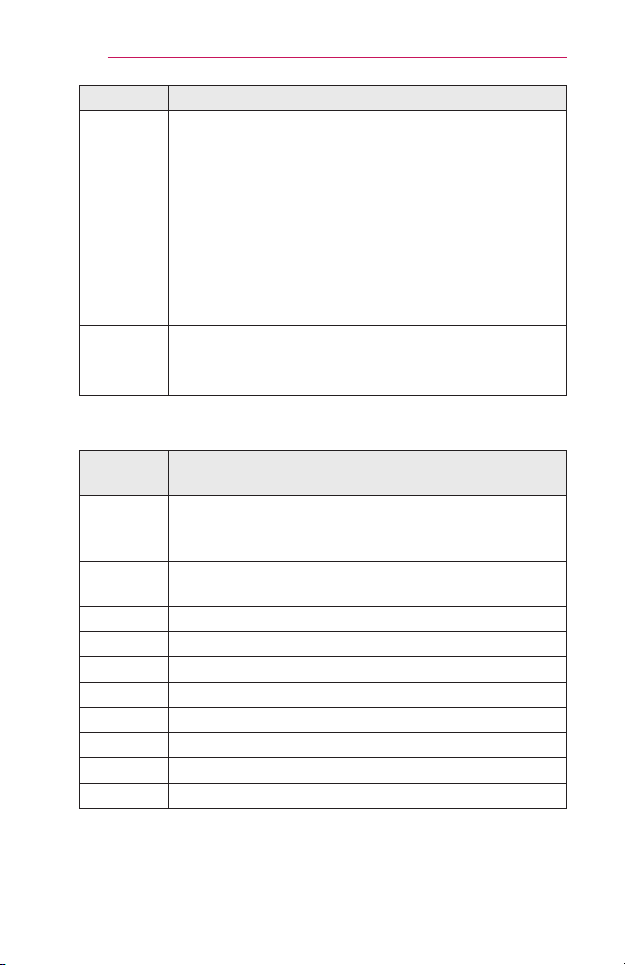
MYMEDIA
Item Description
Pauses the media player.
If no button is pressed on the remote control for 10 minutes
after pausing, the playback is restarted.
Displays in slow motion.
Whenever this button is pressed, the playback speed is
changed.: x2, x4, x8, x16, x32
Reduces power consumption by adjusting peak screen
brightness.
Option A pop-up window will appear.
Hide
Hides the playback bar. Press the OK button to make it
appear.
Exit Returns to the Movie List screen.
OptionsforMovieList
1 Press the Q.MENU button.
2 Use the or button to move to a desired option and press the OK
button.
3 Use the , , , or button to set up each item.
SetVideoPlay.
Item Description
Picture
Size
Selects the size of a playback screen.
• Full: Files are played in full screen mode according to
the aspect ratio of video.
• Original: Displays the video in the original size.
Audio
Language
Allows you to select the language you want for the le with
multiple audio tracks. This option is not available if the le
has only one audio track.
46
MYMEDIA
Item Description
Subtitle
Language
The subtitle can be turned on or off.
• Language: One of any of the available languages can
be selected.
• CodePage: A character set used for a subtitle can
be selected. By default, the subtitle is displayed in a
language configured in OPTION1→ Language.
- Sync: If a subtitle is not synchronized with its video,
you can adjust its speed at 0.5 seconds unit.
- Position: Moves the location of a subtitle.
- Size: Changes the subtitle font size.
Repeat
Turns the repeat function On or Off.
When it is set to off, the next le can be played
sequentially if the le name is similar.
SubtitleLanguage
Subtitle
Language
Language
Latin1
English, Spanish, French, German, Italian, Swedish,
Finnish, Dutch, Portuguese, Danish, Romanian, Norwegian,
Albanian, Gaelic, Welsh, Irish, Catalan, Valencian
Latin2
Bosnian, Polish, Croatian, Czech, Slovak, Slovenian,
Serbian, Hungarian
Latin4 Estonian, Latvian, Lithuanian
Cyrillic Bulgarian, Macedonian, Russian, Ukranian, Kazakh
Greek Greek
Turkish Turkish
Hebrew Modern Hebrew
Chinese Simplied Chinese
Korean Korean
Arabic Arabic
SetVideo.
You can change video settings. (Refer to "PICTURE Settings" on page 60.)
SetAudio.
You can change audio settings. (Refer to "AUDIO Settings" on page 65.)
47
MYMEDIA
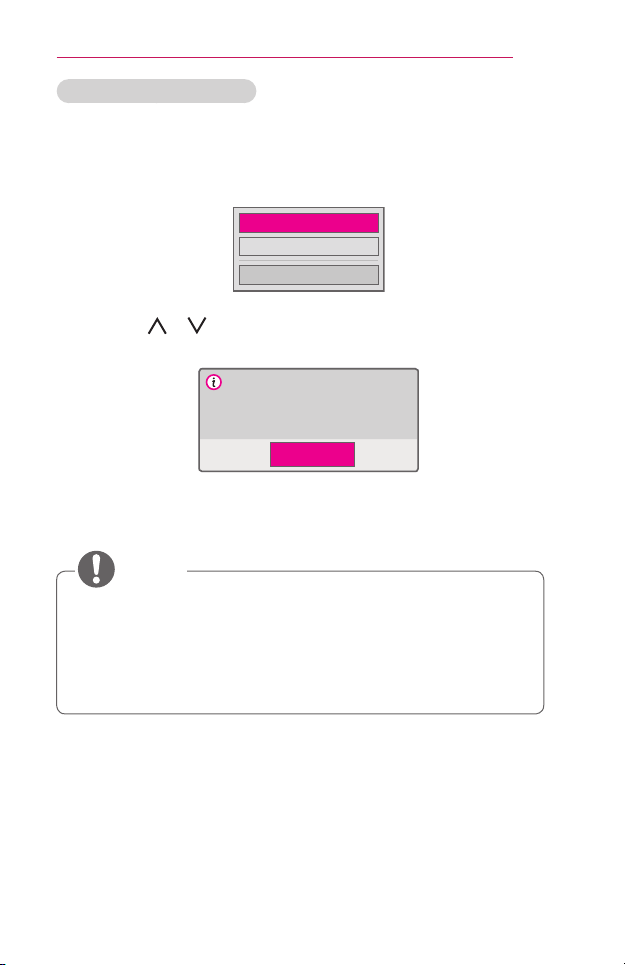
RegisteringtheDivXcode
Checks DivX Reg. Code for replaying DivX protected videos. Register at
http://vod.divx.com.
Use Reg. Code to rent or purchase movies at www.divx.com/vod.
1 In the Settings menu, move to OPTION1 and press DivX(R)VOD.
Registration
Deregistration
Close
2 Press the or button to move to Registration and press the OK
button.
You must register your device to
play DivX(R) protected videos.
Registration Code: XXXXXXXXXX
Register at http://vod.divx.com
OK
3 Check the DivX RegistrationCode.
• Rented/purchased DivX files cannot be played if the DivX
Registration Code of a different device is used. Use only the DivX
Registration Code granted to this specific device.
• Converted files not conforming to the DivX Codec Standard may not
play or may produce abnormal sound.
NOTE

48
MYMEDIA
ToderegistertheDivXcode
Use the DivX deregistration code to deactivate the DivX DRM function.
1 In the Settings menu, move to OPTION1 and press DivX(R)VOD.
2 Use the or button to go to Deregistration and press the OK
button.
3 Select Yes.
No
No
Yes
Yes
Your device is already registered.
Are you sure you wish to deregister?
Deregistration code : ********
Deregister at http://vod.divx.com
Continue with registration?
• What is DRM [Digital Rights Management]?
DRM technologies and services protect the interests and rights of
copyright holders by preventing illegal use of digital content. Files
can be played after the license is verified through an online method,
etc.
NOTE

49
MYMEDIA
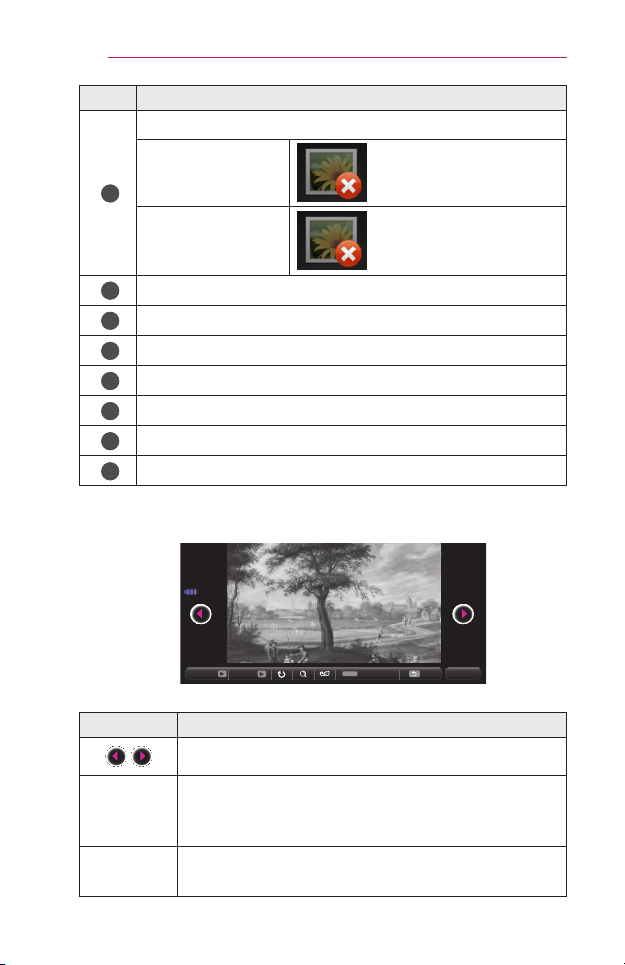
ViewingthePhotos
You can view photos stored on a connected device.
SupportedPhotoFiles
PHOTO (*.JPEG)
Baseline: 64-pixel (width) x 64-pixel (height) - 15360-pixel (width) x
8640-pixel (height)
Progressive: 64-pixel (width) x 64-pixel (height) - 1920-pixel (width) x
1440-pixel (height)
• Only JPEG files are supported.
• Non-supported files are displayed in the form of an icon.
• An error message is displayed for corrupted files or file formats that
cannot be played.
• Corrupted files may not be displayed properly.
• It may take some time to view high-resolution images in full screen.
BrowsingPhotoList
1 Connect a USB device.
2 Press the SETTINGS button.
3 Move to MYMEDIA.
4 Use the , or buttons to select PhotoList and press the OK
button.
5 Use the , , , or button to select the le you want and press
the OK button.
USB STORAGE DEVICE
Page 1/1
Page 1/1
Drive1 Drive5Drive3 Drive4
Drive2
CH
Page Change
Photo List
Butterfly_...
06/09/2014
Go to root folder
Go to upper folder
1
2
4
7 8
3
6
5
50
MYMEDIA
No. Description
1
Thumbnails
Abnormal le
File not supported
2
File List
3
Moves to the upper level folder.
4
Current page/Total no. of folder pages
5
Displays the remaining battery life.
6
Current page/Total no. of le pages
7
Moves to the top level folder.
8
Moves to the upper level folder.
6 Control playback by using the following buttons.
Q.MENU
01_a.jpg
2008/12/10
1920 x 1080
479 KB
[1/4]
Slideshow BGM Option Hide Exit
Item Description
Selects the previous or next photo.
Slideshow
All photos are displayed during slide show.
• Set SlideSpeed in the Option → SetPhotoView.
menu.
BGM
You can listen to music while viewing photos in full size.
Set the BGM in Option → SetPhotoView.menu.
51
MYMEDIA
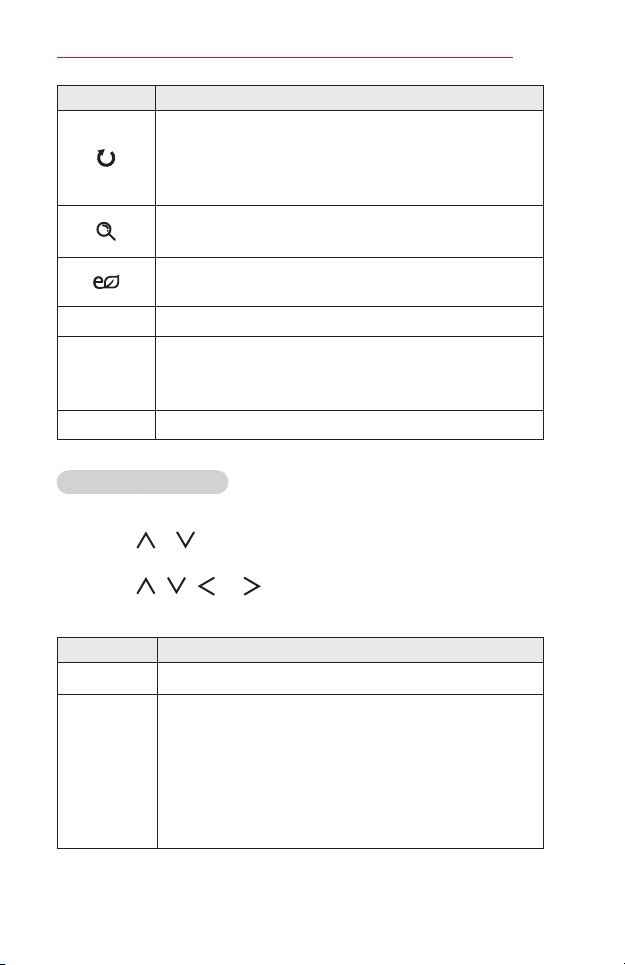
Item Description
Rotates photos.
• Rotates a photo 90°, 180°, 270°, 360° clockwise.
• Photos cannot be rotated if their width is greater than
the height of the max. supported resolution.
Views the photo in full mode or original mode.
Press the blue button to enlarge the image.
Reduces power consumption by adjusting peak screen
brightness.
Option A pop-up window will appear.
Hide
Hides the menu on the full size screen.
• To see the menu, press the OK button on the remote
control.
Exit Exit from full screen photo view.
OptionsforPhotoList
1 Press the Q.MENU button.
2 Use the or button to move to a desired option and press the OK
button.
3 Use the , , , or button to set up each item.
SetPhotoView.
Item Description
Slidespeed Selects a slideshow speed.
BGM
Selects a music folder for the background music.
• You cannot change the music folder while the
background music is playing.
• For background music, only the folder from the same
device can be selected.
- Repeat: Selects repeat play.
- Random: Selects random play.
52
MYMEDIA
SetVideo.
You can change video settings. (Refer to "PICTURE Settings" on page 60.)
SetAudio.
You can change audio settings. (Refer to "AUDIO Settings" on page 65.)
ListeningtoMusic
You can play audio les stored on the connected device.
SupportedMusicFiles
*.MP3
Bit rate range 32 Kbps to 320 Kbps
• Sampling rate MPEG1 Layer3: 32 kHz, 44.1 kHz, 48 kHz
• Sampling rate MPEG2 Layer3: 16 kHz, 22.05 kHz, 24 kHz
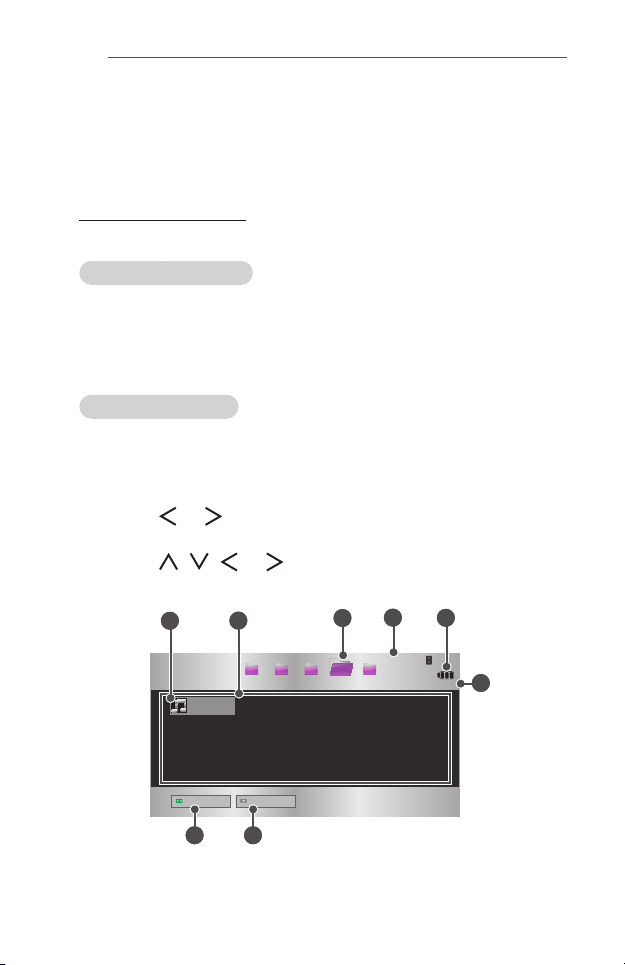
BrowsingMusicList
1 Connect a USB device.
2 Press the SETTINGS button.
3 Move to MYMEDIA.
4 Use the , or button to select MusicListand press the OK
button.
5 Use the , , , or button to select the le you want and press
the OK button.
USB STORAGE DEVICE
Page 1/1
Page 1/1
Drive1 Drive5Drive3 Drive4
Drive2
CH
Page Change
Music List
Butterfly_...
01:34:33
Go to root folder
Go to upper folder
1
2
4
7 8
3
6
5
53
MYMEDIA
No. Description
1
Thumbnails
Abnormal le
File not supported
2
File List
3
Moves to the upper level folder.
4
Current page/Total no. of folder pages
5
Displays the remaining battery life.
6
Current page/Total no. of le pages
7
Moves to the top level folder.
8
Moves to the upper level folder.
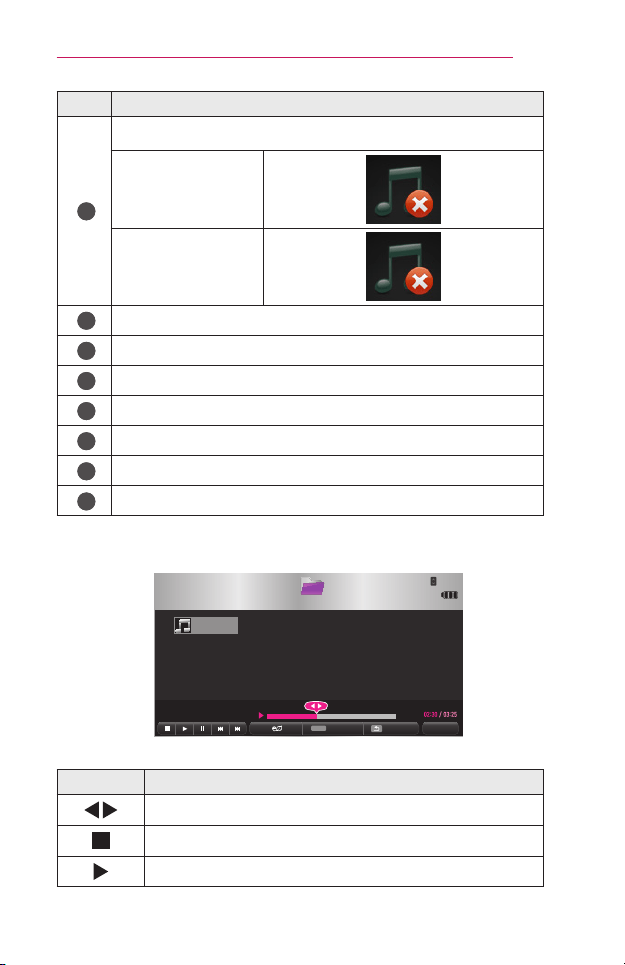
6 Control playback by using the following buttons.
USB STORAGE DEVICE
Page 1/1
Drive1
Q.MENU
002. - B02.mp3
Page 1/1
CH
Page Change
Option Hide
Exit
Butterfly_...
01:34:33
Music List
Item Description
Changes the playing position.
Stops playing.
Returns to normal playback.
54
MYMEDIA
Item Description
Pauses the media player.
Plays the previous/next le.
Reduces power consumption by adjusting peak screen
brightness.
Option Sets up the options of Music List.
Hide
Hides the playback bar.
• Press the OK button to make the playback bar appear.
Exit Returns to the Music List screen.
OptionsforMusicList
1 Press the Q.MENU button.
2 Use the or button to move to a desired option and press the OK
button.
3 Use the , , , or button to set up each item.
SetAudioPlay.
Item Description
Repeat Selects repeat play.
Random Selects random play.
SetAudio.
You can change audio settings. (Refer to "AUDIO Settings" on page 65.)

55
MYMEDIA
ViewingFiles
You can see document les stored on a connected device.
SupportedFileFormats
XLS, XLSX, DOC, DOCX, PPT, PPTX, TXT, PDF, HWP
Microsoft Ofce: 97/2000/2002/2003/2007 Version
Adobe PDF: 1.0/1.1/1.2/1.3/ 1.4 Version
Hangul: 97/2003/2007 Version
• File Viewer realigns a document, so it may look different from what is
displayed on a PC.
• For documents that include images, the resolution may look lower during
the realigning process.
• If the document is large or has many pages, it may take longer to load.
• Unsupported fonts may be replaced by other fonts.
• The file viewer may not open for Office documents that contain many
high resolution images. In that case, reduce the image file size, save it
on a USB storage device and run the file viewer again or connect your
PC to the projector and open the file on your PC.
56
MYMEDIA
BrowsingFileList
1 Connect a USB device.
2 Press the SETTINGS button.
3 Move to MYMEDIA.
4 Use the , or button to select FileList and press the OK button.
5 Use the , , , or button to select the le you want and press
the OK button.
USB STORAGE DEVICE
Page 1/1
Page 1/1
Drive1 Drive5Drive3 Drive4
Drive2
CH
Page Change
File List
DOC
Butterfly_...
06/09/2014
Go to root folder
Go to upper folder
1
3
6 7
2
5
4
No. Description
1
File List
2
Moves to the upper level folder.
3
Current page/Total no. of folder pages
4
Displays the remaining battery life.
5
Current page/Total no. of le pages
6
Moves to the top level folder.
7
Moves to the upper level folder.
57
MYMEDIA
6 Control playback by using the following buttons.
• Click GoPage then the pop-up window for selecting the number of page
appears. Input the page to move to the page you want.
• Press the VOLUME+,- button to zoom in or zoom out.
Press the OK button and then use the Up/Down/Left/Right buttons to
move to GoPage or Zoom.
ꔦ
Q.MENU
Go Page Zoom Option Hide Exit
Item Description
GoPage
Moves to the page you want.
Use the Up/Down/Left/Right buttons to select a page
and press the OK button.
Zoom Enlarges or reduces the document.
Option Sets up the options of File Viewer.
Hide
Hides the menu.
• Press the OK button to make it appear.
Exit Returns to the File Viewer screen.
58
MYMEDIA
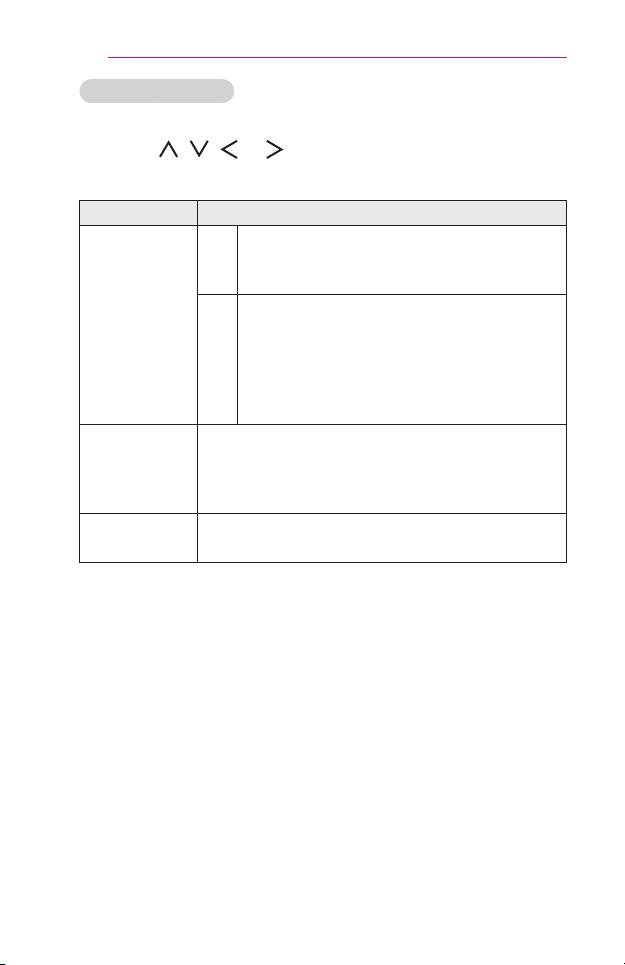
OptionsforFileList
1 Press the Q.MENU button.
2 Use the , , , or button to set up each item.
SetFileViewerOption
Item Description
SinglePage
Loading
On
Loads and displays pages one by one. The
initial loading time is short but a content heavy
page may be displayed slowly.
Off
Loads all pages of a le to memory before it
starts to display them. The initial loading time is
long but you can navigate pages quickly after
loading is complete.
If a le is too large, it may fail to load all the
pages.
ImageQuality
You can set the quality of the image included in the
document. The following three options are available
for the image quality: High, Medium, Low. Higher the
image quality, lower the display time.
Document
Align
Selects initial document align method.
File View settings are default, so close the currently opened document to
apply changes to the new document, if any.
59
CUSTOMIZINGSETTINGS
CUSTOMIZINGSETTINGS
SETTINGS
1 Press the SETTINGS button.
2 Use the , , , or button to select the desired item and press
the OK button.
3 Use the , , , or button to set up the desired item and press
the OK button.
Menu Description
PICTURE Adjusts the image quality for optimal viewing.
AUDIO Adjusts the sound quality and volume level.
CHANNEL Sets up and edits a channel.
TIME Sets the time and time-related features.
INFORMATION Shows information about the Projector.
LOCK Locks or unlocks a channels or a programs.
OPTION1 Customizes the general settings.
OPTION2 Customizes the settings related the projector.
INPUT Selects the desired input source.
MYMEDIA Accesses photo, music, movie, and document les.
60
CUSTOMIZINGSETTINGS
PICTURESettings
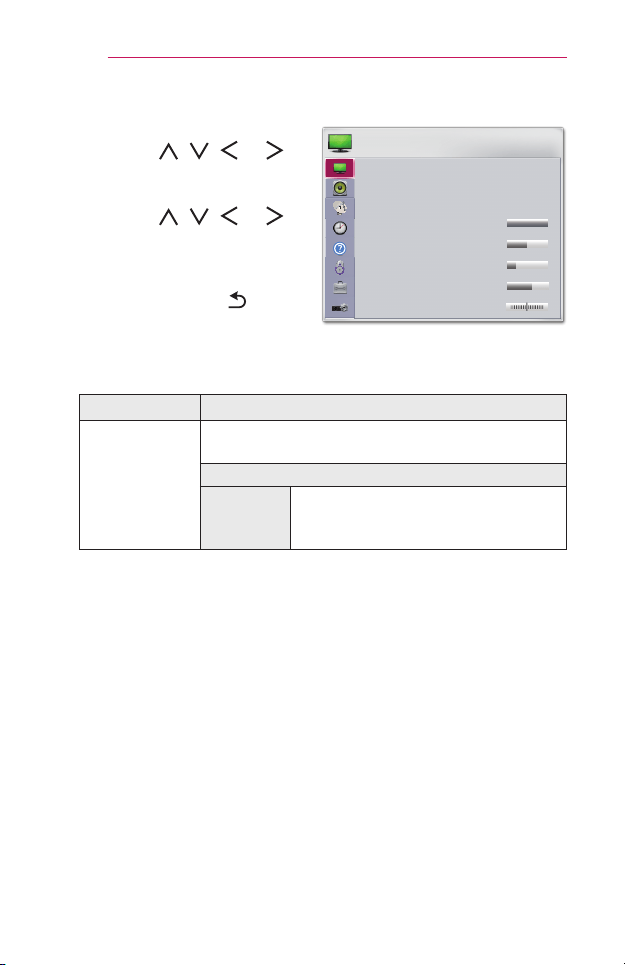
1 Press the SETTINGS button.
2 Use the , , , or
buttons to select PICTURE and
press the OK button.
3 Use the , , , or
button to set up the desired item
and press the OK button.
- To return to the previous
menu, press the button.
• ꕊ Energy Saving : Minimum
• Picture Mode : Standard
• Contrast 100
• Brightness 50
• Sharpness 20
• Color 60
• Tint 0
R
G
PICTURE
ꔂ Move ꔉ OK
The available picture settings are described as follows.
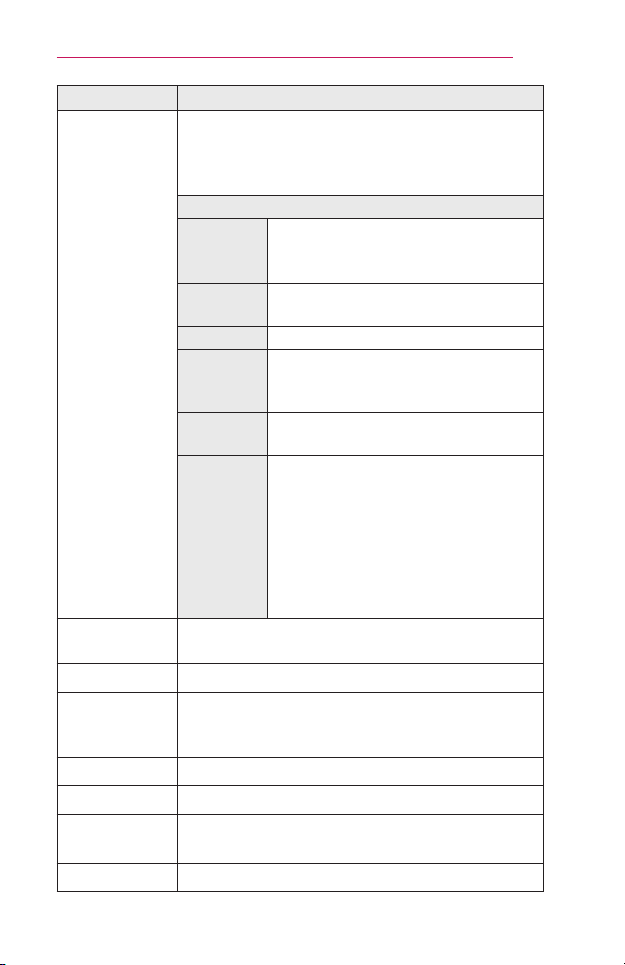
Menu Description
EnergySaving
Reduces power consumption by adjusting peak
screen brightness.
Mode
Minimum/
Medium/
Maximum
Applies the pre-set EnergySaving
mode.
61
CUSTOMIZINGSETTINGS
Menu Description
PictureMode
Selects the picture mode optimized for the viewing
environment or the program.
You can also customize advanced options for each
mode.
Mode
Vivid
Maximizes the visual effect of video.
Heightens contrast, brightness and
sharpness to display vivid images.
Standard
Displays images in standard levels of
contrast, brightness and sharpness.
Cinema Optimizes the image for a movie.
Sport
Optimizes the image for sports by
emphasizing primary colors and
dynamic actions.
Game
Optimizes the image for playing games
on fast-moving screens.
Expert1/
Expert2
Menu for adjusting picture quality that
allows experts and amateurs to enjoy
the best Projector viewing.
- Expert mode is for picture tuning
professionals to control and ne-tune
using a specic image. For normal
images, the effects may not be
dramatic.
Contrast
Adjusts the difference between bright and dark
regions of the screen.
Brightness Adjusts the overall screen brightness.
Sharpness
Adjusts the sharpness of the borders between bright
and dark. Horizontal and Vertical Sharpness are
available only in Expert1/Expert2.
Color Adjusts the intensity of all colors.
Tint Adjusts the balance between red and green levels.
Advanced
Control
Customizes the advanced settings.
PictureOption Sets optional settings.
62
CUSTOMIZINGSETTINGS
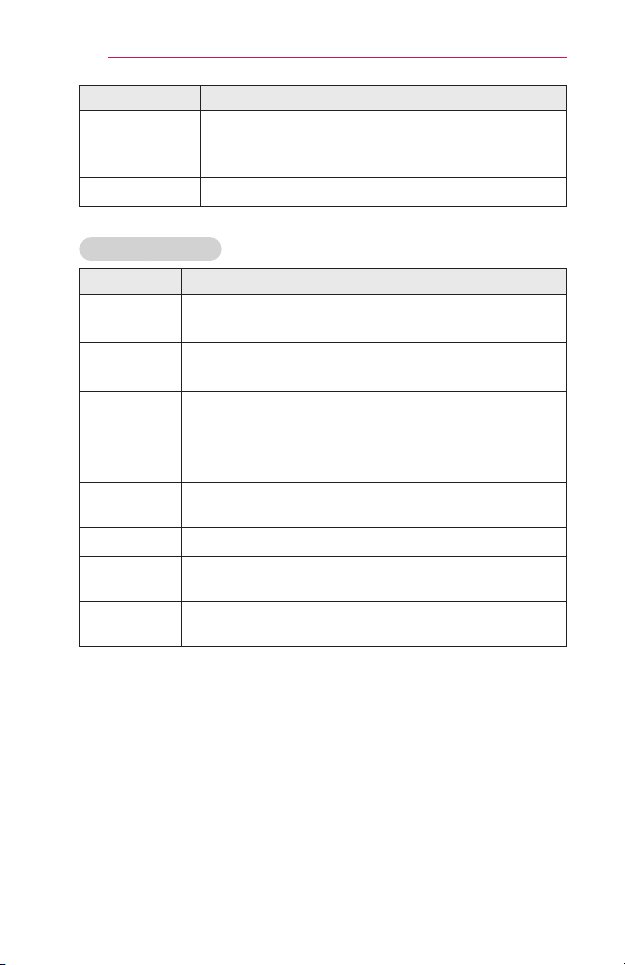
Menu Description
PictureReset
Resets values customized by the user.
Each picture mode is reset. Select the picture mode
you wish to reset.
AspectRatio Resizes the picture.
AdvancedControl
Menu Description
Dynamic
Contrast
Adjusts contrast and color to the optimal level according
to the screen’s brightness.
Dynamic
Color
Adjusts colors for more natural-looking colors.
Color
Gamut
Selects the range of colors that can be expressed.
• Standard: Displays the original colors of an input
signal regardless of the display features.
• Wide: Makes use of the display's rich colors.
SkinColor
Skin color spectrum can be separately set to implement
the skin color as dened by the user.
SkyColor Sky color is set separately.
GrassColor
Natural color spectrum (meadows, hills, etc.) can be
separately set.
Gamma
Sets the gradation curve according to the output of the
picture signal in relation to the input signal.
* Depending on input signal or other picture settings, the range of detailed
items for adjustment may differ.
63
CUSTOMIZINGSETTINGS
ExpertControl
Menu Description
Dynamic
Contrast
Adjusts contrast and color to the optimal level
according to the screen’s brightness.
ColorGamut
Selects the range of colors that can be expressed.
• Standard: Displays the original colors of an input
signal regardless of the display features.
• Wide: Makes use of the display's rich colors.
EdgeEnhancer
Shows clearer and distinctive yet natural edges of
the video.
ExpertPattern Patterns used for expert adjustment.
ColorFilter
Filters a specic color spectrum in RGB colors to
ne-tune color saturation and hue accurately.
Color
Temperature
In Expert mode, you can customize the options of
each mode.
Gamma: Select 1.9, 2.2,or 2.4.
a. Method:2Points
- Pattern:Inner,Outer
- Points:Low,High
- Red/Green/Blue: The adjustment range for
each color is from -50 to +50.
- Applytoallinputs: The values of the Color
Temperature is applied to all the input modes.
b.Method:20PointIRE
- Pattern:Inner,Outer
- IRE(InstituteofRadioEngineers) is the unit
indicating the size of a video signal and can
be set to 5,10,15, ... 100.You can ne-tune for
each setting as shown below.
- Luminance: The adjustment range is 50 to
500.
- Red/Green/Blue: The adjustment range is -50
to +50.
- Applytoallinputs: The values of the Color
Temperature is applied to all the input modes.
64
CUSTOMIZINGSETTINGS
Menu Description
Color
Management
System
Adjusts Red/Green/Blue/Cyan/Magenta/Yellow
colors. Allows an expert to adjust the tint using a test
pattern. Six colors (Red/Green/Blue/Cyan/Magenta/
Yellow) can be selectively adjusted without affecting
other colors. You may not see colors change on a
normal picture even after adjustment.
- SaturationRed/Green/Blue/Yellow/Cyan/
Magenta,
TintRed/Green/Blue/Yellow/Cyan/Magenta,
LuminanceRed/Green/Blue/Yellow/Cyan/
Magenta:
The adjustment range is -30 to +30 each.
* Depending on input signal or other picture settings, the range of detailed
items for adjustment may differ.
PictureOption
Menu Description
NoiseReduction Reduces screen noise in the video.
MPEGNoise
Reduction
Eliminates noise generated while creating digital
picture signals.
BlackLevel
Adjusts the brightness or darkness of the screen
to suit the black level of the picture input using the
degree of darkness (black level) of the screen.
RealCinema Optimizes the screen for movie viewing.
Color
Temperature
Adjusts the overall color of the screen to suit your
preference.
Select Warm, Natural, Cool or Medium.
65
CUSTOMIZINGSETTINGS
AUDIOSettings
1 Press the SETTINGS button.
2 Use the , , , or
button to select AUDIO and
press the OK button.
3 Use the , , , or
button to set up the desired item
and press the OK button.
- To return to the previous
menu, press the button.
AUDIO
• Sound Mode : Standard
• Sound Effect
• Auto Volume : On
ꔂ Move ꔉ OK
The available audio settings are described as follows.
Menu Description
Sound
Mode
Sets the sound mode.
Mode
Standard Suitable for all types of video.
News/Music
/Cinema/
Sport/Game
Sets audio optimized for a specic genre.
66
CUSTOMIZINGSETTINGS
Menu Description
Sound
Effect
The user can select various sound effects.
Mode
ClearVoiceII
Makes the voice from the projector crisp
and clear.
Virtual
Surround
LG’s proprietary audio processing
technology allows 5 channel-like
surround sound from two speakers.
• When ClearVoiceII is set to on,
VirtualSurround cannot be selected.
Equalizer
Adjusts the volume to a level of your
choice using the Equalizer.
• Audio-band (100Hz/300Hz/1kHz/
3kHz/10kHz) can be adjusted from
-10 to 10.
• Reset: Resets voice options that the
user has changed.
Balance
Adjusts the balance of the left and right
speakers.
Reset
Initialize the applied effect under the
SoundEffect menu.
Auto
Volume
Automatically adjusts the volume level.
67
CUSTOMIZINGSETTINGS
CHANNELSettings
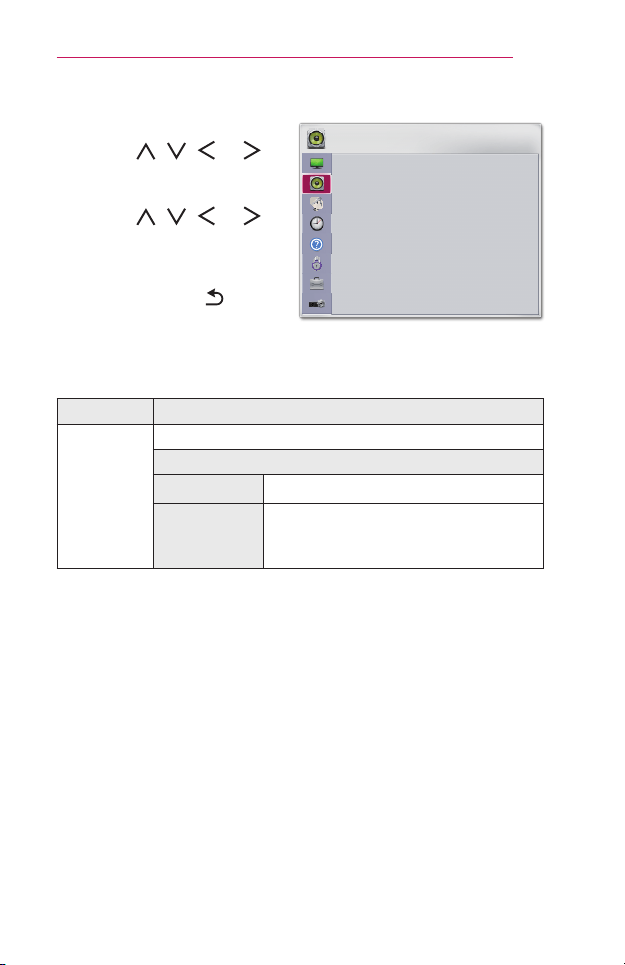
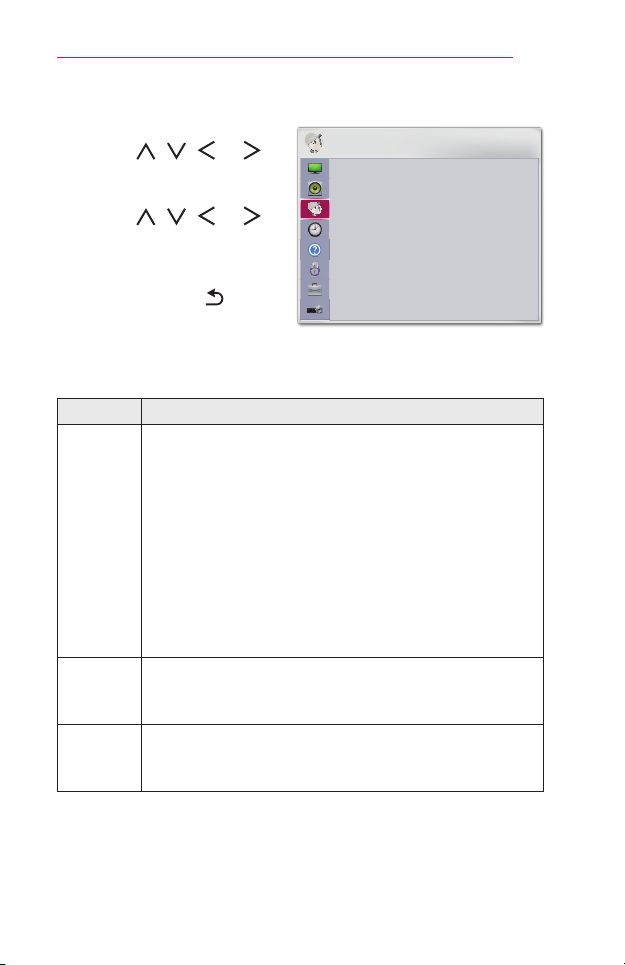
1 Press the SETTINGS button.
2 Use the , , , or
button to select CHANNEL and
press the OK button.
3 Use the , , , or
button to set up the desired item
and press the OK button.
- To return to the previous
menu, press the button.
CHANNEL
• Auto Tuning
• Manual Tuning
• Channel Edit
ꔂ Move ꔉ OK
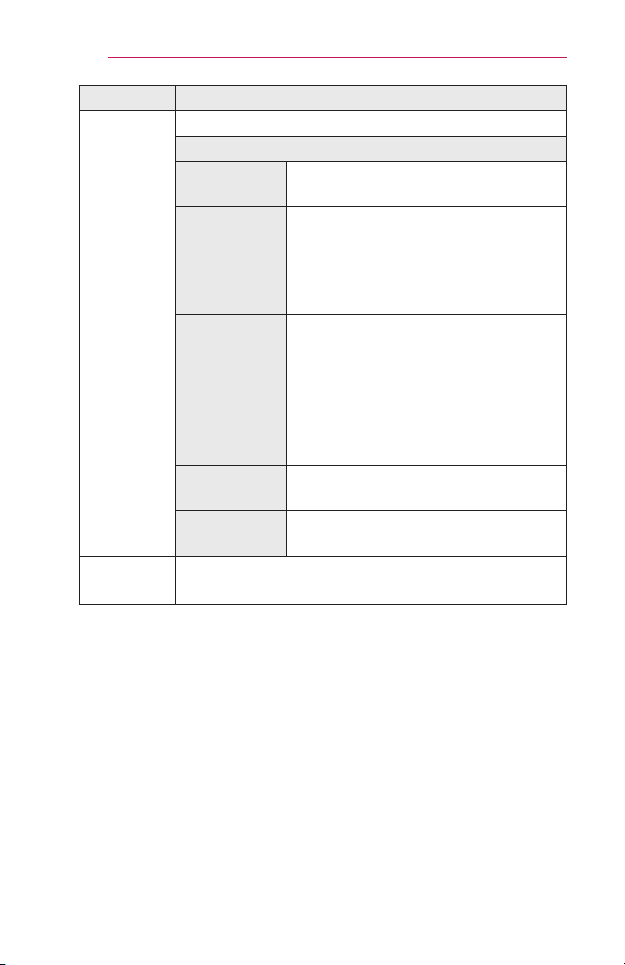
The available channel settings are described below.
Menu Description
Auto
Tuning
Remembers a channel which is currently broadcasting.
You should use this function when you move to another
house or move the Projector to other place. It must be
used while the antenna is connected and there are channel
broadcasting signals.
• Channels are not registered properly unless the antenna/
cable is connected correctly.
• AutoTuning only finds programs that are currently
broadcasting.
• If LockSystem is turned on, a pop-up window will
appear asking for password.
Manual
Tuning
Adjusts programs manually and saves the results.
For digital broadcasting, signal strength and signal quality
can be checked.
Channel
Edit
Edits the saved programs.
Set as favorite program, block/unblock program, skip
program etc. of the selected program.
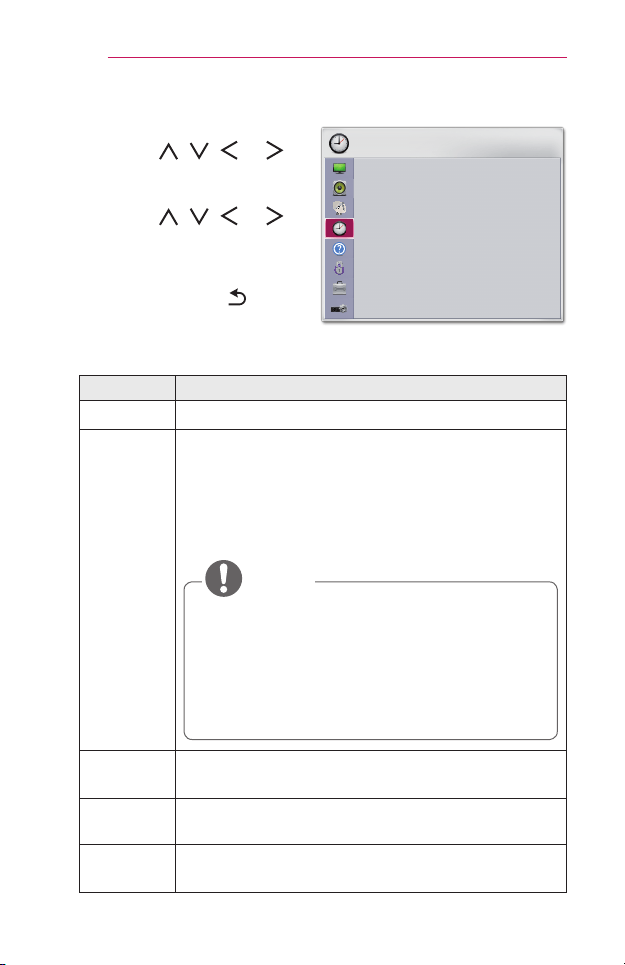
68
CUSTOMIZINGSETTINGS
TIMESettings
1 Press the SETTINGS button.
2 Use the , , , or
button to select TIME and press
the OK button.
3 Use the , , , or
button to set up the desired item
and press the OK button.
- To return to the previous
menu, press the button.
TIME
• Clock
• Off Time : Off
• On Time : Off
• Sleep Timer : Off
• Auto Off : 60 min.
• Automatic Standby : Off
ꔂ Move ꔉ OK
The available time settings are described as follows.
Menu Description
Clock Sets the time, date, or timer feature.
OffTime/
OnTime
Sets the time to turn on or off the projector automatically.
To use this feature, you should set the current time and
date in advance.
To use this feature, set the time correctly.
If you do not want to set OffTime/OnTime, select Off
in Repeat.
• If you set bothOfftime and Ontime features to
the same time, the Off time feature overrides the
On time feature.
• If you do not press any button within two hours after
the projector is turned on by the OnTime feature,
the projector enters standby mode automatically.
NOTE
Sleep
Timer
Turns off the Projector after a preset number of minutes.
To cancel the SleepTimer, select Off.
AutoOff
If there is no input signal or button press, the projector
automatically turns off after the preset time has elapsed.
Automatic
Standby
Turns off the projector automatically after a set period of
time if there is no button input on the projector.
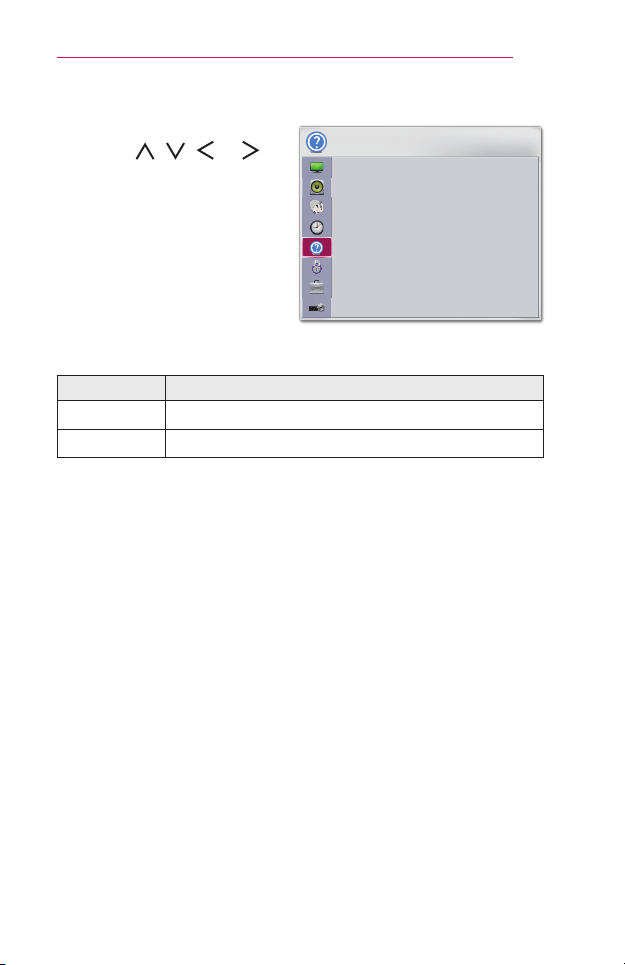
69
CUSTOMIZINGSETTINGS
INFORMATION
1 Press the SETTINGS button.
2 Use the , , , or
button to select INFORMATION
and press the OK button.
INFORMATION
• Model Name : PH300
• INPUT : TV
ꔂ Move ꔉ OK
The following are INFORMATION-related items.
Menu Description
ModelName Shows the model name of the product.
INPUT Shows the current status of inputs.
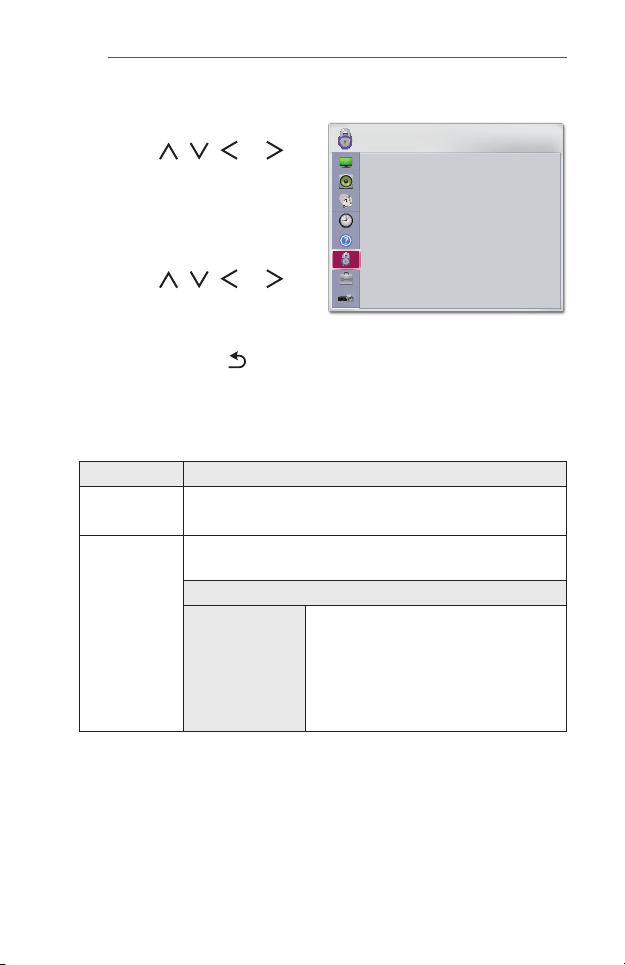
70
CUSTOMIZINGSETTINGS
LOCKSettings
1 Press the SETTINGS button.
2 Use the , , , or
button to select LOCK and
press the OK button.
- Enter the preset password to
enter the LOCK settings. The
initial password is0000.
3 Use the , , , or
button to set up the desired item
and press the OK button.
- To return to the previous
menu, press the button.
LOCK
• Set Password
• Lock System: Off
• Block Channel
• Movie Rating
• TV Rating-Children
• TV Rating-General
• Downloadable Rating
ꔂ Move ꔉ OK
The available lock settings are described below.
Menu Description
Set
Password
Sets or changes projector password.
• The initial password is set as 0000.
Lock
System
Locks the selected channel or external input. First, set
LockSystem to On.
Item
BlockChannel
Blocks the programs that contain
inappropriate contents for children.
The programs can be selected but
the screen is blank and the audio is
muted. To watch a locked program,
enter the password.
71
CUSTOMIZINGSETTINGS
Menu Description
Lock
System
Item
MovieRating
Blocks the movies that are only
broadcasted on the TV and contain
inappropriate contents, based on the
Motion Picture Association of America
(MPAA) rating.
• G (General audiences) All ages
admitted
• PG (Parental guidance suggested)
Some material may not be suitable
for children
• PG-13 (Patents strongly
cautioned) Some material may be
inappropriate for children under 13
• R (Restricted) Under 17 requires
accompanying parent or adult
guardian
• NC-17 No one 17 and under
admitted.
• X Adults only
TVRating-
Children
Blocks the children’s TV programs
that parents do not want their children
to watch. To block other TV programs,
you should set the TV Rating-General
feature.
• Age TV-Y (All children, including
children from ages 2-6), TV-Y7
(Directed to older children, suitable
for children age 6 and above)
• FantasyViolence TY-Y7 (Directed
to older children - Fantasy violence,
suitable for children age 6 and
above, containing more intense or
combative fantasy violence)

72
CUSTOMIZINGSETTINGS
Menu Description
Lock
System
TVRating-
General
Blocks the TV programs that you
want based on the ratings by using
the Parental Control Function
(V-Chip).
The V-Chip electronically reads TV
program ratings and allows parents
to block program that are unsuitable
for children.
• Age TV-G (General audience,
suitable for all ages) TV-PG
(Parental guidance suggested,
containing material that are
unsuitable for younger children)
TV-14 (Parents strongly
cautioned, containing material that
are unsuitable for children age
14 and under) TV-MA (Mature
audience only, unsuitable for
children age
• Dialog (suggestive dialogue) TV-
PG or TV-14
• Language (coarse language)TV-
PG, TV-14, or TV-MA
• Sex (sexual situation) TV-PG,
TV-14, or TV-MA
• Violence TV-PG, TV-14, or
TV-MA
Downloadable
Rating
This function operates only when
TV has received Region5 Rating
data. The name of the rating option
may differ.
InputBlock Block the input sources.

73
CUSTOMIZINGSETTINGS
Menu Description
KeyLock
Locks control buttons on projector.
• Key Lock function remains intact even in case of
power outage or when the power cord is removed
from the wall socket.
• Key Lock function can only be set by remote control,
and not by the button on the projector.
• If you select On: You can turn the projector on only
with the Power button if you have turned the projector
off using the remote control. If you press a button on
the control panel while watching video, the message
"KeyLock" is displayed.
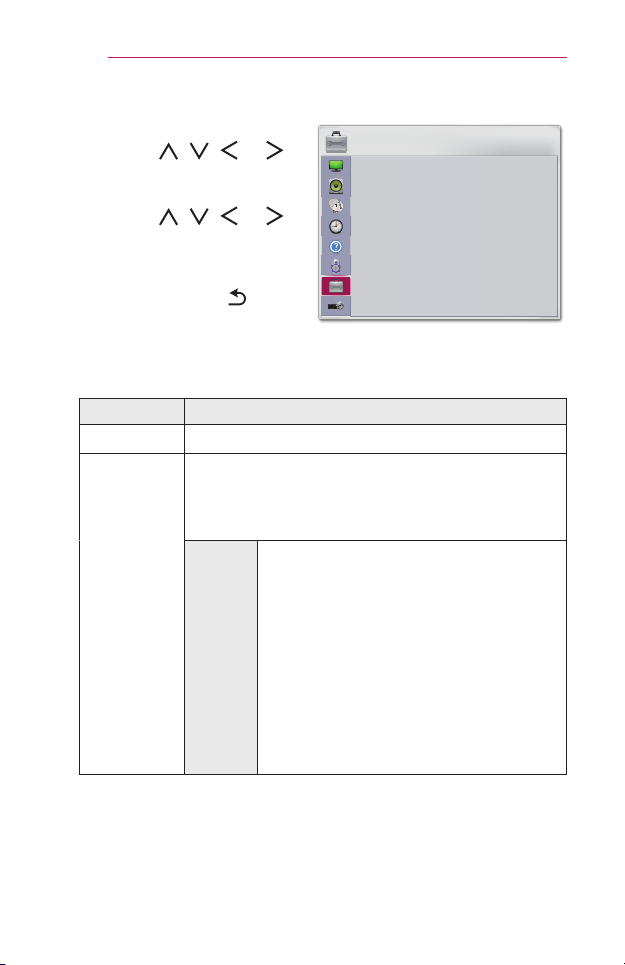
74
CUSTOMIZINGSETTINGS
OPTION1Settings
1 Press the SETTINGS button.
2 Use the , , , or
button to select OPTION1 and
press the OK button.
3 Use the , , , or
button to set up the desired item
and press the OK button.
- To return to the previous
menu, press the button.
OPTION 1
• Language
• Caption : Off
• DivX(R) VOD
• Initial Setting
ꔂ Move ꔉ OK
The available option 1 settings are described as follows.
Menu Description
Language Selects a desired Menu Language.
Caption
View subtitles when the TV station provides subtitled
programing. Program subtitles work only on digital/
analog broadcasts.
Change Caption to On and select caption setting.
Mode
CC1-4 (Closed Captioning) / Text1-4
Displays the audio portion of a TV program
as text on the TV screen. CC1 is the most
common mode in use.
Field 1 data channels: two Captions (CC1,
CC2), two Text (Text1, Text2).
Field 2 data channels: two Captions (CC3,
CC4), two Text (Text3, Text4).
Service1-6
This is only available for the digital
broadcasting system.
75
CUSTOMIZINGSETTINGS
Menu Description
Caption
Digital
Option
Set up the size and color of the subtitles
on DigitalOption. Please select Setby
Program or Custom.
Select Custom to adjust minute options
such as the subtitles’ size and color.
Item
Size Selects the wordsize.
Font Selects a typeface for the text.
TextColor Selects a color for the text.
Text
Opacity
Adjusts the opacity for the text
color.
BgColor
Selects a color for the
background color.
Bg
Opacity
Adjusts the opacity for the
background color.
Edge
Type
Selects an edge type.
Edge
Color
Selects a color for the edges.
DivX(R)
VOD
Sets DivX related settings.
Initial
Setting
Deletes all optional settings and returns to initial default
mode. Once initialization is complete, the projector will
turn off and on by itself.
• If LockSystem is activated, a pop-up password
prompt will appear.
• Do not turn off the power during initialization.
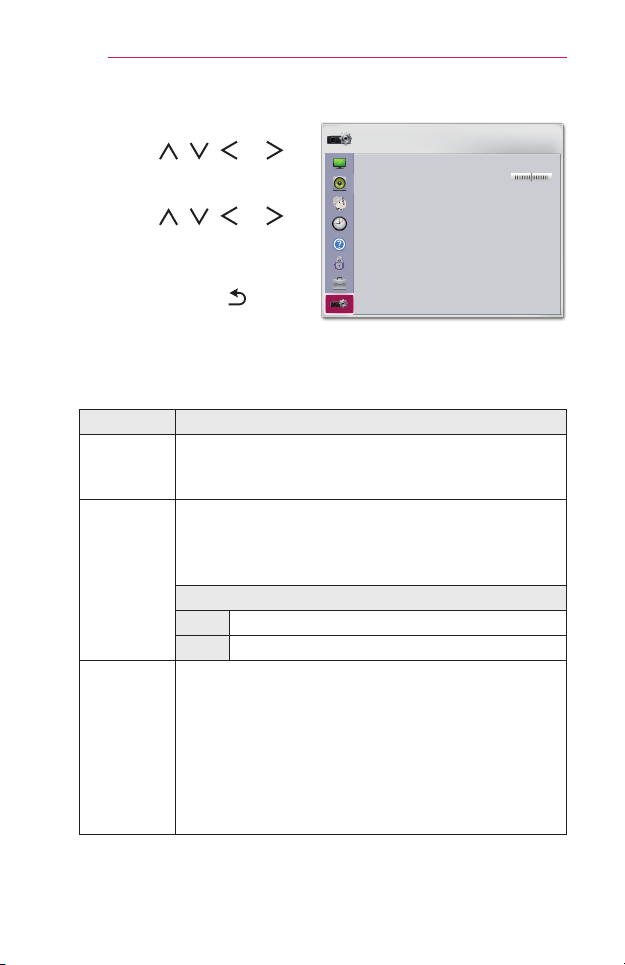
76
CUSTOMIZINGSETTINGS
OPTION2Settings
1 Press the SETTINGS button.
2 Use the , , , or
button to select OPTION2 and
press the OK button.
3 Use the , , , or
button to set up the desired item
and press the OK button.
- To return to the previous
menu, press the button.
OPTION 2
• Keystone 0
-
+
• Auto Keystone : On
• PJT Mode : Front
• High Altitude : Off
• Blank Image : Blue
• Auto Power : Off
• Self Diagnosis
ꔂ Move ꔉ OK
The settings for OPTION 2 are described as follows.
Menu Description
Keystone
To prevent the screen image from becoming trapezoidal,
Keystone adjusts the top and bottom width of the image if
the projector is not set at a right angle to the screen.
Auto
Keystone
AutoKeystone provides a rectangular screen image
by automatically adjusting the Keystone number when
there is a trapezoidal screen image caused by tilting of
the projector.
Item
On Automatically adjusts the Keystone number.
Off Manually adjusts the Keystone number.
PJTMode
This function turns the projected image upside down or
ips horizontal.
• Select Rear when projecting from the back of the
transparent screen purchased separately.
• Select FrontCeiling when installing the product on the
ceiling.
• When the PJTMode is RearCeiling/FrontCeiling,
the left/right of the speaker changes automatically.
77
CUSTOMIZINGSETTINGS
Menu Description
High
Altitude
If the projector is used at an altitude higher than 1200
meters, turn this on.
Otherwise, the projector may overheat or its protection
function may be activated. If this happens, turn the
projector off and then on again after waiting for several
minutes.
Blank
Image
Selects a background for blank Image.
Auto
Power
Makes the projector turn on automatically when the
adaptor plug is inserted.
Item
On
When the AC/DC plug is connected to the
projector, it turns on automatically.
Off
When the AC/DC plug is connected to the
projector, it goes into standby mode.
Self
Diagnosis
Troubleshoots functional problems that can arise while
using the product.
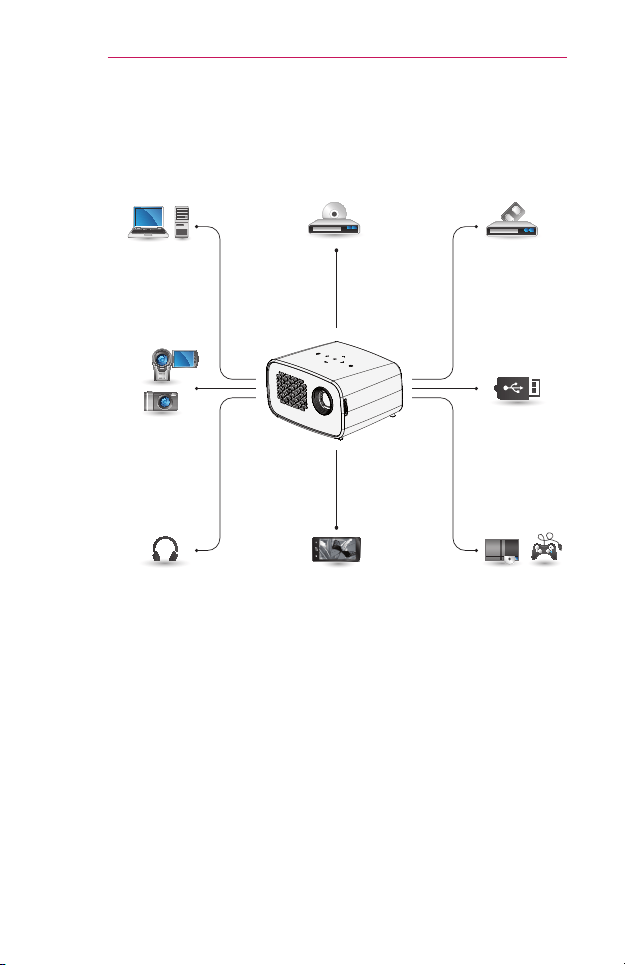
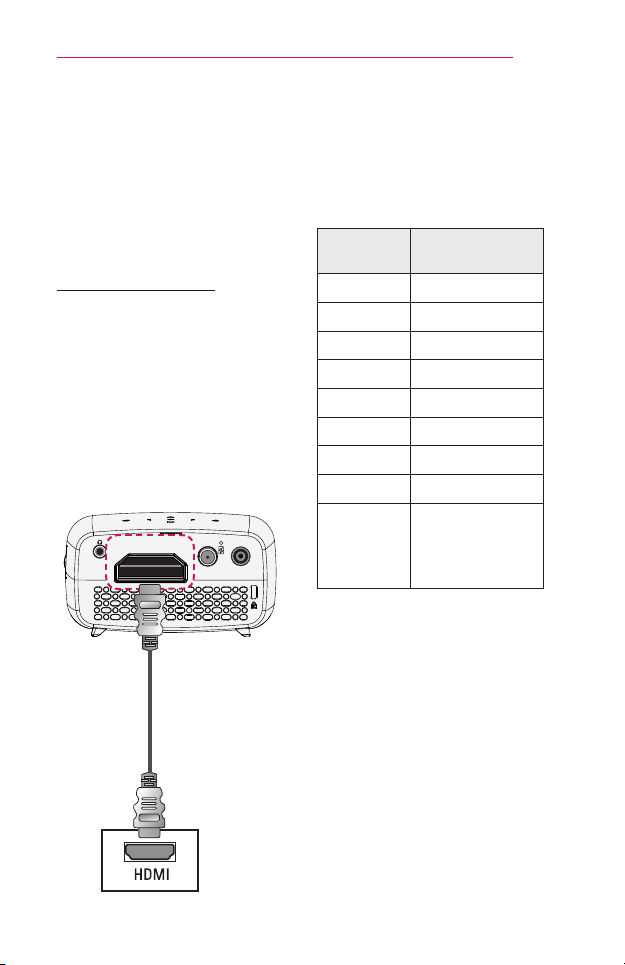
79
CONNECTINGDEVICES
ConnectingHD
Receiver,DVD
Player,orVCRPlayer
You can use various features after
connecting a HD receiver, DVD
player,VCR player, PC, laptop, etc.
to the projector with an HDMI cable.
HDMIConnection
With an HDMI cable, you can
enjoy high quality picture and
sound.
Using a HDMI cable, connect the
HDMI/MHL port of the projector to
the HDMI output port of the device
to connect. Both video and audio
are output at the same time.
Press the INPUT button on the
remote control and select HDMI.
HDMI / MHL
OFF / ON
ANTENNA IN
DC IN
HDMI / MHL
OFF / ON
ANTENNA IN
DC IN
Accessories
The table below shows examples
of switching the output. For
more information, refer to the
"External Output", "Connecting
to an External Monitor", or similar
sections of the owner's manual of
your computer.
Brand
Switching
Output
NEC [Fn]+[F3]
Panasonic [Fn]+[F3]
Toshiba [Fn]+[F5]
IBM
[Fn]+[F7]
Sony [Fn]+[F7]
Fujitsu
[Fn]+[F10]
LG [Fn]+[F7]
Samsung [Fn]+[F4]
Macintosh
Adjust the control
panel to enable
mirroring after
start-up.
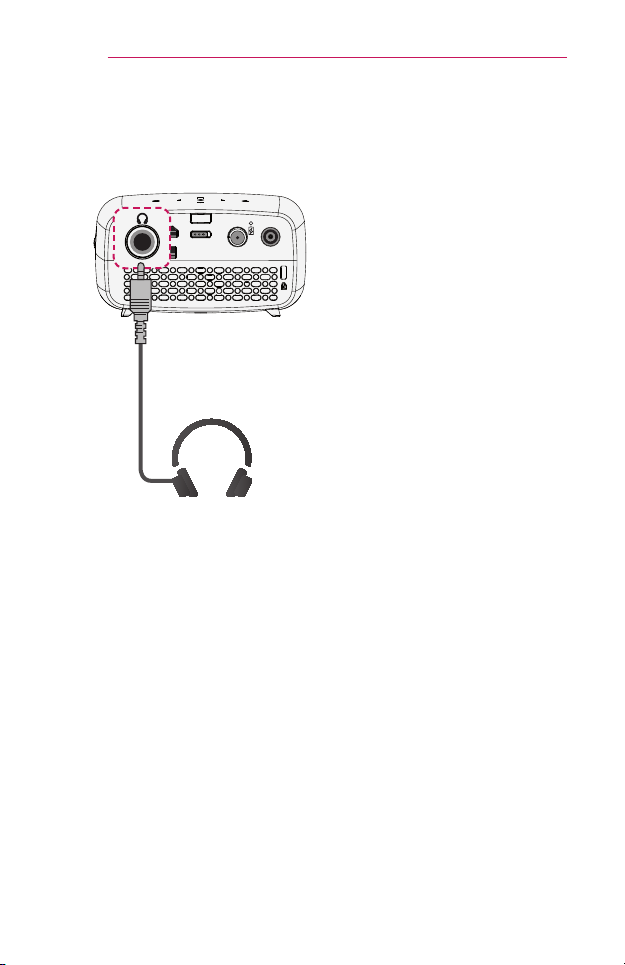
80
CONNECTINGDEVICES
Connecting
Headphones
You can listen to the audio through
a headphone.
HDMI / MHL
OFF / ON
ANTENNA IN
DC IN
HDMI / MHL
OFF / ON
ANTENNA IN
DC IN
Optional Extras
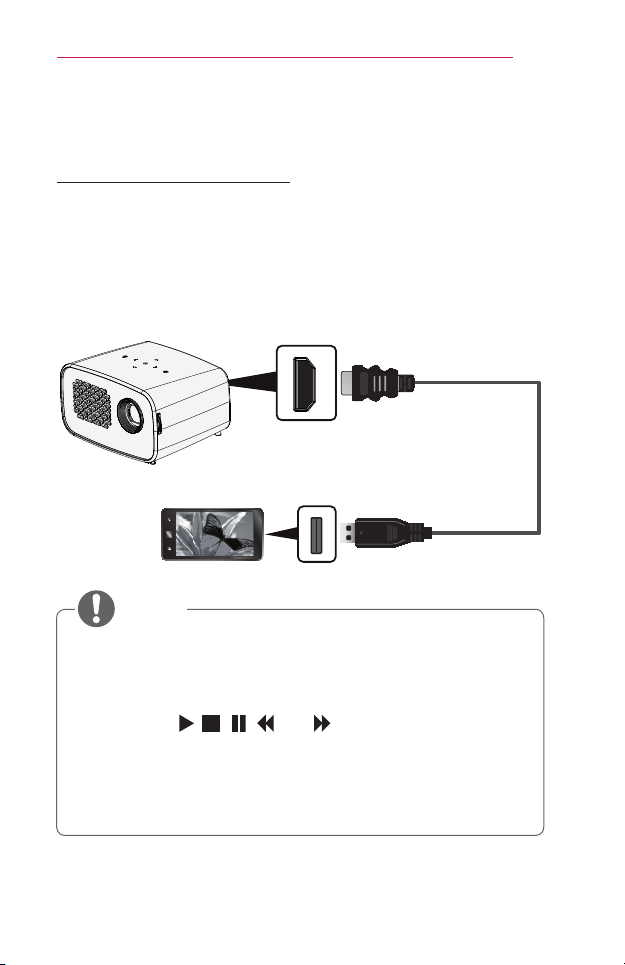
81
CONNECTINGDEVICES
UsingtheMirroringFunctionofaMobile
Phone
MHL/SlimportConnection
You must use a HDMI adapter to connect your cell phone to the projector
and to output images and sound from your cell phone to the projector.
The compatible HDMI adapters are different, depending upon your cell
phone type. Therefore, purchase an appropriate MHL or Slimport adapter.
(To nd out whether your device is MHL/Slimport-certied, please contact
your device manufacturer.)
HDMI / MHL
OFF / ON
ANTENNA IN
Optional Extras
• When you connect a mobile phone to the HDMI/MHL port, you can
see the mobile phone screen through a projector.
- This only applies to mobile phones that support MHL/Slimport.
- You can use the remote control for some applications.
(However, , , , , and buttons on the remote control
are disabled.)
• Disconnect the MHL/Slimport cable from the projector when:
- The MHL/Slimport function is disabled.
- Your mobile device is fully charged in standby mode.
NOTE

82
MAINTENANCE
MAINTENANCE
Clean your Projector to keep it in optimal condition.
Cleaning
CleaningtheLens
If there is any dust or staining on the lens surface, you must clean the lens.
Use an air spray or a cleaning cloth to clean the lens.
To remove dust or stains, use an air spray or apply a small amount of
cleaning agent onto a swab or soft cloth to lightly rub the lens.
Please be aware that liquid may ow into the lens if the product is sprayed
directly onto the lens.
CleaningtheProjectorCase
To clean the projector case, rst unplug the power cord.
To remove dust or stains, use only a dry, lint-free, nonabrasive cloth to
polish the lens.
Do not use alcohol, benzene, thinners, or other chemicals, which may
damage the case.
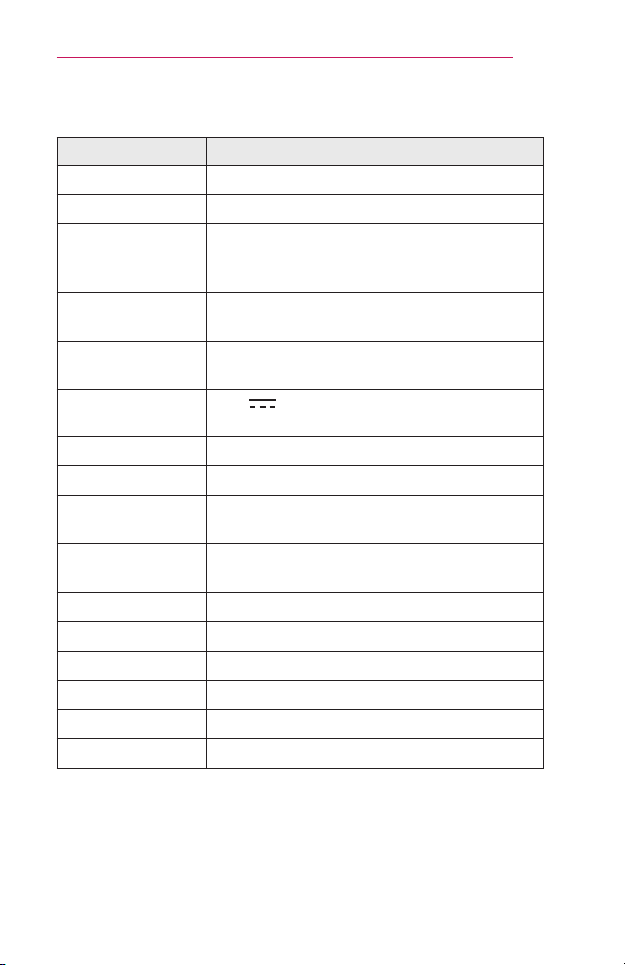
83
SPECIFICATIONS
SPECIFICATIONS
MODELS PH300(PH300-NA)/PH300W(PH300W-NA)
Resolution(Pixel) 1280 (Horizontal) × 720 (Vertical)
AspectRatio
16:9 (Horizontal:Vertical)
Projection
Distance
(Videosize)
0.74 m to 3.76 m (50.8 cm to 254 cm)
RatioofUpward
Projection
100 %
Workingrangeof
theremotecontrol
3 m
AC-DCAdaptor
19 V
2.1 A
(Adaptor Input 100-240 V @ 50/60 Hz)
AudioOutput 1 W + 1 W
Receptiontype DTV-ATSC/TV-NTSC
Reception
channels
VHF 2-13, UHF 14-69, CATV 1-135, DTV 2-69,
CADTV 1-135
ExternalAntenna
Impedance
75 Ω (VHF/ UHF)
Height(mm) 63.9 (front)/54.5 (rear), 65.9 (with foot)
Width(mm) 113.6
Depth(mm) 85.5
Weight(g)
430
USBDevice 5 V, 0.5 A (max.)
Power AC 100 - 240 V~, 50/60 Hz
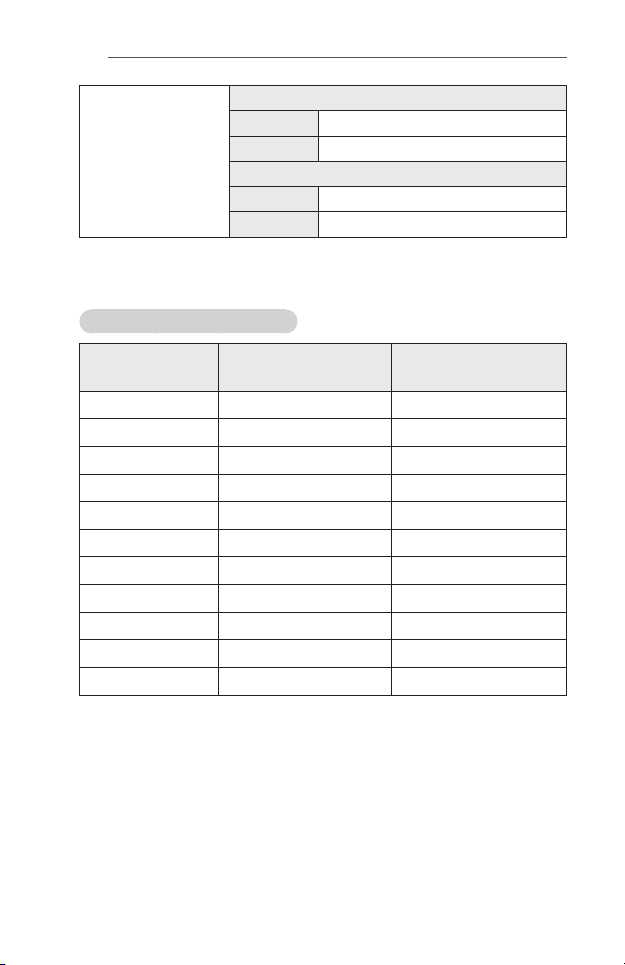
84
SPECIFICATIONS
Operation
environment
Temperature
Operation 0 °C to 40 °C
Storage -20 °C to 60 °C
Relativehumidity
Operation 0 % to 80 %
Storage 0 % to 85 %
* Contents in this manual may be changed without prior notice due to
upgrade of product functions.
SupportedHDMI(PC)Modes
Resolution
HorizontalFrequency
(kHz)
VerticalFrequency
(Hz)
640 x 350 31.468 70.09
640 x 480 31.469 59.94
720 x 400 31.469 70.08
800 x 600 37.879 60.31
1024 x 768 48.363 60.00
1152 x 864 54.348 60.053
1280 x 800 49.68 60
1280 x 1024 63.981 60.02
1360 x 768 47.712 60.015
1400 x 1050 65.317 59.979
1680 x 1050 65.3 60
• If an invalid signal is input into the projector, it will not be displayed
properly on the screen or a message such as NoSignal or Invalid
Format will be displayed.
• The projector supports the DDC1/2B type as the Plug & Play function
(Auto-recognition of PC monitor).
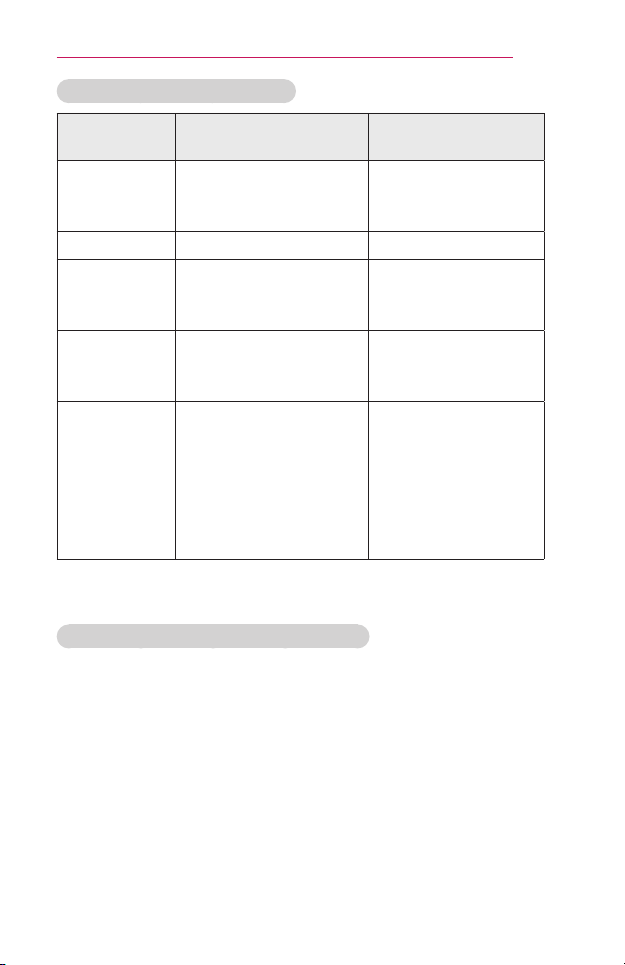
85
SPECIFICATIONS
SupportedHDMI/DVI-DTVMode
Resolution
HorizontalFrequency
(kHz)
VerticalFrequency
(Hz)
480p
31.47
31.47
31.50
60
59.94
60
576p 31.25 50
720p
45.00
44.96
37.5
60.00
59.94
50
1080i
33.75
33.72
28.125
60
59.94
50
1080p
67.500
67.432
27.000
26.97
33.75
33.71
56.25
60
59.939
24.000
23.976
30.000
29.97
50
• To provide the best picture quality, a 1280 x 720 (720p) resolution is
recommended.
OpenSourceSoftwareNoticeInformation
To obtain the source code under GPL, LGPL, MPL, and other open source
licenses, that is contained in this product, please visit http://opensource.lge.com.
In addition to the source code, all referred license terms, warranty disclaimers
and copyright notices are available for download.
LG Electronics will also provide open source code to you on CD-ROM for a
charge covering the cost of performing such distribution (such as the cost of
media, shipping, and handling) upon email request to [email protected].
This offer is valid for three (3) years from the date on which you purchased the
product.