Keep plenty of genuine BISSELL Cleaning Solution on hand so you can clean whenever it fits your schedule. Always use genuine BISSELL deep cleaning formulas. Non-BISSELL cleaning solutions may harm the machine and will void the warranty.
Assembly
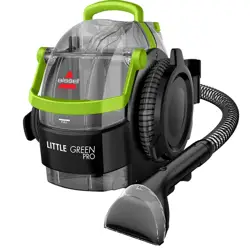
Assembling your Little Green is a simple process. The only thing you will need to assemble your cleaner is a Phillips-head screwdriver.
Slide the back plate of the flex hose clip into the opening on the front of the unit. You will hear a “snap” when it is locked in place.
Take the flex hose storage bracket and slide the lower plate into the opening on the back of unit. Make sure the screw holes line up.
Insert screw and tighten with a screwdriver.
Wrap the flex hose around unit and place hose grip into bracket. Turn bracket latch clockwise to lock in place.
Operations
Getting ready
1. To fill the clean water/solution tank.
a. Remove the tank by lifting it straight up and then away from the unit.
b. Unscrew the black cap at the bottom of the clean/solution tank.
c. Follow the fill lines on your clean tank to add the correct amount of hot tap water (140°F/60°C MAX), portable machine formula, and 1oz of BISSELL Boost if preferred. DO NOT BOIL OR MICROWAVE WATER.
d. Replace the clean/solution tank by lining up the vertical guides on the left side of the unit with the indentations on the clean/solution tank and gently sliding it down into position.
Pre-treating
Cleaning effectiveness will be enhanced if you pre-treat heavily stained or highly-soiled areas. Here’s how to do it:
Hold the cleaning tool just above the surface of the carpet or upholstery to be cleaned. Press the trigger to release a spray of cleaning solution directly onto the soiled area.
Wait 3-5 minutes before cleaning.
Cleaning with the Tough Stain Tool
Attach the 3” Tough Stain Tool to the handheld cleaning hose.
Plug in the unit and press the power button beneath the handle to turn it on.
Hold the tool 1 inch above soiled surface.
Press the spray trigger to mist solution over and onto the soiled area
Release the spray trigger and gently scrub the stain
To lift the stain away, apply downward pressure on the tool and slowly pull it toward you. Watch as powerful suction removes the dirt and cleaning solution. Continue until no more dirt can be removed.
As a final step, use “drying strokes” (by not pressing the spray trigger) to remove as much moisture as possible. Repeat this step as often as necessary.
Note: When using BISSELL Oxy Boost formula, cleaning continues for 6-8 hours after application.
Cleaning with the Deep Stain Tool (select models)
Attach the Deep Stain Tool to the handheld cleaning hose
Plug in the unit and press the power button beneath the handle to turn it on.
Set the tool directly on top of the carpet before pulling the spray trigger to inject formula deep into your carpet fibers. Always keep the Deep Stain Tool in direct contact with carpeting to avoid over-spraying.
Release the spray trigger and gently scrub the stain.
To lift the stain away, apply downward pressure on the tool and slowly pull it toward you. Watch as powerful suction removes the dirt and cleaning solution. Continue until no more dirt can be removed.
As a final step, use “drying strokes” (by not pressing the spray trigger) to remove as much moisture as possible. Repeat this step as often as necessary.
Note: When using BISSELL Oxy Boost formula, cleaning continues for 6-8 hours after application.
Maintenance & Care
After Cleaning
Turn power switch to OFF position.
Unplug power cord from outlet.
Empty and rinse the dirty/collection tank after each use, OR when dirty water reaches the indicated maximum fill line. To remove the tank, lift up the dirty/collection ank retainer lever and remove the tank from the unit.
Disconnect the cleaning tool from the spray trigger by pushing down on button lock and pulling straight off (DO NOT twist tools to remove them).
Once removed from the spray trigger, all tools can be cleaned by rinsing under clean running water
Check spray nozzle for accumulated dirt or debris. If necessary, clean with soft bristle brush.
To flush the tools and hose before storage, suction up a bowl of clean water to ensure all debris are removed.
Machine storage
Wipe all surfaces with a soft cloth.
Wrap power cord around the cord wrap on the back of the Little Green.
Wrap flex hose around the base of the unit and secure the spray trigger.
Store unit in protected, dry area, at room temperature (40º to 110ºF).
Troubleshooting
Problem
Possible causes
Remedies
Reduced spray or no spray
Spray nozzle clogged
Clean spray nozzle
Clean water/solution tank empty
Check/refill tank
Clean water/solution tank insert clogged
Clean insert at bottom of clean water/ solution tank
Pump needs priming
Gently lift clean water/solution tank while depressing the spray trigger OR gently squeeze clean tank while depressing spray trigger
Deep cleaner won’t pick up cleaning solution
Tank release latch is not closed properly
Lift up the tank release latch and press down firmly to make sure it is in place
Poor tool position
Reposition tool on surface, follow recommended cleaning procedures
Dirty water/collection tank is full
Empty dirty water/collection tank
Tool brush worn
Replace with new brush
Excess solution in vacuum flex hose
Lift tool and point upwards to allow water in hose to flow into the dirty water/collection tank
Incorrect Cleaning Formula
Use BISSELL portable machine formulas (with BISSELL Boost if desired) only
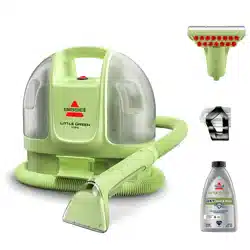
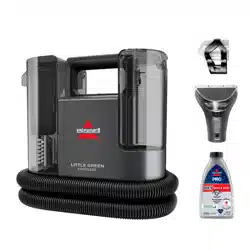
Replacement Parts
Accessories
Cleaning Formulas
Safety Instructions
Use only BISSELL cleaning products intended for use in this machine to prevent internal component damage. See the Cleaning fluid section of this guide.
Connect to a properly grounded outlet only. See grounding instructions. Do not modify the 3-prong grounded plug.
Do not leave appliance when it is plugged in. Unplug from outlet when not in use and before servicing.
Do not expose to rain. Store indoors.
Do not allow to be used as a toy. Close attention is necessary when used by or near children.
Do not use for any purpose other than described in this User’s Guide. Use only manufacturer’s recommended attachments.
Do not use with damaged cord or plug. If appliance is not working as it should, has been dropped, damaged, left outdoors, or dropped into water, have it repaired at an authorized service center.
Do not pull or carry by cord, use cord as a handle, close a door on cord, or pull cord around sharp edges or corners. Do not run appliance over cord. Keep cord away from heated surfaces.
Do not unplug by pulling on cord. To unplug, grasp the plug, not the cord.
Do not handle plug or appliance with wet hands.
Do not put any object into openings. Do not use with any opening blocked; keep openings free of dust, lint, hair, and anything that may reduce airflow.
Keep hair, loose clothing, fingers, and all parts of body away from openings and moving parts.
Turn off all controls before plugging or unplugging appliance.
Use extra care when cleaning on stairs.
Do not use to pick up flammable or combustible materials (lighter fluid, gasoline, kerosene, etc.) or use in areas where they may be present.
Do not use appliance in an enclosed space filled with vapors given off by oil base paint, paint thinner, some moth proofing substances, flammable dust, or other explosive or toxic vapors.
Do not use to pick up toxic material (chlorine bleach, ammonia, drain cleaner, etc.).
Do not pick up anything that is burning or smoking, such as cigarettes, matches, or hot ashes.