1. Overview
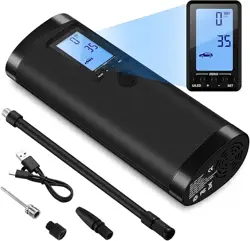
The VEEAPE Portable Tire Inflator is a cordless, rechargeable air compressor designed for inflating tires and other inflatables. It features a digital display, multiple pressure modes, and a built-in battery that can also function as a power bank.

2. Features and Specifications
2.1 Key Features
- Five Inflation Modes: Car, Motorcycle, Bicycle, Ball, and Custom mode.
- Auto Shut-Off: Stops automatically when the preset pressure is reached.
- Digital Display: HD LCD screen with backlight shows pressure readings.
- Multiple Units: Displays pressure in PSI, BAR, KPA, and Kg/cm².
- Rechargeable Battery: Built-in 2000mAh lithium battery (some sources indicate 2x2000mAh).
- Power Bank Function: USB output (5V/2A) to charge mobile devices.
- LED Light: Built-in flashlight for use in low-light conditions.
- Memory Function: Remembers the last used pressure setting.
- Heat Dissipation: Internal fan for continuous operation.
- Portable: Compact and lightweight design (approx. 500g).
2.2 Technical Specifications
| Specification | Detail |
|---|
| Maximum Pressure | 120 PSI (some references state 150 PSI) |
| Air Flow | 20 Liters per Minute |
| Battery Capacity | 2000mAh Lithium (or 2x2000mAh) |
| Charging Input | Micro USB, 5V/2A |
| USB Output | 5V/2A (for power bank function) |
| Product Dimensions | Approx. 6.1 x 3.78 x 15.24 cm |
| Item Weight | Approx. 460 g (0.46 kg) |
| Material | Acrylonitrile Butadiene Styrene (ABS) |
| Included Components | Inflator unit, insulated hose, inflatable needle, swim ring adapter, conversion mouth, USB charging cable, portable bag, user manual. |
3. What's in the Box
- 1 x Portable Air Compressor
- 1 x Insulated Inflatable Tube (Hose)
- 1 x Inflatable Needle (for balls)
- 1 x Swim Ring Inflatable Mouth
- 1 x Conversion Mouth
- 1 x USB Charging Cable
- 1 x Small Portable Bag
- 1 x User Manual
4. Use Guide
4.1 Charging the Inflator
- Before first use, fully charge the device using the provided Micro USB cable. Connect it to a standard 5V/2A USB power adapter (not included) or a computer USB port.
- The device may ship with a partial charge (30-60%). A full charge is recommended for optimal performance.
Note: The battery has protection against over-discharge. Standby time can be up to 2 years.
4.2 Powering On/Off
- To Turn On: Press and hold the Power button for 3 seconds. Wait for the progress bar on the display to complete.
- To Turn Off: Press and hold the Power button for 3 seconds until the device shuts down.
- The device will automatically shut down after 3 minutes of inactivity or when the battery is low.
4.3 Selecting an Inflation Mode
After powering on, short press the SET button to cycle through the five available modes. The default pressure for each mode is:
- Car Mode: 35 PSI (adjustable range 0-65 PSI)
- Motorcycle Mode: 40 PSI (adjustable range 0-55 PSI)
- Bicycle Mode: 38 PSI (adjustable range 0-120 PSI)
- Ball Mode: 8 PSI (adjustable range 0-15 PSI)
- Custom Mode: 120 PSI (adjustable range 0-150 PSI)
Note: Each mode has a maximum safety PSI limit to prevent over-inflation.
4.4 Setting the Target Pressure
- With your desired mode selected, use the Preset + and Preset - buttons to adjust the target pressure value shown on the display.
- Short press to adjust in small increments. Press and hold to adjust the value quickly.
4.5 Changing Pressure Units
Short press the U/LED button to cycle through the four available pressure units: PSI, BAR, KPA, and Kg/cm².
4.6 Connecting to the Item and Inflating
- Attach the appropriate nozzle or adapter to the end of the insulated hose for your item (e.g., tire valve, ball needle).
- Firmly connect the nozzle to the item's valve.
- Ensure the target pressure is correctly set on the display.
- Short press the Power button to begin inflation.
- The device will run automatically and stop when the preset pressure is reached.
- Disconnect the hose from the valve.
Warning: The connection hose may become hot during use due to air compression. Avoid touching it directly with your hands.
4.7 Using the LED Light
The U/LED button also controls the built-in flashlight. Press it once while the device is on to turn the LED light on or off.
4.8 Using as a Power Bank
- Ensure the inflator is turned on.
- Connect your mobile device to the inflator's USB output port using a standard USB charging cable.
- The inflator will charge the connected device. It will automatically shut down if the battery is low or the connected device is fully charged.
Note: The power bank function requires the inflator to be powered on. USB output is 5V/2A.
4.9 Calibrating the Pressure Reading (Zeroing)
If the displayed pressure is not zero when the device is turned on and not connected to anything, you can clear the reading:
- Do NOT connect any hose or item to the inflator.
- Press and hold both the U/LED button and the SET button simultaneously for 3 seconds.
- The display will flash rapidly as it enters the automatic reading clearing process.
5. Safety and Usage Notes
- Intended Use: This inflator is designed for bicycle tires, motorcycle tires, small to medium car tires (including SUVs), balls (basketballs, footballs, rugby balls), and small swimming rings. It is intended as an emergency or portable tool, not a professional-grade high-volume compressor.
- Do NOT Use For: Large truck tires, vans, buses, RVs, air mattresses, large pool inflatables (e.g., pool floats, boats), or inflatable toys. It is not suitable for these applications.
- Noise: The device produces operational noise (approximately 80 decibels measured from one meter). This is normal for air compressors.
- Heat: The unit contains a fan for heat dissipation, allowing continuous use. The air hose connection point may get hot. Handle with care.
- Battery Care: Use only the provided Micro USB cable or a standard 5V/2A charger. Do not expose the unit to extreme temperatures or moisture.
- Pressure Limits: Always observe the maximum PSI limits for the selected mode and the item you are inflating. Do not exceed the manufacturer's recommended pressure for tires or other inflatables.
6. Troubleshooting
| Problem | Possible Cause/Solution |
|---|
| Device does not turn on. | Battery may be depleted. Connect to a charger using the Micro USB cable and charge fully. |
| Inflation stops immediately or seems weak. | Check battery level. The device auto-shuts off when battery is low. Charge fully. Ensure the hose and connections are secure and not leaking. |
| Pressure reading is inaccurate. | Perform the pressure reading calibration (zeroing) procedure as described in section 4.9. |
| Device gets hot during use. | The built-in fan is working to dissipate heat. This is normal. Ensure air vents are not blocked. |
| Power bank function not working. | Ensure the inflator is turned on. Try a different USB cable. The inflator may shut down if its own battery is too low. |
| Unit does not auto-stop. | Verify the target pressure is correctly set. Ensure the hose is properly connected to the valve to allow accurate pressure sensing. |
7. Warranty and Support
This product is covered by a 1-year warranty from the date of purchase.
Manufacturer Contact Information:
shenzhenshi yanyoukejiyouxiangongsi
shenzhen, longgang 518000, CN
If you experience any problems with the product, please contact the manufacturer or the seller from whom you purchased the item.