Loading ...
Loading ...
Loading ...
11
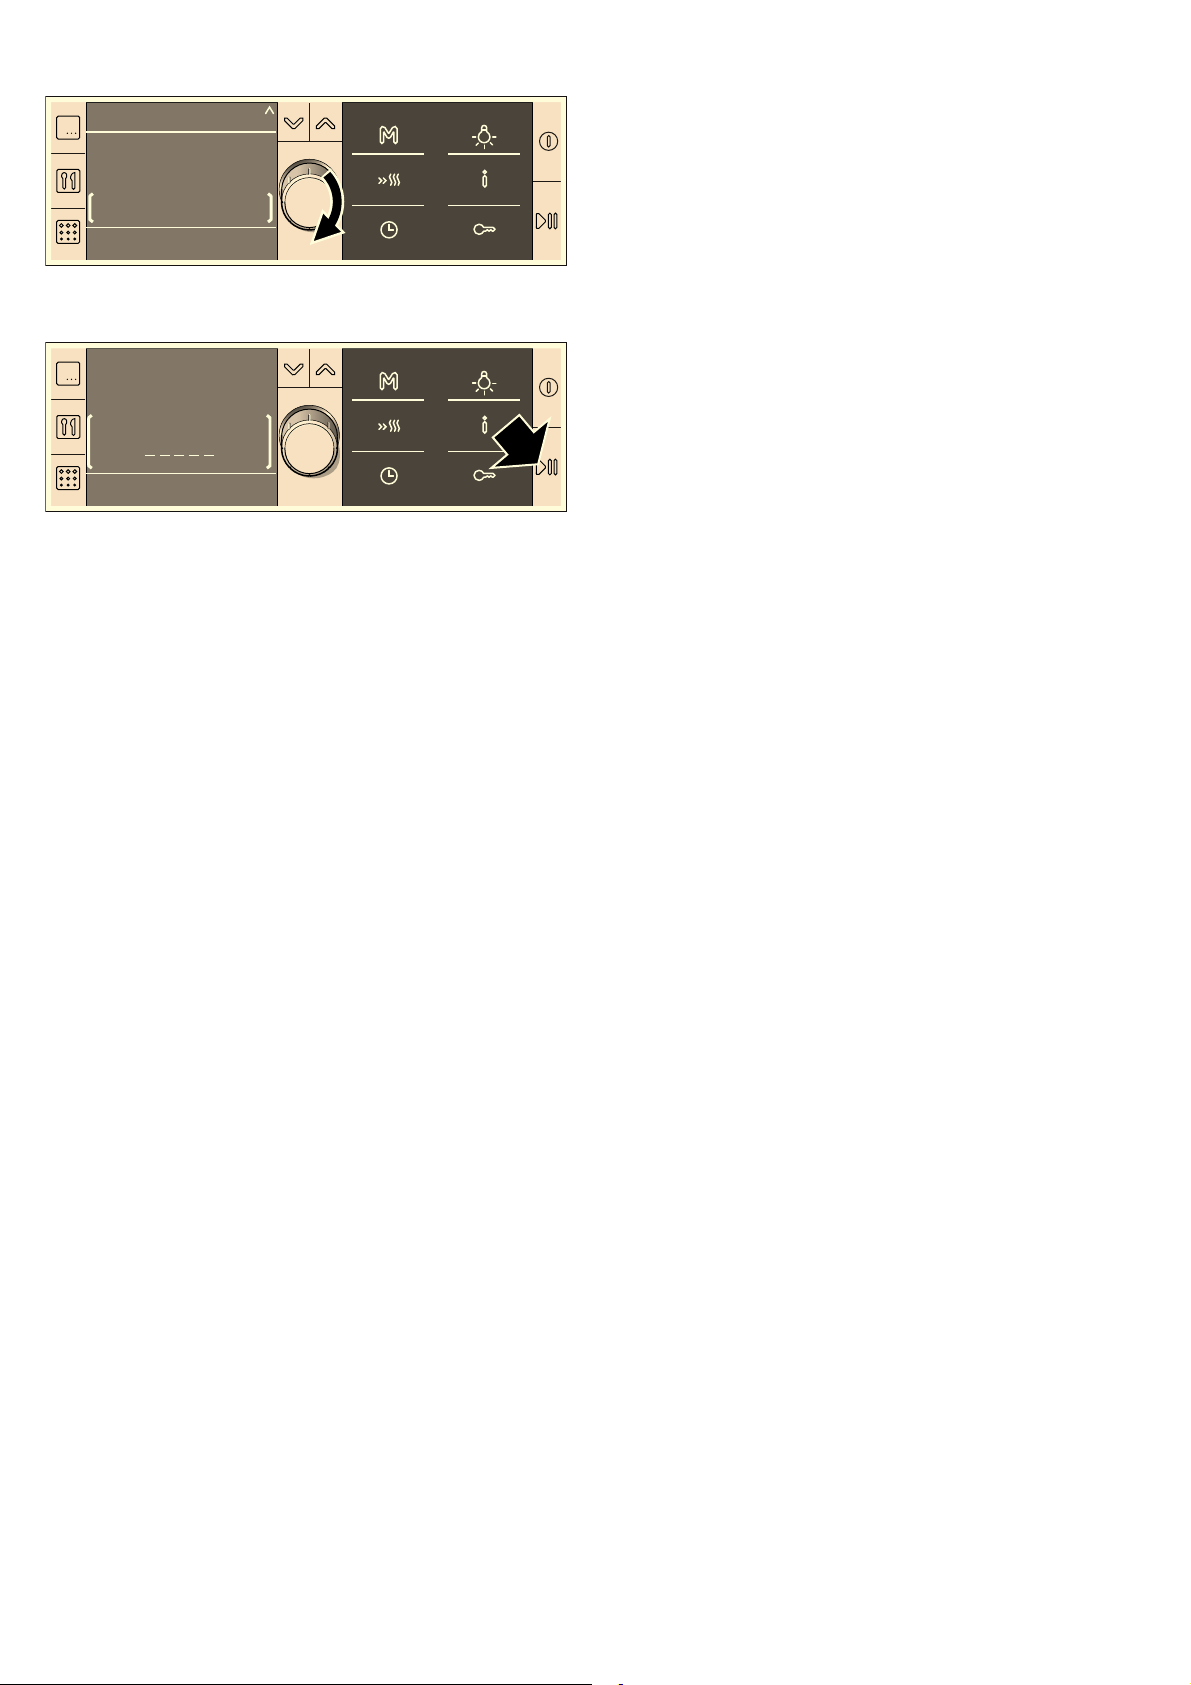
3. Turn the rotary selector to set the desired temperature.
4. Press the n button.
Appliance operation begins.
When the food is ready, switch the oven off with the
% button
or select and apply a new operating mode.
Opening the oven door during cooking
Operation is suspended. The oven is paused. The
n symbol
flashes on the status bar. Close the door and press the
n
button again. The programme will then continue.
Pausing operation
Press the
n button briefly. The oven is paused. The symboln
flashes. Press the
n button again, operation continues.
Changing the temperature or grill setting
This can be done at any time. Turn the rotary selector to
change the temperature or grill setting.
Cancelling operation
Press and hold the
n button until the intervention display
appears. You can now change the settings.
Calling up information
Press the
° button briefly. The first item of information appears.
Check each further item of information using the
[ rotary
selector. You will find information on the heating temperature,
types of heating, shelf position and accessories.
Setting the cooking time
See section Time-setting options, setting the cooking time.
Setting a later end time
See the section entitled Time-setting options, Setting a later end
time.
MicroCombi, gentle / MicroCombi, intensive
For these types of heating, a microwave power setting is
automatically switched on. You simply need to set the
temperature specified in the recipe and halve the cooking time.
MicroCombi, gentle
MicroCombi, gentle is suitable for cakes in tins, such as
■ Sponge cake, e.g. marble cake, fruit loaf, fruit flan
■ Short-crust pastry with moist filling, e.g. apple pie,
cheesecake
■ Cakes made from baking mixtures
■ Yeast cake, e.g. with currants
■ For roasting, the cooking time can also be halved with this
type of heating.
Note: Use dark metal baking tins or else plastic "FlexiForm"
bakeware. For joints, a heat-resistant glass dish with or without
a lid is suitable.
MicroCombi, intensive
This type of heating is suitable for
■ poultry, e.g. chicken
■ baked casseroles, e.g. pasta bake
■ gratins, e.g. potato gratin
■ grilled fish, fresh and frozen
Note: Use heat-resistant containers made of glass or ceramic.
Setting procedure
If there is information in the recipe for different types of heating,
take the setting for Top/bottom heating. The cooking time
specified in the recipe should not be less than 30 minutes.
Place your dish in the cold cooking compartment. Place the
ovenware in the centre of the wire rack at level 1.
1. Press the ! button.
3D hot air and 160 °C are suggested in the display.
2. Using the rotary selector, set the “MicroCombi, gentle” or
“MicroCombi, intensive” heating type.
3. Use the X button to switch to the temperature and set the
temperature using the rotary selector.
4. Press the 0 button and set a cooking time using the rotary
selector.
5. Press the 0 button.
6. Start with the n button.
You can see the cooking time counting down in the status bar.
The cooking time has elapsed
A signal sounds. Operation has finished. The status bar shows
00:00:00. You can cancel the signal before it has finished
sounding by pressing the
0 button.
Recommended settings
If you choose a dish from the recommended settings, the ideal
setting values are already specified. You can choose from
many different categories. You will find recommended settings
for a large number of dishes – from cake, bread, poultry, fish,
meat and game through to bakes and pre-prepared products.
You can change the temperature and cooking time. The type of
heating is fixed.
You can access the various dishes by navigating through
several selection levels. Try it out and see the range of dishes
for yourself.
Selecting a dish
1. Press the ! button.
3D hot air, 160 °C are suggested in the display.
2. Turn the rotary selector anticlockwise to Recommended
settings.
The first food category appears.
3. Press the X button to switch to the food category and select
the required category by turning the rotary selector.
Use the
X button to switch successively to the next level.
Turn the rotary selector to find the next selection.
The setting for the selected dish now appears. You can
change the temperature, but not the type of heating.
4. Press the n button.
Operation starts. The cooking time is shown counting down in
the status bar.
7\SHVRIKHDWLQJ
7RS
ERWWRPKHDWLQJ
&
7RS
ERWWRPKHDWLQJ
&
Loading ...
Loading ...
Loading ...