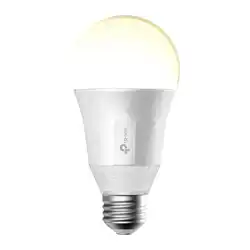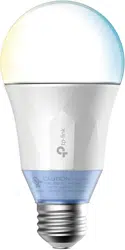

Smart Wi-Fi LED Bulb Installation
Quick Start Guide
LB1XX Series
Important Information
Before installing or replacing the Smart Bulbs, read and follow all precautions,
including the following:
• WARNING: RISK OF ELECTRIC SHOCK OR BURNS . Switch OFF the light
switch controlling the bulb and WAIT for the bulb to cool down before
attempting to change it.
• Do not install the Smart Bulb with wet hands or when standing on wet or
damp surfaces.
• Not suitable for use with standard in-wall dimmers. Dimmable via the app
only.
• Suitable for use in operating environment between -20°C and 40°C (-4°F and
104°F).
• NOT FOR EMERGENCY LIGHTING.
1 Download TP-Link Kasa from the App Store or
Google Play.
2 Connect your mobile device to a 2.4GHz Wi-Fi network.
Note: The Smart Bulbs only support the 2.4GHz networks.
3 Launch Kasa and follow the in-app instructions to
connect the Smart Bulb to your home network.
OR
scan QR
code
7106507003 REV 2.0.1
Sketch 9:41 AM 100%
DONE
Great!
Your Smart Bulb is all set up. It is
now saved in your Device List.
Sketch 9:41 AM 100%
Install your Smart Bulb
First, make sure the power is off on
the light you’re replacing. Swap the
current bulb with your Smart Bulb.
NEXT
Add Device
Sketch 9:41 AM 100%
Smart Plug
Range Extender
RE350k
Smart Bulb
Smart Switch

Frequently Asked Questions
1. The Smart Bulb appears offline or unreachable, what should I
do?
• Check the light switch and make sure that it’s switched to
ON. The Smart Bulb requires an “always-on” power supply to
operate properly.
• Make sure you are connected to the same Wi-Fi network to
control it locally. To control the Smart Bulb outside of your
home, sign in to your Kasa account and enable Remote
Control.
• Reset the Smart Bulb and reconnect it to your Wi-Fi network.
2. How do I reset my Smart Bulb?
• To reset without losing your configuration settings, turn the
light switch controlling the bulb to OFF first, then flip the
light switch on and off 3 times.
• To factory reset, turn the light switch controlling the bulb to
OFF first, then flip the light switch on and off 5 times. Note
that factory resetting the Smart Bulb will erase all of your
custom settings, and you’ll have to set it up again.
3. Can I control the Smart Bulbs from multiple devices?
Yes. Download TP-Link Kasa to your devices and sign in using
the same Kasa account.
4. How do I pair the Smart Bulbs with Amazon Echo?
Visit www.tp-link.com/en/faq-944.html or within the Kasa
Help section for pairing instructions.
© 2016 TP-Link. All rights reserved.
Specifications are subject to change without notice. TP-Link is a registered trademark of
TP-Link Technologies Co., Ltd.
App Store is a registered trademark of Apple Inc.
Google Play is a trademark of Google Inc.
www.tp-link.com
MADE IN CHINA
Support
If you encounter any issues during installation or configuration,
please visit www.tp-link.com/support for web support and
troubleshooting information.