Loading ...
Loading ...
Loading ...
14
Installation Instructions
INSTALLING THE DOWNDRAFT VENT SYSTEM
VENTING OPTIONS
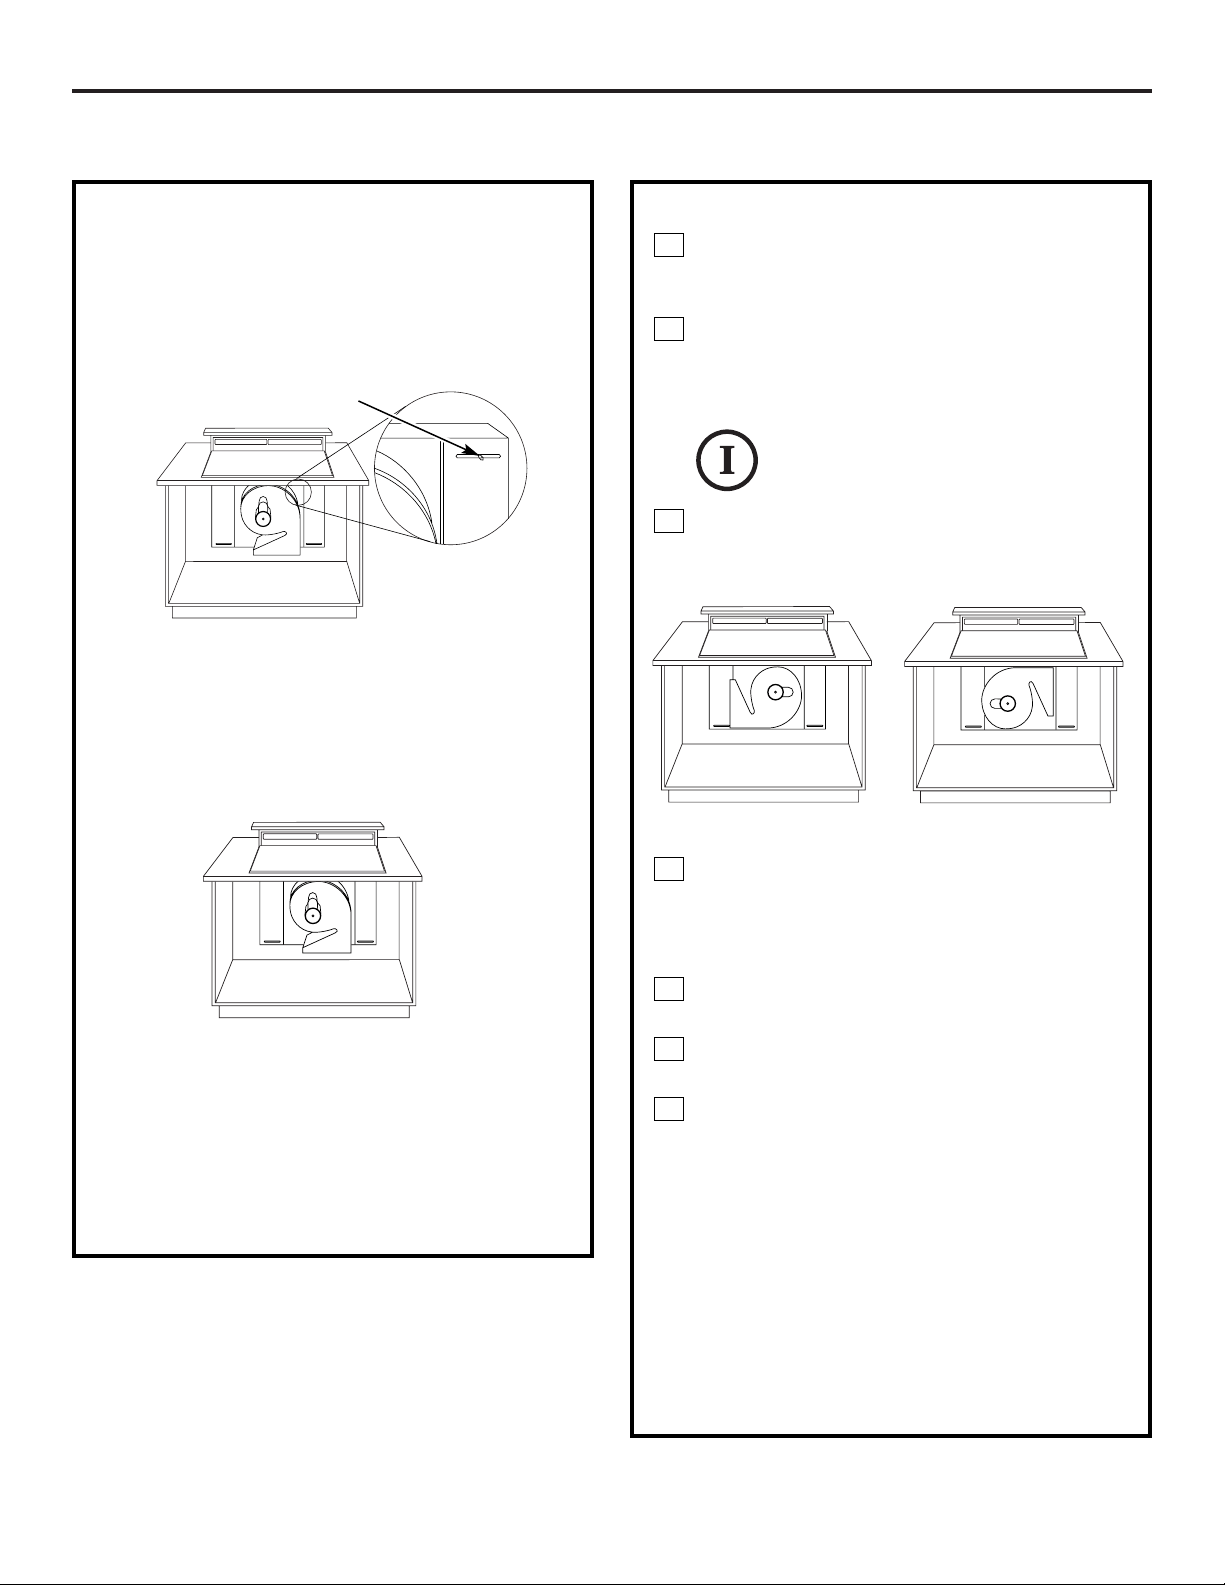
Side-to-Side Adjustments
The entire blower mounting plate can be
adjusted 3
1
⁄2″ to the left or right. This will help
to align vent discharge to house ductwork.
Discharge Direction
The blower assembly may be removed and
turned 90° for a left or right side discharge.
• The downdraft vent is shipped with the
discharge outlet pointing straight down
and can be changed to the left or right side.
• A left or right 90° direction adjustment
should be performed before dropping into
the countertop opening.
• Flatten the shipping box to use as a pad.
• Lay the vent on its back onto the pad.
To Change to a Left or Right Discharge
Remove the 4 screws holding the blower
to the mounting plate assembly. Retain
screws.
Remove the blower assembly, turn it
over to access the 4 nuts holding the
blower to the mounting plate. Remove
the nuts.
IMPORTANT: Do not lift the motor
by the power cable.
Turn the blower to the left or right
discharge direction and reinstall the
4 nuts.
Reinstall the blower and mounting plate
with original screws.
To Locate the Ductwork Holes in the Cabinet
Floor or Side Walls
Temporarily, put vent into the countertop
opening.
Push the vent all the way to the back of
the opening.
If you are transitioning to 6″ round,
place transition (obtained locally) over
the discharge outlet.
• Mark the location and remove the
assembly.
• Cut holes and install ductwork
connections.
Order JXRB67 for installation of the blower
and motor below the floor.
Order JXBC67 for installation of the blower
and motor outdoors.
3
2
1
4
3
2
1
Loosen screws to adjust
blower left to right
Discharge down
(as supplied)
Discharge right
Discharge left
Loading ...
Loading ...
Loading ...