Loading ...
Loading ...
Loading ...
1) Air supply valve and cooktop valve need to be closed, unplug the power plug for AC model.
2) When the gas pressure regulator is in NG state and need to be converted to Propane state,
counterclockwise unscrew the end cap under the gas pressure regulator, and then
counterclockwise unscrew the marked NG threaded rod, reverse the threaded rod, turn the LP
arrow upwards and tighten it to the screw cap, then install the cap back to the gas pressure
regulator. The gas pressure regulator gas conversion needs to be used with the accessory kit (See
Burner Configuration for detailed nozzle specifications).
3) Remove the burners, burner caps, and screw out the nozzles from the burner bases. Then install
those nozzles in the Conversion Kit bag (part no. GX90-20A ASSY NOZZLE KIT ON
EMPV-30GC20.GX90-21A ASSY NOZZLE KIT ON EMPV-30GC21.GX90-22A ASSY NOZZLE KIT
ON EMPV-36GC22.GX90-23A ASSY NOZZLE KIT ON EMPV-36GC23.GX90-24A ASSY NOZZLE
KIT ON EMPV-36GC24.GX90-25A ASSY NOZZLE KIT ON EMPV-36GC25.GX90-26A ASSY
NOZZLE KIT ON EMPV-30GC26.GX90-27A ASSY NOZZLE KIT ON EMPV-36GC27,GX90-28A
ASSY NOZZLE KIT ON EMPV-34GC28.) to each burner base correspondingly. Save the orifices
removed from the appliance for future use.
4) Input inlet pressure of 11 in wc ( 2740Pa ), coat the nozzle joints and the gas pressure regulator
joints with moderate amounts of soapy water, there shall be no bubbling
5) Place the burner, burner cap, check if the position between the ignition pin and the burner is correct,
and then open the valve, AC model plugged in the power plug.
6) Test the outlet pressure, the pressure is required to be 10 ± 1in wc. If it cannot meet the scope of
the requirements, need to unscrew the pressure regulator nut as Figure 18, rotate slightly to adjust
the white plastic parts inside the pressure regulator.
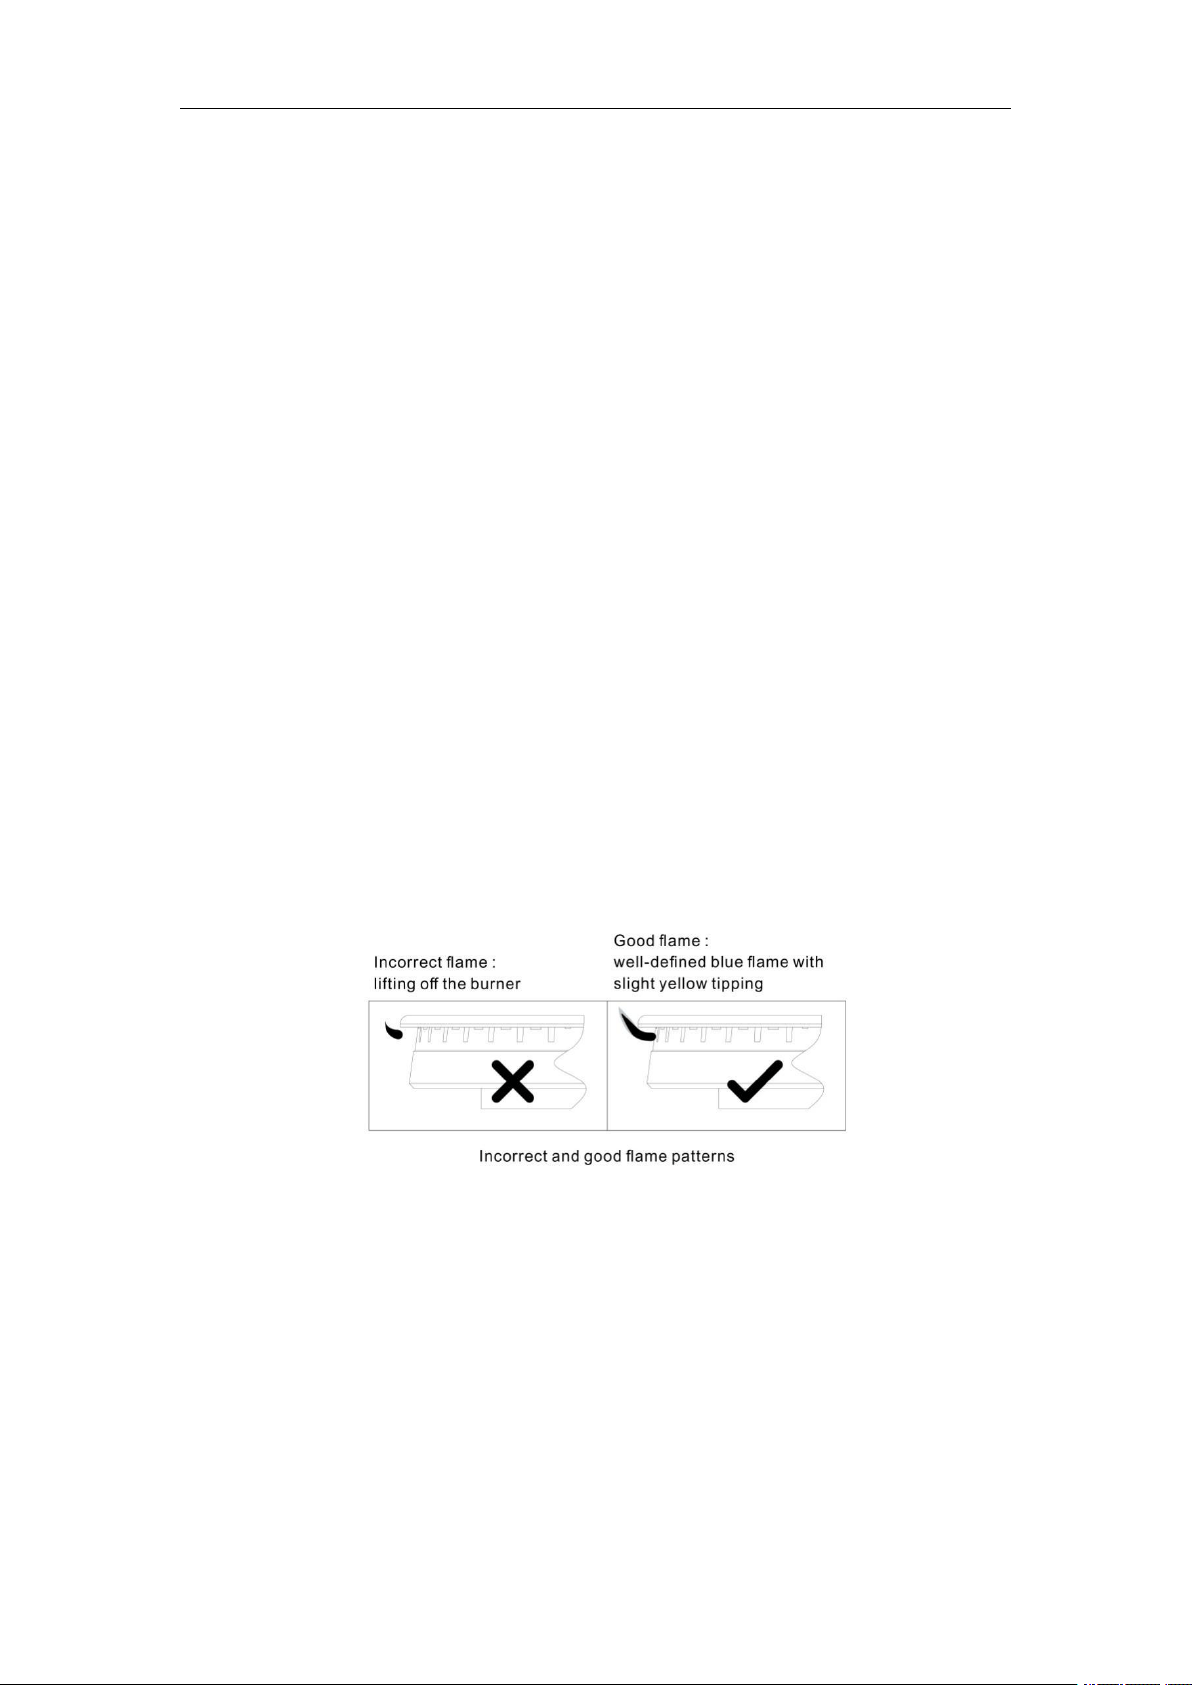
7) Ignition test requires that the burner can be lit in 5 seconds normally, after 1 minute the flame is
stable, there should be no lifted flame and yellow fire.
8) Similarly, when use in NG status, turn the marked NG arrow upwards and tighten it to the screw
cap (see Figure 18). Repeat the above operation. The outlet pressure requires to be 4 ± 1in wc.
9) After the conversion is completed, the conversion label in the accessory bag needs to be attached
next to the original label.
14
Loading ...
Loading ...
Loading ...