Loading ...
Loading ...
Loading ...
15
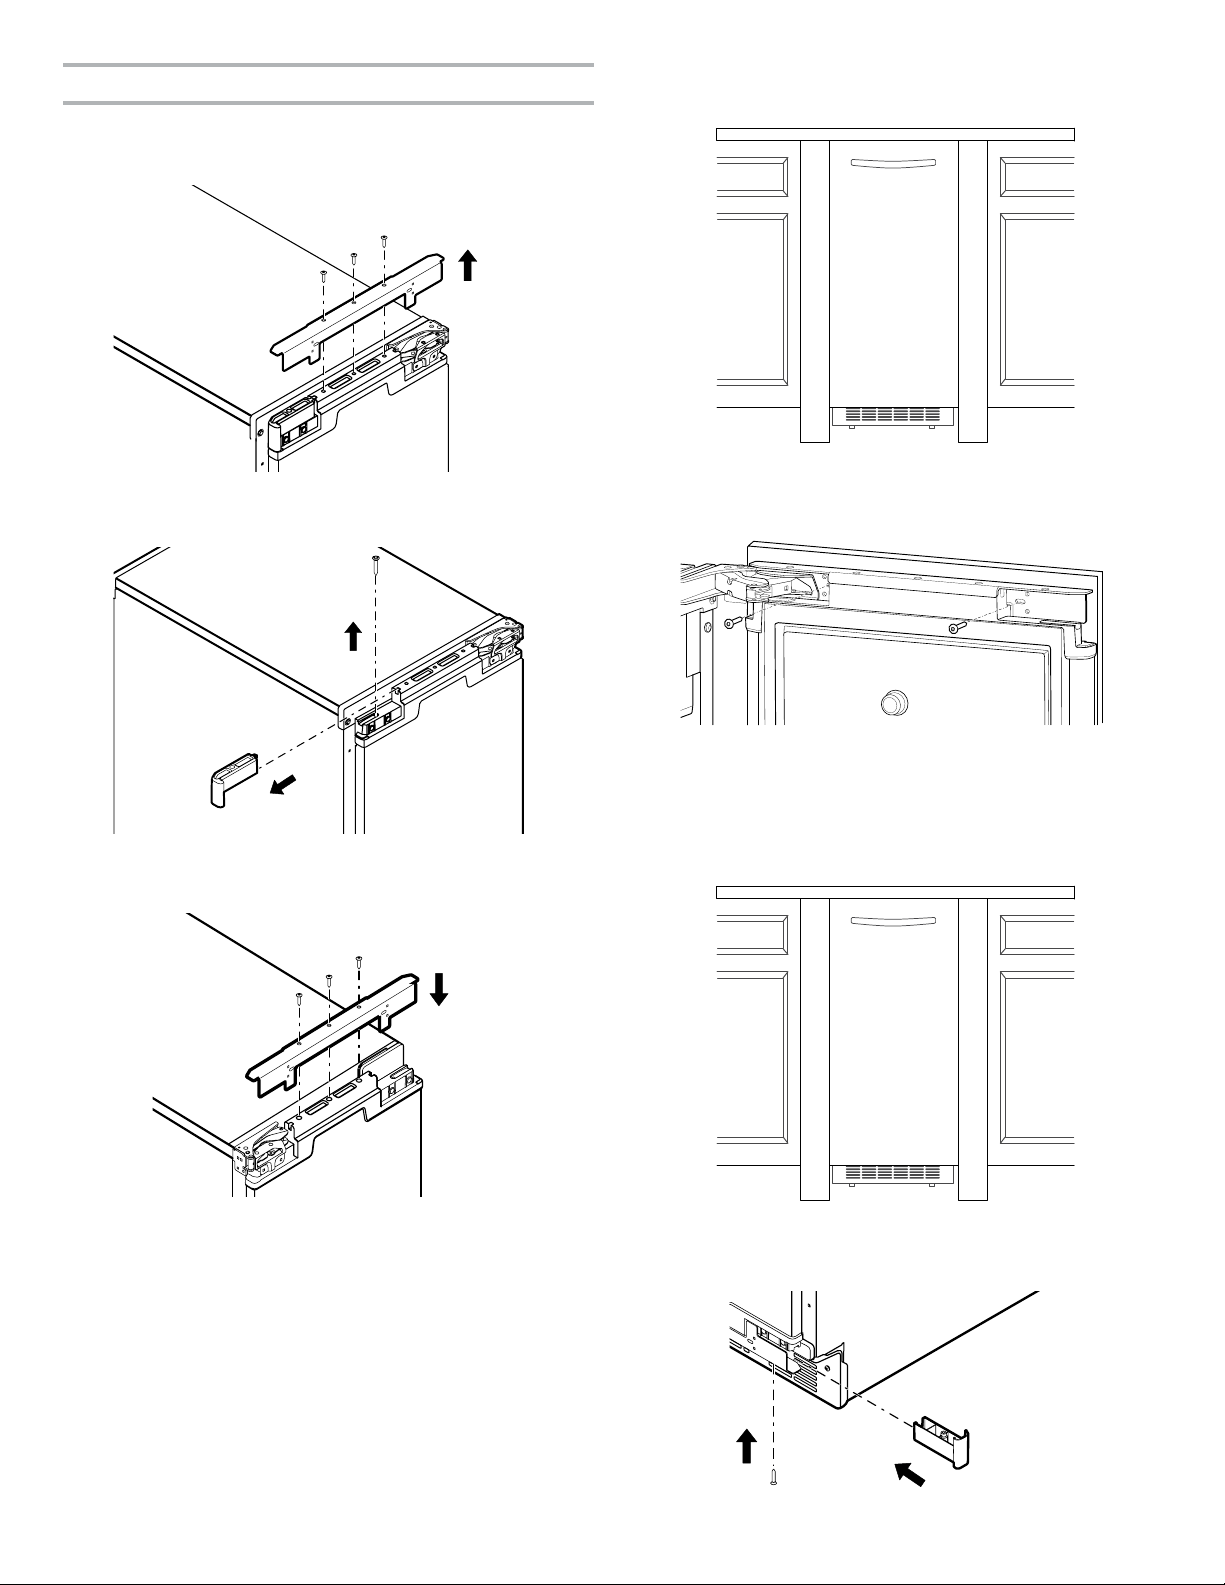
Custom Panel Installation
1. Remove screws and the top metal bracket using the Phillips
screwdriver. Remove and place them aside. Skip this step and
go to the step 4 if the door reversal has been completed.
2. Remove the top and bottom end caps using the Phillips
screwdriver and place them aside.
3. Reinstall top metal bracket using screws removed in the
step 1.
4. Lightly press the custom panel onto the door using double
sided adhesive tape. Adjust height of the panel to align with
the adjacent cabinetry. Press the panel rmly against door.
5. From inside the door, install the wood screws through the
slotted holes in the metal brackets.
Continue to “Leveling and Securing” section at step 5.
6. Adjust the panel side to side to achieve a desired gap on both
sides. Install the remaining screws through the door bracket
into the panel.
NOTE: Be sure that the panel is aligned with adjacent cabinet
before installing the remaining screws to secure the door
panel.
7. Replace the top and bottom end caps into the door. Fix the
bottom end cap using screw through the bottom metal
bracket hole.
Loading ...
Loading ...
Loading ...