Loading ...
Loading ...
Loading ...
13
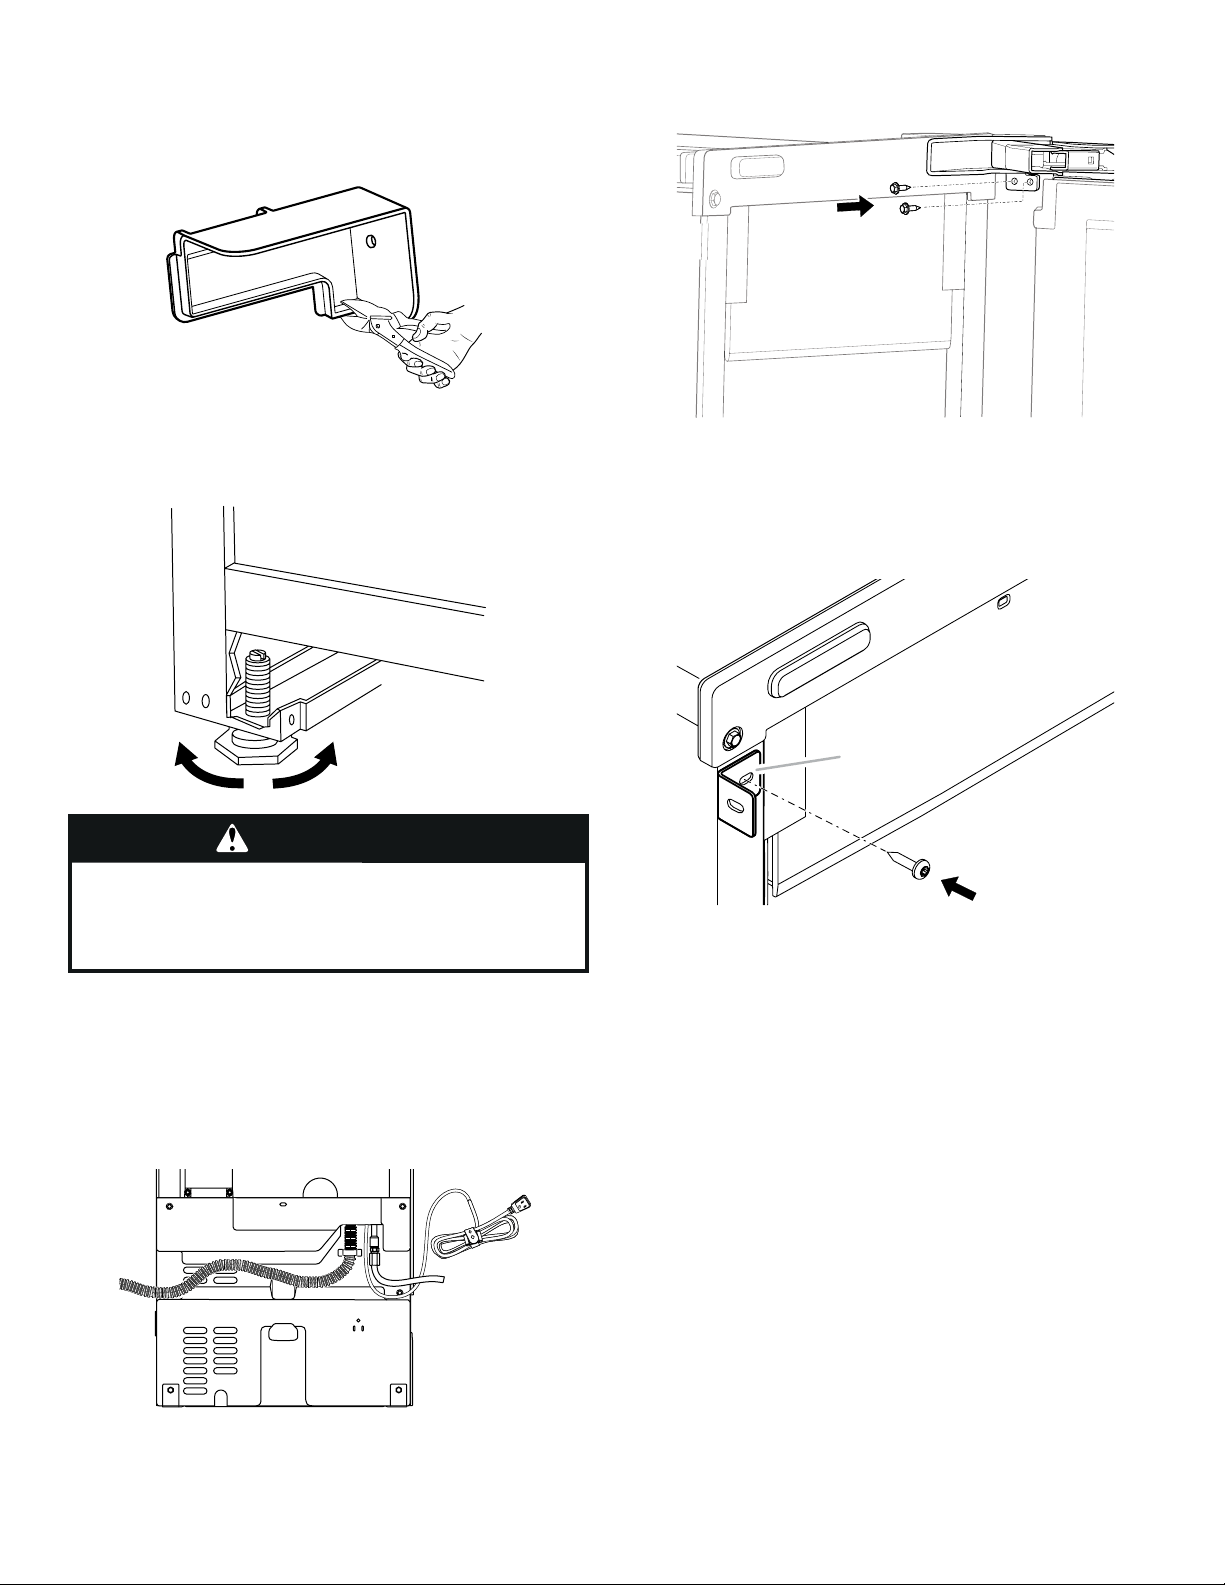
3. Using pliers, remove the hinge covers from the top and
bottom hinges.
NOTE: Save the hinge covers for future use. Reinstall the
hinge covers if product is removed from cabinet installation.
4. For custom panel installation, install the door panel according
to the instructions in the “Custom Wood Panel” section.
5. Use ice maker leveling legs to align ice maker door to the
adjacent cabinet opening.
6. Slide ice maker into the cabinet while managing the utility
connection positions behind the ice maker. Be sure to cover
the oor with cardboard or hardboard to avoid damaging it.
IMPORTANT: For the custom panel model ush install, the ice
maker utility connections must be routed out through the slot
in the ice maker rear panel. Any time ice maker is removed for
service, do the same process when placing the unit back in
the cabinets.
7. Be sure that the ice maker is at desired depth. Secure the top
and bottom hinges to the side of the cabinet using wood
screws.
8. Attach the cabinet brackets (provided with ice maker) to the
holes in the front of ice maker as shown in the illustration.
Attach the cabinet brackets to the side of the cabinet with
wood screws.
NOTE: For the custom wood panel installation, continue
installation at step 7 of “Custom wood panel installation.”
WARNING
Excessive Weight Hazard
Use two or more people to move and install ice maker.
Failure to do so can result in back or other injury.
A
A. Cabinet bracket
Loading ...
Loading ...
Loading ...