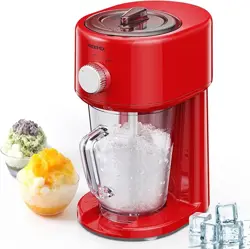
Oster® BLSTET-C Ice Shaving Blender
Product's Documents
Below are documents related to this product, you can read online or download:
- Owner's manual - (English) Read Online | Download pdf
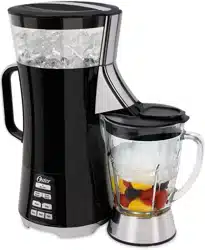
Table of Contents
NOTE: NEVER PUT ANYTHING BUT ICE IN THE ICE RESERVOIR.
1. Place the motor base on a clean dry flat surface with control panel facing you.
2. With handle on the LEFT, place the Ice Shaver Main Body on top of Motor Base and lock into position by turning counter-clockwise (use aligning arrows).
3. Install the Ice Reservoir to Ice Shaver Main Body by first removing the Ice Reservoir Lid (turning it clockwise to the Unlock position). Then place the Ice Reservoir on top of the unit and lock into position by turning counterclockwise (use aligning arrows)
NOTE: In order to properly install the Ice Reservoir to the unit, make sure to first remove the Ice Reservoir Lid from the Ice Reservoir.
4. Plug the unit into a standard 120 Volt wall socket. For best results, use store-bought ice that has been out of the freezer between 20-30 minutes.
5. Fill the Ice Reservoir with ice cubes.
6. Replace the Ice Reservoir Lid and rotate counterclockwise to the locked position.
7. Remove Blending Jar Lid.
8. Add appropriate amount of liquid ingredients to the Blending Jar.
9. Replace Blending Jar Lid and position Blending Jar under the Ice Chute by aligning the chute with the Blending Jar Lid.
10. Push the ON/OFF button to turn the unit on. Power Indicator Light will blink slowly until the ice shaver or blender is placed on Motor Base.
1. If you want to use the automatic frozen drink cycle, start by pushing the “Auto Shave/Auto Blend” button.
2. The unit will shave ice for the appropriate time. The unit will stop at the completion of the cycle.
3. When ice shaving is complete, the lights under Auto Blend will flash slowly.
4. Remove ice shaver assembly from Motor Base.
5. Place Blending Jar assembly on Motor Base.
6. Restart frozen drink cycle by pushing the “Auto Shave/Auto Blend” button again.
NOTE: To customize your drink, after either the auto shave or auto blend cycle, you can pulse manually. Add more shaved ice or blend longer by pushing the “Pulse” button. (See page 9)
7. Status Indicator Lights will be illuminated during auto cycle.
8. To serve:
NOTE: To remove excess ice from the Ice Reservoir, remove Ice Shaver Lid from Ice Shaver Reservoir. Remove Ice Shaver Assembly from Motor Base. Tilt unit enough to allow excess ice to pour out of the unit. WARNING: DO NOT PLACE FINGERS IN THE ICE HOPPER. THE SHAVING BLADE IS SHARP AND COULD CAUSE INJURY.
10. Periodically check the Ice Melt Reservoir and empty as needed.
1. Place Blending Jar assembly on Motor base.
2. To start blending, press “Low”, “Med”, or “High”.
3. To stop blending, press the “Stop” button.
To make a thicker drink:
NOTE: Use LESS liquid when adding ingredients to blending jar.
1. Press and hold the “Pulse” button to add more ice to the blending jar.
2. To stop adding shaved ice, release the “Pulse” button.
3. To blend the added shaved ice, remove the Ice Shaver assembly from the Motor Base and place the Blender assembly on the Motor Base.
4. Hold the “Pulse” button until the desired consistency is achieved.
To make a thinner drink:
Note: Use MORE liquid when adding ingredients to blending jar.
1. If you have already made your drink using the Auto mode, make sure your drink is blended to the desired consistency.
2. Add more liquid ingredients to the Blending Jar assembly.
3. Press and hold the “Pulse” button until the desired consistency is achieved (you may also use the Low, Med, or High buttons to blend your drink).
Fill the Blending Jar with desired contents, use less ice for thinner drink, use more ice for thicker drink.
1. With Ice Shaver assembly on Motor Base, position Blending Jar under Ice Chute.
2. Press and hold the “Pulse” button until the desired amount of shaved ice is added to the Blending Jar.
3. Remove Ice Shaver assembly from Motor Base.
4. Place Blending Jar assembly on Motor Base.
5. To start blending, press “Low”, “Med”, or “High”.
6. To stop blending, press the “Stop” button.
IMPORTANT: Your Blending Jar, Shaving and Blending Blades are subject to wear during normal use. Always inspect for nicks, chips, or cracks. Always inspect for broken, cracked, or loose blades. If the Jar or Shaving and/or Blending Blades are damaged, do not use.
1. Make sure unit is unplugged. Place on a clean dry surface. Turn the unit so the back is facing you. Remove the Ice Reservoir Lid by turning clockwise to the unlock position.
2. To remove the Ice Reservoir, grasp the Reservoir Handle with your hand, turn clockwise, and lift to remove. Note the location of the Shaving Blade inside the Ice Hopper.
WARNING: Do not place fingers inside the Ice Hopper near the Shaving Blade. Blade is sharp – handle carefully.
NOTE: To reassemble, install Ice Reservoir to the unit first, then attach Ice Reservoir Lid.
3. Rinse the Shaving Paddle assembly with water and dry thoroughly before storing.
4. Turn the Blending Jar upside down and unscrew the Jar Base. Carefully remove the Blending Blade and Blending Blade Sealing Ring. WARNING: The Blending Blade is sharp. Handle with care.
5. To remove the Ice Melt Reservoir, hold the unit still and pull straight out on the handle.
6. Blending Jar Lid, Blending Jar, Blending Blade, Blending Blade Sealing Ring, Jar Base and Ice Melt Reservoir can be safely washed in the top rack of your dishwasher. Use only top rack. Failure to do so will result in damage. The Ice Reservoir Lid, Ice Reservoir, Shaving Paddle, Ice Bowl, Ice Deflector Blade Assembly, Shaving Blade and Ice Melt Reservoir are only exposed to ice and water and they should be rinsed with soap and warm water and allowed to air dry.
7. Use a damp cloth to clean the outside of the unit.
Warning: Unplug unit before cleaning. Do not use solvents. Never immerse the unit in water.
Reference file: Oster® BLSTET-C Ice Shaving Blender
Additionally, the document applies to other Oster models: BLSTET-B SERIES