Loading ...
Loading ...
Loading ...
14 15
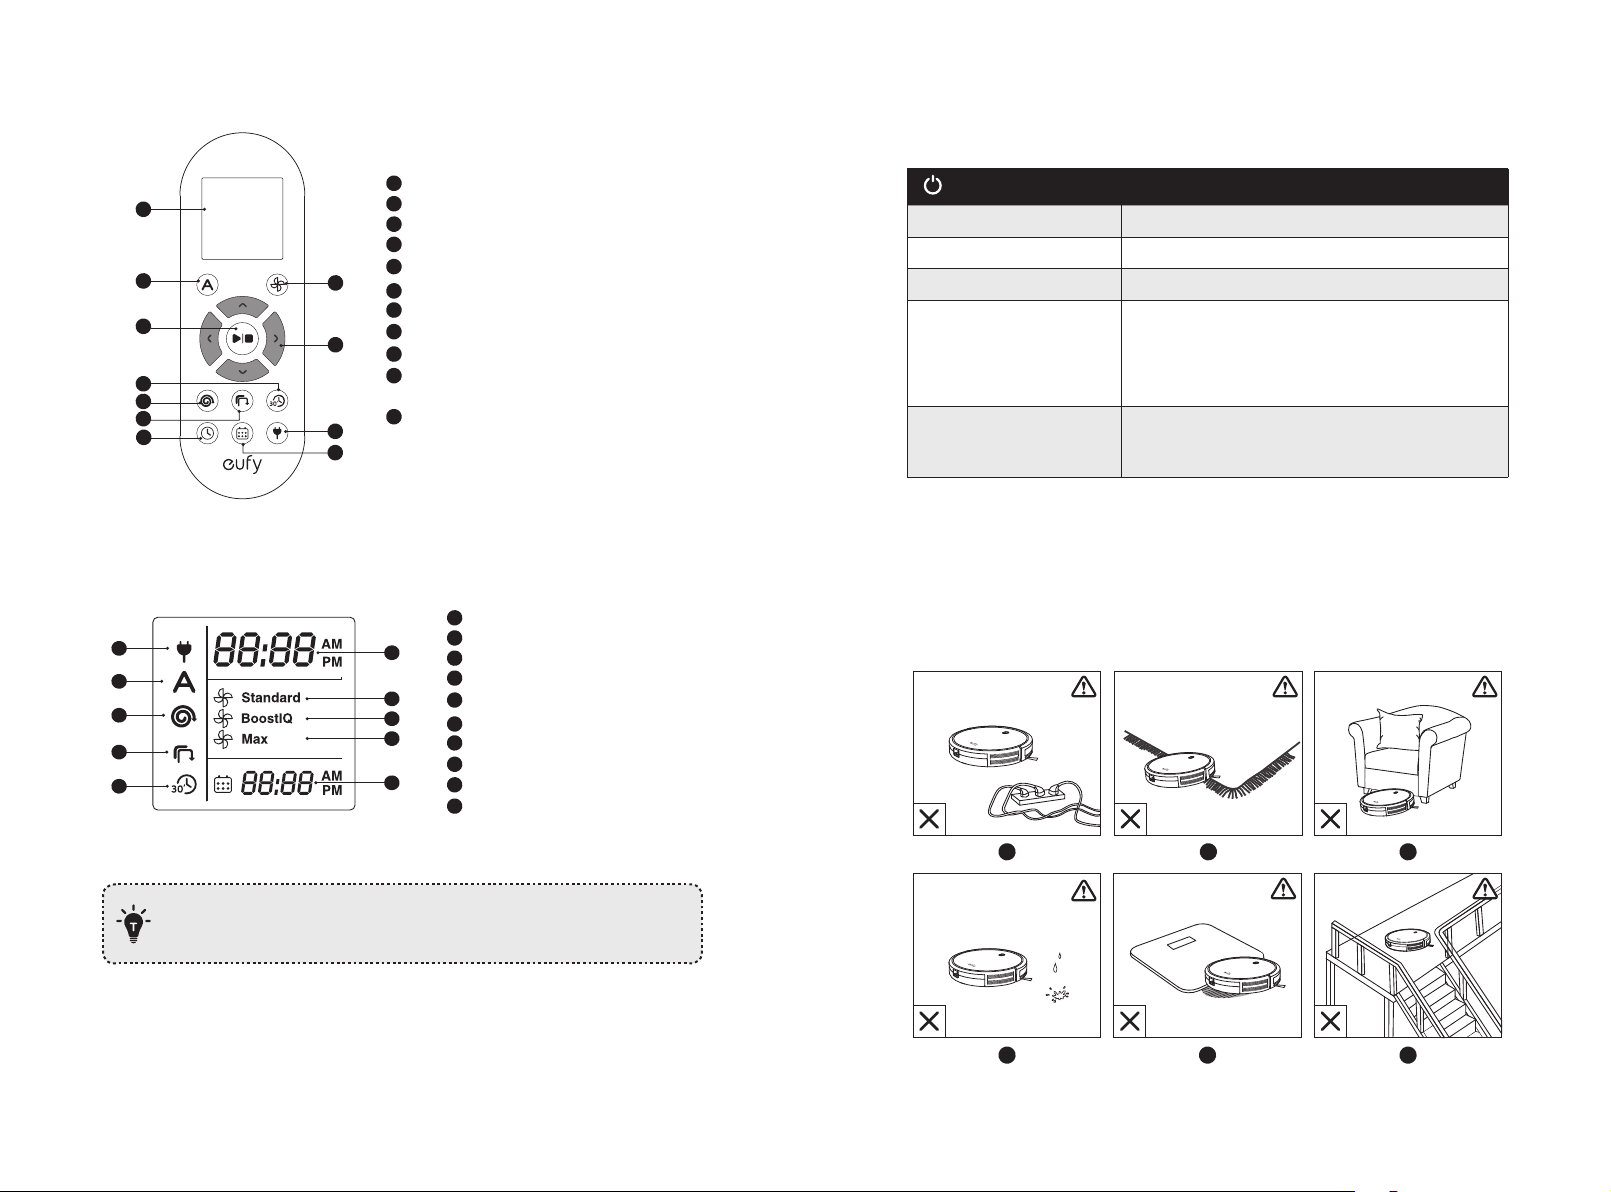
Remote Control
1
11
2
7
5
6
9
8
10
3
4
1
2
3
4
5
6
7
8
9
10
11
Display panel
Start Auto cleaning
Start Auto cleaning / Stop cleaning
Start Quick cleaning
Start Spot cleaning
Start Edge cleaning
Adjust time
Schedule Auto cleaning start time
Return RoboVac to Charging Base
Control cleaning direction manually /
Adjust the hour and minute
Adjust suction power level in Auto and
Quick Cleaning modes
Remote Control Display
6
1
2
3
4
5
7
8
9
10
Returning to Charging Base
Auto cleaning mode selected
Spot cleaning mode selected
Edge cleaning mode selected
Quick cleaning mode selected
Clock
Standard suction power enabled
BoostIQ™ dynamic suction power enabled
Max suction power enabled
Scheduled cleaning time
1
2
3
4
5
6
7
8
9
10
Install 2 AAA batteries before using the remote control for the first time. Make sure
the positive and negative ends are facing the correct polarity direction as marked in
the battery compartment
.
LED Indication
You can see the status of RoboVac from the LED indicators.
(Power Status Light)
Status
Breathing orange Charging
Solid blue Standby / Cleaning / Fully charged
Solid orange Low power and returning to Charging Base
O
• RoboVac is off.
• To conserve power, the light automatically turns
off when RoboVac is not docked to the Charging
Base and has been inactive for 1 minute.
Flashing / Solid red + Beeping
RoboVac has an error.
Refer to the “Troubleshooting>Error Tone” section in
this manual for solutions.
Using Your RoboVac
Important Tips Before Use
a
b
c
d
e
f
Loading ...
Loading ...
Loading ...