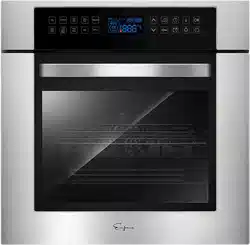
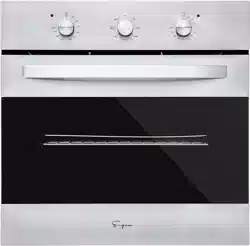
Empava EMPV-24WOC12 Electric Oven
Product's Documents
Below are documents related to this product, you can read online or download:
- Owner's manual - (English) Read Online | Download pdf
 Using energy in a responsible way not only saves money but also helps the environment. So let us save energy! And this is how you can do it:
!Do not uncover the pan too often(a watched pot never boils!)
Do not open the oven door unnecessarily often.
!Switch off the oven in good time and make use of residual heat.
For long cooking times, switch off heating zones 5 to 10 minutes before finishing cooking, This saves up to 20% on energy.
Only use the oven when cooking larger dishes.
Meat of up to 1 kg can be prepared more economically in a pan on the cooker hob.
!Make use of residual heat from the oven.
If the cooking time is greater than 40 minutes switch off the oven 10 minutes before the end time.
Important! When using the timer, set appropriately shorter cooking times according to the dish being prepared.
!Make sure the oven door is properly closed.
Heat can leak through spillages on the door seals. Clean up any spillages immediately.
!Do not install the cooker in the direct vicinity of refrigerators/freezers.
Otherwise energy consumption increases unnecessarily

|
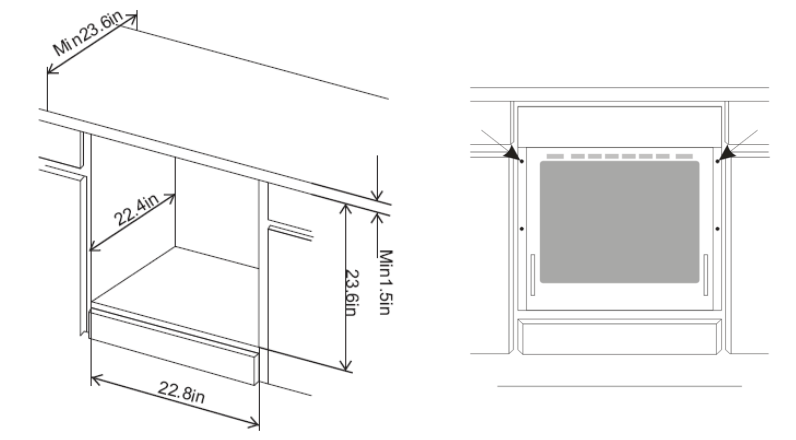
!The kitchen area should be dry and aired and equipped with efficient ventilation. When installing the oven, easy access to all control elements should be ensured. !This is a built-in oven, and its back wall and one side wall can be placed next to a high piece of furniture or a wall. Coating or veneer used on fitted furniture must be applied with a heat-resistant adhesive (215℉).This prevents surface deformation or detachment of the coating. !Make an opening with the dimensions given in the diagram for the oven to be fitted. !Make sure the mains plug is disconnected and then connect the oven to the mains supply. !Insert the oven completely into the opening without allowing the four screws in the places shown in the diagram to fall out. |
|
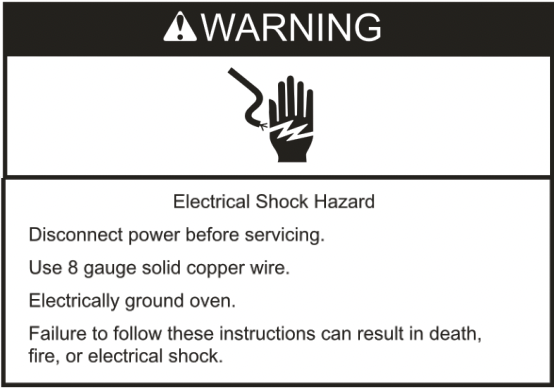
This oven is manufactured with a neutral (white) power supply wire and a cabinet-connected green(or bare)ground wire twisted together.
1. Disconnect power.
2. Feed the flexible conduit from the through the opening in the cabinet.
3. Remove junction box cover, if it is present.
4. Install a UL listed or CSA approved conduit connector to the junction box.

5. Route the flexible conduit from the oven to the junction box through a UL listed or CSA approved conduit connector.
6. Tighten screens on conduit connection.
7. See “Electrical Connection Options “to complete installation for your type of electrical connection.
Electrical Connection Options Chart
|
If your home has : |
|
Go to section: |
|
4-wire
|
4-wire cable from home power supply | |
|
3-wire
|
3-wire cable from home power supply |
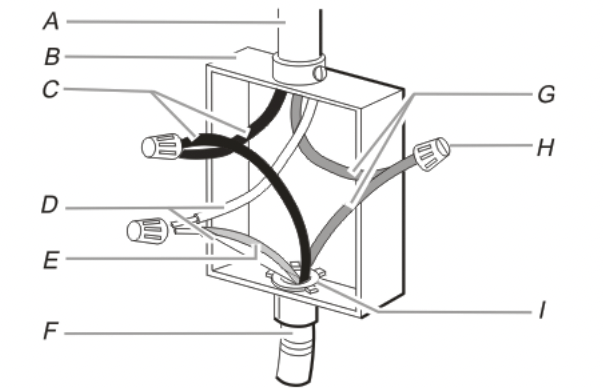
4-Wire Cable from Home Power Supply
IMPORTANT: Use the 4-wire cable from home power supply in the U.S. where local codes do not allow grounding through neutral. New Branch circuit installations (1996 NEC). mobile homes and recreational vehicles. new construction and in Canada.

A. Cable from home power supply
B. Black wires
C. Red wire
D. 3-wire flexible conduit from oven
E. Junction box
F. White wires (No need connect)
G. UL listed wire connectors
H. Green (or bare) ground wires
I. UL listed or CSA approved conduit connector
1. Connect the 2 black wires (B) together using a UL listed wire connector.
2. Connect red wire (C) together using a UL listed wire connector.
3. No need connect (F) with any wire, just with UL list wire connector.
4. Connect the green (or bare) ground wire (H) from the oven cable to the green (or bare) ground wire (in the junction box) using a UL listed wire connector.
5. Install junction box cover.
3-Wire Cable from Home Power Supply - U.S. Only
IMPORTANT: Use the 3-wire cable from home power supply where local codes permit a 3-wire connection.
A. Cable from home power supply
B. Junction box
C. Black wires
D. White wire from home
E. Green(or bare) ground wire (from oven)
F. 3-wire flexible conduit from oven
G. Red wire
H. UL list wire connectors
I. UL listed or CSA approved conduit connector
1. Connect the two black wires (C) together using a UL listed wire connector.
2. Connect the white wires from home (D) and the green (or bare) ground wire (of the oven cable) (E) using a UL listed wire connector.
3. Connect red wire (G) together using a UL listed wire connector.
4. Install junction box cover
Remove packaging, clean the interior of the oven and the hob.
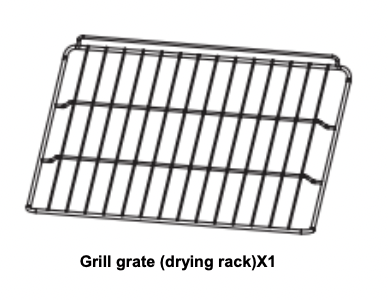
Take out and wash the oven fittings with warm water and a little washing-up liquid.
Switch on the ventilation in the room or open a window.
Heat the oven (to a temperature of 465℉, for approx., 30 min.), remove any stains and wash carefully; the heating zones of the hob should be heated for around 4 min.without a pan.
Important!
The inside of the oven should only be washed with warm water and a small amount of washing-up liquid.
LED display

1. Turn On and off
 , it is in standby status. , it is off.
The LED displays below when in standby:

Note: when it is set up electricity, if the clock is not set up, it will not show time and only shows (0:00)
2. Set up clock (24 hours):
 once, hour flicker, reminding to set up.
 or
or keys, set up hours (0-23), defaulted “00”
once again; finish hour set up, the minute flicker, reminding to set up.or keys, set up minutes (0-59). Defaulted “00”.
 key once, clock setup finish, start to work. The “:” flicker once each second. (Example: 12:30)
3. Function selection: “Roast”as example (other functions are same way to set)

a. Touch or touch one, the temperature can increase (or decrease) 40℉, temperature can be set between 104℉ and 446℉.
b. Touch once, the hour flicker, touch or keys, can set time between 0 and 9 hours.
c. Touch once again (or touch twice continuously), minute flicker and touch or key, it can set up minutes between 0 and 59 minutes, touch key, it will start to work, other icon will not show.
For example: Working time set as 1:30 hours, temperate set as410℉..

d. Under condition of item 3-(1) or item 3-(2) , touch key, it will work as system defaulted or current condition.
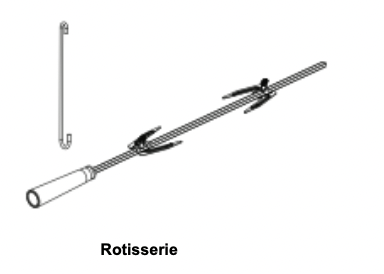
Table 1(With rotisserie)
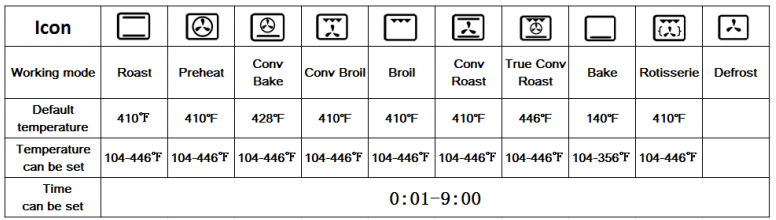
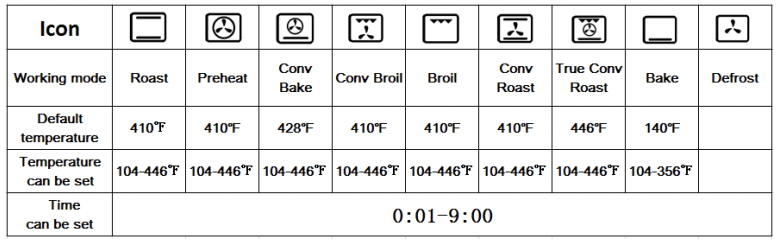
Table 2(Without rotisserie)
4. Checking function
key, can check current time, flicker 5 times it will turn to original working condition automatically. key, can check the time set up, flicker 5 times it will turn to original working condition automatically.5. Set up child lock
 key once, icon shows in LED, it is locked, and there is no function to touch any other keys. key again, icon does not show, and then it is unlocked. Maybe touch
 more than 4 seconds to turn off all funtions.
6.Delay function
 once, the hour flicker, touch or keys, can set time between 0 and 23 hours. Touch again, minute flicker and touch or key, it can set up minutes between 0 and 59 minutes, touch key, delay setup finish. Flicker 3 times it will turn to working time, and flicker 3 times again, it will turn to clock.
By ensuring proper cleaning and maintenance of your cooker, you can have a significant influence on the continuing fault-free operation of your appliance.
Before you start cleaning, the cooker must be switched off and you should ensure that all knobs are set to the “OFF” position.
Do not start cleaning until the cooker has completely cooled.
Caution! The sharp blade should always be protected by adjusting the cover (just push it with your thumb).Injuries are possible so be careful when using this instrument-keep out of reach of reach of children
Caution!
Do not use cleaning products containing abrasive materials for the cleaning and maintenance of the glass front panel steam cleaning﹡:
pour 250ml of water(1 glass)into a bowl placed in the oven on the first level from the bottom
close the oven door,
set the temperature knob to 125℉,and the function knob to the bottom heater position
heat the oven chamber for approximately30 minutes
open the oven door, wipe the chamber inside with a cloth or sponge and wash using warm water with washing-up liquid.
Caution! Possible moisture or water residues under the cooker can result from steam cleaning
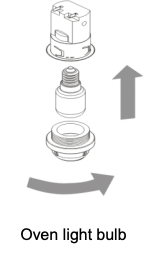
In order to avoid the possibility of an electric shock ensure that the appliance is switched off before replacing the bulb
-voltage 220~240 V~
-power 15 W
-thread E14
In order to obtain easier access to the oven chamber for cleaning, it is possible to remove the door, To do this, tilt the safety catch part of the hinge upwards. Close the door lightly, lift and pull it out towards you. In order to fit the door back on to the cooker, do the inverse. When fitting, ensure that the notch of the Hinge is correctly placed on the protrusion of the hinge holder. After the door is fitted to the oven, the safety catch should be carefully lowered down again. If the safety catch is not set it may cause damage to the hinge when closing the door.
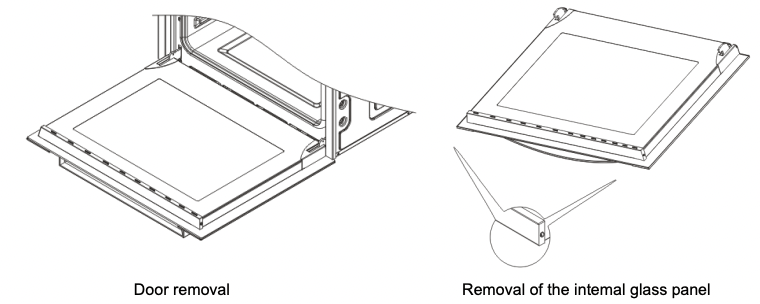
Unscrew and unfasten the plastic latch that is in the corner at the top of the door .Next take out the glass from the second blocking mechanism and remove. After cleaning, insert and block the glass panel, and screw in the blocking mechanism.
In the event of an emergency, you should:
| Problem | Reason | Action |
| The appliance does not work. | break in power supply | check the household fuse box. if there is a blown fuse replace it with a new one |
| The oven lighting does not work | the bulb is loose or damaged | tighten up or replace the blown bulb (see chapter Cleaning and Maintenance) |
About circuit protection issue :
1.Sensor protection : when sensor is not connected or turnoff, display with E1;other function icons with not display ,warning with burner .
Remark : ①when in the open circuit state, warning time need delay 5 min .②when sensor is short circuit ,display with E2 ,other function icons not display ,warning with burner.
2.Over temperature protection : when the oven cavity temperature reach the thermostat 180 °C (355°F) , the oven will turn off.
Reference file: Empava EMPV-24WOC12 Electric Oven
Additionally, the document applies to other Empava models: EMPV-24WOC17, EMPV-24WOB21, EMPV-24WOC02