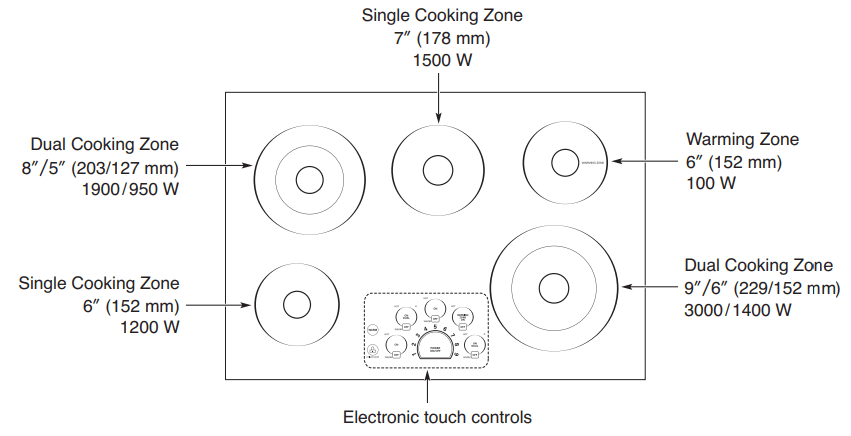
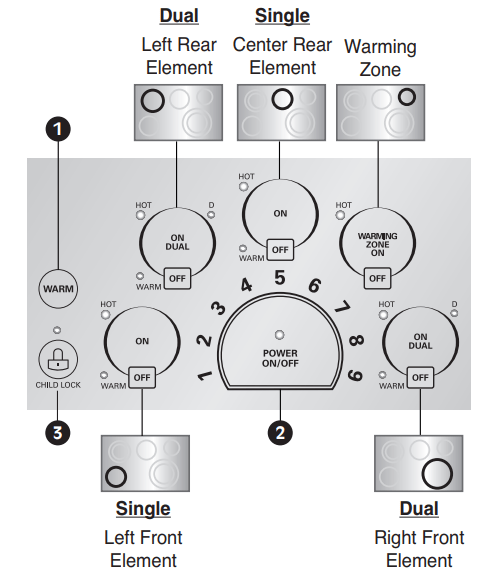
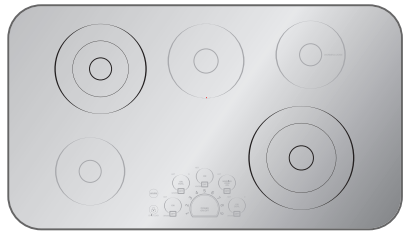
The surface burner elements are positioned in the same locations on the cooktop and the control panel for ease of use.
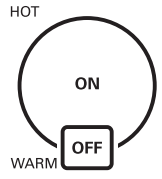
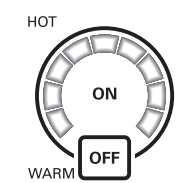
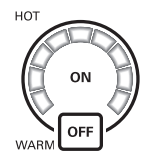
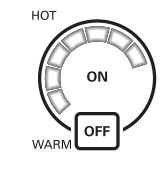
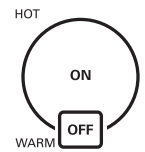
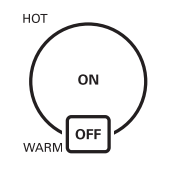
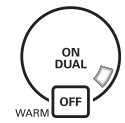
WARM: This pad lowers selected active element to the lowest setting.
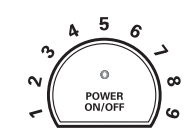
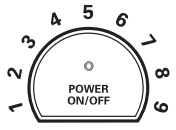
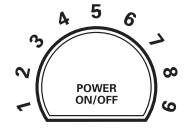
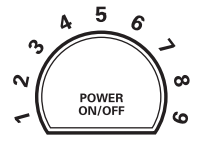
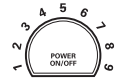
POWER ON/OFF: Touch the POWER ON/OFF pad to turn the entire cooktop ON and OFF. When it is ON, the cooktop is in standby mode until a Cooking Zone is activated.
CHILD LOCK: Touch and hold for 3 seconds to activate and deactivate the child lockout function.
To set the element power level:
Select the number on the element power settings for the active Cooking Zone to adjust the power level from 1 to 9.
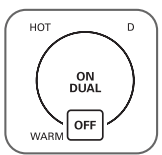
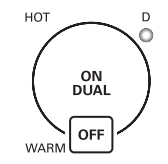
Hot Surface Indicator:
The indicator light below the HOT will illuminate when the cooking area is hot. It will remain on, even after the control is turned off, until the area has cooled.
OPERATING INSTRUCTIONS
BEFORE USING THE COOKTOP
Before using the cooktop for the first time, clean it thoroughly with the included cleaner or ceramic cooktop cleaner according to the Care and Cleaning instructions in this guide. This will help protect the ceramic surface and make future cleanup easier.
CAUTION: Never use scrub pads, abrasive or etching cleaners. They can cause permanent damage to the cooktop surface.
SETTING THE CONTROLS
To operate the touch control pads, touch the pad firmly with the flat part of your fingertip.
FIRST OPERATION
The first time that power is supplied to the cooktop, the display for the controls lights for 1 seconds. If you don't turn on the cooktop within 1 hour after power is supplied to the cooktop, the display for the controls blinks.
ACTIVATING THE COOKTOP
To turn ON the cooktop, touch the POWER ON/OFF pad for approximately 2 seconds. The indicator above the pad will light.
To turn OFF the cooktop, touch the POWER ON/OFF pad. The indicator light above the pad will turn off.
NOTE: After turning on the cooktop with the POWER ON/OFF pad, you must select one of the Cooking Zones within 15 seconds using the Cooking Zone ON pad(s). If no selection is made, the cooktop will turn off for safety.
SELECTING THE COOKING ZONE
To select the desired Cooking Zone, touch the ON pad.
The display for the selected Cooking Zone will light. The power level indicator lights are blinking but no power level is set
NOTE: Once the Cooking Zone has been selected with the ON pad, the power level must be selected within 10 seconds with the Element power settings. Otherwise, the Cooking Zone will turn off for safety.
SETTING THE POWER LEVEL
The power level for the selected Cooking Zone can be set from 1 to 9.
To select the power level:
1. Select the number on the element power settings for the active Cooking Zone to adjust the power level from 1 to 9.
2. Selecting 7 will activate the Cook Zone. After activating the Cook Zone, the indicator lights will flash once and lock your selection.
NOTE: If power level is not selected, the Cooking Zone will turn off after 10 seconds.
To readjust the power level:
1. Select Cooking Zone ON.
2. To change the Cooking Zone power, select the desired level. If power level is not selected after 10 seconds, the Cooking Zone power level will remain the same.
To turn OFF the Cooking Zone:
1..After the cooking is complete, touch the OFF pad to turn off the Cooking Zone.
2. The corresponding cooking zone display will turn off.
3. If the POWER ON/OFF pad is selected, all Cooking Zones will shut off.
WARNING: Your cooktop has a residual heat indicator for each Cooking Zone. This indicator will warn that this area has been used and is still giving off enough heat to cause burns. Avoid touching the Cooking Zone when this indicator is shown. Although the cooktop is OFF, the light will stay lit until the cooktop has cooled down.
WARM
The cooktop has a WARM setting feature that can be used on all Cooking Zone except the Warming Zone element.
To activate:
Touch the ON pad to activate the desired Cooking Zone and touch the WARM pad. The selected Cooking Zone will be set to the LOW setting. The indicator light above WARM will turn ON.
To change the power level:
Touch the ON pad and select a new number on the element power settings. The indicator light above WARM will turn OFF.
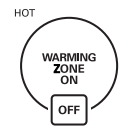
USING THE WARMING ZONE
WARMING ZONE
Use the Warming Zone to keep food warm after it has already been cooked, such as vegetables, gravies and oven-safe dinner plates.
The warming zone is not meat for cooking food. Attempting to cook uncooked or cold food on the warming zone could result in a food borne illness”
To activate the warming zone:
Touch the WARMING ZONE ON pad. Set the desired power level on the element power settings.
NOTE:
All foods should be covered with a lid or aluminum foil to maintain food quality.
When warming pastries and bread, the cover should have an opening to allow moisture to escape.
Do not use plastic wrap to cover foods. Plastic may melt on to the surface and be very difficult to clean.
Use only cookware and dishes recommended as safe for cooktop use.
Always use potholders when removing food from the Warming Zone as cookware and plates will be hot.
Never warm food for longer than one hour (eggs for 30 minutes), as food quality may deteriorate.
Do not heat cold food on the Warming Zone.
The quantity and type of food being held may affect the required heat setting
Do not use large utensils or large amounts of food as this may cause uneven heating.
Always hold food at proper food temperatures. USDA recommends food temperatures between 140˚ - 170˚ F (except pastries).
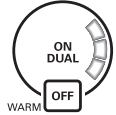
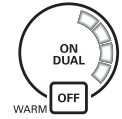
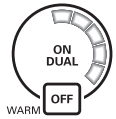
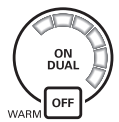
USING THE DUAL COOKING ZONES
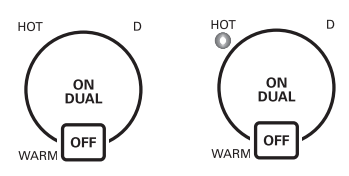
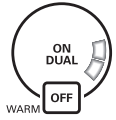
The Dual Element, located in the right front position, offers two different size elements to accommodate different pan sizes. Use one or two sections of the element to accommodate different pan sizes.
To Activate the Dual Cooking Zone
1. Touch the ON pad. The inner most element will activate.
2. Touch the ON pad again to activate the entire element (Dual).
The indicator light below the D (Dual) will turn ON.
3. Select the desired power level.
USING CHILD LOCK
You can lock the entire cooktop at any time when it is not in use. Locking the cooktop will prevent Cooking Zones from being turned on accidentally.
SETTING CHILD LOCK
The cooktop must be OFF to set the CHILD LOCK function. If it is not OFF, touch and hold the POWER pad for approximately 2 seconds. The indicator above the POWER pad will turn OFF.
Touch and hold the CHILD LOCK pad for 3 seconds. The indicator light above the CHILD LOCK pad will turn on to indicate that the cooktop is locked.
CANCELING CHILD LOCK
To turn off CHILD LOCK, touch and hold the CHILD LOCK pad for 3 seconds. The indicator light above the pad will go off and the cooktop can now be used normally.
OTHER FUNCTIONS
AUTOMATIC SHUTOFF
If a Cooking Zone is in constant use for more than 17 hours and the control setting is not changed, the Cooking Zone will shut off automatically.
AUTOMATIC POWER LEVEL CONTROL
The power level displayed may be different from the actual power level at the high temperature range. To prevent the cooktop from overheating, the power level is controlled automatically.
CARE AND CLEANING
CLEANING THE COOKTOP
NORMAL DAILY USE CLEANING
ONLY use Ceramic Cooktop Cleaner on the glass cooktop. Other creams may not be as effective or they might damage the surface with scratches or permanent staining.
To maintain and protect the surface of your glass cooktop, follow these steps:
Before using the cooktop for the first time, clean it with Ceramic Cooktop Cleaner. This helps protect the top and makes cleanup easier.
Daily use of Ceramic Cooktop Cleaner will help keep the cooktop looking new.
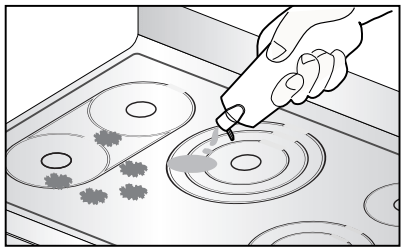
Shake the cleaning cream well. Apply a few drops of Cleaner directly to the cooktop.
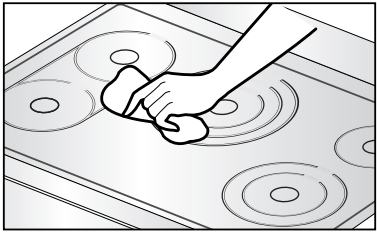
Use a paper towel clean the entire cooktop surface.
Rinse with clear water and use a dry cloth or paper towel to remove all cleaning residue.
NOTE: It is very important that you DO NOT heat the cooktop until it has been cleaned thoroughly.
CAUTION: DO NOT use scrub pads or abrasive cleaning pads. They may damage your glass cooktop surface. For your safety please wear an oven mitt potholder while cleaning the hot cooking surface.
BURNED-ON RESIDUE
To clean the glass-ceramic
Step. 1
First remove any burnt-on deposits or spilled food from your glass-ceramic cooking surface with a suitable metal razor scraper (similar to scraping paint off of your windowpanes in your home - it will not damage the decorated cooking surface). Hold the scraper at approximately a 30˚ angle to the cooktop.
NOTE: Do not use a dull or nicked blade. For your safety, please wear an oven mitt potholder while using the metal scraper.
Step. 2
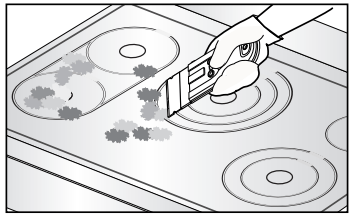
When the cooking surface has cooled down apply a few dabs (about the size of a dime) of an approved cleaner in each burner area and work the cleaning cream over the cooktop surface with a damp paper towel as if you were cleaning a window.
NOTE: Approved cleaner Weiman CookTop Cleaning Cream (www.weiman.com) Cerama Bryte (www.ceramabryte.com) Easy-Off 3 in 1 Glass Top Cleaner Spray (www.easyoff.us)
Step. 3
As a final step, clean with clear water and wipe the cooktop surface with a clean, dry paper towel.
Important: If any sugar or food containing sugar (preserves, ketchup, tomato sauce, jellies, fudge, candy, syrups, chocolate, etc.), a plastic item or kitchen foil accidentally melts on the hot surface of your cooktop, remove the molten material IMMEDIATELY with a metal razor scraper (it will not damage the decorated cooking surface) while the cooking surface is still hot to avoid the risk of damage to the glass-ceramic surface. For your safety please wear an oven mitt potholder while cleaning the hot cooking surface.
METAL MARKS AND SCRATCHES
Be careful not to slide pots and pans across your cooktop. It will leave metal markings on the cooktop surface. These marks are removable using the Ceramic Cooktop Cleaner with the Cleaning Pad for Ceramic Cooktops.
If pots with a thin overlay of aluminum or copper are allowed to boil dry, the overlay may leave black discoloration on the cooktop. This should be removed immediately before heating again or the discoloration may be permanent.
TROUBLESHOOTING
BEFORE CALLING FOR SERVICE
Before you call for service, review this list. It may save you time and expense. This list includes common occurrences that are not the result of a defect in workmanship or materials.
Problem
Possible Causes
Solutions
Cooktop does not work
Cooktop controls are locked.
Circuit breaker has tripped or fuse is blown.
Power outage.
Installation wiring not complete.
See USING CHILD LOCK to turn off the CHILD LOCK feature.
Reset the circuit breaker.
Check house lights to confirm power outage.
Contact the installer or dealer
Cooktop does not heat
Incorrect Cooking Zone selected.
No power to cooktop.
Make sure the correct control is ON for the Cooking Zone being used.
See “Cooktop does not work” above
Elements turns off while cooking.
Cooktop inner temperature too High.
Check that cooktop has been installed According to the installation instructions.
Elements do not get hot enough.
Touch controls may not be set properly.
Cookware may not be shape or flat or the correct size.
Check the power level.
Use the recommended cookware.
A fan sound can be heard.
Cooktop inner temperature is High.
This is normal. The cooling fan will run when any element is turned on. With the heavy use the fan may continue to run after the controls are turned off until the cooktop has cooled.
Flashing
Flashing
Flashing
There is a fault with thermistor or Micom.
Turn the cooktop off using the Power ON/OFF. Turn cooktop back on using the Power ON/OFF.
Flashing
Food spill/soil on touchpads.
Object placed on touchpad.
Touch time is long.
Clean the surface.
Remove object from the touch pad.
If any one of the keys is touched for more than 10 seconds continuously, this error will be displayed.
If water or a metal object is placed on the touchpad this error will be displayed.
Turn the cooktop off using the Power ON/OFF. Turn cooktop back on using the Power ON/OFF.
Flashing
There is a fault with Display
Turn the cooktop off using the Power ON/OFF. Turn cooktop back on using the Power ON/OFF.
Flashing
Low voltage detection
This represents low voltage to the cooktop. Call a licensed electrician.


 Flashing