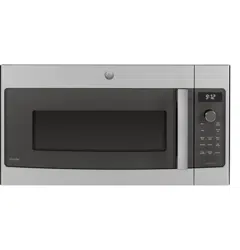
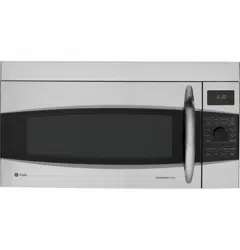
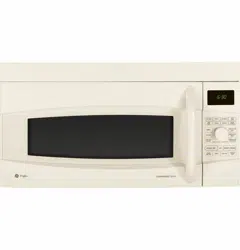
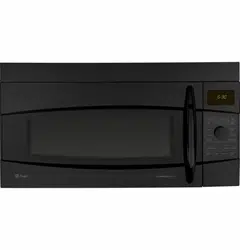
Throughout this manual, features and appearance may vary from your model.
1. Turntable
The turntable must always be in place, on the oven floor, for all cooking. Be sure the turntable is seated securely over the spindle in the center of the oven.
2. Metal Tray
Put food directly on the metal tray and place on the turntable when using the speedcook, broil, and toast.
3. Wire Oven Rack
Put food directly on a metal tray or in an oven-safe dish on the wire oven rack only when convection baking or warming.
4. Clear Glass Tray
Place on the turntable when using the microwave features. Place food or microwave-safe cookware directly on the tray.
5. Upper Halogen Lamp/Ceramic Heater
A 500W halogen lamp and 700W ceramic heater cook food from above in speedcook, broil and toast.
6. Window
Allows food to be viewed during cooking.
7. Door Handle
Pull to open the door.
8. Door Latches
The door must be securely latched for the oven to operate.
9. Lower Ceramic Heater
One 375W ceramic heater cooks food from the bottom in speedcook, broil and toast.
10. Control Panel
The pads used to operate the oven are located on the control panel.
11. Convection System
One 1550W heating element cooks food with a convection fan circulating the hot air throughout the cavity in convection bake and warm.
Controls
With your Advantium oven, you can cook with high-intensity halogen lights, ceramic heaters and convection heating element, and/or conventional microwave energy.
SELECTOR DIAL
Turn to select. Press to enter.
Turn to select food, power level, or temperature selections. Also use the dial to increase (turn clockwise) or decrease (turn counterclockwise) time. Simply press the button to enter the selection.
BACK
Press this pad to step back one or more levels in the programming process.
HELP
Press this pad to find out more about your oven’s features.
DISPLAY
Shows feature selections and information about the oven when in use.
START/PAUSE
Press this pad to start or pause any cooking function.
CANCEL/OFF
Press this pad to cancel ALL oven programs except clock, auto night light, timer, vent fan, and surface light.
SPEEDCOOK
Press this pad to access the pre-set speedcook menu or to set your own speedcook program.
CONVECTION BAKE
Press this pad to use convection bake.
MICROWAVE
Press this pad to access the microwave menu or to set your own microwave program.
SETTINGS
Press this pad to set the clock and access Turntable On/Off, Auto Conversion, Auto Nightlight, Beeper Volume, Reminder, and Temperature Units.
OPTIONS
Press this pad to access Repeat Last, Broil, Proof, Toast, Warm and Delay Start.
ADD 30 SEC
Starts the microwave for 30 seconds of cooking time. An additional 30 seconds is added to the remaining cooking time each time the pad is pressed.
TIMER ON/OFF
Press this pad to set a minute and seconds timer.
SURFACE LIGHT
Press this pad to turn the cooktop light on and off.
VENT FAN
Press this pad to turn the vent fan on and off.
SPEEDCOOKING
Prior to the first use of your oven, the clock must be set. See the Clock section.
Before you begin, make sure the turntable is in place. Use the metal tray and your own glass or ceramic cookware, if needed.
If the door is opened during cooking, the oven will stop and PAUSE will appear in the display. Close the door and press the Start/Pause pad to resume cooking.
At any time during cooking you can change time or power levels by selecting EDIT.
Speedcooking meats in the oven may produce smoke.
To cook for additional time after a cooking cycle has been completed, use the Resume feature as instructed on the display.
Speedcook Power Level
The Advantium uses power from high intensity halogen lamps, a ceramic heater, and microwaves to cook food from the top, bottom and interior simultaneously to seal in moisture and flavor.
When using the pre-set menu foods, the power levels are already selected for you. However, power levels can be adjusted when using pre-set menu foods and MY RECIPE.
Each power level gives you halogen lamp or ceramic heater power and microwave energy for a certain percentage of the time.
For example:
U-07 Upper halogen lamp and ceramic heater on 70% of the time.
L-07 Lower ceramic heater on 70% of the time.
M-03 Microwave on 30% of the time.
NOTE: Be careful when adjusting power levels so that you do not overcook or undercook food.
Press the SPEEDCOOK pad and select your food (follow instructions from Using the pre-set speedcook menu).
When display shows EDIT, SAVE or START, turn the dial to select EDIT. If you do not want to change one of the settings, just press the dial to move to the next selection.
Press the dial if you do not want to adjust cooking time.
Turn the dial clockwise to increase or counterclockwise to decrease the upper power level. Press the dial to enter.
Turn the dial to change the lower power level. Press the dial to enter.
Turn the dial to change the microwave power level. Press the dial to enter. Note that the upper and lower level settings limit the microwave power level. For example, if the upper or lower power level is set to a 7, the microwave can be set no higher than a 3.
Press the START/PAUSE pad or the selector dial to start cooking.
Follow these general guidelines when selecting the best U=, L=, and M= settings for your favorite recipes:
U = Select a higher setting for thin foods requiring a golden brown top (example: fish fillets, toast, boneless chicken breasts). Select a lower setting for thicker foods and foods with high sugar or fat content (example: muffins, roasts, casseroles) or that require a longer cook time.
L = Select a higher setting for thick or dense foods that may not cook quickly in the center (example: steaks, casseroles). Select a lower setting for thin foods (example: cookies).
M = Select a higher setting to shorten cooking time for dense or heavy foods (example: casseroles, whole chicken). Select a lower setting for delicate foods (example: breads) or foods requiring longer cook times for tender results (example: stew, pot roast).
Cooking Tips
Arrange food on the metal trays as shown to ensure consistent and even browning.
Foods can touch but should not overlap.
Fresh meat, chicken, fish or seafood that has been frozen should be thawed before cooking. (The microwave de-frostfeature can be used.) For otherfrozen prepackaged foods, follow package directions.
Speedcook Cookware
Cookware will become hot. Oven mitts will be needed to handle the cookware.
Follow cookware suggestions on the oven display or in the Cookbook.
Place food directly on the metal tray when cooking, unless prompted by the oven to do otherwise.
Use the metal tray in the same way you would use a shallow baking pan or baking tray.
In addition to the cookware provided, you can use non-metal casserole dishes, pie plates and other heat-safe cookware. Place them directly on the metal tray.
Be sure to select a size that will rotate easily.
Place the metal tray on the turntable. Place glass or ceramic cookware on the tray.
Do not use cookware or coverings made of paper, plastic, or foil when cooking during a speedcook cycle.
Pre-set Speedcook Menu
The Advantium is already pre-set to cook over 175 popular foods.
Press the SPEEDCOOK pad. If no selection is made within 15 seconds, the display will return to blank.
Turn the selector dial to select the type of food category you want. Press the dial to enter.
Turn the selector dial to select the specific food (menu selection). Press the dial to enter.
Turn the selector dial to select amount, size and/ or doneness (if required, the oven will prompt you). Press the dial after each selection.
Once the display shows: EDIT, SAVE or START press the START/PAUSE pad or the selector dial to start cooking.
Turn the food over when the oven signals TURN FOOD OVER (for certain foods).
When the oven signals CHECKfor DONENESS, check to see if your food is done to your liking (for certain foods).
To review settings during cooking, press the selector dial.
If you enter an undesired selection at any time, simply press the BACK pad and re-enter the desired selections.
Speedcooking meats in the oven may produce smoke.
CONVECTION BAKING
Convection baking allows you to cook foods the same way as a conventional oven, using an element to heat the air inside the oven. Any oven temperature from 250°F to 450°F may be set.
A fan gently circulates heated air throughout the oven, over and around the food. Because the heated air is kept constantly moving, some foods cook slightly faster than in regular oven cooking.
Before you begin, make sure the metal rack is in place. Both racks may be used for two level cooking.
WARNING When baking, remember that the oven, door and dishes will be very hot!
Per USDA Guidelines, cook meat to an INTERNAL temperature of at least 160°F, and poultry to an INTERNAL temperature of at least 180°F. Cooking to these temperatures usually protects against foodborne illness.
How to Convection Bake
Press CONVECTION BAKE pad.
Turn the dial to set the temperature and press the dial to enter.
Press the dial to enter and confirm the selection.
To start immediately without setting a cook time, select START or press the START/PAUSE pad:
To set a cook time:
Turn the dial and select COOK TIME.
Turn the dial to set the cook time and press the dial to enter.
To start the cook time immediately, place the food in the oven and select START COOK TIME. Then press the dial or the START/PAUSE pad to start. The cook time will immediately start to count down.
To start cook time after preheat, select START PREHEAT. The oven will signal once the oven reaches the cooking temperature. Place the food in the oven and press the START/PAUSE pad. The cook time will begin to count down.
If the oven door is opened during cooking, “Pause” will appear in the display. Close the door and press START/ PAUSE pad.
Cook times are shown in hours and minutes and can be set to a maximum of 2 hours 59 minutes. Time can be changed during cooking by turning the dial.
Cooking Tips
Metal pans are recommended for all types of baked products, but especially where browning is important.
Dark or dull finish metal pans are best for breads and pies because they absorb heat and produce crisper crust.
Shiny aluminum pans are better for cakes, cookies or muffins because they reflect heat and help produce a light tender crust.
Glass or glass-ceramic casserole or baking dishes are best suited for egg and cheese recipes due to the cleanability of glass.
When baking on one level, use the lower level. The top clips are to only be used in two level baking.
Broiling and Toasting
Broil and toast use the upper lamps and lower heater to broil or toast food similar to a conventional oven.
Before you begin, make sure the turntable is in place. Use the metal tray when toasting and when broiling.
WARNING When baking or toasting, remember that the oven cavity, the oven door and dishes will be very hot!
How to Broil
Press the OPTIONS pad.
Turn the dial to BROIL and press to enter.
Place the food in the oven and select START or press the START/PAUSE pad to start.
If the oven door is opened during cooking, “Pause” will appear in the display. Close the door and press the START/PAUSE pad.
Cooking Tips for Broiling
Broiling times may be shorter in the Advantium oven because of the use of halogen lamps. Make sure to monitor food closely to get the desired results.
For best results when broiling, place food directly on the metal tray.
Broiling meats in the oven may produce smoke.
If preheating the oven to broil meat, preheat with the metal tray in the oven and place food on the hot metal tray for best searing of meat.
For best performance, preheat the oven for 5 minutes when broiling meat. Chicken performs best with no preheating.
Foods should be turned halfway through broiling time.
Remove thinner pieces as needed to prevent overcooking and drying.
How to Toast
Press the OPTIONS pad. If the oven door is opened during cooking, “Pause” will
Turn the dial to TOAST and press to enter. appear in the display. Close the door and press the
Turn the dial to set the toast time, place the food in START/PAUSE pad. the oven and select START or press the START/ PAUSE pad to start.
Cooking Tips for Toasting
For best results when toasting, use the metal tray.
No turning is necessary for most foods.
When toasting nuts, stir halfway through the cooking time.
Toast thicker pieces a longer time, thinner pieces a shorter time.
MICROWAVING
Cook By Time
Use COOK BY TIME to microwave food that is not in the pre-set microwave selections.
Press the MICROWAVE pad.
Turn the dial to select COOK BY TIME and press the dial to enter.
Turn the dial to set the cook time and press the dial to enter.
Turn the dial to set the power level and press the dial to enter.
Press the dial or the START/ PAUSE pad to start cooking.
You may open the door during COOK BY TIME to check the food. Close the door and press START/PAUSE to resume cooking.
Cook By Time 1 & 2
Use COOK BY TIME 1 & 2 to microwave food that requires two different times and power levels.
Press the MICROWAVE pad.
Turn the dial to select COOK and press the dial to enter.
Turn the dial to select COOK BY TIME 1 & 2 and press the dial to enter.
Turn the dial to set the first time and press the dial to enter. Repeat for the first power level, the second time, and the second power level.
Press the dial or the START/PAUSE pad to start cooking.
Microwave Power Level(s)
The microwave power level is automatically set on all microwave features but you can change it for COOK BY TIME, COOK BY TIME 1&2, ADD 30 SEC, and DEFROST BY TIME.
First, follow directions for COOK BY TIME, COOK BY TIME 1 & 2, MICRO 30, or DEFROST BY TIME.
Select START or press the START/PAUSE pad to start.
Press EDIT to change the cooking time and then the microwave power level. Press the dial to enter cooking time and power level changes.
Here are some examples of uses for various power levels:
High 10: Fish, bacon, vegetables, boiling liquids.
Med-High 7: Gentle cooking of meat and poultry; baking casseroles and reheating.
Medium 5: Slow cooking and tenderizing for stews and less tender cuts of meat.
Low 2 or 3: Defrosting; simmering; delicate sauces.
Warm 1: Keeping food warm; softening butter.
Add 30 Sec
Press ADD 30 SEC repeatedly for 30 second increments of microwave cooking time. Oven starts immediately.
The power level is automatically set at high, but you can change it for more flexibility. See Microwave Power Levels section for instructions.
My Recipes
See the MY RECIPE sections in the Speedcook section of this book for instructions on how to save, use, change or delete a microwave custom recipe.
Cooking Tips
When cooking bacon, layer strips on a plate. Cover each layer with a paper towel.
When cooking vegetables, use a microwave-safe casserole or bowl. Cover with a microwave-safe lid or vented plastic wrap.
For frozen vegetables, follow the package instructions for adding water.
For fresh vegetables, add 2 tablespoons of water for each serving.
OTHER FEATURES
Cooking Complete
To remind you that you have food in the oven, the oven will display the cooking mode and COOKING COMPLETE and beep once a minute until you either open the oven door or press the CANCEL/OFF pad.
Repeat last
Use this time saving feature for cooking repetitive items like cookies or appetizers. This feature will repeat the last cooking cycle used, including time, temperature, power levels, and turntable settings
NOTE: The last program used is stored for two hours.
Press OPTIONS and select REPEAT LAST.
The last cooking cycle will be displayed.
Press the START/PAUSE pad or the selector dial to start cooking.
Resume feature
If your food needs to cook a bit longer, you can restart the oven by pressing the START/PAUSE pad or selector dial.
RESUME COOKING will be displayed and the oven will restart immediately at 10% of the original time.
The program stays in memory for 5 minutes. After that you will need to begin the program again.
Clock
The clock must be set before you can use your oven for the first time. When setting the clock time for the first time go directly to step two.
The clock is designed to turn off when unit is idle for 30 seconds to minimize the standby power usage. The clock will turn on when unit is in use or door is opened. There is not an override option available based on the DOE energy requirements.
To change the clock time, press the SETTINGS pad and turn the dial to CLOCK SETTINGS. Select SET TIME.
Turn the dial to set hours. Press the dial to enter. NOTE: Setting hours sets AM/PM.
Turn the dial to set minutes. Press the dial to enter.
Auto Conversion
Auto conversion automatically reduces the convection baking temperature. You still input the recipe temperature and the oven control does the rest.
To change the setting, press the SETTINGS pad and turn the dial to AUTO CONVERSION. Press the dial to enter. Turn the dial to change the setting to CONVERSION ON or CONVERSION OFF. Press the dial to enter.
Beeper Volume
Use this feature to adjust the volume of the beeper. You can even turn it off.
Press the SETTINGS pad, turn the dial to select BEEPER VOLUME, press the dial to enter. Select the beeper volume, press the dial to enter.
Temperature Units
To change temperature units, press the SETTINGS pad and select TEMPERATURE UNITS. Turn the dial to select F or C and press the dial to enter.
CARE AND CLEANING
Inside of the oven
Be certain the oven control is turned off and the oven is warm or cool to the touch before cleaning any part of this oven.
Clean the inside of the oven often for proper heating performance.
Some spatters can be removed with a paper towel, others may require a warm soapy cloth. Remove greasy spatters with a sudsy cloth, then rinse with a damp cloth.
If the dirt and spatter do not come off easily with a warm sudsy cloth, place a medium sized bowl full of water in the unit on the metal tray and press the SPEEDCOOK pad. Select MY RECIPE and set for 10 minutes at U=3, L=3, M=7.This should loosen the dirt in the oven so that it can be removed with a warm sudsy cloth.
If you notice yellowing on the metal inside the oven that cannot be removed with a warm sudsy cloth, use a stainless steel cleaner that removes heat discoloration and/or tarnishing. You can then clean the inside of the oven as you normally do.
Do not use abrasive cleaners or sharp utensils on oven walls.
Never use a commercial oven cleaner on any part of your oven.
Do not clean the inside of the oven with metal scouring pads. Pieces can break off the pad inside the oven, causing electrical shock as well as damaging the inside surface finish of the oven.
Removable Turntable
The area underneath the turntable should be cleaned frequently to avoid odors and smoking during a cooking cycle.
The turntable can be broken if dropped. Wash carefully in warm, sudsy water. Dry completely and replace.
To replace the turntable, place its center over the spindle in the center of the oven and turn it until it seats into place.
Cooking Trays and Wire Oven Rack
To prevent breakage, allow the trays to cool completely before cleaning. Wash carefully in hot, sudsy water or in the dishwasher.
Do not use abrasives to clean the glass tray or wire oven rack, as they may damage the finish.
A plastic scrubbing pad may be used to clean the metal trays.
Mica Sheet
Do not remove the mica sheet.
To clean the mica sheet: Allow the oven to cool completely. Wipe clean with a warm soapy cloth.
Halogen lamp cover and mica sheet
Do not remove the halogen lamp glass cover or the mica sheet.
The upper halogen lamp cover must be kept free of grease and food spatterings in order to operate effectively.
Clean the lamp glass cover and mica sheet often to avoid excess smoking and decreased cooking power.
To clean the upper lamp cover: Allow the oven and glass cover to cool completely. Wipe clean with a warm soapy cloth or plastic scrubbie.
For heavy burned on soil, a cleaning scraper may be used to clean the halogen lamp cover. Hold the cleaning scraper at a 30° angle. Scrape the glass clean and wipe up excess soil.
To clean the mica sheet: Allow the oven to cool completely. Wipe clean with a warm soapy cloth.
Outside of the Oven
We recommend against using cleaners with ammonia or alcohol, as they can damage the appearance of the oven. If you choose to use a common household cleaner, first apply the cleaner directly to a clean cloth, then wipe the soiled area.
Case
Clean the outside of the microwave with a sudsy cloth. Rinse and then dry. Wipe the window clean with a damp cloth.
Control Panel
Wipe with a damp cloth. Dry thoroughly. Do not use cleaning sprays, large amounts of soap and water, abrasives or sharp objects on the panel - they can damage it. Some paper towels can also scratch the control panel.
Stainless Steel Surfaces (on some models)
The stainless steel panel can be cleaned with Stainless Steel Magic or a similar product using a clean, soft cloth. Apply stainless cleaner carefully, avoiding the surrounding plastic or glass parts. Do not use appliance wax, polish, bleach or products containing chlorine on stainless steel.
Plastic Color Panels (on some models)
Use a clean, soft, lightly dampened cloth, then dry thoroughly.
Door Seal
It’s important to keep the area clean where the door seals against the oven. Use only mild, non-abrasive detergents applied with a clean sponge or soft cloth. Rinse well.
Bottom
Clean off the grease and dust on the bottom often. Use a solution of warm water and detergent.
Replacing the Surface Light
To replace the surface light, first disconnect the power at the main fuse or circuit breaker panel or unplug the oven.
Remove the screw from the side of the light compartment cover and lower the cover until it stops.
Be sure the bulb to be replaced is cool before removing. Gently pull the bulb from the receptacle. Replace with a 130 volt, 50-watt halogen bulb. Order WB08X10051 from your GE Appliances supplier.
Raise the light cover and replace the screw. Connect electrical power to the oven.
Removing and Cleaning the Filters
The metal filters trap grease released by foods on the cooktop. They also prevent flames from foods on the cooktop from damaging the inside of the oven.
For this reason, the filters must always be in place when the hood is used. The vent filters should be cleaned once a month, or as needed.
To remove, slide them to the rear using the tabs. Pull down and out.
To clean the vent filters, soak them and then swish around in hot water and detergent. Don’t use ammonia or ammonia products because they will darken the metal. Light brushing can be used to remove embedded dirt.
Rinse, shake and let dry before replacing.
To replace, slide the filters into the frame slots on the back of each opening. Press up and to the front to lock into place.
Replacing the Oven Cavity Lamp
Disconnect power at the main fuse or circuit breaker panel.
Remove the top grill by removing the two screws that hold it in place.
Remove charcoal filter if present. Slide the filter toward the left and pull toward the front to remove. NOTE: Charcoal filter is an optional kit, you may not have one.
Remove the screw holding the lamp shield in place.
Pull the lamp shield out. Pull the light bulb out and replace with the 120V-130V, 20-watt halogen bulb. Order WB25X10019 from your GE Appliances supplier.
Return the lamp and lamp shield to original position and replace screw and charcoal filter.
Replace the grill and 2 screws. Reconnect power to the oven
Charcoal Filter (JX81D - optional kit)
If the model is not vented to the outside, the air will be recirculated through a disposable charcoal filter that helps remove smoke and odors.
The charcoal filter cannot be cleaned. It must be replaced. Order Part No. JX81D-WB02X10943 from your GE Appliances supplier.
The charcoal filter should be replaced when it is noticeably dirty or discolored (usually after 6 to 12 months, depending on usage).
To install a new filter:
Remove plastic and other outer wrapping from the new filter.
Remove the top grill by removing the two screws that hold it in place.
Insert the filter into the top opening of the oven as shown.
It will rest at an angle on two back support tabs and in front by two tabs.
Replace the grill and two screws.
To remove the filter, repeat step 2 above, remove the filter and repeat step 5.
TROUBLESHOOTING TIPS
Save time and money! Review the charts on the following pages first and you may not need to call for service.
Problem
Possible Cause
What To Do
LIGHTS
Light during a speedcook cycle dims and cycles on and off, even at full power levels
This is normal. Power level has been automatically reduced because the oven is hot.
This is normal. The oven senses the heat level and adjusts automatically.
Light visible around the door and outer case while speedcooking
This is normal.
When the oven is on, light may be visible around the door and outer case.
FAN
Fan continues to run after cooking stops
The oven is cooling.
The fan will automatically shut off when the internal parts of the oven have cooled.
Oven vent emits warm air while oven is on
This is normal.
Vent fan comes on automatically when oven not in use.
This is normal.
If the cooktop or oven gets hot enough the vent fan comes on. (see Automatic Fan section.)
Fan comes on automatically when using the microwave
This is normal.
If the microwave is used after speedcook and the oven senses that it is too hot, the vent fan comes on to cool the oven.
The oven makes unusual sounds while cooking.
Clicks and fans blowing are normal. The relay board is turning the components on and off.
These sounds are normal.
Fan sound changes while cooking.
This is normal.
Fan may turn on or off during cooking to maintain cooking temperature.
COOKING
Smoke comes out of the oven when the door is opened
Food is high in fat content. Aerosol spray used on the pans.
Smoke is normal when cooking high-fat foods. Use vegetable oil or olive oil on the meat itself instead of coating the entire pan.
Food is not fully cooked or browned at the end of a cooking program
Programmed times may not match the size or amount of food you are cooking.
Increase or decrease time for doneness or adjust the upper or lower lamps for browning.
Oven has turned off in Warm, Proof, or Convection Bake
The maximum cooking time of 179 minutes has been reached.
This is normal. The control will automatically turn off the oven and indicate that cooking time is reached. The cooking time is not always displayed.
A cooking time was set for Convection Bake to start after preheat and the door was not opened at the end of preheat.
This is normal The control will automatically turn off the oven after one hour and indicate that cooking is complete if the door is not opened.
DISPLAY
The display is blank
The clock is designed to turn off when unit is idle for 30 seconds to minimize the standby power usage. (See Clock section)
Control Panel “LOCKED” appears in display.
The control has been locked.
Press and hold CANCEL/OFF for about 3 seconds to unlock the control. See Other Features Section.
Control display is lighted yet oven will not start
Clock is not set.
Follow prompts to set the clock.
Door not securely closed.
Open the door and close securely.
START/PAUSE pad not pressed after entering cooking selection
Follow prompts.
Delay Start was accidentally set.
Press CANCEL/OFF and reset.
Oven is in DEMO Mode.
Unplug the oven for 1 minute. Then, plug the oven back into the wall. DO NOT set the oven clock; press and hold the HELP and START/PAUSE pads for 3 seconds. The control should exit DEMO mode. Set clock and continue.
CANCEL/OFF was pressed accidentally.
Reset cooking program and press START/PAUSE.
OTHER PROBLEMS
The door and inside of the oven feels hot
The oven produces intense heat in a small space.
This is normal. Use oven mitts to remove food when ready.
Floor of the oven is warm, even when the oven has not been used.
The cooktop light is located below the oven floor. When the light is on, the heat it produces may make the oven floor get warm.
This is normal.
Oven will not start
A fuse in your home may be blown or the circuit breaker tripped.
Replace fuse or reset circuit breaker.
Power surge.
Unplug the oven, then plug it back in.
Plug not fully inserted into wall outlet.
Make sure the plug on the oven is fully inserted into wall outlet.
Glass microwave tray does not lock into center hub.
Align the protrusion on the bottom of the glass microwave tray with the indentation in the turntable. This fit is not tight, some movement is normal.