Loading ...
Loading ...
Loading ...
10 49-7845 Rev. 0
Installing the Air Conditioner
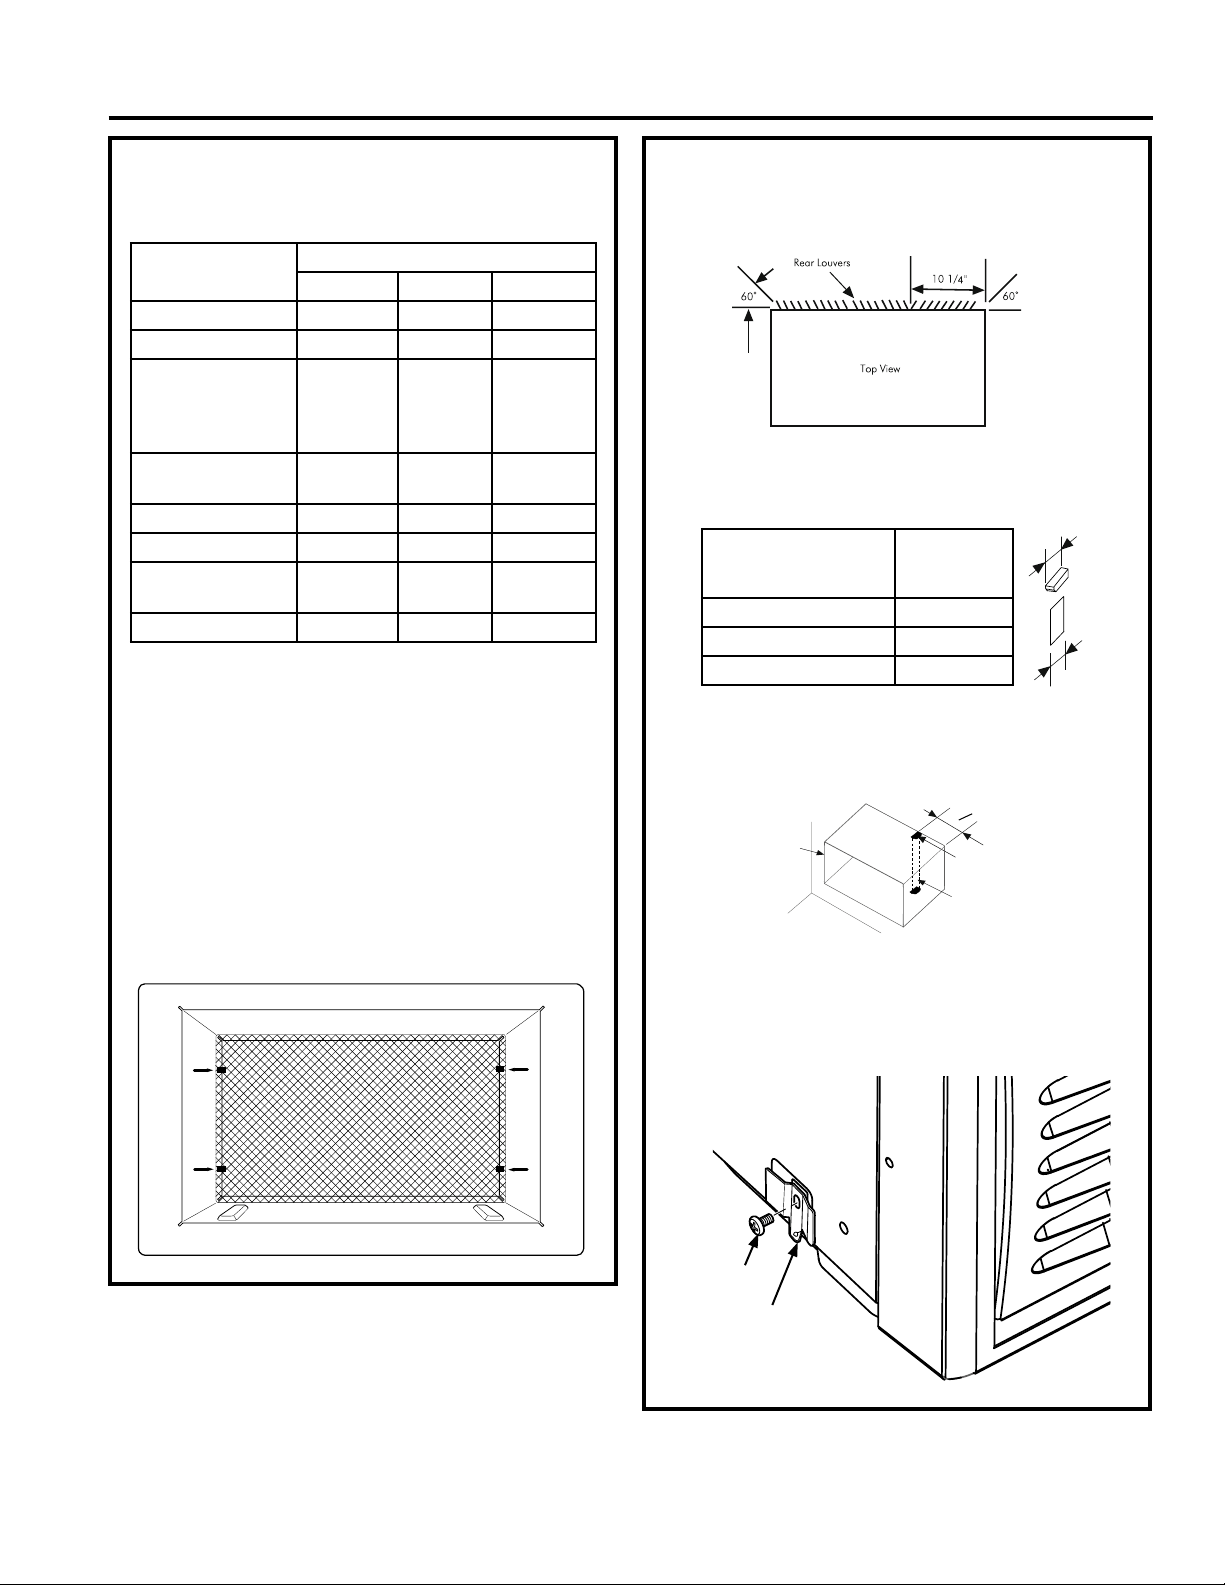
1. Identify the existing wall sleeve before installing
the unit from the list below:
NOTE: All wall sleeves used to mount the new Air
Conditioner must be in sound structural condition
and have a rear grille that securely attaches to
sleeve,or rear flange that serves as a stop for the
Air conditioner.
2. Clean the interior of the sleeve (do not disturb
seals).
3. Repaint the sleeve if needed.
4. For best performance and energy efficiency,
replace the existing rear louver grille with the
plastic mesh supplied in the package. Measure
and cut the plastic grille to fit and place inside
the wall sleeve against the rear flange.
Installing the Air Conditioner (Cont.)
If your existing sleeve has a rear grille and you
wish to retain: redirect the louvers to 60 angle
as shown below.
5. If the depth of your existing wall sleeve is less
than or equal to 20”,skip to step 7. Otherwise,
cut the baffles and the support blocks according
to length “A” in the table below.
6. Remove the backing from the support blocks
and attach them to the inside of the wall sleeve
as shown below. Slide the baffle into slots of the
support blocks.
7. Install unit into the wall sleeve, leaving enough
of the unit exposed to access bracket location.
8. Install retaining bracket at front left corner by
removing and reusing screw. Push unit fully into
sleeve
Brand
Wall Sleeve Dimensions
Width Height Depth
Haier Amana 25-13/32” 15-3/4” 17-1/2”
Haier Amana 25-7/8” 15-9/16” 16-3/4”
White-
Westinghouse
Frigidare Carrier
(52F series)
25-1/2” 15-1/4” 16, 17-1/2”
or 22
GE Appliances/
Hotpoint
26” 15-5/8” 16-7/8”
Whirlpool 25-7/8” 16-1/2” 17-1/8”
Sears/Kenmore 25-7/8” 15-17/32” 16-23/32”
Carrier (51S
series)
25-3/4” 16-7/8” 18-5/8”
LG 25-7/8” 15-17/32” 16-23/32”
Plastic
Clamp
Plastic
Clamp
Plastic
Clamp
Plastic
Clamp
Serrage
En Caoutchouc
Serrage
En Caoutchouc
Serrage
En Caoutchouc
Serrage
En Caoutchouc
Abrazadera
de Goma
Abrazadera
de Goma
Abrazadera
de Goma
Abrazadera
de Goma
Pales arrieres
Rejillas traseras
Vista desde arriba
A
A
Depth “D” of the
existing wall sleeve
(inches)
Length “A”
(inches)
20 < D ≤ 20-5/8” 3/4
20-5/8 < D ≤ 21-3/4 1-3/4
21-3/4 < D ≤ 24 4
Tapered Spacer
Block Board
FRONT
Wall
Sleeve
Wall
Tapered Spacer
Block
6
1
2
”
Plaque de bloc
d'espacement
en biseau
AVANT
Compartiment
Mural
Bloc d'espacement
en biseau
6
1
2
po
Tablilla del bloque
espaciador cónico
FRONTAL
Forro aislante
pared
Pared
Bloque espaciador
cónico
6
1
2
”
Installation Instructions
INSTALLATION INSTRUCTIONS
Retaining
Bracket
Screw
Loading ...
Loading ...
Loading ...