Loading ...
Loading ...
Loading ...
19
Assembly Instructions
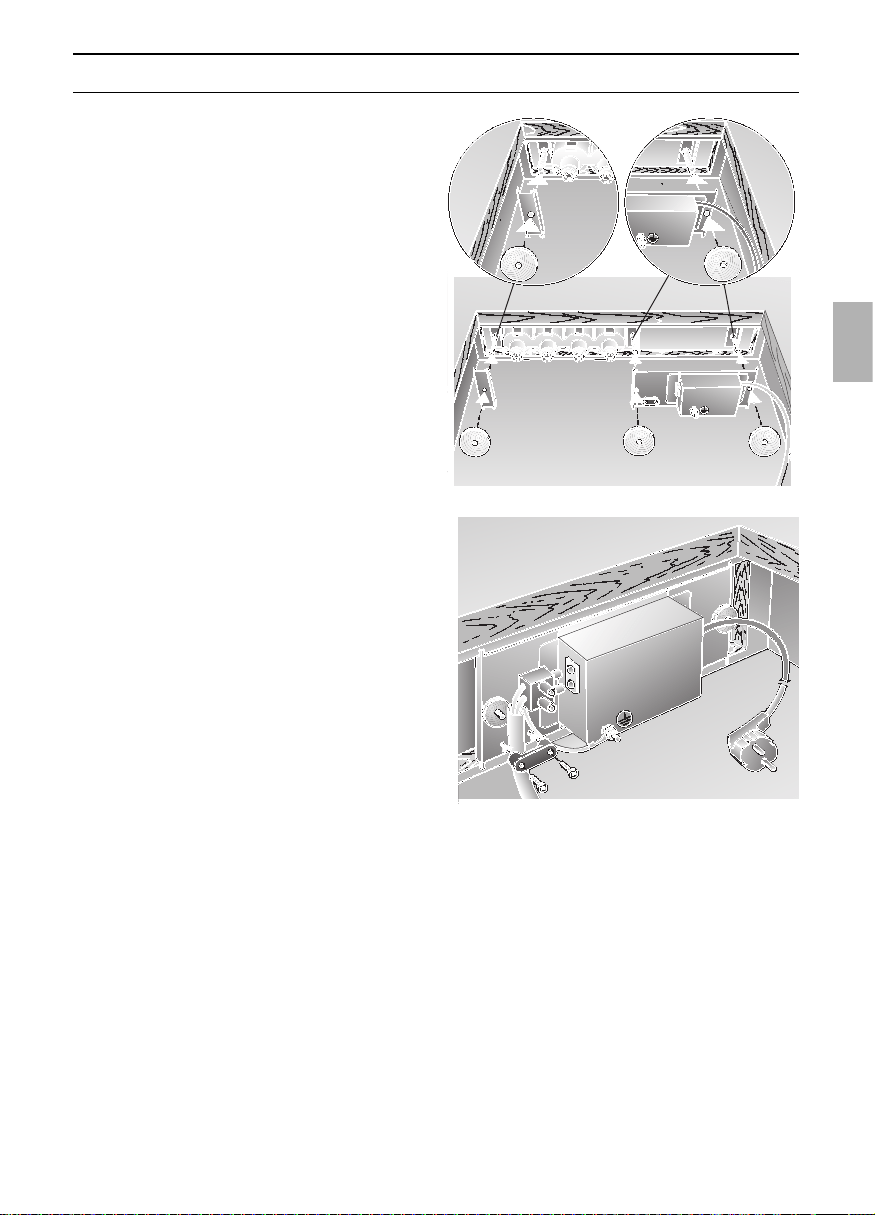
2. Preparing for installation:
❑ The gas built-in facia and fixing plates
are screwed together when supplied
and must be separated before
assembly.
3. Remove protective caps.
4. Position the gas built-in facia from the
front and set it on the two bracket
plates.
5. Screw fasten the gas built-in facia using
the two fixing plates and the three
knurled nuts.
Note:
❑ Firstly position the knurled nuts and
turn only slightly.
❑ Align the gas built-in facia vertically
and horizontally.
❑ Tighten the knurled nuts by hand until
the gas built-in facia is seated all the
way round.
❑ Do not use any tools when
tightening.
6. Make the mains connection and the
electrical connection between the hob
and the gas built-in facia.
❑ Secure the connecting cable between
hob and gas built-in facia using the
retaining clip.
❑ Connect the earth cable of the hob to
the earth screw.
7. Install hob.
❑ It is imperative to follow the assembly
instructions enclosed with the
appliance.
8. Function check.
❑ When properly installed the appliance
must be covered on all sides in such
a way that any contact, even to
functionally insulated parts, is
impossible. The cover should only be
removable using tools.
Loading ...
Loading ...
Loading ...