Loading ...
Loading ...
Loading ...
7COOKER HOOD INSTALLATION
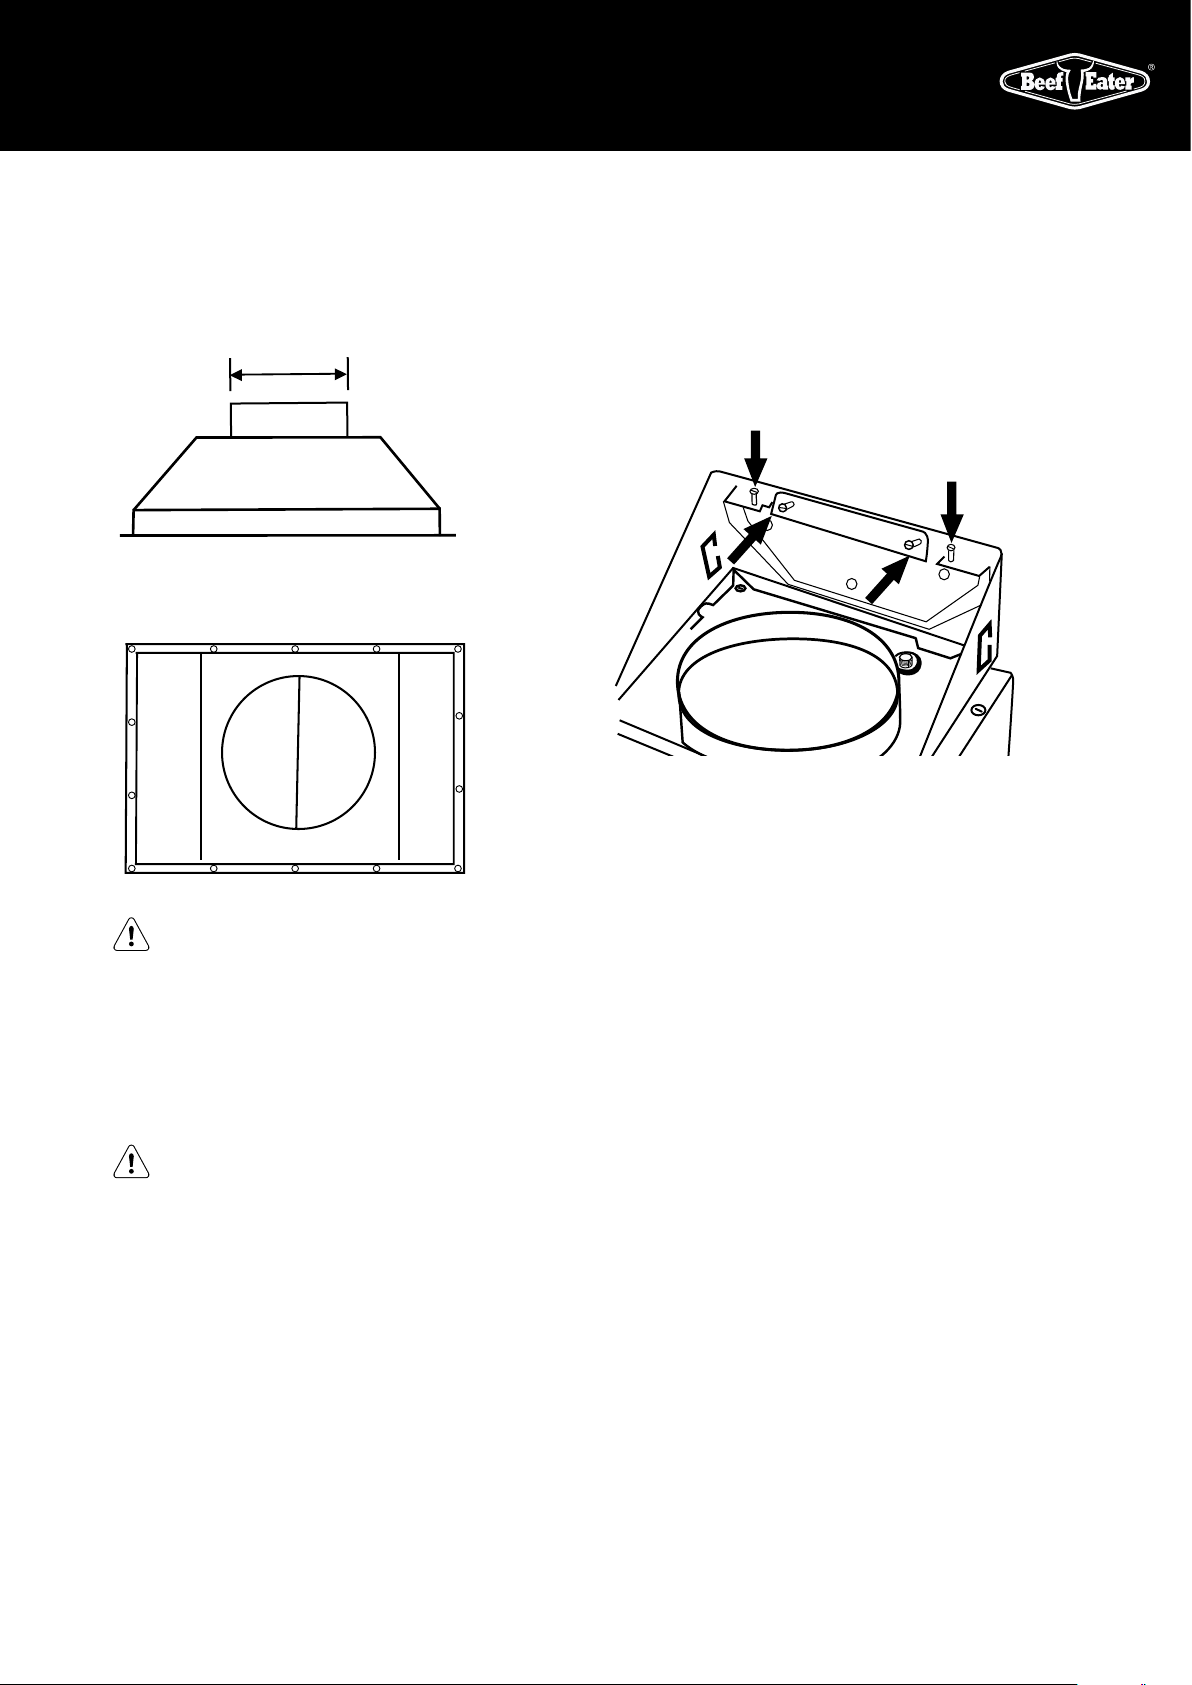
4. If required, fix the exhaust transition duct using the
screws supplied, prior to installing the cooker hood
into position (Fig.D).
Transition piece
200
Transition piece
Screw holes (14 places)
200
WARNING!
Use screws provided to secure transition piece at
preformed holes. Using alternate screws and hole
locations may cause an electrical safety risk.
5. Hang hood on the mounting bracket. The rangehood
should sit squarely onto the wall brasket.
The two top holes of the bracket are to lock the
rangehood into position once it is in place.
WARNING!
Due to product weight, take appropriate measures to lift
and position the product to avoid injury.
6. Make fine adjustments and lock the rangehood
into position
Use the vertical screws on the rangehood to make
fine adjustments to the rangehood to ensure that the
rangehoods is perfect horizontal.
Screw the two horizontal screws in the wall bracket
all the way in to secure the rangehood and ensure it
cannot be accidentally dislodged.
200
7. Non-combustible rigid on flexible flue pipe is to be used
for exhausting the hood.
Use worm drive clamps, cable ties or suitable duct tape to
secure flexible pipe to the transition duct.
NOTE: We recommend extending flue pipe through the roof
to external roof cowl to vent exhaust externally.
We do not recommend venting into ceiling cavity.
To ensure optimum performance of the cooker hood, the
use of 2 x 150mm or 1 x 200 mm diameter rigid ducting is
recommended. The use of bends should be avoided.
Rigid flexible ducting is suitable, although loose flexible
ducting is unacceptable. All ducting must be fire retardant.
Electrical connection
Check that the installation complies with the standards
of local building, gas and electrical authorities. Before
connecting to the mains supply ensure that the mains
voltage corresponds to the voltage on the rating plate
inside the cooker hood.
COOKER HOOD INSTALLATION
Loading ...
Loading ...
Loading ...