Loading ...
Loading ...
Loading ...
● Do not fill a portable fuel container in
the vehicle or trailer. Static electricity
can cause an explosion of flammable
liquid, vapor or gas in any vehicle or
trailer. To reduce the risk of serious
injury or death when filling portable fuel
containers:
– Always place the container on the
ground when filling.
– Do not use electronic devices when
filling.
– Keep the pump nozzle in contact
with the container while you are fill-
ing it.
– Use only approved portable fuel con-
tainers for flammable liquid.
CAUTION
● Do not use E-15 or E-85 fuel in your
vehicle. For further information see the
“Fuel Recommendation” in the “Techni-
cal and consumer information” section
of this manual.
● Failure to tighten the fuel-filler cap
properly may cause the
Malfunc-
tion Indicator Light (MIL) to illuminate.
If the
light illuminates because
the fuel-filler cap is loose or missing,
tighten or install the cap and continue
to drive the vehicle. The
light
should turn off after a few driving trips.
If the
light does not turn off after a
few driving trips, have the vehicle in-
spected by a NISSAN dealer.
● The LOOSE FUEL CAP warning mes-
sage will display if the fuel-filler cap is
not properly tightened. It may take a
few driving trips for the message to be
displayed. Failure to tighten the fuel-
filler cap properly after the LOOSE
FUEL CAP warning message is dis-
played may cause the
Malfunc-
tion Indicator Light (MIL) to illuminate.
● For additional information, see the
“Malfunction Indicator Light (MIL)” in
the “Instruments and Controls” section
in this manual.
● If fuel is spilled on the vehicle body,
flush it away with water to avoid paint
damage.
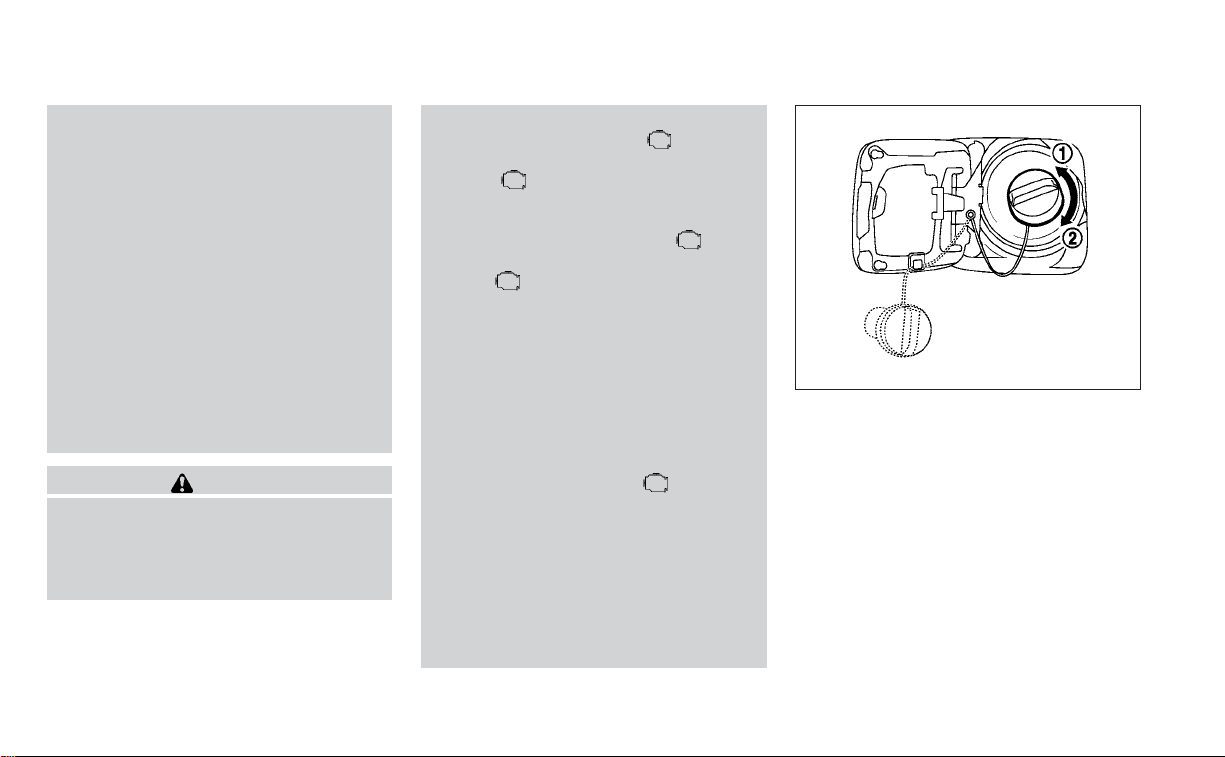
To remove the fuel-filler cap:
1. Turn the fuel-filler cap counterclockwise
䊊
1
to remove.
2. Loop the tether strap around the hook while
refueling.
To install the fuel-filler cap:
1. Insert the fuel-filler cap straight into the fuel-
filler tube.
2. Turn the fuel-filler cap clockwise
䊊
2
until a
single click is heard.
SPA1755
Pre-driving checks and adjustments 3-27
Loading ...
Loading ...
Loading ...