Loading ...
Loading ...
Loading ...
14 15ninjakitchen.com
ENGLISH
ninjakitchen.com
8 To release the vacuum seal, pull up on
the vacuum release tab on pitcher lid.
9 Remove lid and pour out the
blended contents.
10 Unplug the unit when finished. To
lift the motor base, place your hands
underneath both sides of it and gently
pull the unit up and toward you. Refer
to the Care & Maintenance section for
storing instructions.
MAKING JUICE WITH THE PITCHER
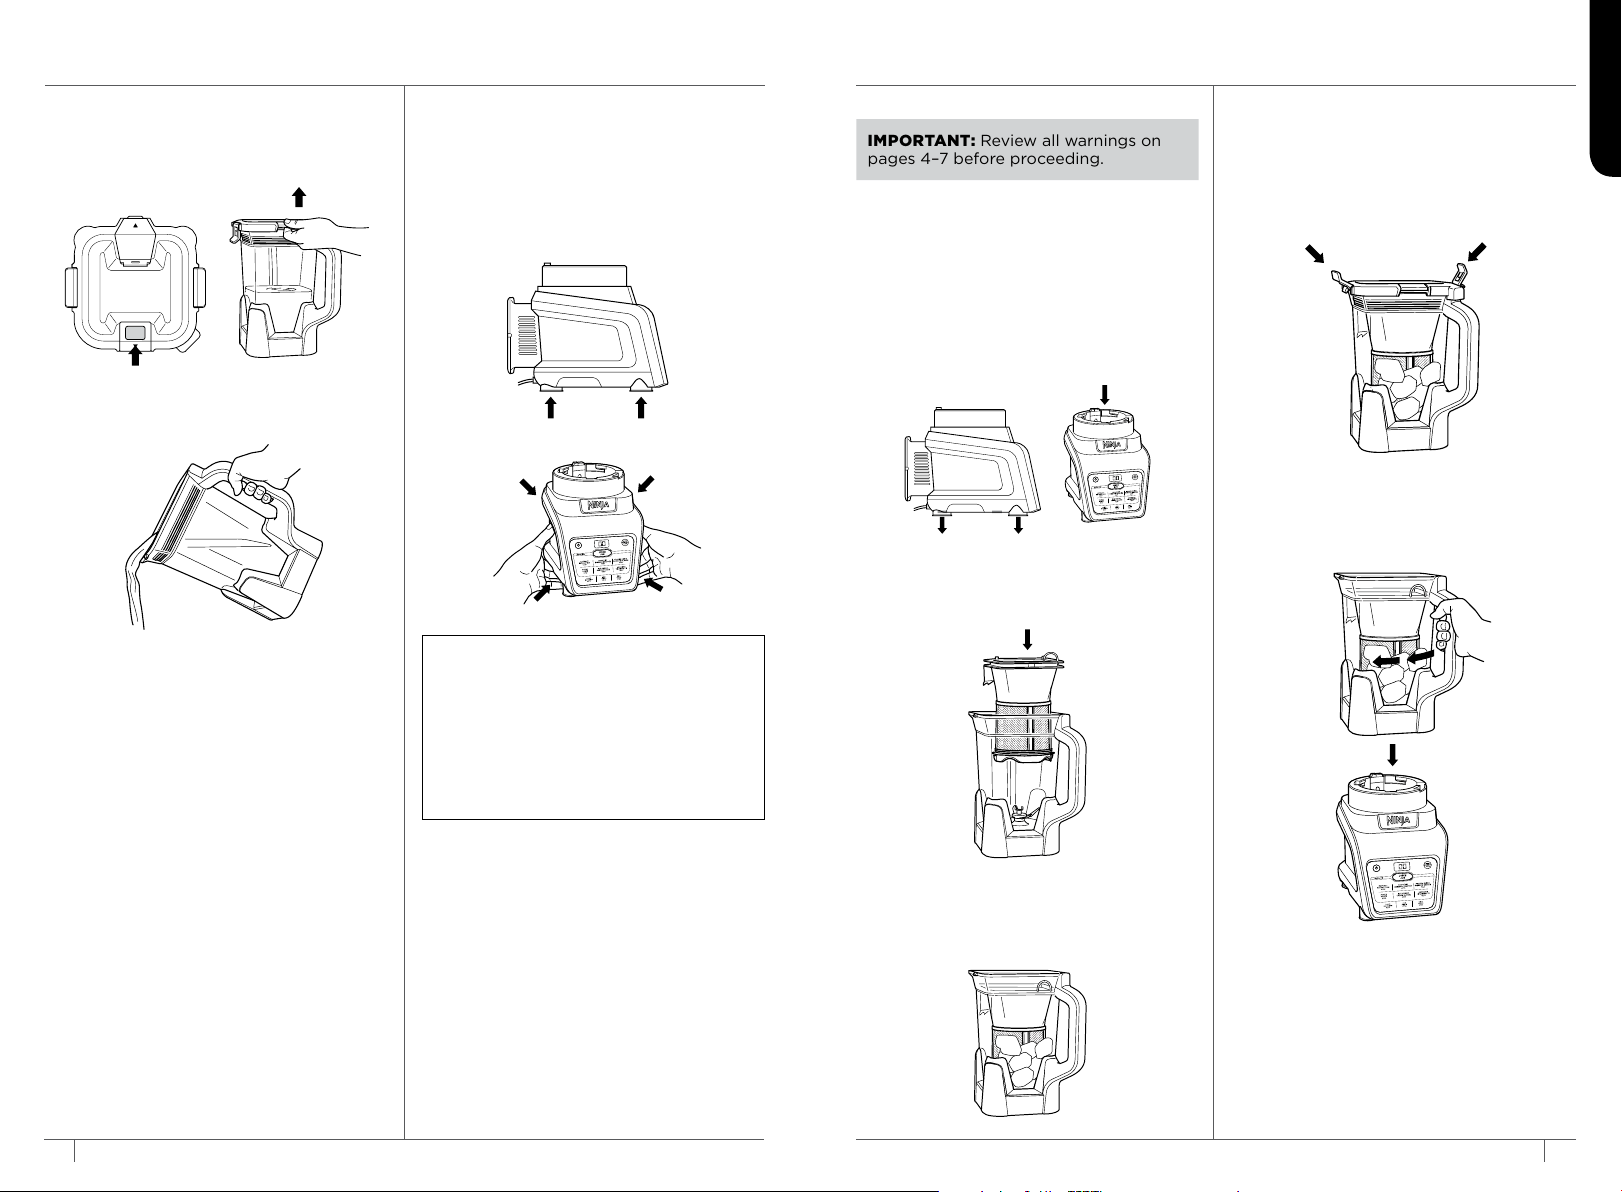
IMPORTANT: Review all warnings on
pages 4–7 before proceeding.
2 Set the pitcher on a level surface. Insert
Micro-Juice
TM
Filter into the pitcher,
aligning the arrow on filter with pour
spout on pitcher.
3 Fill filter with desired contents up to
the MAX FILL line. Start with fresh fruit
and veggies. Next add liquid and top
o with frozen ingredients/ice.
4 Place lid on pitcher, aligning the triangle
symbol located on the pitcher’s handle.
Press down on both tabs to lock lid into
place. The triangle symbol MUST be
aligned for the lid to lock into place and
the unit to operate.
5 Lower pitcher onto base. Align arrow
on pitcher with arrow on base. Then
rotate the pitcher clockwise until it
clicks into place.
1 Place the unplugged motor base on
a clean, dry, level surface such as a
countertop or table. Press downward
on the motor base to adhere the
suction cups to the work surface. Then
plug the motor base into a wall outlet.
Vacuum blending is necessary to
make light, refreshing, virtually
pulp-free juices�
L
I
F
T
T
O
R
E
L
E
A
S
E
V
A
C
U
U
M
O
P
E
N
T
O
C
L
E
A
N
TIP: Storing in the Pitcher
After vacuum blending in the pitcher,
don’t release the seal—just put the
pitcher in the refrigerator. When you’re
ready, release the seal and remove the
lid to pour a serving. Then lock the lid
back on the pitcher, attach pitcher to
base, and press DRINKSAVER to vacuum
seal the remaining contents for later.
BLENDING WITH THE PITCHER – CONT�
Loading ...
Loading ...
Loading ...