Loading ...
Loading ...
Loading ...
19ninjakitchen.com
ENGLISH
18 ninjakitchen.com
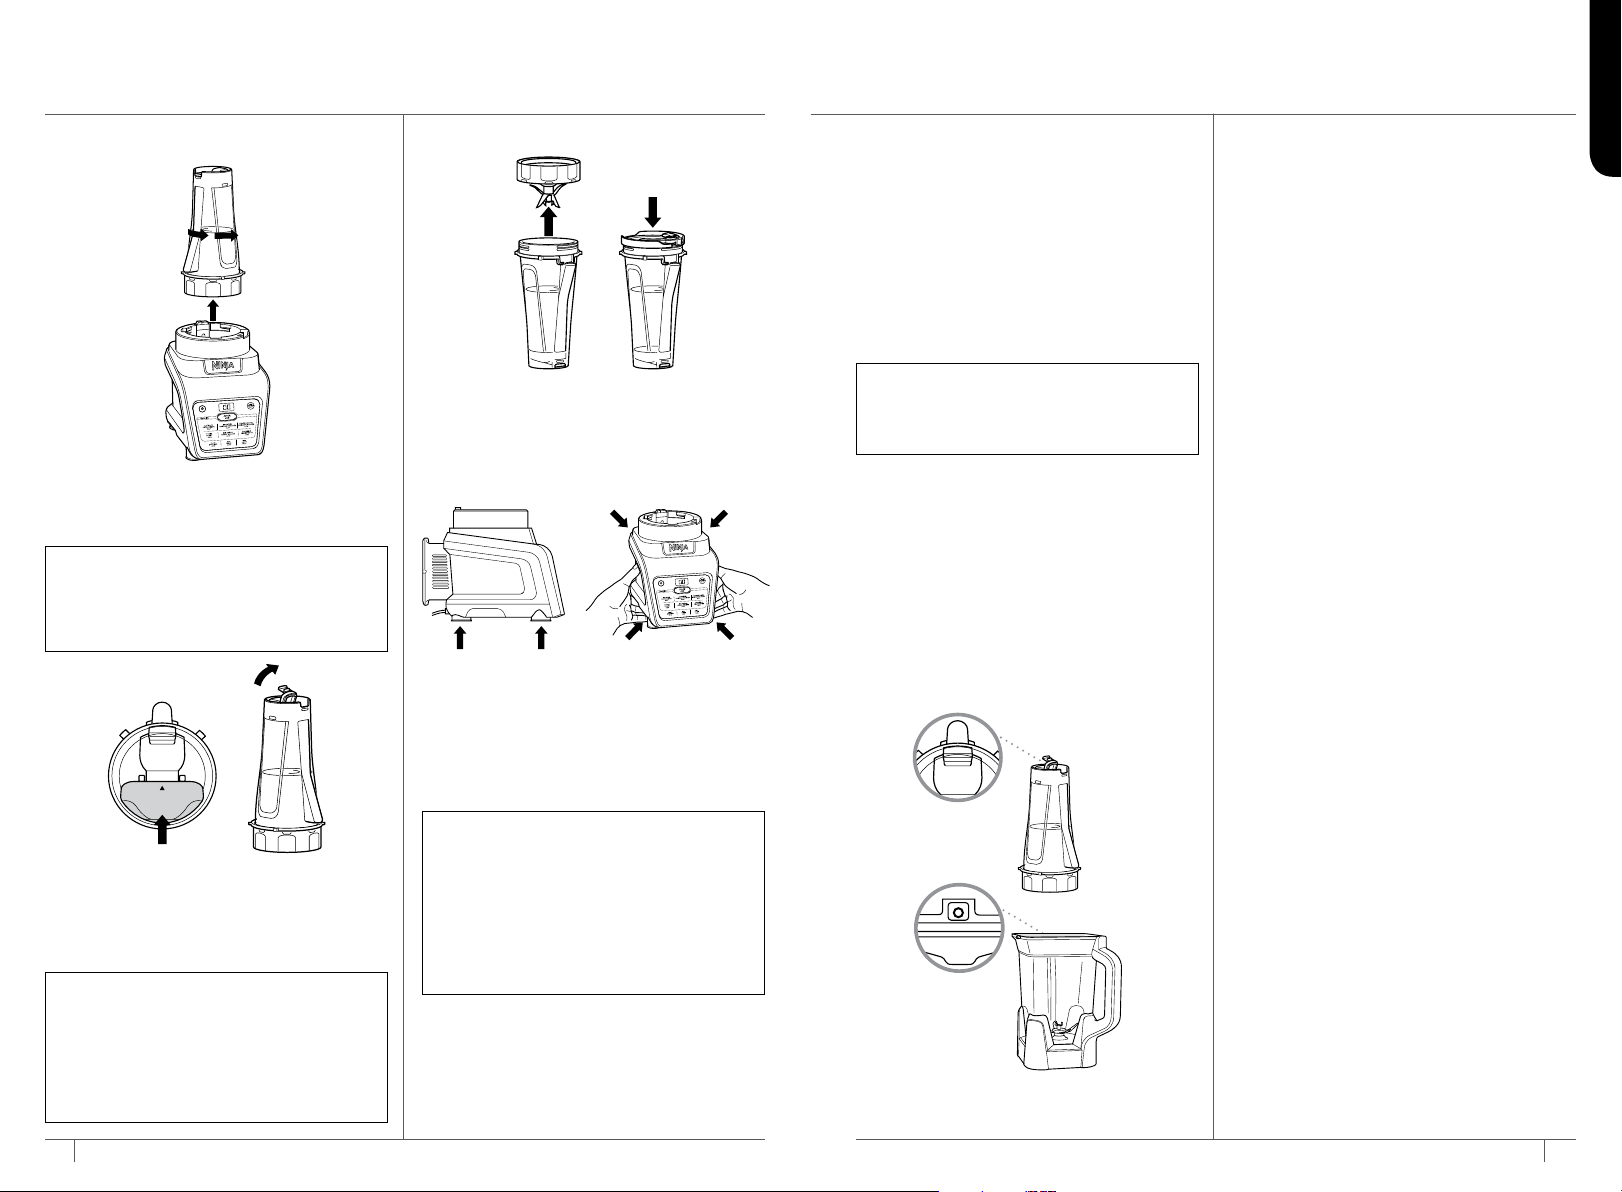
6 When blending is complete, rotate
cup counterclockwise to remove from
motor base.
7 With cup flat on the counter (with blade
assembly on the bottom), pull up on the
vacuum release tab. Once the vacuum
is released, you’ll be able to remove the
blade assembly.
8 Turn cup over so blade assembly is on top.
Rotate blade assembly counterclockwise
to remove. To take your blended contents
on the go, place the sealed spout lid on
cup and turn clockwise to seal.
9 Unplug the unit when finished. To lift
the motor base, place your hands
underneath both sides of it and gently
pull the unit up and toward you. Refer
to the Care & Maintenance section for
storing instructions.
L
I
F
T
T
O
R
E
L
E
A
S
E
V
A
C
U
U
M
E
N
S
U
R
E
L
I
D
I
S
O
P
E
N
W
H
E
N
C
L
E
A
N
I
N
G
BLENDING WITH THE
SINGLE-SERVE BLENDING CUP – CONT�
NOTE: If vacuum blending, you must
release the vacuum seal before
removing the blade assembly (see step
7 below for more information).
TIP: Storing with the Blade Assembly
After vacuum blending in the cup,
don’t release the seal—just put the cup
with the blade assembly attached in
the refrigerator. When you’re ready to
enjoy, release the seal and remove the
blade assembly.
TIP: Storing with the Spout Lid
After vacuum blending in the cup,
releasing the seal, and removing the
blade assembly, twist the spout lid onto
the cup, attach cup to base, and press
DRINKSAVER to vacuum seal contents.
They’ll stay fresh in the sealed cup until
you’re ready to enjoy at home or on
the go.
TIP: Keep the channel covers on the
single-serve blending cup and pitcher
lid open when washing, so the vacuum
channel gets cleaned every time.
CARE & MAINTENANCE
CLEANING
Separate all parts.
Hand-Washing
Wash containers, lids, blade assembly,
and overflow reservoir in warm soapy
water. Use a dishwashing utensil with
handle to avoid direct contact with the
blades. Exercise care when handling the
blade assembly as the blades are sharp.
Thoroughly rinse and air-dry all parts.
STORING
Wrap power cord around cord wrap on
back of motor base. Store unit upright
and store all blade assemblies inside or
attached to their respective containers
with their lids locked into place.
DO NOT stack items on top of the cups.
Store any remaining attachments alongside
the unit or in a cabinet where they will not
be damaged or create a hazard.
RESETTING THE MOTOR THERMOSTAT
This unit features a unique safety system
that prevents damage to the motor and
drive system should you inadvertently
overload it. If the unit is overloaded, the
motor will be temporarily disabled. Should
this occur, follow the reset procedure below.
Unplug the unit from the electrical outlet
and allow the unit to cool for approximately
15 minutes. Remove the cup’s blade
assembly. Empty the cup and ensure no
ingredients are jamming the blade assembly.
IMPORTANT: Ensure that maximum
capacities are not exceeded. This is the
most typical cause of appliance overload.
If your unit needs servicing, call Customer
Service at 1-877-646-5288. So we may
better assist you, please register your
product online at registeryourninja.com and
have the product on hand when you call.
L
I
F
T
T
O
R
E
L
E
A
S
E
V
A
C
U
U
M
E
N
S
U
R
E
L
I
D
I
S
O
P
E
N
W
H
E
N
C
L
E
A
N
I
N
G
Dishwasher
Containers, lids, and blade assembly are
dishwasher safe. Place the containers,
lids, and blade assembly on the top rack
of the dishwasher ONLY. Remove the
lids from the containers and the blade
assembly from the cup before placing in
the dishwasher.
Motor Base
Turn o the unit and unplug the motor
base before cleaning. Wipe motor base
with a clean, damp cloth.
Loading ...
Loading ...
Loading ...