Remove the oven and all materials from the carton and oven cavity.
Your oven comes with the following accessories:
Glass tray: 1
Turntable ring assembly: 1
Instruction Manual: 1
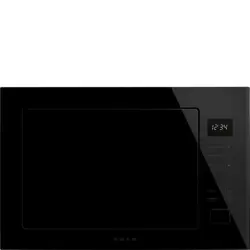
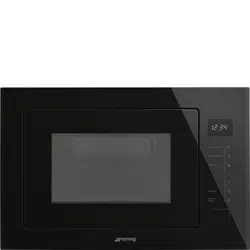
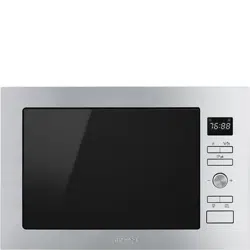
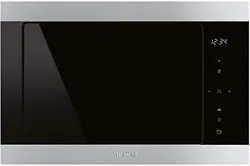
A) Control panel
B) Turntable shaft
C) Turntable ring assembly
D) Glass tray
E) Observation window
F) Door assembly
G) Safety interlock system
Turntable Installation
Never place the glass tray upside down. The glass tray should never be restricted.
Both glass tray and turntable ring assembly must always be used during cooking.
All food and containers of food are always placed on the glass tray for cooking.
If glass tray or turntable ring assembly cracks or breaks, contact your nearest authorized service center.
Installation and connection
This appliance is only intended for domestic use.
This oven is intended for built-in use only.It is not intended for counter-top use or for use inside a cupboard.
Please observe the special installation instructions.
The appliance can be installed in a 60cm wide wallmounted cupboard(at lease 55cm deep and 85cm off the floor).
The appliance is fitted with a plug and must only be connected to a properly installed earthed socket.
The mains voltage must correspond to the voltage specified on the rating plate.
The socket must be installed and connecting cable must only be replaced by a qualified electrician.If the plug is no longer to accessible following installation,an all-pole disconnecting device must be present on the installation side with a contact gap of at lease 3mm.
Adapters,multi-way strips and extension leads must not be used. Overloading can result in a risk of fire.
The accessible surfacemay be hot during operation.
Operation Instructions
1. Clock Setting
When the microwave oven is electrified, the LED will display "0:00", buzzer will ring once.
Press " " , the hour figures will flash.
Press " −" or "+ " to adjust the hour figures, the input time should be within 0--23.
Press " ", the minute figures will flash.
Press "− " or "+ " to adjust the minute figures, the input time should be within 0--59.
Press "" to finish clock setting. ":" will flash, and the time will light.
Note:
If the clock is not set, it would not function when powered.
During the process of clock setting, if you press " ", the oven will go back to the previous status automatically
2. Microwave Cooking
Press " ", the LED will display "P100". Press " " for times or press " −" or "+ " to choose the power you want, and "P100", "P80", "P50", "P30" or "P10" will display for each added press.
Then press " " to confirm, and press "− " or "+ " to set cooking time from 0:05 to 95:00. Press " " again to start cooking.
Example: If you want to use 80% microwave power to cook for 20 minutes, you can operate the oven as the following steps.
Press " " once, the screen displays "P100".
Press " " once again or press "− " or "+ " to choose 8 microwave power.
Press " " to confirm, and the screen displays "P 80".
Press "− " or "+ " to adjust the cooking time until the oven displays "20:00"
Press " " to start cooking .
Note: the step quantities for the adjustment time of the coding switch are as follow:
0---1 min : 5 seconds
1---5 min : 10 seconds
5---10 min : 30 seconds
10---30 min : 1 minute
30---95 min : 5 minutes
" " Pad instructions
Order
Display
Microwave Power
Grill Power
1
P100
100%
2
P80
80%
3
P50
50%
4
P30
30%
5
P10
10%
6
G
0%
100%
7
C - 1
55%
45%
8
C - 2
36%
64%
3. Grill or Combi. Cooking
Press " " once "P100" displays an,d then press " " for times or press "− " or "+ " to choose the power you want, and "G","C-1" or "C-2" will display for each added press. Then press to confirm, and press "− " or "+ " to set cooking time from from 0:05 to 95:00. Press " " again to start cooking.
Example: If you want to use 55% microwave power and 45% grill power(C-1) to cook for 10 minutes, you can operate the oven as the following steps.
Press " " once, the screen displays "P100".
Press " " for times or press "− " or "+ " to choose combi. 1 mode.
Press "" to confirm, and the screen displays "C-1".
Press "− " or "+ " to adjust the cooking time until the oven displays "10:00".
Press " " to start cooking
Note:If half the grill time passes, the oven sounds twice, and this is normal. In order to have a better effect of grilling food, you should turn the food over, close the door, and then press " " to contime cooking. If no operation, the oven will continue cooking.
4. Quick Start
In waiting state, press " " to start 30 seconds cooking with 100% power, each added press will increase 30 seconds cooking time up to 95 minutes.
In microwave, grill, combi. cooking or time defrost state, each press of " " can increase 30 seconds of cooking time.
In waiting state, press " − " to set cooking time with 100% microwave power, then press " " to start cooking.
5. Defrost By Weight
Press " " once, and the oven will display "dEF1".
Press "− " or "+ " to select the weight of food from 100 to 2000 g.
Press " " to start defrosting.
6. Defrost By Time
Press " " twice, and the oven will display "dEF2".
Press"− " or "+ " to select the defrost time.
Press " " to start defrosting.
7. Auto Menu
Press "+ " to choose the menu, and "A-1" to "A-8" will display, which means pizza, meat, vegetable, pasta, potato, fish, beverage and popcorn.
Press "− " or "+ " to confirm
Press " " to choose the default weight as the menu chart.
Press " " to start cooking.
Example: If you want to use "Auto Menu" to cook fish for 350g.
Press clockwise till "A-6" displays
Press " " to confirm.
Press to select the weight of fish till "350" display .
Press " " to start cooking.
The menu chart:
8. Kitchen Timer
Press " " once, LED will display 00:00.
Press "− " or "+ " to enter the correct time.(The maximum cooking time is
Press " " to confirm setting.
When the kitchen time is reached, the buzzer will ring 5 times.
If the clock has been set(24-hour system), LED will display the current time.
Note: The kitchen Time is differ from 24-hour system Kitchen Timer is a timer.
9. Multi-section cooking
At most 2 sections can be set for cooking. In multi-section cooking, if one section is defrosting, then defrosting shall be placed in the first section.
Example: If you want to defrost food for 5 minutes and then cook with 80% microwave power for 7 minutes, operate it as the following:
Press " " twice, and the oven will display "dEF2"
Press "− " or "+ " to select the defrost time till "5:00" displays.
Press " ", once, the screen displays "P100".
Press " ", once again press "− " or "+ " to choose 80% microwave power.
Press " " to confirm, and the screen displays "P 80"
Press "− " or "+ " to adjust the cooking time till the oven displays "7:00".
Press " " to start cooking, and buzzer will sound once for the first section, defrosting time counts down; buzzer will sound once again entering the second cooking. When cooking finishes, buzzer sounds five times.
10. Inquiring Function
In states of microwave, grill and combination cooking, press " ", the current power will be displayed for 3 seconds. After 3 seconds, the oven will turn back to the former state
In cooking state, press "" for 3 seconds.
11. Lock-out Function for Children
Lock: In waiting state, press " " for 3 seconds, there will be a long beep denoting entering the children-lock state and the current time will display if the time has been set, otherwise, the LED will display "0:00".
Lock quitting: In locked state, press " " for 3 seconds, there will be a long "beep" denoting that the lock is released.
12. Specification
" " must be pressed to continue cooking if the door is opened during cooking
Once the cooking programme has been set , " " is not pressed in 5 minutes. The current time will be displayed. The setting will be cancelled
The buzzer sounds once by efficient press, inefficient press will be no response.
The buzzer will sound five times to remind you when cooking is finished.
13. Open the oven door
Press "" button, the oven door will be opened. If the button does not work, please open the door by the sucker. Refer to the following figures
Trouble shooting
If something does trouble shooting; before seeking assistanace carry out the following checks first.
Normal
Microwave oven interfering TV reception
Radio and TV reception may be interfered when microwave oven operating. It is similar to the interference of small electrical appliances, like mixer, vacuum cleaner, and electric fan.
It is normal.
Dim oven light
In low power microwave cooking, oven light may become dim. It is normal.
Steam accumulating on door, hot air out of vents
In cooking, steam may come out of food. Most will get out from vents. But some may accumulate on cool place like oven door. It is normal.
Oven started accidentally with no food in.
It is forbidden to run the unit without any food inside. It is very dangerous.
Trouble
Possible Cause
Remedy
Oven can not be started.
(1) Power cord not plugged in tightly.
Unplug. Then plug again after 10 seconds.
(2) Fuse blowing or circuit breaker works.
Replace fuse or reset circuit breaker (repaired by professional personnel of our company)
(3) Trouble with outlet.
Test outlet with other electrical appliances.
Oven does not heat.
(4) Door not closed well.
Close door well.
Glass turntable makes noise when microwave oven operates
(5) Dirty roller rest and oven bottom.
Refer to "Maintenance of Microwave" to clean dirty parts.


 The accessible surfacemay be hot during operation.
 " , the hour figures will flash.
 ", the oven will go back to the previous status automatically
 ", the LED will display "P100". Press "
 " to confirm, and press "− " or "+ " to set cooking time from 0:05 to 95:00. Press "
 " once, and the oven will display "dEF1".
 " once, LED will display 00:00.
 " to confirm, and the screen displays "P 80"
 " for 3 seconds.
 " for 3 seconds, there will be a long beep denoting entering the children-lock state and the current time will display if the time has been set, otherwise, the LED will display "0:00".
 " button, the oven door will be opened. If the button does not work, please open the door by the sucker. Refer to the following figures