Loading ...
Loading ...
Loading ...
English
16
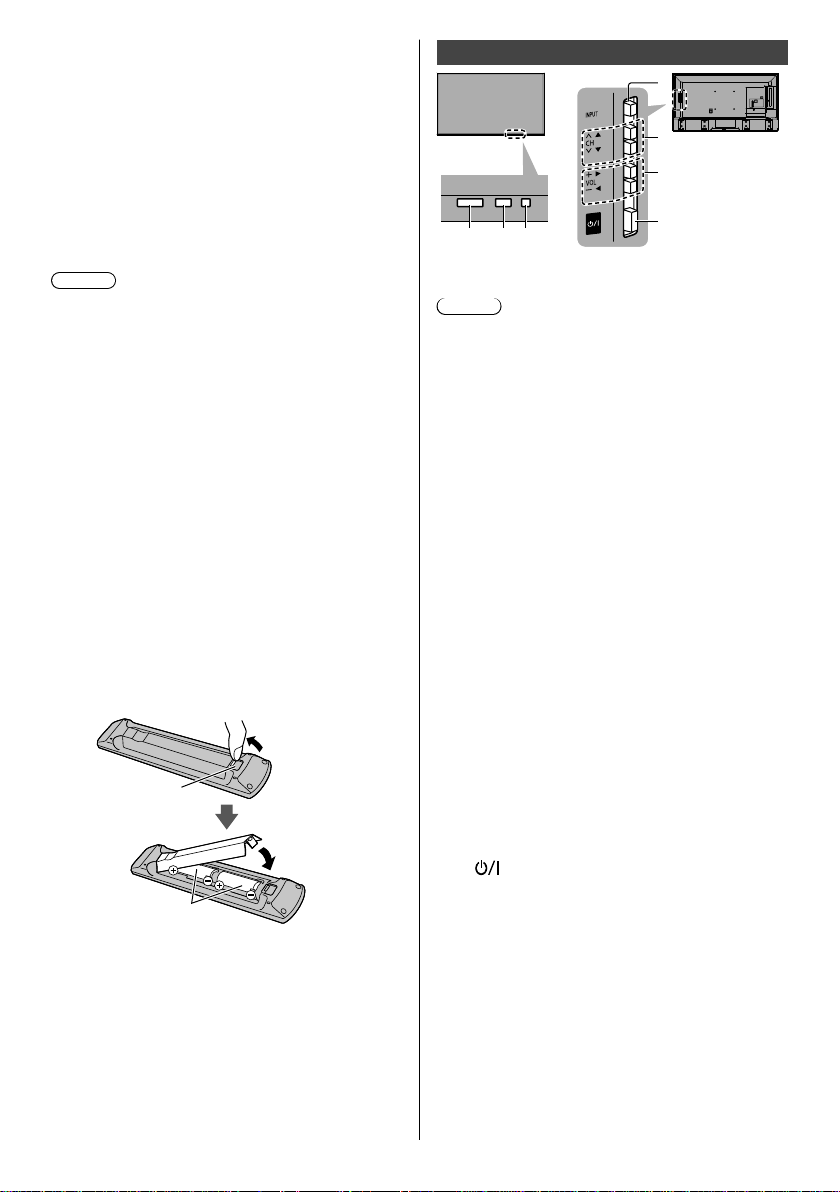
Indicator / Control panel
123
7
5
4
6
Rear side of the TV
Note
●
Location of indicators may vary depending on the
models.
1
Remote control signal receiver
●
Do not place any objects between the TV remote
control signal receiver and remote control.
2 Ambient
sensor
●
Senses brightness to adjust picture quality when
[Ambient Sensor] in the V
ideo Menu is set to [On].
3 Power LED
Red: Standby
Green: On
Orange: Standby with some functions (recording,
etc.) active
●
The LED blinks when the TV receives a command
from the remote control.
4
Input mode selection
●
Press repeatedly until you reach the desired mode.
[Main Menu]
●
Press and hold for about 3 seconds to display main
menu.
OK (when in the menu system)
5
Channel Up / Down
Cursor Up / Down (when in the menu system)
6 Volume Up / Down
Cursor Left / Right (when in the menu system)
7 Mains power On / Off switch
●
Use to switch the mains power.
●
To turn Off the apparatus completely, you must pull
the mains plug out of the mains socket.
●
[
]: Standby / On
26
ASPECT
●
Changes aspect ratio.
●
Displays the [Aspect Selection] screen. [Auto] /
[16:9] / [Just] / [4:3] / [Zoom]
■ [Auto]
The best ratio is selected automatically
.
■ [16:9]
*
Directly displays the image at 16:9 without distortion
(anamorphic).
- For Digital Broadcast channels, image will be
displayed based on broadcasted channel aspect
ratio.
Note
●
16:9 Overscan Function only applies for 16:9 input
source
■ [Just]
Displays a 4:3 image full-screen. Stretching is only
noticeable at the left and right edges.
■ [4:3]
Displays the image at the standard 4:3 without
distortion.
■ [Zoom]
Displays a 16:9 letterbox or 4:3 image without
distortion
*
●
Select [16:9 Overscan] in [Screen Settings]
(V
ideo Menu).
●
Selects the screen area displaying the image for
16:9 aspect. [Off] / [On].
[On]: Enlarges the image to hide the edge of the
image.
[Off]: Displays the image in the original size.
●
Set to [On] if noise is generated on the edge of
the screen.
■ Installing / Removing batteries
Pull open
Hook
Note the correct
polarity (+ or -)
Close
TH_55GX600_640AZ_Eng.indb 16TH_55GX600_640AZ_Eng.indb 16 4/2/2019 3:45:05 PM4/2/2019 3:45:05 PM
Loading ...
Loading ...
Loading ...