Loading ...
Loading ...
Loading ...
27
Operating
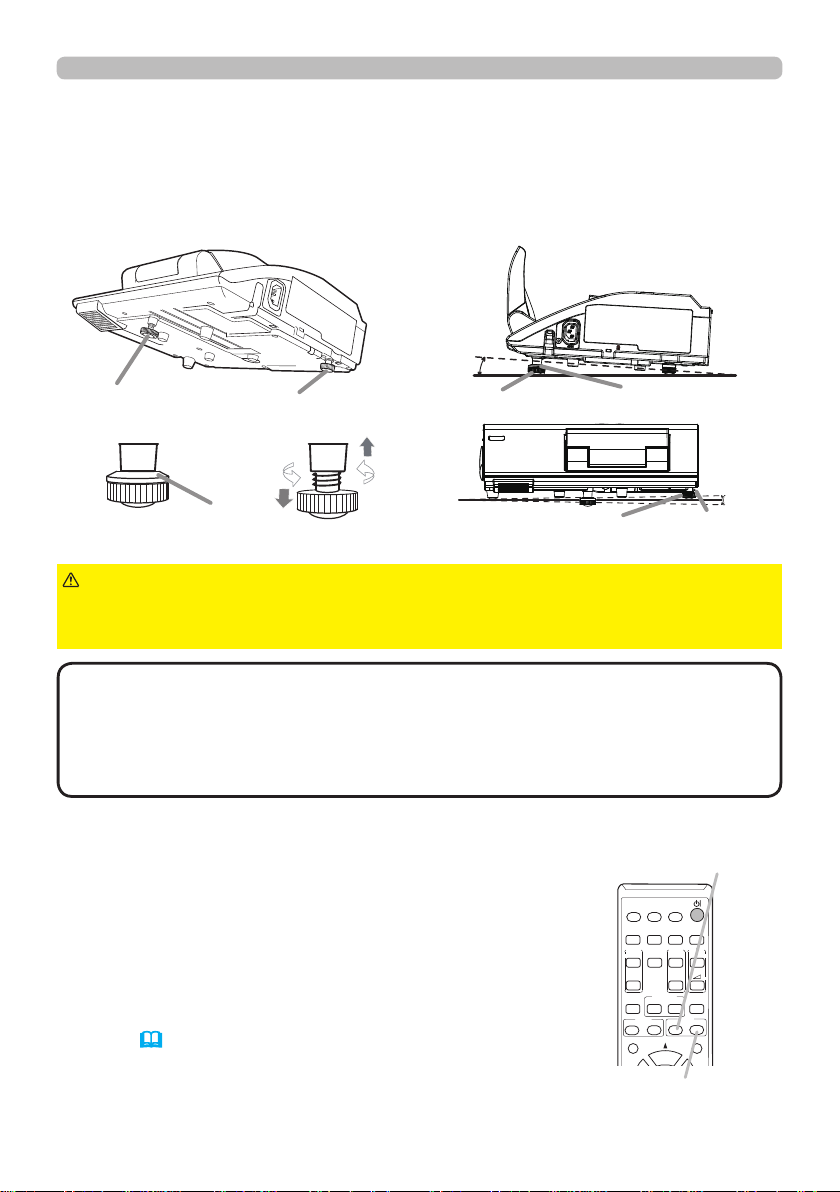
Adjusting the zoom and focus
Adjusting the projector's elevator
The projector has Front foot for inclinations and Rear foot for horizontals. Spacers
on the each elevator foot are installed at the time of shipment, and projector is in a
condition to be able to just project. If necessary, detach the spacer, and the elevator
feet can be manually twisted to make more precise adjustments.
Front foot Rear foot
2.3~4.3°
-1~1°
Front foot
Rear foot
Spacer
Spacer (Large)
Spacer (Small)
Press the D-ZOOM + or D-ZOOM - button on the remote
control to display D-ZOOM dialog on screen.
Use the D-ZOOM + and D-ZOOM - buttons to adjust the
picture size.
To nish the operation, do not touch these buttons for about
ten seconds until the dialog is disappeared.
● If you want to expand a part of the image, use the magnify
function (30).
►Keep the spacers away from children and pets. Be careful not
to let them swallow the spacers. If swallowed, consult a physician immediately
for emergency treatment.
WARNING
• The adjustment angle can be adjusted up to plus or minus 1° each of
FRONT and REAR foot.
•
After the foot is adjusted, it is possible to return it to the state of the shipment with a spacer.
Install Large on the Front foot and Small on the Rear foot of the spacer. If change
the setting place of the projector, it will recommend keep and reuse the spacers.
NOTE
VIDEO
DOC.CAMERA
KEYSTONE
ASPECT
SEARCH
BLANK
MUTE
MY BUTTON
POSITION
ESC
MENU
RESET
COMPUTER
MY SOURCE/
AUTO
MAGNIFY
PAGE
DOWN
ON
OFF
FREEZE
UP
ー
+
VOLUME
1
2
ENTER
FOCUS
-
+
D-ZOOM
-
+
D-ZOOM + button
D-ZOOM - button
(continued on next page)
Loading ...
Loading ...
Loading ...