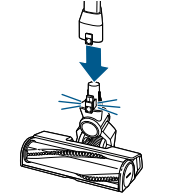
1. Connect the Extension Wand to Motorized Floor Cleaning Foot. You’ll hear a “click” when they’re connected.
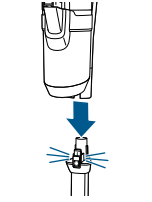
2. Connect the Hand Vacuum Assembly to the Extension Wand. You’ll hear a “click” when they’re connected.
3. Make sure to charge your stick vacuum before first use. Refer to page 6, “Charging the Battery” for instructions.
Installing the Wall Storage & Charging Station
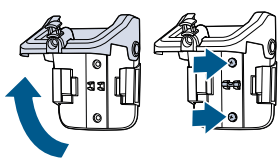
1. Open the Wall Storage & Charging Station, use the bubble level to ensure it is level and insert two screws to secure to wall. In order to charge the machine, ensure the Wall Storage & Charging Station is mounted near a wall outlet.
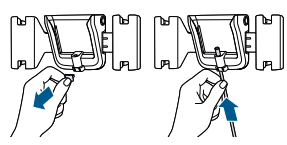
2. Insert the tool holders into the side of the Wall Storage & Charging Station. To install the charging cord, remove the power cord clip from the Wall Storage & Charging Station. Insert the charging cord and secure it with the charging cord clip.
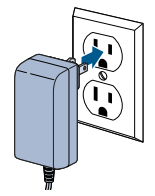
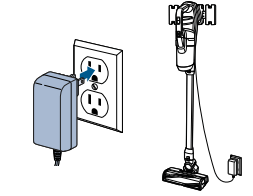
3. Plug the power adapter into the wall and place the machine on the Wall Storage & Charging Station for charging. Refer to page 6, “Charging the Battery” for instructions.
Charging the Battery
Before first use, make sure to fully charge your stick vacuum for 4 hours to get a full charge. To charge the battery you can plug the charger directly into the Hand Vacuum Assembly or into the Wall Storage & Charging Station.
Charging with the Hand Vacuum
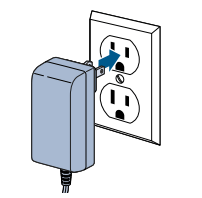
1. Plug the battery charger into the wall.
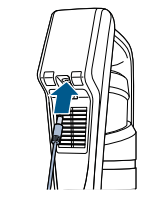
2. Plug the charger into the charging port on the back side of the hand vacuum.
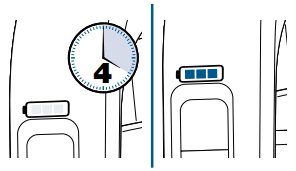
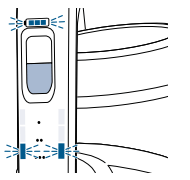
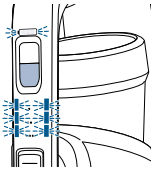
3. Let the hand vacuum charge for 4 hours or until all three sections of the battery charge icon are illuminated.
Charging with the Wall Storage & Charging Station
1. Follow instructions on page 5 for installing the Wall Storage & Charging Station. Once installed, hang the machine onto the station.
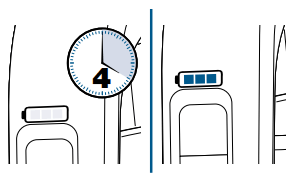
2. Let the vacuum charge for 4 hours or until all three sections of the battery charge icon are illuminated.
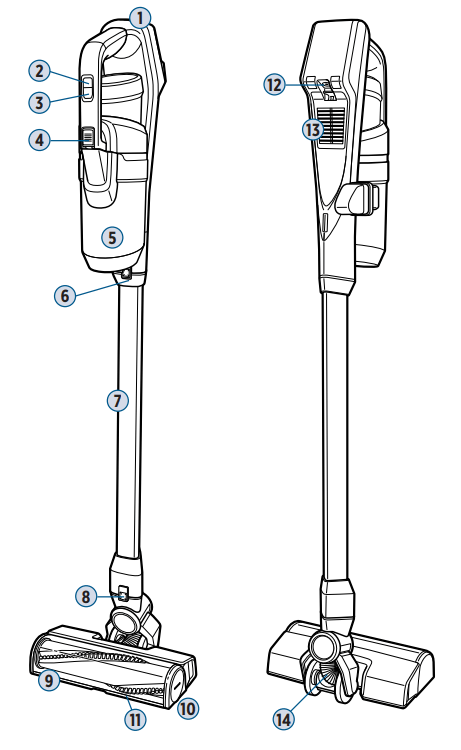
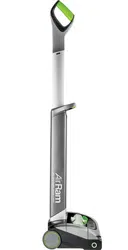
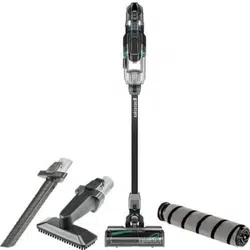
Using the Vacuum
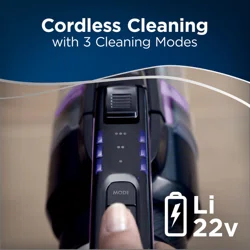
ICONpet Cordless can be used as a stick vacuum, hand vacuum or for extended reach with hand vacuum + wand.
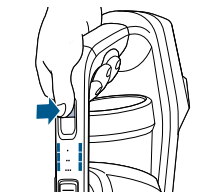
1. Press the Power Button to begin cleaning and to turn OFF the machine when finished cleaning.
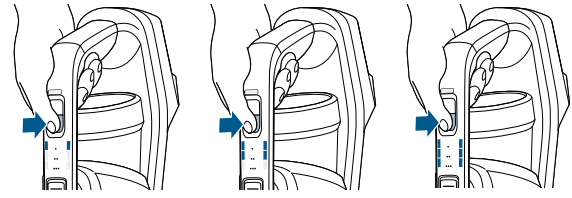
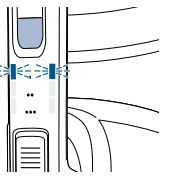
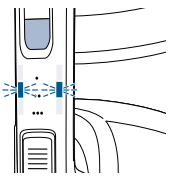
2. Press the Cleaning Mode Button to toggle between the three settings:
••• Recommended for maximum suction. It’s the most powerful setting which is great for cleaning carpets, however has the shortest run time. This is the default suction mode when the vacuum is turned ON.
•• Recommended for everyday cleaning. It’s great for hard floors, low pile carpets and area rugs. It balances power and run time.
• Recommended for the longest run time. It’s great for hard floors and offers the quietest sound.
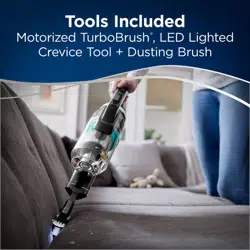
Attaching Tools for Hand Vac Use
1. To use as a hand vacuum, press the release button to disconnect it from the extension wand.
2. Attach your chosen tool
3. Use the tool to clean furniture, stairs or other surfaces in your home.
Emptying the Dirt Tank
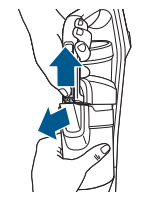
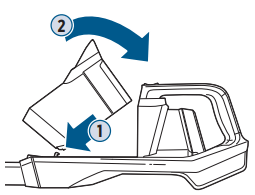
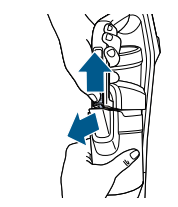
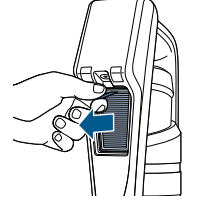
1. Turn OFF your machine. Remove the Dirt Tank from the hand vacuum by sliding the latch on the front of the tank.
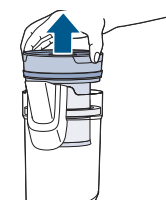
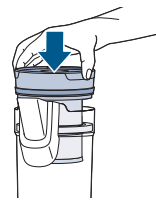
2. Grab the top of the tank and pull up. This will activate a wiping feature to remove debris from the mesh filter screen.
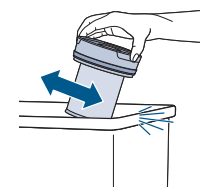
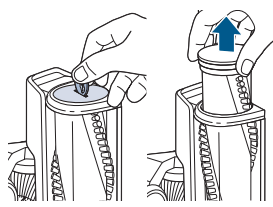
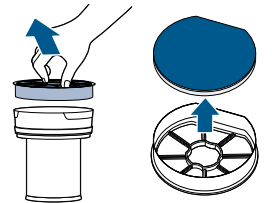
3. Fully remove the separator from the tank and tap the mesh screen on the side of the trash bin.
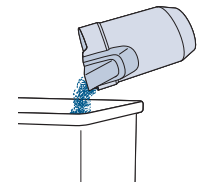
4. Dump dirt from the tank into the trash bin.
5. Slide the separator back into the tank, ensuring the notch is seated into the tank correctly.
6. Put the whole tank into the hand vacuum by guiding the notched out area on the bottom of the tank onto the hook on the hand vacuum. Push into place.
Removing and Changing the Brush Roll
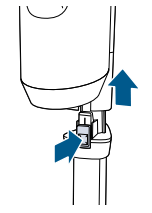
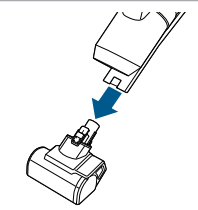
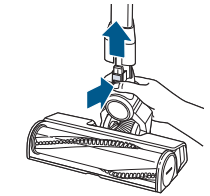
1. Turn the machine OFF and press the Foot Release Button to disconnect the Motorized Floor Cleaning Foot from the Extension Wand.
2. With a flathead screwdriver or coin, twist the slot on the side of the foot clockwise and pull the Brush Roll out.
3. To use the hard floor brush roll or replace the brush after cleaning it, push the brush roll back in the chamber and twist counter-clockwise with a tool or coin to lock in place.
Cleaning & Replacing the Filters
Pre-Motor Filters
For best cleaning performance, always clean your pre-motor filter after each use.
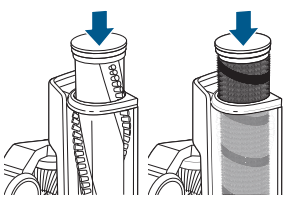
1. To clean the pre-motor filter, turn OFF machine and remove Dirt Tank from the hand vacuum.
2. Pull filter from the top of the tank. Remove the filter from the filter frame housing. Tap the filter against the side of a trash bin to remove dust and debris.
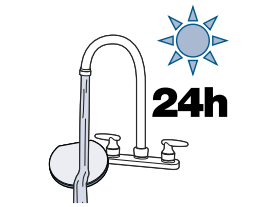
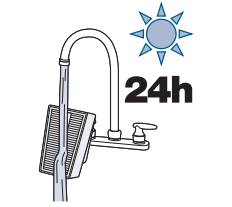
3. To clean, rinse under warm water and squeeze to remove dirt. Lay out for 24 hours, until completely dry. Make sure to replace your filter into the frame with the tag side down (touching the frame) before using your machine.
Post-Motor Filter
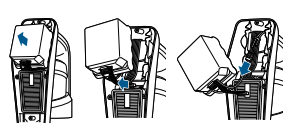
1. To clean your post-motor filter, turn OFF machine and press the latch on the back of the hand vacuum.
2. Remove the post-motor filter from the vacuum.
3. If there’s debris on the filter, tap it on a trash bin and rinse under warm water. Let dry for at least 24 hours before putting it back in the vacuum and replacing the filter cover
Disposing of the Batteries
1. Run the battery out. Make sure the unit is disconnected from the charger and turned OFF and the hand vacuum is disconnected from the extension wand.
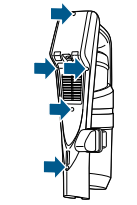
2. Remove five screws from the back of the unit.
3. Pull the bottom cover off of the back of the unit.
4. Disconnect and remove entire battery assembly by unplugging the two sockets from the vacuum.
5. Properly discard remainder of product
Troubleshooting
This guide has everything you need to get ready for first use, including setting up, using and maintaining your machine, but online you’ll find additional resources like tips and troubleshooting, videos, product registration, parts, and more.
Problem
Possible Cause
Remedies
Vacuum won’t pick up dirt
Filters are dirty.
Remove and rinse Pre-Motor Filters. Allow enough time for them to dry properly before reinserting. Remove and dust off post-motor filter.
There is a clog in the vacuum.
Remove the foot and extension wand from the hand vacuum. Check for debris buildup or clogs in each of these sections. Clear any debris or clogs before reassembling.
Dirt Tank is not seated correctly.
Remove the tank and reseat properly.
Dirt is escaping from the vacuum
Dirt Tank is full.
Empty the tank.
Filters are missing or dirty.
Check to see if the Pre-Motor & Post Motor Filters are in place and clean, if necessary.
There is a clog in the vacuum.
Remove the foot and extension wand from the hand vacuum. Check for debris buildup or clogs in each of these sections. Clear any debris or clogs before reassembling.
Vacuum won’t charge
Wrong charger is being used.
Use only the charger that comes with the machine.
Charger is not plugged into the machine properly.
Remove the charger and reinstall into the hand vacuum.
Errors
Cause: Suction motor fault.
Remedy: Turn machine OFF. Check and clean filters. Check and clean the machine of clogs. If this doesn’t solve the problem, contact Consumer Care.
Cause: Brush roll stall.
Remedy: Turn machine OFF. Check and clean the brush roll of any clogs. Brush roll can be removed for thorough cleaning (page 8). Turn machine ON.
Cause: Battery issue.
Remedy: Contact Consumer Care.
Air flow issue.
Remedy: Turn machine OFF. Check and clean filters. Check and clean the machine of clogs. If this doesn’t solve the problem, contact Consumer Care.