Loading ...
Loading ...
Loading ...
49-20000373 Rev. 2 13
ENGLISH
Microwave Oven Care
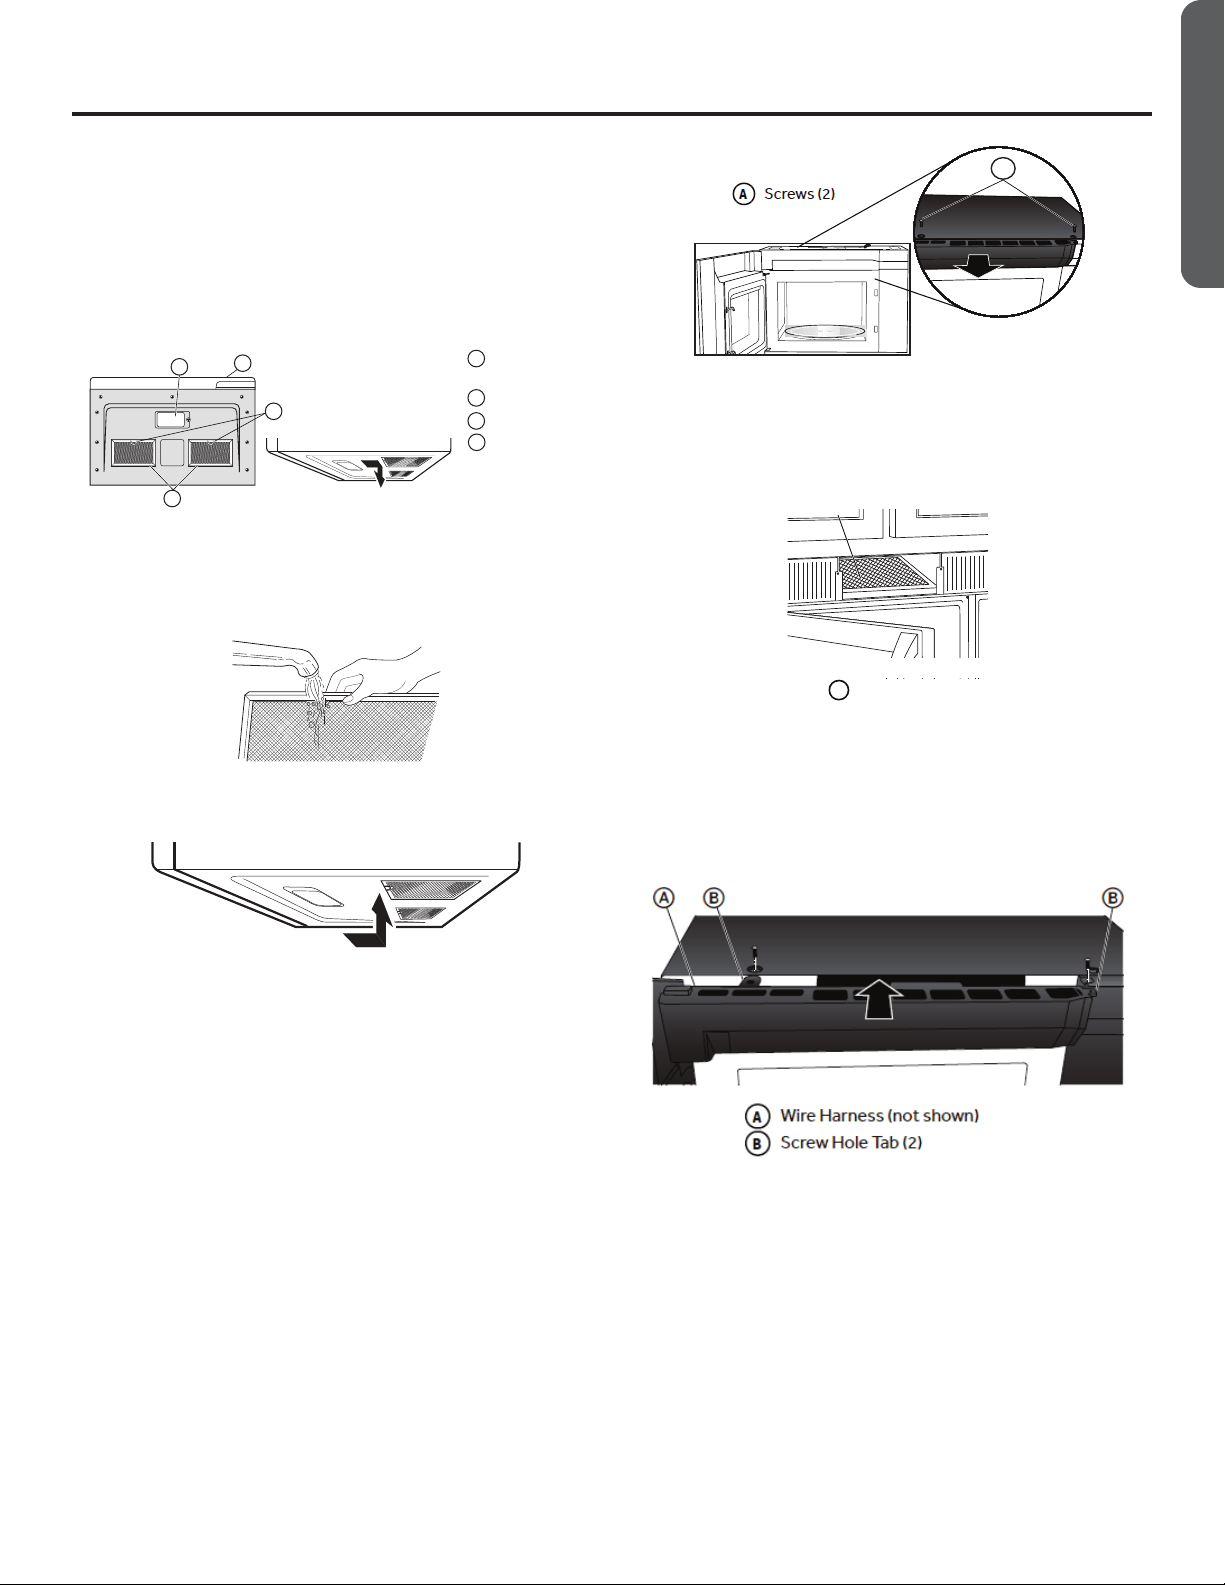
GREASE FILTER(S)
Grease filters are located on the underside of microwave
oven. The grease filters should be removed and cleaned
often; generally at least once every month.
1. Remove the grease filter. Grasp the metal ring, slide
the filter toward the back, and then gently pull the filter
downward. Repeat for the second filter.
Surface
Lights
Door
Metal Loop
Grease
Filters
A
A
B
B
C
C
D
D
2. Soak the grease filters in hot water with a mild detergent
added. Rinse well and shake to dry.
NOTE: Do not use ammonia or wash in a dishwasher. The
aluminum on the filter will corrode and darken.
3. Reinstall the grease filter by inserting the back edge of the
filter into the opening and gently pushing it up into place.
Repeat for the second filter.
CHARCOAL FILTER
IMPORTANT: A charcoal must be installed in the microwave
oven when it is used in a non-vented (recirculating)
installation. Your microwave oven comes from the factory
with the charcoal installed.
The charcoal cannot be cleaned, so it must be replaced at
least every 6 months or more often depending on use. To
order a replacement charcoal for your model, contact the
Customer Satisfaction Center. See “Back Cover” for contact
information.
1. Unplug or disconnect power.
2. Using a Phillips screwdriver, remove screws from the
top grille.
3. Open the microwave door so you can grasp the top grille,
and then pull the grille straight out to remove.
A
4. Remove the used charcoal from the back of the grille, and
then discard the filter.
5. Align the holes in the new charcoal filter with the five posts
on the back of the grille, and gently press down to attach.
A
Charcoal Filter
a
6. Align the top edge of the grille so that when the grille is
pushed into place the screw holes align with holes in the
microwave cabinet. Gentilly push grille until it snaps into
place and screw holes are aligned.
NOTE: Make sure that the wire harness, located near the door
hinge, is not pinched when you are replacing the top grille.
7. Replace the two screws removed earlier, and tighten the
screws completely.
LIGHTS
IMPORTANT: Your microwave oven features LED interior
lighting as well as LED surface lighting. These lights are
designed to last for the life of your microwave oven. However,
if the lights stop illuminating, please contact a technician for
replacement or the Customer Satisfaction Center for service.
See the back cover for contact information.
Loading ...
Loading ...
Loading ...