Loading ...
Loading ...
Loading ...
10 49-2000373 Rev. 2
ENGLISH
Microwave Oven Use
MICROWAVE COOKING
TIMED COOKING
1. Press the number pads to set the cooking time. For example,
to cook for 10 minutes, press “1,0,0,0” in turn.
NOTE:
• The maximum cooking time is 99 minutes and 99 seconds.
• 100% power is the default. If you wish to cook at 100% power,
skip steps 2 and 3, and go directly to Step 4.
2. Press POWER LEVEL to activate Power mode.
3. Press the number pads or press POWER LEVEL repeatedly to
select the desired power level. See “Power Levels” chart later
in this section.
4. Press START to begin cooking. The time will count down.
NOTE: When cooking is finished, an alert tone sounds 3 times
and “End” appears in the display.
Variable power levels add flexibility to microwave cooking. The
power levels on the microwave oven can be compared to the
surface units on the range. Each power level gives you microwave
energy a certain percent of the time. Power level 7 is microwave
energy 70% of the time. Power level 3 is energy 30% of the
time. Most cooking will be done on High (power level 10), which
gives you 100% power. Power level 10 will cook faster but food
may need more frequent stirring, rotating, or turning over. A
lower setting will cook more evenly and needs less stirring or
rotating of the food. Some foods may have better flavor, texture,
or appearance, if one of the lower settings it used. Use a lower
power level when cooking foods that have a tendency to boil
over, such as scalloped potatoes and some casseroles.
Rest periods (when the microwave energy cycles off) give time
for the food to "equalize" or transfer hea to the inside of the food.
An example of this is shown with Power level 3—the deforst
cycle. If microwae energy did not cycle off, the outside of the
food would cook before the inside was defrosted.
Here are some examples of uses for various power levels:
Power Levels
Ten power levels are available.
Level Power Display Tips
10 100% PL - HI Fish, Bacon, Vegetables, Boiling Liquids
9 90% PL-90 Gentle cooking of meat and poultry; baking
casseroles and reheating
8 80% PL-80
7 70% PL-70
6 60% PL-60 Slow cooking and tenderizing for stews and
less tender cuts of meat
5 50% PL-50
4 40% PL-40
3 30% PL-30 Defrosting; simmering; delicate sauces
2 20% PL-20
1 10% PL-10 Keeping food warm; softening butter
0 0% PL-0 -----------
CONVENIENCE COOKING
• Press START/+ 30 SEC to begin cooking at 100% microwave
power for 30 seconds.
• Press START/+ 30 SEC during microwave cooking, to increase
the cooking time in 30-second increments.
NOTE: The maximum cooking time is 99 minutes and 99
seconds.
• Press number pads from 1 to 9 to start cooking with 100%
microwave power for 1 to 9 minutes.
NOTE: During Convenience cooking, the microwave power level
can be viewed, but not adjusted.
SENSOR COOK
The Sensor Cook control automatically sets the appropriate
cooking time calculated by sensing the moisture level of the food
or beverage being cooked.
The Sensor Cook control is programmed to cook the following
items: Potato, Fresh Veggies, Frozen Veggies, Frozen Dinner,
White Rice, Frozen Breakfast, and Ground Meat.
For best results when using sensor cooking, use microwave-safe
containers and cover the containers with vented lids or vented
plastic wrap.
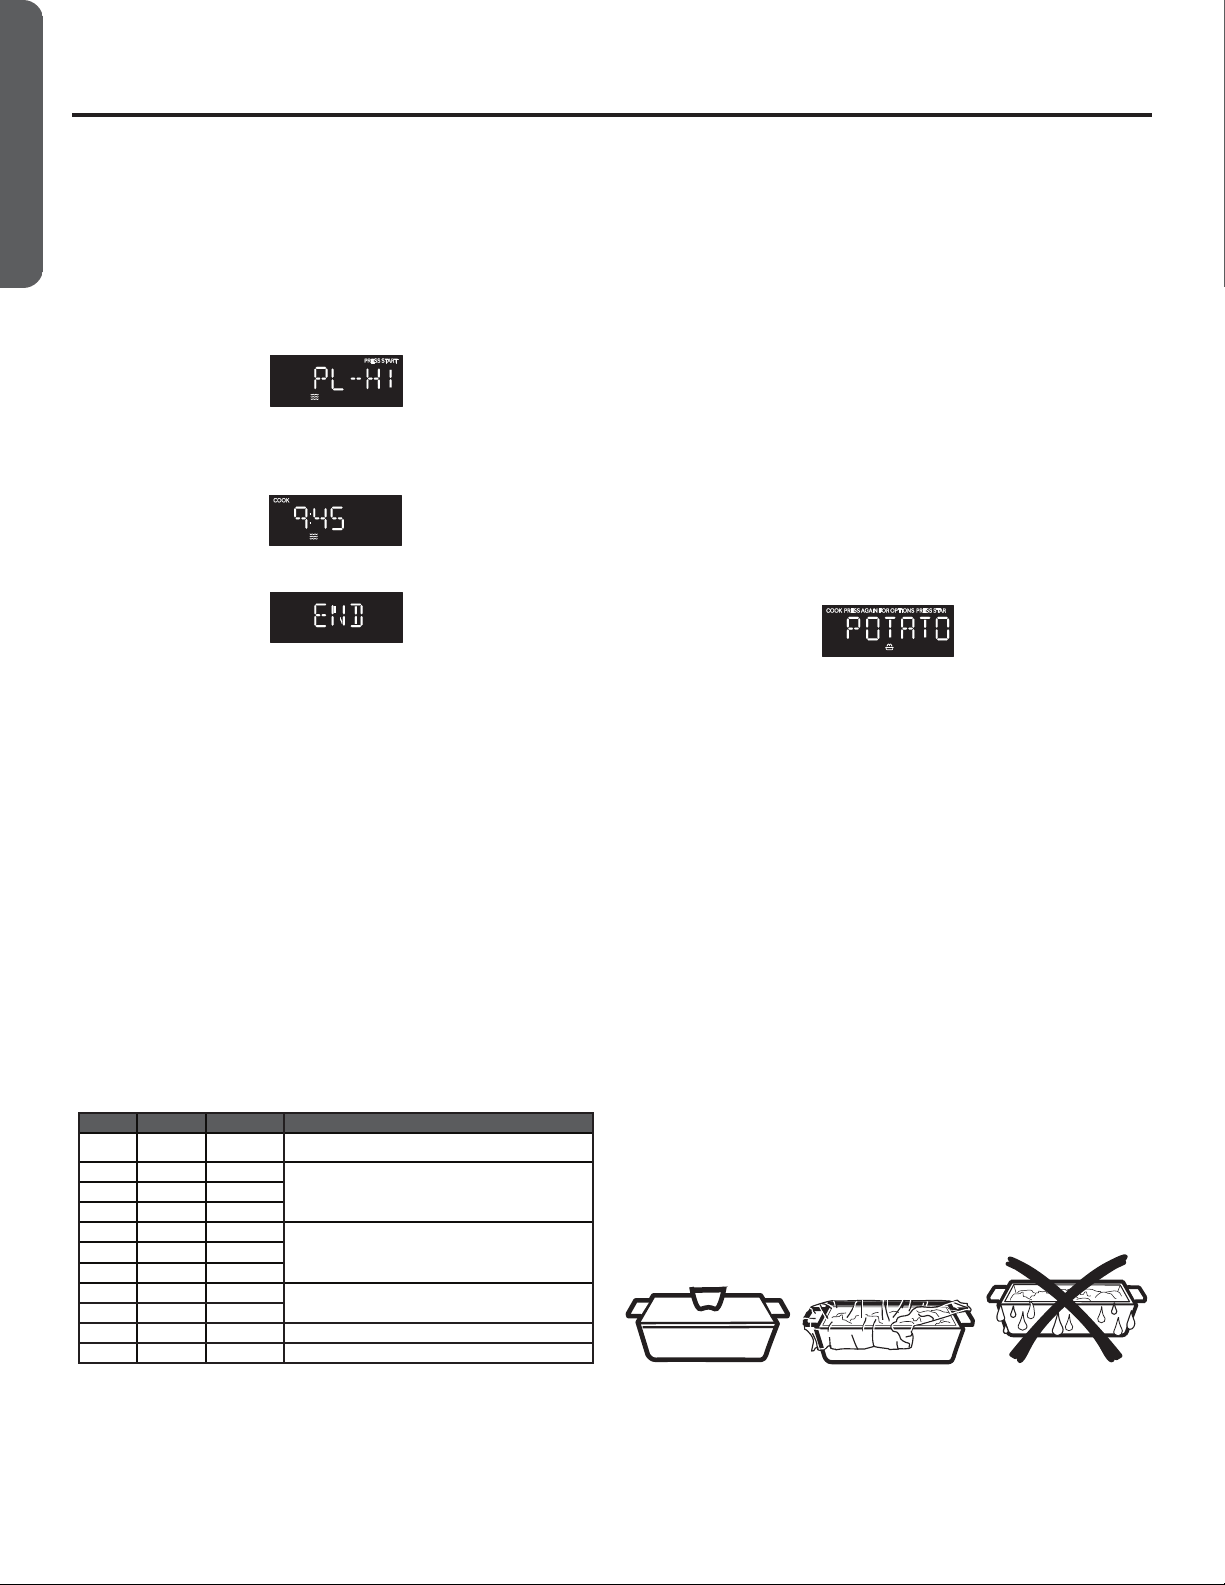
1. Place the covered container in the microwave oven.
2. Press SENSOR COOK once, “Potato” will appear on the
display. Continue to press SENSOR COOK to toggle among
the choices unitl the desired item appear in the display.
3. Press START to confirm and begin cooking.
4. Once Start is pressed, the Sensing process begins. When the
Sensing process is completed, alert tones will sound and the
calculated cook time will begin to count down.
NOTE: Do not open the door during the Sensing process. If you
do, the Sensor Cook program will be cancelled.
5. If the food is undercooked, use the Timed or Convenience
Cooking function to cook food to the desired degree.
Humidity Sensor
The Sensor Features detect the increasing humidity released
during cooking. The oven automatically adjusts the cooking
time to various types and amounts of food.
Do not use the Sensor Features twice in succession on the same
food portion—it may result in severely overcooked or burnt
food. If food is undercooked after the countdown, use Time
Cook for additional cooking time.
• The proper containers and covers are essential for best
sensor cooking.
• Always use microwave-safe containers and cover them
with lids or vented plastic wrap. Never use tight sealing
plastic containers—they can prevent steam from
escaping and cause food to overcook.
• Be sure the outside of the cooking containers and the
inside of the microwave oven are dry before placing food
in the oven. Beads of moisture turning into steam can
mislead the sensor.
Dry off dishes so they
don’t mislead the
sensor.
Vented
Covered
Loading ...
Loading ...
Loading ...